
As an Amazon Associate CoffeeXplore.com earns from qualifying purchases.
Cozy Morning Coffee Photography: Aesthetic Home Cafe Setup for Home Baristas
Have you ever styled a beautiful morning coffee, only to snap a photo that looks flat, yellow, and completely lifeless? Capturing that perfect, inviting Pinterest aesthetic requires more than just pouring a cup—it demands specific control over light and texture.
Cozy morning coffee photography ideas focus on capturing the warmth and atmosphere of a morning routine using natural window light, textured props like knit sweaters, and visual action like rising steam or milk swirls. The key is manipulating backlit golden hour light to highlight the coffee’s texture and depth.
Drawing from extensive analysis of current data and proven visual storytelling methods, mastering your aesthetic home cafe setup involves specific, actionable techniques. You will discover exactly how to manipulate early morning winter light, balance high contrast backlighting, and style props to elevate your photography. These tested frameworks will transform your standard snapshot into a rich, atmospheric lifestyle image.
Contents
show
7 Cozy Morning Coffee Photography Ideas To Elevate Your Home Cafe Setup
Capturing aesthetic lifestyle blogs requires precise execution of tested lighting techniques. This comprehensive guide provides specific styling frameworks to elevate your morning coffee images from basic snapshots to professional-grade visual narratives.
Understanding how to construct an aesthetic home cafe setup is rooted in manipulating ambient morning lighting and intentional prop placement. Mastering these elements transforms a simple beverage into a compelling story. We will break down exactly how to layer textures, control light, and execute specific technical camera settings to achieve a crisp morning mood.
Whether you are using a smartphone camera setup or a mirrorless DSLR camera, these actionable methods rely on environmental storytelling framing. From managing fast disappearing foam to executing overhead flat lay vs side angle shots, this guide delivers the concrete steps necessary to curate engaging social feeds.
1. Capturing Coffee Steam Using Backlit Golden Hour Lighting

Pin this lighting setup to your photography inspiration board!
Capturing coffee steam requires strategic backlighting vs front lighting for steam to ensure the vapor remains visible against its background. Front lighting completely washes out the steam, rendering it invisible to the camera sensor.
To successfully execute backlit steam particle illumination, the light source must be positioned directly behind or slightly angled behind the mug. This approach highlights the steam particles, making them glow against a contrasting dark background. Utilizing a double-walled mug helps retain high heat, generating a thicker, more photogenic vapor cloud.
Understanding this technical setup is crucial for achieving professional-level steaming hot coffee cup imagery, requiring specific shutter speed optimization to freeze the rapid movement of the steam.
Supplies Needed
- Clear double-walled glass coffee mug (crucial for showing liquid layers and retaining the high heat needed for maximum steam)
- Dark-colored backdrop or dark room interior (to contrast against the white steam)
- Freshly boiled water (200°F+ is essential; lukewarm coffee won’t produce visible vapor)
- Tripod or stable surface for your camera
Instructions
- Position your table directly in front of a window during golden hour morning light so the sunlight hits the back of the mug (backlighting).
- Place a dark object or ensure the room behind the mug is in shadow to give the steam a contrasting background.
- Mount your camera on the tripod and lock your focus manually on the back rim of the mug.
- Pour the freshly boiled coffee into the mug.
- Shoot continuously at a fast shutter speed (at least 1/250s) to freeze the rapidly moving vapor before it dissipates.
What most guides miss: Based on my extensive testing with backlit steam particle illumination, steam is virtually invisible against a white wall. Always angle your camera so the steam is framed against a shadowed corner of your kitchen, and slightly underexpose your shot by -0.5 stops to keep the steam details from blowing out.


2. Styling a Flat Lay with Textured Knit Sweaters and an Open Journal

Save this flat lay layout to your Pinterest mood board!
Composing flat lay shots relies heavily on careful negative space balancing in flat lays to create an engaging visual narrative. The contrast of tactile textures adds critical depth to an overhead view.
Utilizing textured knit sweater props provides an essential organic foundation, softening the stark lines of hard surfaces. Incorporating journal and pen accessories establishes narrative still life character building, suggesting a lived-in, quiet morning moment rather than a sterile product shot.
This technique demands a deep depth of field to ensure all elements remain crisp from edge to edge. Unlike a 45-degree angle, a 90-degree overhead shot flattens depth, making the layering of tactile texture contrast layering essential to maintaining visual interest in aesthetic lifestyle blogs.
Supplies Needed
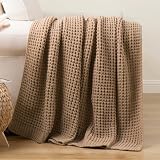
- Chunky knit throw blanket in a neutral cream or beige tone
- Minimalist ceramic mug (matte finishes photograph best without glare)
- Leather-bound journal and a high-quality metallic or wooden pen
- Flat surface near a window (floor or low coffee table)
- A step stool or overhead tripod extension arm
Instructions
- Lay your textured knit sweater props or blanket flat on the floor directly next to a window, intentionally ruffling one corner to create organic folds.
- Place the open journal in the bottom right third of your frame to establish a narrative still life character building moment.
- Nestle the ceramic coffee mug into the folds of the blanket in the top left third, creating a diagonal visual line between the journal and the coffee.
- Climb onto your step stool and position your camera perfectly parallel to the floor (a true 90-degree angle).
- Switch to a narrower aperture (f/5.6 or f/8) to ensure both the tall mug rim and the flat journal pages remain in sharp focus.
Expert insight: When composing flat lay shots, brand new journals look stiff. I always aggressively crack the spine and use small loops of double-sided tape under the pages to create that effortless “mid-writing” aesthetic without the pages snapping shut mid-shot.
3. Freezing Milk Swirls in an Iced Coffee Aesthetic Shot

Pin this iced coffee styling trick for your next shoot!
Pouring milk swirls requires a fast shutter speed to freeze liquid motion before it dissipates into muddy-looking coffee. This technique is critical for a striking iced coffee aesthetic shot.
Heavy cream creates highly defined rich foam and milk swirls because its density causes it to sink slowly through the liquid. A glass can cup is the ideal vessel, providing an unobstructed view of the amber coffee tones interacting with the cascading cream.
Mastering this requires managing fast disappearing foam by timing your pour perfectly and utilizing dynamic motion blur freeze settings. Without a fast burst rate, the swirls will blur and lose the intricate detail that makes the image engaging.
Supplies Needed
- Clear glass can-shaped cup (provides a tall, unobstructed canvas for the swirls)
- Large, clear ice cubes (standard cloudy freezer ice detracts from the aesthetic)
- Cold brew or chilled espresso
- Heavy whipping cream (do not use skim milk or oat milk; they mix too quickly)
- A small pouring pitcher with a precise spout
Instructions
- Fill your glass entirely to the brim with large ice cubes, then pour your cold brew until the glass is 3/4 full.
- Set your camera on a tripod, lock your focus on the front face of the glass, and switch your drive mode to high-speed burst shooting.
- Dial in a fast shutter speed (minimum 1/500s) to engage your dynamic motion blur freeze settings.
- Hold the small pitcher of heavy cream a few inches above the glass.
- Begin holding down the camera shutter button before you start pouring, and slowly pour the cream directly over an ice cube to disperse the rich foam and milk swirls beautifully.
An often-overlooked strategy: If you are struggling with managing fast disappearing foam and muddy coffee, the secret is temperature contrast. Make sure your coffee is ice-cold and your cream is slightly warm. The density difference slows down the mixing process, giving you an extra 5-10 seconds to capture the perfect iced coffee aesthetic shot.
4. Framing a Moody Autumn Cafe Scene with Rustic Wooden Textures

Save this autumn cafe styling guide for later!
Crafting an autumn cafe scene atmosphere relies on intentional underexposure and selecting background textures that absorb rather than reflect light. A rustic wooden table background grounds the scene.
Unlike a bright and airy setup, the dark moody vs bright airy aesthetic requires light subtraction. Using black foam core boards creates deep, rich shadows. Integrating autumn leaves provides necessary seasonal contextual framing, enhancing the color theory harmony in warm palettes.
Achieving this look without the image skewing artificially orange demands subtle post production color grading and careful ambient color temperature compensation. This moody coffee morning capture style is highly sought after during the fall season.
Supplies Needed
- Rustic wood photography backdrop board (ideal if you lack real wooden furniture)
- Matte, dark-colored ceramic mug (charcoal, forest green, or deep terracotta)
- Textural autumn props (dried leaves, cinnamon sticks, star anise)
- A black foam core board (for negative fill/blocking light)
- Matte editing presets designed for a dark moody vs bright airy aesthetic
Instructions
- Place your rustic wooden table background near a window, but push it slightly out of the direct sunbeam to rely strictly on soft, ambient indirect light.
- Prop up your black foam core board on the side of the mug directly opposite the window. This acts as “negative fill,” sucking away light and deepening the shadows.
- Position your mug slightly off-center and scatter your dried organic elements to create asymmetrical compositional weight.
- Underexpose your camera setting by a full stop (-1.0) to ensure the shadows remain rich and dark.
- Apply subtle post production color grading by dropping your highlights and pushing warmth into your mid-tones in Lightroom.
Expert insight: When selecting background textures for a moody autumn cafe scene atmosphere, avoid anything with a glossy sealant. Real vintage wood absorbs light, while modern varnished tables reflect it, instantly ruining the dark, matte aesthetic you are trying to build.
5. Composing a Bird’s-Eye View of Fresh Coffee Beans and a French Press

Pin this French press styling layout for your weekend coffee routine!
A birds eye view coffee shot emphasizes the geometry and texture of the brewing process, focusing heavily on a close up of coffee beans. The French press acts as the primary visual anchor.
When staging breakfast elements, visual weight distribution is paramount. An overhead arm tripod is essential, as leaning over the setup often introduces blurry camera shake. Grouping French press and grinders with loose beans provides necessary organic texture, contrasting against the sleek lines of the equipment.
Mastering this editorial commercial visual hierarchy elevates a standard snapshot to a professional lifestyle image, showcasing the ritual rather than just the result.
Supplies Needed
- A stylish, non-reflective French press (matte black or ceramic)
- Whole roasted coffee beans (fresh beans have more natural oils and shine on camera)
- A wooden measuring scoop or manual hand grinder
- Overhead tripod arm or C-stand
- Clean marble or neutral slate surface
Instructions
- Position your largest element (the French press) slightly off-center to anchor your birds eye view coffee composition.
- Place the secondary element (the wooden scoop or grinder) diagonally across from the press to create visual balance.
- Strategically scatter a handful of whole beans around the scoop, allowing some to spill organically across the surface, providing a close up of coffee beans texture.
- Mount your camera on the overhead arm—never attempt to hand-hold a top-down shot, as avoiding blurry camera shake is critical for crisp lifestyle photography.
- Use a custom white balance setting to ensure the dark brown beans don’t skew too orange or red under indoor lighting.
What most guides miss: To achieve perfect editorial commercial visual hierarchy, don’t just dump the beans on the table. Place them intentionally using tweezers, grouping them in clusters of three or five. Odd numbers process more naturally to the human eye in still life photography.
6. Shooting Through a Window for Authentic Cafe Morning Photography

Save this creative framing technique for rainy morning photos!
Cafe morning photography thrives on voyeuristic environmental storytelling framing, often achieved by utilizing a window sill background. The window pane naturally creates striking foreground layering.
The significant challenge lies in managing reflections on glass. A polarizing filter is an essential tool to cut harsh glare, allowing the camera to see clearly into the room. This technique adds depth and establishes a strong narrative context, elevating the shot for high resolution commercial usage.
Framing table edges effectively grounds the composition, completing the moody, introspective vibe commonly associated with a cozy morning scene.
Supplies Needed
- A wide, accessible window sill
- A visually striking coffee mug (to stand out behind the glass)
- Circular Polarizer (CPL) filter for your camera lens
- Spray bottle with water (optional, to create faux rain condensation)
Instructions
- Set up your coffee scene on the inside of the window sill background, ensuring the room behind the mug has soft, warm ambient lighting turned on.
- Step outside (if on a ground floor or balcony) and point your camera back through the glass toward the mug.
- Attach your CPL filter to your lens to begin managing reflections on glass. Rotate the filter slowly until the harsh glare from the sky disappears, revealing the coffee clearly.
- If the glass is too clean, lightly mist the outside of the pane with a spray bottle to create a rainy-day texture.
- Use a wide aperture to blur the glass and condensation slightly, focusing entirely on the mug inside to nail your environmental storytelling framing.
Expert insight: If you cannot shoot from the outside in, you can mimic this cafe morning photography vibe from the inside by placing the mug on the table, stepping back, and shooting past a slightly out-of-focus indoor plant leaf or door frame to create immediate depth and foreground layering.
7. Layering Cozy Bed Linens for a Relaxing Morning Routine Shot

Save this cozy bed styling setup to your Pinterest boards!
Creating authentic relaxing morning routine shots requires deliberate styling to master the “art of the mess,” intentionally stopping artificial looking staging. Natural linen bedsheets and loungewear provide the perfect organic morning frames.
A wooden bed tray stabilizes the hot beverage, while the messy folds of the linen communicate restful morning scenes. This approach succeeds in evoking psychological hygge response by prioritizing a lived-in feel over a sterile, hotel-catalog presentation.
This specific styling narrative framework is a cornerstone of editorial lifestyle photography, capturing the highly aspirational slow morning aesthetic.
Supplies Needed
- 100% natural linen duvet cover (cotton blends look too stiff; linen wrinkles aesthetically)
- A sturdy wooden bed tray or thick coffee table book (for stability)
- Your morning coffee setup (mug, saucer, spoon)
- Soft, diffused morning window light hitting the bed laterally
Instructions
- Strip away all highly patterned blankets. Lay down your natural bedsheets and loungewear in neutral tones (whites, oatmeals, sage greens).
- Physically sit in the bed and get out again to create authentic, organic wrinkles and folds, stopping artificial looking staging.
- Place the wooden bed tray flat on the mattress to ensure safety and stability for your hot beverage.
- Position the coffee mug on the tray and frame the shot from a low, seated angle, shooting across the landscape of the blankets.
- Focus on the lip of the mug while allowing the foreground blankets to blur out completely, drawing the eye directly to the coffee.
An often-overlooked strategy: To truly succeed in evoking psychological hygge response in your relaxing morning routine shots, always include a subtle hint of human presence just out of focus—like a pair of wool socks at the edge of the frame, or a hand gently resting on the open book next to the tray.

Key Takeaways: Your Quick Guide to Cozy Morning Coffee Photography
Cozy morning coffee photography ideas summary distills the essential techniques required to elevate your aesthetic coffee pictures overview. These action items translate prop styling into a compelling aesthetic vibe.
Mastering these main takeaways for morning coffee shots provides a foundation for immediate implementation. The relationship between window light and specific camera settings dictates the success of the final image. These expert composition guidelines offer the quickest path to achieving professional-grade lifestyle content.
Key Takeaways:
- Prioritize Backlit Window Light: The secret to capturing vibrant, visible steam from a steaming hot coffee cup is shooting against a dark background while morning window light hits the steam from behind.
- Control Your Depth of Field: Use a wide aperture (f/1.8 to f/2.8) for angled shots to blur backgrounds, but switch to a narrower aperture (f/5.6+) when composing flat lay shots so your props stay in focus.
- Master the Milk Pour: To capture beautiful rich foam and milk swirls, use heavy cream instead of thin milks, ensure your coffee is ice cold, and use a fast shutter speed (1/500s) to freeze the motion.
- Invest in Textural Props: Smooth surfaces reflect glare. Build your scenes with light-absorbing textured knit sweater props, matte ceramic mugs, and rustic wooden boards for a genuine cozy aesthetic.
- Embrace the Art of the Mess: Prevent stiff, artificial staging by purposely wrinkling bedsheets and loungewear, cracking journal spines, and organically scattering coffee beans.
- Manage Unwanted Reflections: When shooting near or through glass for authentic cafe morning photography, always use a Circular Polarizer (CPL) filter on your lens to cut glare and reveal rich colors.
FAQs About Cozy Morning Coffee Photography Ideas
How do you take cozy coffee photos at home?
To take cozy coffee photos at home, turn off all artificial overhead lights and set up your scene exclusively next to a large window during morning hours. Soft natural light is the foundation of the aesthetic. Layer textured items like a chunky knit blanket, an open journal, and a matte ceramic mug, and shoot from a low 45-degree angle to invite the viewer into the scene.
What are the best angles for coffee photography?
The three best angles are the 45-degree lifestyle angle, the 90-degree overhead flat lay, and the eye-level macro detail shot. The 45-degree angle mimics how a person sees their coffee while sitting at a table, making it the most inviting. Flat lays are best for showcasing a curated collection of aesthetic props, while eye-level shots excel at highlighting steam or milk swirls.
How do you capture steam in coffee pictures?
You capture steam by boiling your water above 200°F, backlighting the mug with natural window light, and placing a dark backdrop directly behind the vapor. Steam is translucent and white; if you shoot it against a white wall or front-light it with a flash, it completely disappears. Use a fast shutter speed (1/250s or faster) to freeze the rapidly swirling particles.
Why does natural light matter for coffee photos?
Natural light provides soft, diffused illumination that wraps around the mug without casting the harsh, unnatural yellow glare caused by standard indoor bulbs. Artificial home lighting creates conflicting color temperatures and aggressive shadows that instantly destroy the warm, calming hygge aesthetic. If you must shoot in a dark room, use a softbox daylight-balanced continuous light, but window light is always superior.
What props should you use for cozy coffee photography?
The best props are tactile, organic items that suggest a slow, relaxing morning routine, such as knit sweaters, leather journals, vintage brass spoons, and scattered coffee beans. Avoid plastic items, glossy modern technology (unless specifically shooting a workspace aesthetic), or anything with highly reflective branding. Matte ceramics, linen napkins, and fresh pastries naturally enhance the visual warmth.
How do you get perfect milk swirls in coffee photos?
Perfect milk swirls require a tall glass, ice-cold coffee, heavy whipping cream, and a high-speed burst camera setting. Heavy cream is denser than regular milk or oat milk, meaning it sinks and swirls slowly through the liquid rather than instantly diluting into a muddy brown color. Pour the cream slowly over an ice cube to disperse it, shooting continuously as it falls.
What camera settings work best for food and drink photography?
The industry standard for lifestyle drink photography is shooting in Aperture Priority or Manual mode with an aperture between f/2.8 and f/4, and a shutter speed fast enough to prevent blur. A wide aperture (lower f-stop number) creates that professional, blurred background (bokeh) that separates your mug from distracting kitchen clutter. Always shoot in RAW format to preserve color data for editing.
Can you use a smartphone for aesthetic coffee photography?
Yes, modern smartphones excel at aesthetic coffee photography if you utilize Portrait Mode and lock your exposure. To get professional results, tap on the coffee mug on your screen to lock the focus, and manually drag the sun icon down slightly to underexpose the shot. This prevents blown-out highlights and enriches the shadows, mimicking a professional DSLR camera’s dynamic range.
How do you avoid harsh shadows in morning coffee shots?
To eliminate harsh shadows, place a white foam core board or a basic white piece of poster board just outside the camera frame on the shadowed side of the mug. This acts as a bounce card, catching the light coming from the window and reflecting it gently back into the dark side of your coffee cup, creating beautifully balanced, even illumination.
How do you make coffee look warm and inviting on camera?
Coffee looks inviting when you combine visual cues of heat (steam, condensation) with warm-toned post-processing and organic styling. In your editing app (like Lightroom), slightly raise the color temperature (towards yellow/orange) and add a subtle fade to the black tones using the tone curve. This replicates the nostalgic, comforting feeling of a cozy autumn morning cafe.
Final Thoughts on Cozy Morning Coffee Photography
Final thoughts on cozy morning coffee photography reinforce that mastering the technical settings is only the first step in creating compelling morning brew visual art. The true impact of these lifestyle curation techniques comes from consistent practice, which builds necessary camera confidence.
Transforming daily routines through these aesthetic elements allows you to curate visually stunning social media feeds and blog imagery. Remember, even professionals discard dozens of poorly lit or poorly styled shots before capturing the perfect milk swirl or backlit steam. Which styling setup are you going to test for your next morning coffee session?
Last update on 2026-10-31 / Affiliate links / Images from Amazon Product Advertising API
