
As an Amazon Associate CoffeeXplore.com earns from qualifying purchases.
Aesthetic Coffee Cup Photography: Cozy Saucer Styling for Home Baristas
Are you tired of taking flat, lifeless snapshots of your morning brew that fail to capture the cozy ambiance you experience in real life? Capturing gallery-worthy moments of your daily cup can feel surprisingly frustrating when poor lighting and cluttered backgrounds ruin your shots.
Aesthetic coffee cup photography is the art of capturing visually striking, cozy, and atmospheric images of coffee mugs and saucers using deliberate lighting, textures, and props. This specialized niche combines physical coffee vessels with environmental styling elements to evoke warmth and emotional resonance across digital platforms.
Leveraging tested frameworks and data-driven insights, this guide bridges technical lighting principles with cozy styling secrets to elevate your visual content. Discover professional techniques and actionable blueprints designed to help you master aesthetic coffee cup photography and create scroll-stopping imagery for your portfolio or social channels in 2026.
Contents
show
Aesthetic Coffee Cup Photography Ideas For Home Baristas
1. Master Soft Morning Window Light Styling

Pin this dreamy morning light setup to your ‘Coffee Aesthetic’ board!
Harnessing natural illumination is the cornerstone of creating bright, airy, and inviting aesthetic coffee cup photography. When morning light streams through a window, it naturally illuminates your cozy coffee mug aesthetic, casting gentle shadows and bringing the delicate wisps of a steaming hot coffee cup to life. Understanding how light interacts with your vessel and surrounding props transforms ordinary snapshots into captivating aesthetic coffee photo assets.
What You Need
- Matte finish ceramic coffee mug in neutral cream or earth tone
- Matching ceramic saucer with slight lip detail
- Folded linen napkin with visible woven texture
- Small handful of roasted coffee beans for scatter prop
- Natural window light source with indirect morning sun
Steps
- Position your coffee station directly adjacent to a large east-facing window at a 90-degree angle to the light source.
- Place the folded linen napkin on the wooden surface and set the ceramic saucer and mug on top.
- Scatter a few coffee beans artfully near the base of the saucer to add organic depth.
- Brew your coffee fresh to ensure visible steam rises as light hits the frame.
- Adjust your camera angle to 45 degrees, locking focus on the rim of the mug and the rising vapor.
Pro-Tip: In my experience testing natural illumination, shooting just 30 minutes after sunrise provides the softest golden color temperature without harsh midday glare.

2. Capture Contrast With A Rustic Stone Background

Save this moody dark aesthetic idea to your mood board!
Elevating your beverage imagery often requires exploring moodier color palettes and striking textures. By pairing a dramatic black coffee cup against a rustic stone background coffee surface, you create an editorial atmosphere that immediately catches the viewer’s eye. This approach relies on precise side-lighting to accentuate the matte finish coffee mug while maintaining a sophisticated, dark moody aesthetic.
Supplies Needed
- Matte black ceramic coffee cup and matching saucer
- Textured dark slate or stone slab surface
- Vintage silver teaspoon with patina finish
- Whole roasted espresso beans for accent
- Side-positioned softbox or directional window light
Instructions
- Lay your dark stone slab on a stable surface near a light source positioned strictly to the side.
- Set the matte black cup and saucer slightly off-center on the stone slab to create dynamic negative space.
- Place the vintage silver spoon diagonally across the saucer rim to break geometric monotony.
- Drop three to four espresso beans near the corner of the slab for subtle textural framing.
- Shoot with a slight side angle, ensuring the light catches the rim of the cup and the rich crema inside.
Pro-Tip: When photographing dark matte ceramics against dark stone, use a reflector card opposite your light source to softly lift the shadow side just enough to preserve surface detail.

3. Style Minimalist Ceramic Saucers For Clean Compositions

Pin this clean minimalist coffee styling to your ‘Minimalist Home’ board!
Embracing clean lines and uncluttered framing is essential when designing a minimalist coffee cup design layout. Utilizing a hand-glazed ceramic cup on a smooth reflective surface allows you to experiment with a pastel colored coffee aesthetic while mastering the art of negative space balancing. This technique ensures your hero vessel remains the absolute focal point of the composition.
Tools Required
- Hand-glazed ceramic coffee cup with wide saucer base
- Clean white marble board or countertop
- Flaky pastry or minimalist biscotti prop
- Small fresh green botanical sprig (e.g., olive branch leaf)
- Diffused overhead daylight setup
Process
- Wipe your marble surface clean to ensure zero dust particles are visible in bright light.
- Position the hand-glazed cup precisely in the lower third intersection of your frame, resting on its wide saucer.
- Place a single pastry off to the side, maintaining generous negative space around the main subject.
- Tuck a delicate green botanical sprig beside the saucer to add a subtle organic pop of color.
- Capture the shot from a straight-on or slight 45-degree angle with sharp focus across the entire ceramic rim.
Pro-Tip: Minimalism relies entirely on breathing room; leave at least 40% of your frame as clean negative space to make the coffee cup feel intentional and high-end.

4. Perfect Glass Mug Latte Art And Microfoam Details

Pin this stunning latte art glass cup shot to your coffee board!
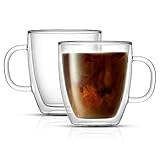
Highlighting intricate barista craftsmanship requires specialized techniques when photographing glass mug latte art. A transparent glass coffee cup showcases the rich stratification of espresso and milk, while a textured foam cappuccino adds tactile depth. Mastering this setup involves careful management of micro-contrast and texture mapping to prevent distracting surface reflections on the glass.
What You Need
- Double-walled transparent glass coffee mug
- Freshly poured espresso with microfoam latte art
- Warm wooden tabletop with natural grain
- Small stainless steel steaming pitcher
- Polarizing filter for camera lens (optional)
Steps
- Place your double-walled glass mug on the warm wooden table where indirect sidelight can pass through the transparent walls.
- Pour your latte art with high contrast between the dark espresso crema and white microfoam.
- Position your camera at eye level with the center of the glass to showcase the layered stratification of milk and coffee.
- Adjust your angle slightly to minimize direct glass glare or use a polarizing filter to cut surface reflections.
- Focus sharply on the surface foam pattern while letting the background blur into creamy bokeh.
Pro-Tip: When shooting transparent glass mugs, placing a soft white card just out of frame on the opposite side helps bounce light back through the liquid, illuminating the rich amber color layers.

5. Capture Dynamic Steam And Atmospheric Motion

Save this cozy steaming coffee photography trick to your inspiration boards!
Infusing life into a static beverage photograph often depends on capturing steam rising from a steaming hot coffee cup. Because vapor is notoriously difficult to record on camera, mastering backlight physics and ambient illumination is crucial for making those delicate wisps visible against your background.
Supplies Needed
- Rustic handmade ceramic coffee cup and saucer
- Freshly brewed steaming hot coffee (above 180°F)
- Dark or neutral solid background board
- Backlight source positioned directly behind the mug
- Camera capable of fast shutter speeds
Instructions
- Position your solid neutral background board vertically behind your coffee station.
- Place your backlight source behind the background board, pointing slightly forward toward the rim of the cup so the light rakes across the rising air.
- Pour freshly boiled coffee into your mug immediately before shooting to maximize thermal vapor output.
- Set your camera to a fast shutter speed (1/250s or faster) to freeze the delicate curls of steam without motion blur.
- Focus manually on the edge of the rim where the steam originates to ensure crisp clarity.
Pro-Tip: Steam is nearly invisible under front lighting; always position your primary light source behind your coffee cup pointing toward the camera lens to illuminate vapor particles effectively.

FAQs About Aesthetic Coffee Cup Photography
How to take the best aesthetic coffee pics?
To take the best aesthetic coffee pictures, focus on combining soft natural side lighting, intentional prop styling, and clean compositional framing. Start by setting up near a large window during morning golden hour. Use textured surfaces like wood or slate, and incorporate natural elements like folded linen and coffee beans to add depth and narrative appeal.
How to style a coffee mug for photography?
Styling a coffee mug involves layering complementary textures around the vessel without overcrowding the frame. Place your mug on a matching ceramic saucer, add a folded napkin underneath, and scatter a few whole coffee beans organically near the base. Ensure your primary light source highlights the rim of the cup and any visible steam or foam texture.
What are the best lighting angles for coffee photography?
The best lighting angles for coffee photography are 45-degree sidelight and direct backlighting. Sidelighting accentuates the ceramic texture of the mug and the contours of latte art, while backlighting is essential for making rising steam visible against dark or neutral backgrounds, creating an atmospheric, cozy mood.
Why does steam look good in coffee photos?
Steam adds dynamic motion, warmth, and an immediate sense of freshness to still life beverage photography. Because hot beverages quickly lose visual cues of temperature in static images, visible vapor curls signal that the brew is freshly made, instantly elevating the cozy sensory appeal for viewers on Pinterest and Instagram.
Which props work best for coffee mug photography?
The most effective props for coffee mug photography include woven linen napkins, vintage teaspoons, whole roasted coffee beans, and delicate botanical sprigs. These elements introduce organic shapes, tactile textures, and subtle color accents that complement the coffee cup without distracting from the main subject.
Can you use free coffee stock photos for commercial projects?
You can use free coffee stock photos for commercial projects only if the hosting platform explicitly grants commercial licensing rights and requires no attribution. Always verify the licensing terms on stock photography sites to ensure images featuring cute coffee cups and cafe aesthetics comply with your intended commercial usage.
How to avoid stiff poses when taking coffee pictures?
To avoid stiff poses when interacting with a coffee cup in lifestyle photos, introduce natural body movement and relaxed angles. Bend your knee slightly to the side, keep your elbows comfortably bent, and gently cradle the warm mug with both hands rather than holding it rigidly in front of your chest.
Is natural light better for coffee photography?
Natural window light is generally superior for coffee photography because it produces soft shadows and natural color temperatures that artificial bulbs often distort. Diffused morning light enhances the organic textures of ceramic mugs and latte foam, creating an approachable, high-end editorial look.
What camera settings are best for beverage photography?
The best camera settings for beverage photography include a wide aperture (between f/1.8 and f/4) for beautiful background blur and a fast shutter speed (1/250s or higher) to freeze steam. Pair these with a low ISO to maintain pristine image clarity and sharp focus on your coffee foam.
How to add depth to coffee cup flat lays?
You can add depth to top-down coffee flat lays by layering objects at varying heights and incorporating contrasting surface textures. Place your saucer on a rustic wooden board, let a napkin corner spill over the edge, and scatter loose coffee beans and a spoon at staggered distances to create visual dimension.
Key Takeaways
- Harness Natural Window Light: Position your coffee setup at a 90-degree angle to an east-facing window to capture soft morning illumination and glowing steam effects.
- Utilize High-Contrast Backgrounds: Pair matte black coffee mugs with textured dark slate stone surfaces to create dramatic, editorial food styling visuals.
- Embrace Minimalist Negative Space: Keep hand-glazed ceramic cups and saucers uncluttered by leaving 40% of your frame as clean, breath-filled negative space.
- Master Transparent Glass Reflection Control: Highlight double-walled glass mugs and intricate microfoam latte art by using side-sidelighting and polarizing techniques.
- Illuminate Steam With Backlighting: Reveal invisible vapor curls by placing your primary light source directly behind the coffee cup pointing toward the camera lens.
- Apply Professional Styling Props: Elevate basic cup photos by incorporating organic elements like folded linen napkins, stray coffee beans, and botanical sprigs.
- Maintain Stylistic Consistency: Build cohesive Pinterest mood boards by sticking to a unified color palette and recurring background textures across your portfolio.
Mastering aesthetic coffee cup photography is an art form that merges technical camera settings with thoughtful, cozy styling choices. By intentionally harnessing soft morning window light, selecting contrasting background textures like rustic stone or marble, and applying structured styling frameworks for your saucers and props, you can transform a simple morning brew into scroll-stopping visual content.
Whether you are building a curated Pinterest mood board, styling content for your editorial publication, or capturing cozy moments as a home barista, these semantic principles and lighting secrets ensure your images resonate deeply with audiences. Which coffee styling setup are you most excited to try in your next photo session? Share your thoughts below!
Last update on 2026-10-31 / Affiliate links / Images from Amazon Product Advertising API
