
As an Amazon Associate CoffeeXplore.com earns from qualifying purchases.
Coffee Station Ideas Hidden Microwave: 7 Genius DIY Plans
Do you struggle with finding counter space every busy morning? Cluttered countertops and an unsightly microwave can ruin your kitchen. Discovering practical coffee station ideas hidden microwave setups easily solves this daily frustration.
The best way to build a hidden microwave coffee station is designing a custom appliance garage. You should utilize retractable pocket doors and tambour doors to maximize counter space. This setup requires a dedicated GFCI outlet and strict appliance ventilation clearance for safe operation.
Drawing from interior design best practices and kitchen ergonomics, we mapped the safest architectural solutions. You will explore seven genius DIY plans for building a concealed coffee bar with microwave integration. Upgrading your kitchen cabinetry instantly transforms messy countertops into a streamlined morning hub.
To hide your microwave and coffee station, consider integrating heavy-duty cabinetry hardware that prioritizes both aesthetics and safe appliance ventilation. Building a custom appliance garage or retrofitting a pantry cabinet completely changes how you interact with your daily routines. By installing specialized tracks like pocket doors or bottom-mount drawer glides, you can securely tuck heavy appliances entirely out of sight.
Whether you are tackling a comprehensive kitchen remodel or simply modifying a freestanding baker’s rack, these seven architectural layouts provide the perfect blueprint. We will explore everything from designing a stealth kitchen island coffee bar to utilizing over-the-range cabinetry for maximum space efficiency. These step-by-step methods utilize actionable design principles to satisfy your immediate organizational needs and elevate your home’s interior.
Contents
show
1. Build a Custom Appliance Garage with Retractable Pocket Doors

Pin this gorgeous pocket-door appliance garage to your Dream Kitchen board!
Building a hidden appliance garage requires precise cabinet construction and heavy-duty sliding hardware. This design is incredibly popular because the doors retract into the cabinet walls, revealing your appliances without blocking your workspace.
When you build a diy hidden coffee bar and microwave cabinet, you immediately solve the problem of limited counter space. Because the doors slide completely out of the way, this setup provides maximum convenience while maintaining a sleek, modern kitchen aesthetic.
Materials & Hardware Needed
- Retractable pocket door slide hardware kit (rated for at least 30 lbs per door)
- Custom casework wood panels (matched to existing kitchen cabinetry)
- European soft-close cabinet hinges
- Pre-cut quartz or butcher block to match the existing kitchen countertops
- A licensed electrician (to ensure a dedicated electrical circuit inside the cabinet)
Installation Steps
- Measure the depth of your deepest appliance (usually the microwave) and add 3 inches for appliance ventilation clearance and cord space.
- Assemble the outer cabinet box structure directly onto the existing countertop or base cabinet.
- Install the heavy-duty drawer glides and pocket door slide mechanisms onto the interior side walls using a laser level for precision.
- Mount the cabinet doors to the hinges attached to the sliding hardware, ensuring they can seamlessly push back into the cabinet casing.
- Wire the interior with a GFCI outlet before plugging in the microwave and coffee maker, ensuring cables are neatly tucked away.
What most guides miss: Following NKBA guidelines, ensure your pocket door hardware allows the doors to recess flush with the face frame. If the doors stick out even a half-inch, it ruins the flush inset cabinetry aesthetic and can block access to the microwave keypad.

2. Design a Concealed Pantry Cabinet Breakfast Station

Save this brilliant pantry transformation to inspire your next weekend project!
Concealing countertop appliances in a custom pantry creates an all-in-one centralized breakfast prep area. By dedicating a specific pull-out shelf inside your pantry unit, you can easily organize appliances alongside your cereal, coffee pods, and mugs.
When comparing an appliance garage vs pantry setup, pantries offer significantly more vertical storage for families. You must focus heavily on safe appliance ventilation when designing this hidden breakfast station microwave hub. It is critical to keep the pantry doors completely open during microwave operation or install passive cabinet vents to prevent dangerous heat buildup.
Materials & Hardware Needed
- A tall, standard depth pantry cabinet (at least 24 inches deep)
- Heavy-duty pull-out shelf rated for 100+ lbs
- Bottom-mount drawer glides
- Hole saw bit for cord management routing
- Cabinet door soft-close mechanisms
Assembly Steps
- Design the layout by designating the waist-high shelf specifically for the microwave and coffee maker to ensure perfect kitchen ergonomics.
- Drill a 2-inch hole through the back panel of the pantry using the hole saw to safely route power cables to a nearby wall outlet.
- Mount the heavy-duty drawer glides to the fixed shelf floor inside the pantry.
- Secure the custom pull-out shelf to the glides, ensuring it can comfortably hold the weight of your espresso machine and microwave when fully extended.
- Organize your coffee pods, mugs, and breakfast supplies on the floating shelves immediately above the appliance zone.
Pro-Tip: Always install a GFCI outlet on a dedicated electrical circuit when wiring a pantry. Microwaves and heating elements in coffee makers draw massive wattage and will easily trip a shared circuit.
3. Install a Hidden Microwave Coffee Station Over The Range

Love this sleek space-saving idea? Pin it for your kitchen remodel!
Installing an over-the-range hidden station utilizes upper cabinet real estate to completely free up your lower countertops. This specific method targets small kitchen organization by concealing appliances behind upward-lifting cabinet hardware.
To successfully execute these coffee station ideas hidden microwave over range plans, you must strictly adhere to fire safety standards. Your microwave in cabinet setup needs adequate distance from the hot stovetop below. Additionally, managing the rising steam from coffee makers stored inside upper cabinetry is crucial to prevent long-term wood damage.
Tools Required
- Lift-up cabinet door hardware hinges (gas strut or mechanical)
- Cabinet-grade plywood for shelf reinforcement
- Power drill and woodworking screws
- Ventilation grilles for cabinet tops
- Stud finder and level
Mounting Steps
- Measure the vertical clearance between your range and the upper cabinet, ensuring you maintain a minimum of 30 inches of clearance per fire safety standards.
- Reinforce the bottom shelf of your upper cabinet to safely hold the combined weight of a compact microwave and a coffee maker.
- Install the lift-up cabinet door hardware on a single, wide cabinet door face, allowing it to swing up and out of the way vertically rather than horizontally.
- Cut ventilation slots in the top panel of the cabinet box and install ventilation grilles to allow ambient heat from the microwave to escape upward.
- Mount under-cabinet lighting inside the cubby so you can clearly see your coffee station while brewing.
Expert Insight: Never run a coffee maker with the lift-up door closed. Steam from the brewing cycle will warp the MDF or wood of your custom casework over time. Always leave the door open until the moisture entirely dissipates.

4. Customize a Freestanding Baker’s Rack Hideaway

Don’t have built-in cabinets? Save this genius baker’s rack idea to your DIY boards!
Customizing a freestanding baker’s rack offers a highly effective, renter-friendly alternative for hiding large kitchen appliances. By retrofitting the lower compartments with sliding doors, you can easily camouflage bulky electronics while utilizing the upper shelves for aesthetic coffee mug displays.
When evaluating a custom built vs store bought coffee bar, this coffee station ideas hidden microwave stand approach requires much less permanent modification. However, you must carefully calculate structural integrity and weight distribution. Placing heavy appliances in a customized freestanding unit requires proper wall anchoring to prevent dangerous tipping hazards.
Supplies Needed
- A sturdy, heavy-duty baker’s rack featuring lower enclosed cabinet doors
- Power outlet strip with built-in surge protection
- Cable management zip ties and adhesive clips
- Anti-tip furniture wall anchors
- Heat-resistant silicone mat
Setup Steps
- Assemble the freestanding baker’s rack, ensuring the lower cabinet section has enough interior depth to house your microwave.
- Remove or cut the thin fiberboard backing from the lower cabinet section to provide necessary safe appliance ventilation for the microwave.
- Customize the back of the unit by mounting the surge-protector power outlet strip directly to the metal frame, hiding it from frontal view.
- Place your coffee maker on the exposed middle shelf on top of a heat-resistant silicone mat to protect the wood finish from spills and heat.
- Secure the entire rack to the wall using anti-tip wall anchors to ensure structural integrity, especially since the heavy microwave sits in the lower half.
Pro-Tip: If your baker’s rack has mesh or glass lower doors, line the inside of the glass with frosted window film or decorative rattan webbing. This completely conceals the unsightly microwave while adding an aesthetic, trendy texture to the room.
$22.50 offBestseller No. 4

5. Integrate a Stealth Coffee Bar and Microwave in Your Kitchen Island

Pin this ultimate luxury kitchen island upgrade to your dream home board!
Integrating a stealth coffee bar into your kitchen island entirely removes visual clutter from your upper visual field. By utilizing unused depth at the end panels of an island, you can seamlessly combine a drawer microwave with a lower-level beverage center.
When debating a drawer microwave vs hidden microwave setup, island integration provides incredible minimalist appeal. You must hire a licensed electrician to run dedicated electrical circuits through the floor. Furthermore, proper architectural design is required to ensure this enclosed coffee station ideas hidden microwave in island configuration breathes correctly through specialized tambour doors.
Materials & Hardware Needed
- Tambour door kit (roll-up slat door)
- Pre-assembled base cabinet box (sized for your island end)
- Custom island end-panel trim
- Dedicated electrical circuit wiring and junction box
- Pop-up countertop outlet
Construction Steps
- Plan the layout at the end of your kitchen island, dedicating the top drawer space for a built-in microwave drawer and the lower cabinet for the coffee station.
- Wire the island interior by hiring a licensed electrician to run a dedicated circuit up through the floor to handle both heavy-draw appliances.
- Install the tambour door kit on tracks inside the lower cabinet, allowing the door to roll up and backward smoothly to reveal the coffee maker.
- Mount a heavy-duty sliding tray in the lower cabinet so the coffee maker can be pulled out easily for water reservoir refilling.
- Integrate a pop-up electrical outlet flush into the island’s countertop, ensuring wires inside the cabinet aren’t stretched when sliding the appliances out.
What most guides miss: Island cabinets are notoriously tight spaces. Ensure you leave a minimum of 2 inches of clearance behind the microwave unit for the fan exhaust, and consider installing a discrete toe-kick vent at the bottom of the island to allow hot air to escape the enclosed space.

6. Create a Small Space Pull-Out Drawer Microwave Nook

Short on space? Pin this brilliant lower-drawer appliance hack!
Creating a pull-out drawer nook provides highly accessible, ergonomic lower-cabinet appliance storage. By tucking compact appliances into deep base cabinets, you instantly solve severe limited counter space issues in smaller galley kitchens.
To execute these small space kitchen coffee bar ideas with microwave integration, you must demonstrate a solid understanding of structural cabinetry styles. Upgrading an existing pot-and-pan drawer into a functional pull out coffee station requires reinforcing the drawer bottom and utilizing heavy-duty drawer glides to prevent structural failure over time.
Tools Required
- Heavy-duty drawer glides (bottom mount, rated for 200+ lbs)
- 3/4-inch plywood for drawer bottom reinforcement
- Deep base cabinet (pot-and-pan drawer size)
- Flexible conduit tubing for cord management
- Wood glue, brad nailer, and screws
Installation Process
- Remove an existing deep base drawer (typically used for pots and pans) from your lower cabinetry setup.
- Reinforce the bottom of the drawer box by cutting and gluing a piece of 3/4-inch plywood to ensure it won’t bow under the weight of the microwave.
- Upgrade the existing side rails to bottom-mount heavy-duty drawer glides that can handle the violent opening and closing motions while supporting heavy appliances.
- Organize the drawer interior by placing the microwave on one side and your compact coffee maker on the other, ensuring neither touches the drawer face.
- Install flexible conduit tubing behind the drawer to guide the appliance power cords safely, ensuring they don’t get pinched or sliced in the tracks when the drawer slides in and out.
Pro-Tip: Never run the microwave while the drawer is pushed in. This setup is strictly for storage and usage while the drawer is extended, ensuring heat disperses into the open room rather than trapping inside the enclosed cabinet box.
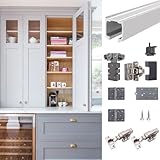
7. Assemble a Bi-Fold Cabinet Hardware Beverage Center

Transform your kitchen with this elegant bi-fold door coffee center! Save for later!
Assembling a bi-fold cabinet hardware beverage center creates a luxurious countertop hutch that completely transforms your kitchen. This high-end solution fully displays a beautifully lit espresso station when open, but seamlessly masquerades as standard tall cabinetry when closed.
When comparing sliding tracks to bi-fold cabinet hardware, folding doors provide a significantly wider, unobstructed opening for large espresso machine setups. To build this hidden coffee maker and microwave center effectively, you must maintain exact mechanical alignment. Ensuring perfect continuous grain matching and precise hinge tension demonstrates professional finishing skills on your beautiful appliance hutch.
Materials Needed
- Bi-fold cabinet door hardware hinge kit (tracks and hinges)
- Countertop-to-ceiling cabinet box (often called a countertop cabinet)
- Pre-finished cabinet doors (two pairs)
- Heat-resistant protective mat
- Wood shims and leveling tools
Assembly Steps
- Design the space by installing a tall, deep cabinet box directly onto the countertop, ensuring the interior is wide enough for both appliances side-by-side.
- Mount the top and bottom track guides for the bi-fold cabinet hardware to the interior lip of the cabinet face frame.
- Assemble the cabinet doors by attaching the specialized folding hinges between the two door panels, ensuring seamless alignment and continuous grain matching.
- Install the doors into the track guides, adjusting the tension so they fold completely flat against the outer sides of the cabinet when opened.
- Protect the countertop inside the cabinet by placing a heat-resistant mat under the coffee maker to prevent water damage or coffee stains on your expensive stone.
Expert Insight: Bi-fold hardware requires exact, perfectly level cabinet boxes. Use wood shims behind the cabinet during installation to ensure it is perfectly plumb; otherwise, the folding doors will drag on your countertops and refuse to close properly.
Finding the perfect concealed kitchen setup requires addressing several technical and structural considerations before you actually begin building. Many homeowners run into unexpected challenges when trying to safely hide heat-generating appliances behind closed cabinet doors. To ensure your custom woodwork remains beautiful and your home stays completely safe, we have compiled the most common questions regarding appliance ventilation, electrical code compliance, and optimal space planning.
Whether you are curious about the technical differences between a standard pantry and a dedicated appliance hideaway, or you need to know which heavy-duty hinges will adequately support your daily morning routine, these expert answers will guide your project. Reviewing these essential safety standards and design principles will give you the confidence to install a seamlessly integrated, stealthy coffee bar in your kitchen.
To build a hidden coffee station and microwave, you should construct an appliance garage directly on your countertop using custom casework and retractable pocket doors.
Start by measuring your tallest appliance, allowing 3 inches of extra clearance for ventilation. Install heavy-duty drawer glides or pocket door hardware inside the cabinet box so the doors can slide out of the way entirely. Finally, have a licensed electrician install a dedicated GFCI outlet inside the cabinet before placing your coffee maker and microwave inside.
Is it safe to put a microwave inside a closed cabinet?
Yes, it is safe to put a microwave inside a closed cabinet only if you provide adequate ventilation clearance and operate it with the cabinet doors completely open.
Microwaves generate significant ambient heat that must escape. According to fire safety standards and NKBA guidelines, you should never run a microwave while enclosed behind closed doors unless you have installed an active exhaust fan system or specific ventilation grilles built into the cabinet’s architecture.
To vent a hidden microwave cabinet, you must leave a minimum clearance of 3 inches on the top, back, and sides of the appliance, and install passive ventilation grilles in the cabinet wood.
For completely enclosed built-in microwave installations, you can cut ventilation slots into the top panel or toe-kick of the cabinet to allow hot air to escape and cool air to enter. Always operate the microwave with the pocket doors open to allow immediate heat dissipation.
What is an appliance garage?
An appliance garage is a specialized kitchen cabinet designed specifically to hide countertop appliances like coffee makers, microwaves, and toasters behind sliding, rolling, or pocket doors.
Unlike standard upper cabinets, an appliance garage sits completely flush against the kitchen countertops. This allows you to slide heavy appliances out for use without lifting them, serving as the perfect solution for concealing messy appliances and maintaining a streamlined kitchen design.
To add an outlet to a hidden coffee cabinet, you must cut a hole in the cabinet backing and hire a licensed electrician to run a dedicated electrical circuit with a GFCI outlet.
Because microwaves and espresso machines draw incredibly high wattage (often over 1500 watts each), plugging them into a standard shared kitchen circuit will frequently trip your breaker. The outlet must be securely mounted inside the cabinet, keeping cords organized and away from heat sources.
What size cabinet do I need for a microwave and coffee maker?
You need a cabinet that is at least 30 inches wide, 20 inches deep, and 24 inches tall to comfortably house both a standard microwave and a coffee maker side-by-side.
When planning your space planning layout, remember to account for the physical footprint of the appliances plus the required 3-inch ventilation gap around the microwave. If you use bi-fold cabinet hardware, ensure you account for the space the hinges take up on the interior sides.
The best hinges for a hidden coffee station are retractable pocket door slides, heavy-duty bi-fold cabinet hardware, or tambour door roll-up tracks.
Standard swinging hinges are generally poor choices because the open doors will block your workspace and stick out into the kitchen. Pocket doors are the gold standard for custom cabinetry, as they allow the doors to slide back completely inside the cabinet box, keeping your breakfast prep area totally unobstructed.
How to hide a coffee station in a kitchen?
To hide a coffee station in a kitchen, you can integrate it into a pantry cabinet, build a countertop appliance hutch, or install heavy-duty pull-out drawers in your lower base cabinets.
The easiest method for clearing counter clutter is to use a dedicated appliance garage with tambour doors. If you are doing a full kitchen remodel, consider hiding the java station inside a tall, floor-to-ceiling pantry equipped with a pull-out shelf and internal lighting.
Can you put a microwave in a coffee bar cabinet?
Yes, you can put a microwave in a coffee bar cabinet, provided the cabinet shelf is structurally reinforced to handle the weight and has access to a dedicated power outlet.
Combining these appliances creates a highly efficient breakfast bar. However, ensure that steam from the coffee brewing process does not rise directly into the microwave vents, and always place a heat-resistant mat under the coffee pot to protect the cabinet wood from water damage.
What is the difference between an appliance garage and a pantry?
The difference between an appliance garage and a pantry is that an appliance garage sits directly on the countertop specifically to hide appliances, while a pantry is a tall, freestanding or built-in closet used primarily for dry food storage.
While both can conceal a microwave, an appliance garage provides better kitchen ergonomics because it utilizes existing counter height. A pantry requires installing a custom, heavy-duty pull-out shelf to achieve the same accessibility for your daily coffee routine.
As we analyze modern interior design trends updated for September 2026, a few core principles stand out when planning your build:
- Plan for Dedicated Power: You must wire a dedicated GFCI circuit inside your cabinet; running a microwave and espresso machine simultaneously on a shared circuit will constantly trip your breakers.
- Never Ignore Ventilation Requirements: Always leave at least 3 inches of clearance around the appliance inside the cabinet, or use ventilation grilles to ensure safe appliance ventilation and prevent fire hazards.
- Invest in Heavy-Duty Hardware: Standard hinges will fail quickly; always install specialized bi-fold cabinet hardware or retractable pocket doors rated for heavy daily use.
- Prioritize Kitchen Ergonomics: Position your hidden breakfast station microwave between waist and chest height to prevent dangerous bending or reaching when handling hot liquids.
- Protect the Cabinet Interior: Coffee makers generate steam; always leave the appliance garage cabinet doors open during brewing to prevent moisture from destroying your custom casework.
- Match Your Aesthetic: Ensure continuous grain matching and flush inset cabinetry so your hidden station looks like a natural, seamless part of your kitchen’s architecture when closed.
Implementing these smart coffee station ideas hidden microwave setups is one of the most impactful upgrades you can make to your home. By taking the time to conceal these bulky, everyday items behind beautiful pocket doors or inside a custom appliance garage cabinet, you instantly reclaim your workspace and elevate your kitchen’s entire aesthetic. Whether you decide to build a brand new countertop hutch or simply retrofit a freestanding baker’s rack, the key is to prioritize functionality just as much as design.
However, beautiful custom casework is only half the battle. As we’ve explored throughout these DIY plans, true success relies on adhering to strict kitchen safety codes. From ensuring your hidden kitchen appliances have adequate ventilation clearance to hiring a licensed electrician for that crucial GFCI circuit, marrying safety with style ensures your new morning hub will last for years without damaging your cabinetry or posing a fire risk.
By applying these structural guidelines and clever hardware solutions, you can completely declutter countertops and finally achieve that seamless, magazine-worthy kitchen you’ve always wanted. Which of these seven hidden appliance methods are you planning to install in your own home?
Last update on 2026-09-07 / Affiliate links / Images from Amazon Product Advertising API
