
As an Amazon Associate CoffeeXplore.com earns from qualifying purchases.
Keurig Coffee Station Ideas: 7 Aesthetic Setups for 2026
Are your countertops constantly cluttered with messy appliance cords and scattered K-cups? Finding practical coffee station ideas keurig setups can feel impossible when dealing with limited kitchen real estate. You need a dedicated, aesthetic beverage station that maximizes your vertical space while minimizing daily frustration.
Keurig Coffee Station: To build an aesthetic Keurig coffee station, clear a 15-inch wide countertop corner or repurpose a bar cart. Utilize vertical space by placing the brewer on a sliding K-cup drawer, organize your favorite pods, and style the surrounding area with a hanging mug tree, syrup dispensers, and cozy decor.
Drawing from comprehensive analysis of current data and expert home styling methodologies, this guide provides exact dimensional requirements for small space coffee solutions. We will explore seven actionable blueprints to transform your chaotic morning routine into a streamlined, aesthetic experience. Discover how proper appliance footprint management instantly elevates your home decor and frees up precious counter space.
Before diving into these single serve coffee makers layouts, you must conduct a rapid “Small Space Assessment.” Grab a measuring tape and evaluate your available counter footprint, checking for at least 15 inches of width and 22 inches of vertical clearance below your upper cabinets. This crucial first step dictates whether you should pursue a compact coffee bar or transition to a freestanding furniture piece.
Based on professional organizer tips, forcing a brewing system into a cramped corner without proper measurement creates workflow friction. The following seven blueprints offer tested, budget-verified DIY projects that address distinct spatial constraints. Each blueprint integrates seamlessly with functional storage solutions to protect your aesthetic while keeping your daily essentials perfectly organized.
Contents
show
1. Build a Repurposed Monitor Stand & Sliding Drawer Setup

Save this genius space-saving hack to your Dream Kitchen board!
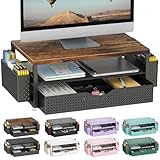
To maximize vertical counter space in a cramped kitchen, framing a repurposed monitor stand for keurig creates brilliant out-of-the-box compact storage. Nesting your pod drawer directly underneath the wooden riser effectively halves your overall appliance footprint while keeping K-cups highly accessible. Using exact measured spatial requirements ensures the brewer perfectly clears your upper cabinets when opened.
Materials Needed
- Heavy-duty wooden monitor stand (minimum 15 inches wide with a 4-inch under-clearance)
- Keurig coffee maker (standard or Duo model)
- Sliding coffee pod drawer designed for K-Cups
- Cable management clips to hide keurig cords
- Two favorite ceramic coffee mugs
Step-by-Step Directions
- Declutter kitchen counters by clearing a corner specifically near an electrical outlet to avoid cord stretching.
- Measure the height from your countertop to the upper cabinets to ensure you have at least 22 inches of clearance.
- Place the wooden monitor stand squarely in the designated corner.
- Slide the K-cup pod storage drawer directly underneath the monitor stand riser.
- Center your Keurig machine on top of the monitor stand.
- Route the power cable down the back leg of the stand using adhesive cable clips to conceal appliance cords.
- Organize coffee pods in the drawer by roast type or flavor profile for a streamlined morning routine.
What most guides miss: Applying spatial workflow optimization principles is crucial here. Ensure your water reservoir is positioned on the side facing outward. This allows you to easily refill the tank without dragging the entire heavy appliance footprint forward every single morning.
2. Arrange a Rustic Farmhouse Tiered Tray Station

Pin this gorgeous farmhouse aesthetic for your upcoming kitchen makeover!
Creating a highly stylized, Pinterest-worthy coffee setup relies heavily on balancing trendy rustic farmhouse keurig coffee decor with daily brewing functionality. A tiered tray organizes coffee accessories vertically while drastically enhancing your kitchen aesthetics. Following interior design expert tips, you must carefully balance visually heavy items at the base with delicate decorative pieces at the top.
Materials Needed
- 3-tier rustic distressed wood serving tray
- Clear glass apothecary jars with airtight lids
- Hot chocolate pods and specialty coffee K-cups
- Farmhouse-style enamelware mugs
- Wooden coffee stirrers or vintage spoons
- Small faux greenery (like a potted eucalyptus)
- A space-saving keurig setup (like the Keurig K-Select)
Step-by-Step Directions
- Design a brewing space by placing your Keurig to the left of the counter and the empty 3-tier tray to the right.
- Anchor the bottom tier with your heaviest, most frequently used items: your farmhouse mugs and a small jar of sugar.
- Arrange a tiered tray middle section by creating a decorative cluster of K-cups, using small wire baskets to contain the pods.
- Fill the clear apothecary jars with hot cocoa marshmallows or biscotti and place them on the middle tier.
- Create a rustic look on the top tier by adding lightweight items like wooden stirrers in a mason jar and your small faux greenery.
- Weave a small string of battery-operated copper fairy lights through the tiers for ambient lighting.
Expert insight: To achieve perfect aesthetic cohesion principles, professional interior designers use the “Rule of Three.” Always group functional items on your farmhouse style coffee bar tray in odd numbers to create a more dynamic, visually pleasing arrangement.

3. Assemble a Rolling Bar Cart Hot Beverage Center

Save this rolling coffee cart idea to free up your kitchen counters instantly!
When kitchen real estate is completely exhausted, relocating your brewer to a rolling bar cart in an adjacent dining or living area is the perfect solution. A dedicated portable coffee cart setup transforms small countertops by removing the bulky appliance entirely. Proper coffee bar cart styling tips and tricks ensure the mobile furniture piece looks intentional rather than displaced.
Materials Needed
- Heavy-duty rolling bar cart with locking caster wheels
- Keurig coffee maker (a model with a large water reservoir is ideal)
- Large glass water carafe or filtered water pitcher
- Woven storage baskets or wire bins for the bottom shelves
- Heavy tray with a lip to protect counters from coffee spills
- Rotating k-cup carousel
Step-by-Step Directions
- Assemble a bar cart ensuring you firmly tighten all bolts and engage the wheel locks to prevent rolling during the brewing process.
- Place a spill-proof tray on the top shelf, and set your Keurig directly onto the tray to catch any accidental drips.
- Position your rotating k-cup carousel next to the brewer on the top shelf.
- Set up a dedicated glass water carafe next to the machine; since you aren’t near a kitchen sink, this saves you from taking the reservoir back and forth.
- Use the middle shelf to organize your coffee mugs, sugar bowls, and coffee syrup dispensers.
- Utilize the bottom shelf for heavy items, placing extra boxes of pods and wire baskets inside to keep the cart looking tidy.
An often-overlooked strategy: When managing a freestanding bar cart vs kitchen counter station, you must prioritize safety tips for hot beverage stations. Always utilize ergonomic brewing station design by placing your heaviest bulk items on the absolute bottom shelf. This lowers the center of gravity and prevents tipping hazards if the cart gets bumped.

4. Create a Clever Cabinet Hidden Coffee Nook

Love a clutter-free kitchen? Pin this hidden cabinet coffee bar idea!
For minimalists who despise visual clutter, a clever cabinet coffee station completely hides all appliances behind closed doors. Converting a standard kitchen appliance garage into a built-in coffee nook instantly streamlines your morning routine while maintaining pristine countertops. This setup heavily relies on custom cabinetry modifications, specifically heavy-duty sliding trays to manage heat and steam clearance safely.
Materials Needed
- Deep kitchen cabinet or countertop appliance garage
- Heavy-duty sliding appliance tray (weight rated for at least 30 lbs)
- Cord management zip ties
- Clear acrylic coffee station organizers for K-cups
- LED puck lights (battery operated)
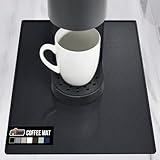
- Heat-resistant mat
Step-by-Step Directions
- Empty the chosen cabinet and install the heavy-duty sliding appliance tray by drilling the base tracks into the cabinet floor.
- Place a heat-resistant mat over the sliding tray to protect the wood from steam or accidental drips.
- Position your Keurig on the sliding tray and test the pull-out mechanism to ensure the top of the brewer clears the cabinet frame when opened.
- Route the power cord through a pre-drilled hole in the back of the cabinet, using zip ties to gather slack and conceal appliance cords securely.
- Mount battery-operated LED puck lights to the interior ceiling of the cabinet to illuminate your clutter-free coffee corner.
- Store mugs on the shelf directly above the brewer, and place acrylic organizers next to the machine for your pods.
- To brew, simply open the doors, slide the machine out fully so steam escapes into the room, and push it back when finished.
Expert insight: When comparing open shelves vs closed cabinet coffee bar layouts, you must proactively manage humidity control near coffee stations. Never brew a cup of coffee while the machine is pushed back inside the wooden cabinet. Always extend the sliding tray fully to allow steam to dissipate, preventing severe moisture damage to your woodwork over time.

5. Style Open Shelving & Mount a Hanging Mug Rack

Running out of cabinet space? Pin this gorgeous floating shelf mug rack idea!
If your cabinets are bursting, you need to mount a hanging mug rack and utilize vertical space to store bulky coffee mugs efficiently. A hanging system perfectly accommodates various mug sizes while adding immediate visual interest to an empty wall above your brewing appliance. Knowing exactly how to style open shelving ensures your arrangement looks intentionally curated rather than haphazardly cluttered.
Materials Needed
- Two heavy-duty floating wooden shelves
- Wall-mounted iron mug rack or hooks attached to the bottom shelf
- Drill, level, and drywall anchors (rated for 50+ lbs)
- Assorted coffee mugs
- Glass canisters for reusable coffee filters and pods
- Trailing houseplant (like a Pothos or Ivy)
Step-by-Step Directions
- Design a brewing space by clearing the countertop and using a stud finder to locate secure mounting points on the wall directly above your Keurig.
- Install the bottom floating shelf approximately 18 inches above the countertop, ensuring enough clearance to open your Keurig’s K-cup chamber.
- Mount a hanging mug rack directly underneath the bottom shelf, securing it firmly to the wood.
- Install the second floating shelf 12 to 14 inches above the first one.
- Hang your most-used, aesthetically pleasing mugs on the rack hooks to free up precious cabinet space.
- Style open shelving by placing functional items on the accessible lower shelf, and decorative items like coffee bar signs on the upper shelf.
Proven space-saving techniques: When engaging in vertical storage utilization, structural safety is paramount. Always anchor your floating shelves directly into wooden wall studs rather than relying solely on plastic drywall anchors. A fully loaded aesthetic coffee station carrying heavy ceramic mugs and thick glass jars can easily exceed 30 pounds.

6. Design a Minimalist Keurig Mini Dorm Room Station

Heading to college? Save this ultimate dorm room coffee setup!
Creating a highly functional dorm room coffee bar demands extreme efficiency when you lack access to a dedicated kitchen sink. Utilizing a Keurig mini coffee maker requires space-saving storage solutions tailored specifically for confined bedroom environments. By focusing on ultra-compact organization and proactive water management, you can successfully setup a dorm station that streamlines your morning routine without ruining rented furniture.
Materials Needed
- Keurig mini coffee maker (less than 5 inches wide)
- Small protective silicone mat
- Filtered water pitcher
- Slim, vertical wire K-cup tower
- Disposable or reusable travel mug
- Mini trash bin for used pods
Step-by-Step Directions
- Find a stable, flat surface like the top of a mini-fridge or the edge of a study desk to setup a dorm station safely.
- Place a silicone mat down first to protect the dorm furniture from accidental heat or water damage.
- Position the Keurig Mini on the mat, ensuring the power cord is safely tucked away from foot traffic.
- Keep a dedicated filtered water pitcher directly next to the machine, as the Mini requires adding fresh water for every single cup.
- Place a slim, vertical pod tower next to the machine; vertical organizers have a much smaller appliance footprint than wide carousel spinners.
- Set up a tiny, dedicated trash bin right next to the station specifically for tossing wet pods immediately, keeping your minimalist coffee corner setup for bedrooms sanitary.
Hands-on coffee station setup tip: When operating a beverage station in a carpeted bedroom, micro-zoning in interior design is absolutely essential. Keep all wet materials tightly contained exclusively on your waterproof silicone tray to completely prevent carpet staining or water damage.
7. Curate the Ultimate Cafe Experience with Syrup Dispensers

Ready to ditch the drive-thru? Pin this ultimate at-home cafe setup!
Recreating the ultimate cafe experience at home involves elevating your basic brewing appliances with luxurious, cohesive accessories. Integrating uniform coffee syrup dispensers and a Keurig duo system supports multiple beverage types, easily accommodating lattes and iced coffees. When your station successfully pairs with milk frothers and flavor add-ins, you must organize messy coffee syrups to maintain an elegant, commercial coffee shop aesthetic.
Materials Needed
- Keurig duo system (capable of single serve and carafe brewing)
- Set of 4 matching glass coffee syrup dispensers with pumps
- Minimalist waterproof syrup labels
- Standalone electric milk frother
- Bamboo vanity tray to corral the bottles
- Assorted flavoring syrups (Vanilla, Caramel, Hazelnut)
- Cinnamon or cocoa powder shaker
Step-by-Step Directions
- Design a brewing space on your largest section of uninterrupted countertop.
- Transfer your store-bought flavor syrups into the matching glass dispenser bottles to instantly elevate the aesthetic and organize messy coffee syrups.
- Apply waterproof minimalist labels to each glass bottle.
- Place the four syrup bottles together on a small bamboo tray to the right of your Keurig machine.
- Set up your electric milk frother directly next to the syrup tray.
- Organize your workflow linearly: keep mugs on the far left, the Keurig in the center, and your syrups, frother, and cinnamon shakers on the right.
- To craft a cafe beverage, brew your pod, pump 2 dashes of syrup into the cup, froth your milk, pour it over the coffee, and finish with a dusting of cinnamon.
Expert insight: To achieve perfect kitchen triangle workflow integration, always set up your luxury cafe station in the exact ergonomic order of operation. Arranging functional items sequentially from left to right (Mug → Pod → Brewer → Syrup → Frother) prevents you from crossing your own arms and making a mess during groggy mornings.

How to set up a Keurig coffee station?
To set up a Keurig coffee station, clear a dedicated 15-inch counter space, place a protective mat down, position your brewer, and organize K-cups nearby using a sliding drawer or carousel. A well-designed setup should be located near a grounded electrical outlet and ideally close to a sink or water source. Keep your daily essentials like mugs, sugar, and stirrers within arm’s reach to streamline your morning routine and create an efficient brewing area.
How to hide a Keurig on the counter?
You can hide a Keurig on the counter by installing an appliance garage, using a slide-out cabinet tray, or tucking it into a deep corner concealed by a decorative plant or cutting board. If you lack specialized cabinetry, the easiest solution is to relocate the machine entirely to a rolling bar cart in a different room. You can also cover the appliance with a custom-fitted cloth cover that matches your kitchen decor when the brewer is not in use.
How to organize K-cups at a coffee station?
The most space-efficient way to organize K-cups is by placing the Keurig directly on top of a sliding pod drawer, which utilizes vertical space without expanding the appliance footprint. For larger setups, use a rotating K-cup carousel, stackable clear acrylic bins, or a tiered decorative tray. For a rustic aesthetic, toss loose pods into a wire basket or a large glass apothecary jar to keep them contained yet visually accessible.
What goes on a coffee bar cart?
A complete coffee bar cart should include your single-serve brewer, a filtered water pitcher, organized coffee pods, a selection of mugs, sugar/creamer containers, and flavor syrups. Utilize the cart’s shelving strategically: put the brewer and everyday items on the top shelf, mugs and syrups on the middle shelf, and heavy bulk items like extra water jugs or backup boxes of pods on the bottom shelf to keep the cart stable.
Why are there coffee grounds in my Keurig cup?
Coffee grounds in your cup are usually caused by a clogged exit needle or an overfilled reusable pod that caused pressure to blow grounds out of the top of the K-cup during brewing. To fix this, perform routine first-hand keurig maintenance by taking a straightened paperclip and gently clearing debris out of the upper and lower puncture needles. Run two water-only cleansing brews afterward to flush the system and ensure clean, grounds-free coffee moving forward.
How to build a DIY coffee station for Keurig?
To build a DIY coffee station on a budget, repurpose a wooden monitor stand to elevate the brewer, slide a pod drawer underneath, and hang an inexpensive iron mug rack on the wall above. You don’t need expensive custom cabinetry. Upcycling vintage furniture, painting an old microwave cart, or utilizing inexpensive floating shelves can transform any empty wall or awkward corner into a highly functional and beautiful home cafe.
What is the best Keurig model for a small coffee bar?
The Keurig K-Mini or K-Mini Plus is the absolute best model for a small coffee bar because it measures less than 5 inches wide, fitting easily into tight dorms or crowded apartment counters. If you have slightly more room but still want a compact footprint, the K-Express offers a slim profile while providing a removable multi-cup water reservoir, eliminating the need to pour fresh water for every single brew.
How to clean a Keurig coffee station?
Clean your station weekly by wiping down the brewer exterior with a damp microfiber cloth, washing the drip tray with warm soapy water, and wiping your countertops to prevent sticky syrup residue. Every three to six months, you must fully descale the keurig machine using equal parts white vinegar and water (or commercial descaling solution) to remove internal mineral buildup based on manufacturer recommended cleaning protocols. This ensures your appliance runs efficiently and your coffee tastes fresh.
How to maximize counter space with a Keurig?
Maximize counter space by implementing vertical storage solutions, such as placing the brewer on top of a pod drawer and mounting floating shelves above it to hold your mugs and accessories. Avoid wide, spinning carousels that eat up horizontal real estate. If your kitchen counters are absolutely maxed out, the most effective solution is to remove the machine from the kitchen entirely and create a dedicated hot drink center on a sideboard in the dining room.
What syrup bottles work best for home coffee bars?
Clear glass dispenser bottles with stainless steel or gold pump nozzles work best for home coffee bars because they provide a uniform, high-end aesthetic while preventing messy, sticky pours. Standard store-bought syrup bottles are often branded with clashing colors and bulky labels. Decanting your hazelnut, vanilla, and caramel syrups into matching glass bottles with custom waterproof labels instantly upgrades a basic setup to a luxurious commercial cafe experience.
Synthesizing the most critical design and organization strategies from these setups will help you begin your transformation immediately. By blending aesthetic tips with practical spatial rules, you can easily declutter kitchen counters and master your daily routine.
- Utilize Vertical Real Estate for Small Kitchens – If counter space is limited, repurpose a monitor stand or use sliding K-cup drawers to stack your brewer and pods vertically, minimizing your appliance footprint.
- Corral Clutter with Trays and Baskets – Whether using a farmhouse tiered tray or a bamboo vanity board, grouping coffee syrup dispensers and loose accessories onto a single tray instantly makes a space look styled rather than messy.
- Relocate to a Bar Cart When Counters are Full – A mobile rolling bar cart is the perfect portable coffee cart setup for renters or dorm-dwellers, completely removing the coffee footprint from the kitchen prep area.
- Hide Unsightly Appliance Cords – Always use cable clips or zip ties routed down the back of furniture or cabinets to conceal appliance cords, which is the fastest way to elevate the aesthetic of your setup.
- Protect Your Cabinetry from Steam – If building a clever cabinet coffee station, ensure your sliding tray pulls out entirely so the steam from brewing doesn’t warp your upper cabinets or cause moisture damage.
- Implement Micro-Zoning for Workflow – Arrange your station in the exact order you make coffee (Mug, Pod, Brewer, Flavor, Froth) to streamline your morning routine and avoid cross-counter spills, applying true spatial workflow optimization.
Creating the perfect home coffee bar ideas setup doesn’t require a massive kitchen renovation or expensive custom cabinetry. As we’ve explored through these layouts, the secret to a beautiful compact coffee bar lies in clever organization, utilizing vertical space, and applying intentional styling to everyday functional items. Whether you are repurposing vintage pieces to fit a brewer into a tiny dorm room, or arranging a lavish tiered tray to create a rustic look, the goal is simply to create a dedicated zone that brings a little bit of joy and efficiency to your morning routine.
Remember that the most successful setups prioritize workflow just as much as aesthetics. By taking the time to hide cords, group your syrups properly, and keep your K-cups accessible but tidy, you eliminate the daily visual clutter that makes kitchens feel chaotic. When you apply these proven space-saving techniques, even the smallest apartment counter can house a truly aesthetic coffee station.
Now that you have the blueprints, it’s time to measure your space and start designing your brewing sanctuary. Which of these seven setups are you planning to recreate in your home? Are you leaning toward the hidden cabinet nook, or the rolling bar cart? Let me know in the comments below, and happy brewing!
Last update on 2026-08-27 / Affiliate links / Images from Amazon Product Advertising API
