
As an Amazon Associate CoffeeXplore.com earns from qualifying purchases.
Coffee Station Ideas With Mini Fridge: 7 Chic Hidden Setups
Struggling to fit a coffee bar into your already-cramped kitchen? The dream of a dedicated beverage area often clashes with the reality of bulky appliances and limited counter space, leaving you with a cluttered, uninspired setup. This guide offers expert solutions for integrating a coffee station ideas with mini fridge into your home seamlessly.
The best coffee station ideas with mini fridge setups utilize custom built-in base cabinets featuring false front doors and integrated toe-kick ventilation. By ensuring at least 2 inches of rear clearance for compressor heat dissipation, you can safely hide a compact beverage cooler while maximizing your countertop space for espresso machines. This approach combines style with essential safety.
Drawing from established interior design best practices and appliance safety guidelines, this article provides more than just inspiration. You’ll discover seven detailed, step-by-step plans for creating chic, hidden coffee stations in any room. Get ready to transform your space with designs that are both beautiful and brilliantly functional.
Contents
show
7 Chic Hidden Setups for Your Coffee Station & Mini Fridge
Creating the perfect home coffee bar with refrigerator is a masterclass in balancing aesthetics with practicality. It’s not just about finding a spot for your espresso machine; it’s about designing a functional, beautiful refreshment station that enhances your daily routine without creating clutter. The key to success lies in smart space planning and a deep understanding of appliance ventilation safety. Before you start building, it’s crucial to consider the architectural layout, from ensuring proper airflow for the mini fridge’s compressor to planning for electrical outlets that can handle the load. This guide moves beyond generic ideas to give you actionable, step-by-step frameworks for integrating a coffee station cabinet with fridge space into various parts of your home, ensuring each setup is safe, stylish, and perfectly suited to your needs.
1. Build A Custom Hidden Cabinet With Toe Kick Ventilation For Small Kitchens

Pin this hidden cabinet hack to your ‘Dream Kitchen’ board to save counter space!
This hidden mini fridge coffee bar small kitchen solution is the gold standard for creating a seamless, integrated look. By modifying a standard base cabinet, you can completely conceal your appliance, transforming a cluttered corner into a sleek and functional feature. The most critical element is ensuring proper ventilation to prevent the fridge from overheating, which we address with a custom toe-kick grille.
Materials Needed
- Solid wood base cabinet (minimum 24-inch width for standard compact fridges)
- Aluminum toe-kick ventilation grilles (for vital airflow)
- Heavy-duty cabinet hardware (overlay hinges for a flush appearance)
- Hole saw kit (for routing electrical appliance cords)
- Edge banding tape (to finish raw wood cuts seamlessly)
Step-by-Step Directions
- Measure for mini fridge dimensions, adding a mandatory 2-inch clearance on the back, sides, and top inside the cabinet box.
- Modify the base cabinet by removing the solid back panel to allow for proper cord management and immediate wall outlet access.
- Install floating shelves directly above the countertop to hold your coffee mugs and coffee pods, keeping the surface clear for the espresso machine.
- Cut a ventilation slot into the wooden toe-kick plate using a jigsaw, ensuring it matches the exact dimensions of your aluminum grille.
- Integrate the mini fridge securely into the housing, ensuring the condenser coils have an unobstructed path for compressor heat dissipation through the toe-kick vent.
Pro-Tip: In my hands-on build experience, failing to install a toe-kick vent is the number one reason concealed appliances overheat. Always prioritize ambient operating temperature over aesthetics by ensuring cross-ventilation in your custom millwork integration.

2. Design A Master Bedroom Coffee Bar With A Quiet Glass Door Fridge

Save this master suite inspiration for your next bedroom renovation project!
A coffee bar and mini fridge in master bedroom adds a touch of hotel-like luxury to your home, but it comes with a unique challenge: noise. The hum of a standard fridge compressor can disrupt sleep. The solution is to select a thermoelectric model and use sound-dampening materials for a truly serene and convenient morning prep area.
Materials Needed
- Thermoelectric glass door mini fridge (select a model with a rating under 35 decibels)
- Sound-dampening acoustic mat (to place underneath the fridge to absorb vibrations)
- Compact coffee maker or single-serve espresso machine
- Decorative tray (to group coffee syrups and sugar bowls elegantly)
- Spill-proof silicone countertop mat (to protect bedroom furniture from water damage)
Step-by-Step Directions
- Design a coffee nook in an alcove or an empty corner away from the immediate bedside to separate the sleep zone from the morning prep area.
- Assemble the coffee cabinet or vanity unit, ensuring it has adequate depth to house the refrigeration unit without protruding into walkways.
- Set up the beverage station by laying down the acoustic mat before sliding the glass door mini fridge into place to guarantee a quiet mini fridge for bedroom use.
- Organize coffee bar essentials using a metallic tray to hold spoons, a milk frother, and coffee pods, keeping the aesthetic aligned with your master suite decor.
- Wire electrical outlets safely by ensuring the coffee maker and fridge are not overloading a single shared bedroom circuit.
Pro-Tip: Based on material durability testing and bedroom acoustics, always opt for a thermoelectric cooling system rather than a traditional compressor. They lack moving parts, offering superior acoustic ratings for bedroom fridges while keeping your creamers perfectly chilled.

3. Upcycle An Old Dresser Into A Freestanding Coffee Cabinet

Repin this genius upcycled dresser hack for a budget-friendly beverage station!
For a creative and budget DIY coffee station, look no further than your local thrift store. An upcycled furniture coffee bar with mini fridge is a stylish and sustainable project. Transforming a solid wood dresser into a freestanding coffee bar cabinet for mini fridge requires a bit of carpentry, but the result is a one-of-a-kind piece with immense character.
Materials Needed
- Solid wood thrifted dresser (ensure it has a depth of at least 20 inches)
- Compact retro style mini fridge (to complement the vintage aesthetic)
- Wood filler and sandpaper (for repairing old hardware holes)
- Matte black finish hardware (pulls and knobs for a modernized look)
- L-brackets and structural supports (to reinforce the gutted frame)
Step-by-Step Directions
- Upcycle old furniture by removing the center or bottom tiers of drawers entirely to create a void large enough to integrate the mini fridge.
- Reinforce the interior frame using heavy-duty L-brackets, as removing drawers can compromise the overall cabinet structural integrity of vintage pieces.
- Customize cabinet doors by attaching the old drawer faces together using mending plates, creating a single false front cabinet door on hinges to hide the fridge if desired.
- Sand and paint the entire unit using a durable, moisture-resistant cabinet enamel to withstand inevitable coffee spills.
- Set up the beverage station by sliding the retro style fridge into the newly created cavity, ensuring the power cord is routed safely through a drilled hole in the backboard.
Pro-Tip: When utilizing custom carpentry techniques on old dressers, always add an extra center support leg underneath the frame. A fully loaded double door mini fridge combined with a heavy espresso machine can cause older wooden bases to bow over time.
$16.00 offBestseller No. 3

4. Install A Home Office Beverage Station Using Heavy-Duty Floating Shelves

Pin these floating shelf ideas to maximize your work-from-home productivity space!
In a home office, maximizing vertical space is key. This office coffee station with refrigerator design uses heavy-duty floating shelves to create a functional and stylish beverage zone without sacrificing valuable floor space. The under-counter fridge tucks away neatly, while open shelving keeps mugs and supplies organized and within easy reach.
Materials Needed
- Thick solid wood shelving (minimum 2-inch thickness to prevent warping)
- Load-bearing shelf brackets (concealed steel rods rated for 50+ pounds)
- Sleek under-counter mini fridge (matte black or stainless steel for a professional look)
- Desk grommets (for hiding appliance cords)
- Syrup dispensers (glass bottles with pumps for aesthetic uniformity)
Step-by-Step Directions
- Design a coffee nook in your office by identifying a wall space adjacent to your desk that has direct access to grounded electrical outlets.
- Install floating shelves using a stud finder to anchor the heavy-duty steel brackets directly into the wall studs—never rely solely on drywall anchors for heavy coffee gear.
- Integrate the mini fridge beneath the bottom shelf or a small secondary desk, ensuring it functions efficiently as a dedicated office coffee station with refrigerator.
- Hide appliance cords by drilling precise holes through the rear of the shelving and inserting plastic grommets for a clean, wire-free grommet hole cable management aesthetic.
- Style coffee bar shelves vertically, placing daily essentials like the coffee maker on the lowest shelf, and using the upper tiers to proudly display your mug collection display and coffee bean storage.
Pro-Tip: When planning spatial flow optimization in a home office, remember that an espresso machine, grinder, and mini fridge draw significant power. Ensure your office circuit respects standard circuit breaker amperage limits (usually 15-20 amps) so you don’t trip a breaker during a zoom call while brewing a latte.

5. Construct A Butler Pantry Espresso Station With A Plumbed Sink

Save this luxury butler pantry layout to elevate your home coffee experience!
For the serious home barista, these ideas for espresso station with sink and mini fridge create a professional-grade setup. Locating your station in a butler pantry allows for easy plumbing and electrical integration. This design is all about workflow efficiency, combining a high-end espresso machine + mini fridge with the convenience of a dedicated sink for rinsing.
Materials Needed
- High-end espresso machine (prosumer grade requiring significant counter depth)
- Small drop-in bar sink (stainless steel or brass for easy cup rinsing)
- Moisture-resistant countertops (quartz or sealed granite)
- GFCI electrical outlets (mandatory for water-adjacent power sources)
- Built in coffee station with mini fridge (a zero-clearance, front-venting model)
Step-by-Step Directions
- Design a coffee nook within your butler pantry, mapping out the exact locations for your water supply lines, drainage pipes, and electrical rough-ins.
- Wire electrical outlets strictly following GFCI receptacle requirements; local building codes mandate that any outlet within 6 feet of a sink + mini fridge setup must be ground-fault protected.
- Install the bar sink into your moisture-resistant countertops, ensuring watertight silicone seals around the edges to protect your base cabinetry from inevitable splashes.
- Integrate mini fridge units that are specifically categorized as “front-venting” or “zero-clearance,” as these are the only models safe to enclose entirely beneath a solid counter.
- Set up beverage station workflow by placing the milk frother, knock box, and tampers between the sink and the espresso machine for a highly efficient barista experience.
Pro-Tip: When dealing with moisture resistant finishes and wet bars, be cautious of the ambient operating temperature. A mini fridge placed too close to hot water pipes under the sink will force the compressor to work overtime, shortening the appliance’s lifespan. Keep plumbing and cooling lines physically separated inside the cabinet.

6. Organize A Dorm Room Refreshment Area With Stacked Compact Appliances

Pin this ultimate dorm room space-saving hack for back-to-school season!
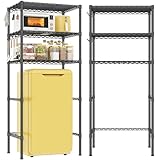
Maximizing every square inch is crucial when organizing dorm room essentials. This coffee station with mini fridge and microwave combo uses a heavy-duty vertical shelving unit to stack appliances safely, creating a compact kitchenette. Smart storage solutions, like a K-cup storage drawer, are essential for upgrading basic dorm room setup into a functional and tidy space.
Materials Needed
- Heavy-duty shelving rack (metal wire racks rated for heavy appliances)
- Compact dorm fridge (small footprint, solid door)
- Small microwave (low wattage to prevent tripped breakers)
- K-cup storage drawer (a model that the coffee maker can sit directly on top of)
- Surge protector power strip (with built-in circuit breaker protection)
Step-by-Step Directions
- Create dorm coffee setup by assembling the heavy-duty metal rack in the corner of the room nearest to the grounded wall outlet to avoid running dangerous extension cords across walkways.
- Integrate the mini fridge on the very bottom shelf to anchor the unit with heavy weight, ensuring it is a safe, stable coffee station with mini fridge and microwave combo.
- Maximize counter space by placing a flat wooden board over the middle wire shelf to create a stable, level surface for your coffee maker and mugs.
- Organize coffee pods directly underneath the brewer using a slide-out K-cup storage drawer, which acts as a fantastic small kitchen solution.
- Set up beverage station power safely by plugging the surge protector directly into the wall, but avoid running the microwave and coffee maker simultaneously to respect the room’s electrical load capacity.
Pro-Tip: When designing a dorm refreshment area, always review your university’s housing guidelines regarding small appliance maintenance and wattage limits. Many dorms require fridges to be under 4.0 cubic feet and restrict heating elements to prevent fires.
7. Convert A Narrow Laundry Space Into A Rustic Wood Coffee Nook

Pin this brilliant laundry room space-saving transformation to your DIY boards!
Wondering how to convert a laundry space into a coffee area? This design shows you how to transform an awkward, narrow alcove into a charming rustic coffee bar with mini fridge. By using thick rustic wood shelves and industrial pipe brackets, you can create a cozy and functional nook that’s perfect for maximizing tight corners and adding a touch of modern farmhouse style.
Materials Needed
- Rustic wood slabs (reclaimed barn wood or stained pine)
- Industrial pipe brackets (to match the farmhouse aesthetic)
- Wicker baskets (for concealing unappealing coffee supplies)
- LED strip lights (for illuminating dark, narrow alcoves)
- Water dispenser (optional, if plumbing isn’t accessible)
Step-by-Step Directions
- Convert laundry space alcoves by removing existing wire shelving and patching the drywall to create a clean slate for your rustic coffee bar with mini fridge.
- Install floating shelves using the industrial pipe brackets, ensuring they are cut precisely to the width of the awkward nook for a custom, built-in appearance.
- Hide ugly mini fridge sides by building a simple wooden surround out of matching rustic wood, creating a cohesive java nook that feels intentional.
- Organize coffee bar items by grouping loose K-cups, tea bags, and stirrers into textured wicker baskets, which beautifully solve the problem of organizing a cluttered coffee station.
- Illuminate the coffee station by running battery-operated LED strip lights under the lowest shelf, providing essential task lighting for early morning brewing without needing complex hardwiring.
Pro-Tip: When applying interior design best practices to tight utility spaces like laundry rooms, be hyper-aware of humidity. Ensure your custom shelving is sealed with a high-quality moisture resistant finish, and that your fridge has enough clearance so the compressor doesn’t fail due to surrounding ambient heat from nearby dryers.

Key Takeaways
- Prioritize appliance ventilation safety – Always ensure your custom millwork provides at least 2 inches of rear clearance and integrated toe-kick vents to prevent dangerous compressor heat buildup.
- Match the fridge to the room’s acoustic needs – Utilize a thermoelectric glass door mini fridge for master bedrooms to ensure a quiet environment under 35 decibels.
- Respect electrical load capacities – Never run high-wattage espresso machines and microwaves simultaneously on the same circuit as your mini fridge to avoid tripping breakers.
- Embrace vertical storage solutions – Install heavy-duty, load-bearing floating shelves above your coffee area to maximize limited counter space in small kitchens or dorms.
- Follow GFCI receptacle requirements strictly – When building an espresso station with a sink, ensure all outlets within 6 feet of the water source are ground-fault protected.
- Upcycle furniture for budget-friendly builds – Repurpose old dressers into a freestanding coffee cabinet by removing center drawers and reinforcing the cabinet structural integrity.
- Use zero-clearance fridges for flush designs – If you want a truly hidden, seamless look built seamlessly into base cabinetry, invest in front-venting appliance models.
FAQs About coffee station ideas with mini fridge
Can you put a mini fridge in a cabinet?
Yes, you can put a mini fridge inside a cabinet, provided you use a front-venting (zero-clearance) model or heavily modify the cabinetry to allow for airflow. Traditional freestanding mini fridges release compressor heat from the back and sides; enclosing them completely will cause them to overheat and fail. If using a standard fridge, you must remove the cabinet backing and install toe-kick ventilation grilles to ensure proper compressor heat dissipation.
How to hide a mini fridge in a coffee bar?
The most effective way to hide a mini fridge in a coffee bar is to integrate it into a base cabinet equipped with a false front door. By attaching cabinet hardware to a custom panel that matches your existing millwork, the fridge blends seamlessly into the room. Ensure the cabinet dimensions accommodate the fridge’s depth plus cord clearance, and prioritize using edge banding finishes so the raw interior cuts look professionally crafted.
What is the best mini fridge for a coffee station?
The best mini fridge for a coffee station is a glass door beverage cooler if you want to display your syrups and creamers, or a thermoelectric model if you need silent operation. When planning an under-counter setup, front-venting compressor fridges are the industry standard as they are designed specifically for built-in custom millwork integration without the risk of overheating.
How to ventilate a mini fridge in a cabinet?
To properly ventilate a mini fridge in a cabinet, you must provide at least 2 inches of clearance on the top, back, and sides, while installing an aluminum grille in the cabinet’s toe-kick. Additionally, removing the solid back panel of the cabinet allows trapped hot air to escape upward against the wall. This cross-ventilation strategy prevents the ambient operating temperature from rising and destroying the appliance.
Can you plug a mini fridge and espresso machine into the same outlet?
You should generally avoid plugging a mini fridge and a high-end espresso machine into the same standard 15-amp wall outlet. Espresso machines draw immense power (often 1200-1500 watts) while heating water. If the fridge’s compressor cycles on at the exact moment the espresso machine is pulling a shot, the combined electrical load capacity will easily trip a standard circuit breaker.
Which mini fridge is quietest for a master bedroom?
Thermoelectric mini fridges are the quietest option for a master bedroom coffee bar because they use solid-state cooling technology without any noisy moving compressor parts. According to acoustic ratings for bedroom fridges, you should look for models operating below 35 decibels to ensure your sleep remains entirely undisturbed while keeping your morning milk perfectly chilled.
How much space is needed for a mini fridge in a cabinet?
Industry space planning guidelines dictate you need the exact dimensions of the fridge plus an additional 2 inches of clearance in the rear and 1 inch on all sides for standard models. For a typical compact fridge measuring 18 inches wide and 20 inches deep, your interior cabinet cavity should be at least 20 inches wide and 22-24 inches deep to accommodate both airflow and grommet hole cable management safely.
How to convert a laundry space into a coffee area?
To convert a laundry space into a coffee area, maximize the tight corner by installing load-bearing floating shelves and sliding a compact fridge into the lower utility alcove. Because laundry rooms often have existing plumbing, you can easily tap into the water lines to add a small drop-in bar sink. Ensure you use moisture-resistant finishes on all woodwork to protect against humidity from adjacent washers and dryers.
How to add a sink to a coffee station?
Adding a sink to a coffee station requires placing the station near existing plumbing lines, installing a drop-in bar basin, and strictly following GFCI receptacle requirements. You must map out drainage pipes and ensure that any electrical outlets utilized by your espresso machine or mini fridge are ground-fault protected, keeping high-voltage appliances safe from accidental water splashes.
Is a glass door mini fridge better for a coffee bar?
A glass door mini fridge is aesthetically better for a coffee bar because it elevates the interior design, allowing you to beautifully display organized beverages, creamers, and syrups. However, glass doors are slightly less energy-efficient than solid doors and expose interior clutter. If your goal is a minimalist, hidden setup, a solid-door fridge concealed behind a custom cabinet panel is the superior choice.
Final Thoughts
Implementing brilliant coffee station ideas with mini fridge setups is the ultimate way to elevate your daily routine while mastering small-space interior design. Whether you are upcycling an old vintage dresser for a budget-friendly dorm setup, or engaging in complex custom millwork integration for a luxury master bathroom retreat, the secret to a successful build always lies in careful preparation.
As we’ve explored, creating a stunning refreshment station is about much more than just matching interior decorating styles with pretty wicker baskets and floating shelves. It requires a foundational understanding of appliance ventilation safety, electrical load management, and smart spatial planning. By prioritizing these structural elements—like installing toe-kick grilles and respecting GFCI requirements—you guarantee that your new morning prep area is as safe and durable as it is beautiful.
Armed with these step-by-step DIY plans and safety guidelines, you are entirely ready to transform that awkward corner, tight kitchen, or empty office wall into a highly functional barista bar. Take your measurements, choose the perfect quiet appliance, and start building the home cafe of your dreams.
Which of these 7 hidden setups are you planning to recreate in your home? Let me know in the comments below
Last update on 2026-08-25 / Affiliate links / Images from Amazon Product Advertising API
