
As an Amazon Associate CoffeeXplore.com earns from qualifying purchases.
Coffee Station Ideas Dorm: 9 Aesthetic Space-Saving Setups
Waking up for an early class is brutally hard without immediate access to caffeine. You desperately need reliable coffee station ideas dorm configurations that actually work. Building a functional setup with limited outlets and zero sink access feels completely impossible.
To set up a functional coffee station in a tiny dorm, utilize vertical space by placing a compact brewer on top of a mini-fridge or rolling cart. Ensure all appliances are strictly UL listed and stay well under your specific campus wattage limits. Use bottled water and disposable paper filters to easily manage the absolute lack of a kitchen sink.
Drawing from extensive first-hand experience as a former resident advisor and college barista, I understand exact campus housing compliance. This guide explores nine aesthetic, space-saving configurations designed specifically for tight college quarters. You will discover actionable, budget-friendly solutions to safely upgrade your morning routine today.
Transforming your incredibly small dorm into a functional cafe requires strategic planning and a focus on vertical storage. A well-organized dorm room coffee bar keeps your essential morning brew accessible while strictly complying with rigorous fire safety rules. By intentionally selecting compact, low-wattage appliances, you can create a beautiful setup that drastically minimizes your daily campus cafe spending.
When space is tight, prioritizing space-saving furniture like baker’s racks and utility carts prevents your precious desk from becoming hopelessly cluttered. Whether you prefer a quick pod machine or an artisanal pour-over routine, these practical solutions bypass common dorm restrictions. Let’s explore exactly how to assemble these nine aesthetic, budget-friendly coffee corners step-by-step.
Contents
show
1. Assemble a Multi-Tier Rolling Cart Caffeine Corner

Save this rolling cart space-saver to your Dorm Inspiration board!
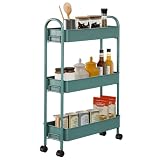
A rolling cart coffee setup is the ultimate small space lifesaver because it consolidates your entire brewing routine into one mobile footprint. This compact organizer easily fits perfectly into tight corners and can be swiftly rolled out of the way during room inspections or social gatherings.
Supplies Needed
- 3-tier metal rolling utility cart (narrow width, locking caster wheels)
- Compact pod coffee maker (e.g., Keurig K-Mini or Nespresso Essenza Mini)
- Acrylic K-cup storage drawer or pod carousel
- 2-3 favorite coffee syrups with portion-control pumps
- Sealed 1-gallon water dispenser (for sinkless refilling)
Setup Instructions
- Assemble the utility cart, ensuring the heaviest items like water jugs and bulk pods are placed firmly on the bottom tier to prevent top-heavy tipping hazards.
- Position the compact coffee maker on the top tier, leaving enough vertical clearance to open the pod lid comfortably.
- Organize the middle tier with an aesthetic acrylic pod organizer, your syrup bottles, and a dedicated dorm-friendly wash basin for dirty mugs.
- Lock the caster wheels into place against the wall nearest to your designated, safe electrical outlet.
What most guides miss: In my experience as a former RA, keeping a small, waterproof silicone mat on the top tier of your cart prevents accidental water damage to dorm floors. This simple addition makes wiping up accidental coffee spills a ten-second job and saves you from massive end-of-year flooring fines.
2. Build an Over-The-Mini-Fridge Coffee Bar

Pin this genius vertical space-saving hack for your tiny dorm!
Learning how to set up coffee bar on mini fridge units is critical for maximizing dead vertical space in a cramped kitchenette. A sturdy over-fridge Baker’s rack safely elevates your espresso machine, keeping your valuable floor space completely clear.
Supplies Needed
- Freestanding over-the-mini-fridge storage shelf (metal or sturdy wood)
- Dorm-sized mini fridge (standard 3.2 cu ft to 4.4 cu ft)
- Compact espresso machine
- Independent milk frother (for cold foam and lattes)
- Small woven organizer bins for storing accessories
Setup Instructions
- Measure the exact width and height of your mini-fridge to ensure the over-fridge shelving unit will clear the top and sides with at least 2 inches of ventilation space.
- Assemble the shelving rack and slide it carefully over and around the mini-fridge structure.
- Set your coffee machine on the first solid shelf above the fridge, ensuring the power cord runs directly to a wall outlet, not a dangerous overloaded power strip.
- Arrange your milk frother, woven organizer bins for coffee pods, and clean mugs on the upper shelving tiers.
Expert insight: Never place a heat-generating coffee maker directly on top of a mini-fridge without a proper heat-resistant barrier. The ambient heat can easily force the fridge compressor to overwork, potentially violating strict campus housing safety protocols and ruining your groceries.

3. Maximize a Minimalist Dorm Desk Setup

Save this aesthetic study-and-sip desk setup to Pinterest!
A minimalist coffee station ideas for college approach integrates your brewer directly onto your study desk without sacrificing crucial textbook area. By utilizing a narrow tray, this setup creates a strict physical boundary that protects your expensive electronics from accidental liquid damage.
Supplies Needed
- Ultra-narrow bamboo or acrylic vanity tray (under 6 inches wide)
- Single-serve compact coffee maker (pod-based for mess-free brewing)
- Under-desk K-cup adhesive storage drawers
- Spill-proof insulated desk mug
- Cord organizers/cable clips
Setup Instructions
- Designate the back corner of your desk furthest from your laptop as the dedicated beverage zone.
- Place the narrow tray precisely in the corner; this acts as a physical boundary and catches any accidental drips before they reach your study materials.
- Mount adhesive pod storage drawers underneath the desk surface to completely eliminate desktop visual clutter.
- Route the brewer’s power cable using adhesive cord clips along the back edge of the desk to keep it away from your feet and chair.
An often-overlooked strategy: Using a designated tray isn’t just for the aesthetic visual appeal—it’s a critical spill-containment strategy. A cheap bamboo tray can easily save a highly expensive laptop during chaotic, sleep-deprived late-night study sessions.

4. Create a Sinkless Pour-Over Corner

Pin this dorm-friendly artisanal pour-over hack!
Building a no sink coffee station using a pour-over method completely eliminates the nightmare of washing messy coffee grounds in a tiny communal bathroom. A precision gooseneck kettle pours into a glass Kalita Wave, allowing you to bypass horrible campus coffee while maintaining an exceptionally clean environment.
Supplies Needed
- Low-wattage electric gooseneck kettle (under 1000W is usually dorm-approved)
- Pour-over dripper (e.g., Kalita Wave or Hario V60)
- Unbleached paper filters
- Digital coffee scale with a timer
- Gallon of filtered drinking water (critical for water chemistry)
Setup Instructions
- Set up your digital scale and place your favorite mug with the pour-over dripper directly on top.
- Heat filtered bottled water in your low-wattage gooseneck kettle, explicitly avoiding bathroom sink water as the poor chemistry ruins the roast profile.
- Place a paper filter in the dripper, add your ground coffee, and carefully initiate a 30-second bloom phase before completing your continuous pour.
- When finished, simply toss the paper filter and wet grounds directly into the trash can—no sink washing required beyond a very quick rinse of the mug.
Expert insight: Pour-over is actually the best setup for a dorm room without a sink. Unlike complex espresso machines or reusable drip baskets that require heavy scrubbing, a paper filter traps all the oils and grounds perfectly. You just throw it away, leaving zero mess behind.


5. Organize a Bookshelf Barista Corner

Turn an empty dorm shelf into a stunning coffee bar—pin this idea!
Repurposing your university-provided furniture into built in coffee station ideas for tiny rooms is incredibly budget-friendly and highly practical. By adjusting standard dorm shelf pegs, you can transform an otherwise useless cubby into a compact coffee storage display that perfectly organizes your syrups and beans.
Supplies Needed
- Existing dorm-provided adjustable bookshelf
- Airtight acrylic or ceramic coffee canisters
- Compact, quiet manual burr grinder
- Woven or canvas organizer bins
- Small waterproof shelf liner
Setup Instructions
- Remove all heavy books from one waist-high shelf and adjust the shelf pegs to ensure at least 18 inches of vertical clearance for your equipment.
- Cut and lay down a heavy waterproof shelf liner to protect the university’s property from permanent water damage or stubborn coffee stains.
- Place your brewer neatly on one side, and stack your airtight coffee canisters and grinder compactly on the other side.
- Utilize the shelf immediately above to display your aesthetic mugs, and use the shelf below with canvas bins to completely hide ugly overstock items.
Pro-Tip: If your dorm strictly prohibits bulky extra furniture, removing one shelf of books and creating a “built-in” look is the most space-saving, campus-housing-compliant solution available to students today.

6. Design a Quiet French Press Morning Routine Area

Need coffee without waking your roommate? Save this quiet setup!
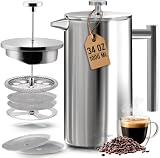
When evaluating a french press vs aeropress dorm setup, prioritizing decibel levels during early morning hours is essential for roommate harmony. A quiet dorm coffee grinder paired with an unbreakable stainless steel French press delivers robust flavor without the loud, mechanical grinding noise that shatters peaceful morning routines.
Supplies Needed
- Insulated stainless steel French press (unbreakable)
- Manual hand-crank burr grinder (silent operation)
- Electric kettle with a “keep warm” silent feature
- Long wooden stirring spoon (quieter than metal)
- Thick cork or felt mat to dampen vibration
Setup Instructions
- Place a thick cork mat on your desk or dresser to absorb any sound vibrations when setting down ceramic mugs or metal equipment.
- Use a manual hand burr grinder instead of an electric one; it produces a much quieter, low-decibel grinding sound that won’t wake a sleeping roommate.
- Boil your water and carefully pour it over the coarse grounds in your heavy stainless steel French press.
- Gently press the plunger down after exactly 4 minutes, pour into your insulated travel mug, and quietly head to your 8 AM class.
Pro-Tip: Always choose a double-walled stainless steel French press for a dorm over a traditional glass beaker. Fragile glass shatters incredibly easily in cramped living spaces, but stainless steel is virtually indestructible and keeps your coffee hot for hours.
7. Set Up a Hidden Wardrobe Coffee Nook

Out of counter space? Hide your coffee station in your closet! Pin it!
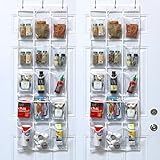
If you want to completely hide coffee maker dorm appliances from plain sight, an internal wardrobe setup is a fantastic clutter-free solution. By utilizing an over-door organizer, you brilliantly organize pods vertically while keeping the bulky machine perfectly tucked into a hidden closet nook.
Supplies Needed
- Clear-pocket over-the-door hanging organizer
- Ultra-compact single-serve coffee maker
- Heavy-duty, damage-free adhesive hooks (Command brand)
- Flat-plug, low-profile extension cord (if permitted by housing)
- Small pull-out drawer or sturdy closet shoe rack base
Setup Instructions
- Hang the clear-pocket organizer securely over the inside of your wardrobe door to sort all K-cups, tea bags, and stirring sticks vertically.
- Place a sturdy shoe rack or small pull-out drawer base at the absolute bottom of the closet to act as a makeshift structural “countertop.”
- Set your compact coffee maker on the base and route a flat-plug extension cord safely to the nearest available wall outlet.
- When finished brewing, unplug the machine immediately, let it cool completely, and close the wardrobe door to hide the clutter instantly.
Expert insight: Never leave a coffee maker actively plugged in when hidden inside a closed wardrobe or closet. Residual heat trapped in an enclosed, unventilated space with highly flammable clothing is a major dorm fire hazard. Always unplug completely after every single use.
8. Customize a Vertical Wall-Mounted Syrup Station

Free up desk space with this damage-free floating shelf hack! Save to Pinterest!
Figuring out how to organize coffee syrups in a dorm without drilling holes is incredibly easy with damage-free adhesive wall shelves. This visually aesthetic layout holds syrups gracefully while functioning as beautiful, customized room decor that completely bypasses strict property damage rules.
Supplies Needed
- Lightweight acrylic or composite wood floating shelves
- Heavy-duty, damage-free adhesive strips (rated for 10+ lbs)
- Glass coffee syrup bottles with aesthetic pumps
- Handheld battery-operated milk frother with stand
- Adhesive under-shelf mug hooks
Setup Instructions
- Clean your dorm wall thoroughly with rubbing alcohol and let it air dry completely (this is crucial for ensuring strong adhesive grip).
- Apply the heavy-duty adhesive strips cleanly to the back of the floating shelves, press firmly against the wall, and wait a full 24 hours before adding any weight.
- Decant your clunky commercial coffee syrups into highly aesthetic glass bottles with sleek pumps for a cohesive, minimalist look.
- Arrange the syrup bottles proudly on the top shelf, place your frother stand neatly next to them, and attach adhesive hooks securely under the shelf to hang lightweight mugs.
What most guides miss: To actively avoid hefty end-of-year dorm damage fines, absolutely never overload adhesive shelves. Keep heavy ceramic mugs and full water jugs grounded on your desk, and strictly reserve floating shelves for lightweight syrups and frothers.
9. Craft a Dual Tea and Coffee Beverage Station

Love tea AND coffee? Pin this dual-beverage dorm setup!
Finding the best dorm coffee maker that uses pods is essential for a dual tea and coffee area because it provides both coffee extraction and pure hot water functionality. By utilizing a sturdy drawer base underneath the brewer, you brilliantly organize pods and tea bags without doubling your precious surface footprint.
Supplies Needed
- Heavy-duty rolling K-cup storage drawer (acts as a machine base)
- Multi-beverage pod brewer (handles coffee and hot water for tea)
- Clear acrylic divided tea bag organizer box
- Small jars for honey, sugar, and stir sticks
- Reusable silicone brewing mat
Setup Instructions
- Place a durable, reusable silicone mat directly on your dresser or desk to protect the underlying wooden surface from hot, staining spills.
- Set the heavy-duty K-cup storage drawer directly on the mat—this crucial step acts as the structural foundation for your entire beverage station.
- Place your coffee maker directly on top of the storage drawer to instantly and effortlessly double your vertical space efficiency.
- Position your clear acrylic tea bag organizer immediately beside the machine, neatly filling the divided sections with a colorful gradient of herbal and caffeinated teas.
Pro-Tip: Buying a modern brewer that features a dedicated “hot water only” button prevents your delicate chamomile tea from tasting exactly like yesterday’s dark roast coffee. If your machine doesn’t have this, intentionally run one blank cycle without a pod before making any tea.

Understanding core fire safety and space optimization principles is critical before assembling your new caffeine corner. A well-planned setup protects university property while significantly upgrading your college living experience.
- Prioritize Low-Wattage Appliances: Check your university housing rules carefully; most dorms restrict heating appliances to under 800W or 1000W, making specific compact brewers and low-wattage kettles a necessity.
- Go Vertical for Storage: Desk space is premium real estate. Utilize multi-tier rolling carts, over-the-mini-fridge racks, or damage-free floating shelves to organize your aesthetic dorm coffee station without sacrificing study space.
- Plan for a “Sinkless” Cleanup: Because you’ll likely be washing mugs in a tiny bathroom sink, avoid complex espresso machines. Stick to mess-free pod brewers or pour-overs with paper filters that go straight into the trash.
- Protect University Furniture: Always place a waterproof tray or silicone mat beneath your coffee station. Water rings and coffee stains on dorm-provided desks or dressers will result in expensive damage fines at move-out.
- Never Hide Plugged-In Appliances: While hiding a coffee maker in a closet or wardrobe is a great space-saving hack, leaving a heat-generating appliance plugged in inside an enclosed space is a severe dorm fire hazard.
- Optimize for Roommate Peace: If you have early morning classes, invest in a quiet manual burr grinder and a stainless steel French press to quietly brew your morning coffee without waking your sleeping roommate.
Students frequently encounter complex logistical anxieties regarding specific campus rules and difficult cleaning scenarios. Addressing these common frustrations ensures you purchase the correct equipment for your room constraints.
Can you have a coffee maker in a dorm?
Yes, you can generally have a coffee maker in a dorm, provided it does not have an exposed heating element like a traditional hot plate. Standard campus housing policies typically approve single-serve pod machines (like Keurigs) and automatic shut-off electric kettles. However, you must verify your specific university’s wattage limits, as older dorms often restrict appliances pulling more than 800-1000 watts to prevent tripping circuit breakers.
How to clean a coffee maker in a dorm sink?
To clean a coffee maker using a tiny dorm bathroom sink, avoid brewing methods with loose messy grounds and stick to pod machines or paper-filter pour-overs. Discard the pod or paper filter directly into the trash, leaving only the mug to be rinsed. Keep a small bottle of dish soap and a dedicated sponge on your coffee bar cart, and use bottled or filtered water for descaling cycles to avoid mineral buildup from hard bathroom tap water.
Is a Keurig or Nespresso better for college?
A Keurig is generally better for college students because K-cups are significantly cheaper, widely available in campus convenience stores, and the machines often have a smaller dorm-friendly footprint. While Nespresso offers a superior, richer espresso extraction, the pods are substantially more expensive and harder to source locally. If you prioritize budget living and standard morning coffee, choose Keurig; if you prefer iced lattes and espresso, opt for Nespresso.
How to store K-cups in a dorm?
The most space-saving way to store K-cups in a dorm is by using an under-desk adhesive drawer or a rolling storage base that your coffee maker sits directly on top of. Alternatively, you can use clear acrylic organizers on a multi-tier utility cart or hang an over-the-door pocket organizer inside your wardrobe. Keeping them out of their bulky cardboard retail boxes is essential for minimizing visual clutter in extremely small dorm spaces.
Do I need a mini fridge for dorm coffee?
You do not strictly need a mini fridge for dorm coffee if you drink it black or use shelf-stable powdered creamers and syrups. However, if you prefer fresh milk, cold foam, or iced coffee, a dorm mini fridge is an absolute morning coffee must. If space is tight, look for shelf-stable barista-grade oat or almond milk cartons that only require refrigeration after opening, utilizing significantly less overall fridge space.
What is the best dorm coffee maker?
The Keurig K-Mini is widely considered the best dorm coffee maker due to its ultra-slim 5-inch width, automatic shut-off safety feature, and mess-free pod system. It fits perfectly on narrow student desks or small bedside tables. For those who enthusiastically prefer traditional brewing without pods, a low-wattage gooseneck kettle paired with a simple Kalita Wave pour-over dripper is the top recommendation from experienced college baristas.
How to make iced coffee in a dorm?
To make iced coffee in a dorm, brew a highly concentrated 4oz hot coffee shot using a pod machine, then pour it immediately over a large insulated tumbler completely filled with ice. The ice will rapidly dilute the concentrate to the perfect drinking strength. Alternatively, you can buy a dedicated cold brew pitcher that steeps coarse grounds in your mini fridge overnight, requiring no electricity or hot water at all.
How to boil water for coffee in a dorm?
The safest and most efficient way to boil water in a dorm is using an automatic shut-off electric kettle. Never use microwave-heated water for coffee, as it heats unevenly and can superheat dangerously. Ensure you carefully select a kettle that falls under your dorm’s maximum wattage limit (usually under 1000W) and always plug it directly into a wall outlet rather than a cheap, overloaded power strip.
What are aesthetic dorm coffee bar ideas?
Aesthetic dorm coffee bar ideas focus on hiding cords, standardizing containers, and utilizing vertical space, such as transferring commercial syrups into matching glass pump bottles. Popular minimalist setups include styling a 3-tier rolling cart with neutral-toned organizers, creating a floating shelf display with trailing plants, or setting up a sleek pour-over station on a bamboo vanity tray to create a dedicated, cafe-like caffeine corner.
Why have a coffee station in your dorm?
Having a dedicated coffee station in your dorm saves college students hundreds of dollars a semester compared to buying daily campus coffee. Beyond saving significant money, an in-room brewing area saves critical time during rushed mornings, provides a reliable caffeine source for late-night study sessions when campus cafes are closed, and creates a comforting, personalized home environment in an otherwise sterile dormitory setting.
Creating the perfect dorm setup isn’t about having the absolute most expensive espresso machine or a massive kitchen counter; it’s about clever spatial organization and creatively maximizing every single inch of vertical space. Whether you consciously choose to assemble a multi-tier utility cart, securely mount damage-free floating shelves, or set up a highly minimalist tray directly on your study desk, these concepts prove that you certainly do not have to sacrifice your daily caffeine ritual just because you’re living in a tiny college dorm.
By strictly keeping your university’s fire safety rules in mind and intentionally choosing mess-free, sinkless brewing methods, you can successfully build a functional caffeine corner that acts as a true small space lifesaver. Not only will a dedicated coffee nook genuinely make those brutal early morning 8 AM classes significantly more bearable, but it will also save you hundreds of dollars by completely skipping the chaotic campus cafe lines.
The most important step is simply choosing the specific setup that best fits your daily personal routine and room layout. Gather your supplies, check your specific wattage limits, and start confidently customizing your space today. Which of these nine dorm coffee station ideas are you planning to actively build this semester? Share your favorite setups in the comments below, or pin this guide to your college mood board to keep these invaluable space-saving hacks handy for move-in day!
Last update on 2026-10-25 / Affiliate links / Images from Amazon Product Advertising API
