
As an Amazon Associate CoffeeXplore.com earns from qualifying purchases.
Pour Over vs Espresso: 7 Essential Taste & Brew Secrets
Choosing a home coffee setup without understanding extraction physics creates deep frustration. You risk brewing sour, under-extracted filter coffee or harsh, bitter espresso shots. Understanding the pour over vs espresso difference solves this daily struggle completely.
The core difference between pour over and espresso lies in extraction mechanics and concentration. Pour over utilizes gravity-fed percolation, producing a delicate cup with high flavor clarity. Espresso requires nine bars of pressure, yielding a highly concentrated, viscous shot with rich crema. This structural variance entirely dictates your daily caffeine output and flavor experience.
Drawing from comprehensive analysis of current data and Specialty Coffee Association standards as of October 2026, we understand these extraction physics. Pour over relies on gravity filtration, while espresso operates under mechanical pressure. You will discover exactly which brewing style matches your specific taste preferences and morning workflow capacity.
Contents
show
What is the Difference Between Pour Over and Espresso?
Understanding the core difference between pour over and espresso fundamentally shifts how you approach your morning routine. The distinction goes far beyond just the brewing equipment; it rests entirely on the physics of extraction. When you blindly guess your method, you inevitably face the frustrating reality of preventing sour under-extracted pour over or desperately fixing bitter over-extracted espresso. By applying the SCA Golden Cup standard, we can objectively analyze how water interacts with roasted coffee beans to achieve perfection.
The primary mechanical divide is simple but profound. Filter coffee vs espresso is a battle of gravity versus mechanical force. Espresso forces water through a dense bed of fine grounds using nine bars of pressure, heavily impacting the hydraulic conductivity of coffee puck. This rapid, violent extraction creates a dense, emulsified liquid. Conversely, manual drip methods rely strictly on gravity fed percolation. Water gently navigates the interstitial void ratio in coffee bed, filtering gracefully through paper. This slower, gentler process highlights delicate floral acidity while removing heavy oils, leaving you with unmatched flavor clarity. So, which brewer actually fits your lifestyle?
7 Essential Taste & Brew Secrets: Pour Over vs Espresso Comparison
Mastering your kitchen setup requires a precise pour over vs espresso comparison that moves beyond basic taste descriptions. To truly replicate specialty café results at home, you must understand the exact brewing method comparison parameters used by professionals. World Barista Championship techniques emphasize strict control over every variable, from dialing in grind size to measuring the exact water to coffee ratio.
This masterclass bridges the gap between theoretical physics and practical brewing. Whether you are chasing the brilliant, clean paper filtered cup of a manual dripper or the heavy, concentrated espresso shot from a dual boiler espresso machine, success relies on empirical measurement. By leveraging tools like a calibrated digital coffee refractometer and understanding micron particle size distribution, you can definitively diagnose extraction errors. Let us dive into the seven core pour over vs espresso methods and secrets that dictate exactly how to manipulate water, time, and coffee to achieve absolute perfection in your cup.
1. Calibrating Burr Grinder for Flavor Clarity vs Crema Density

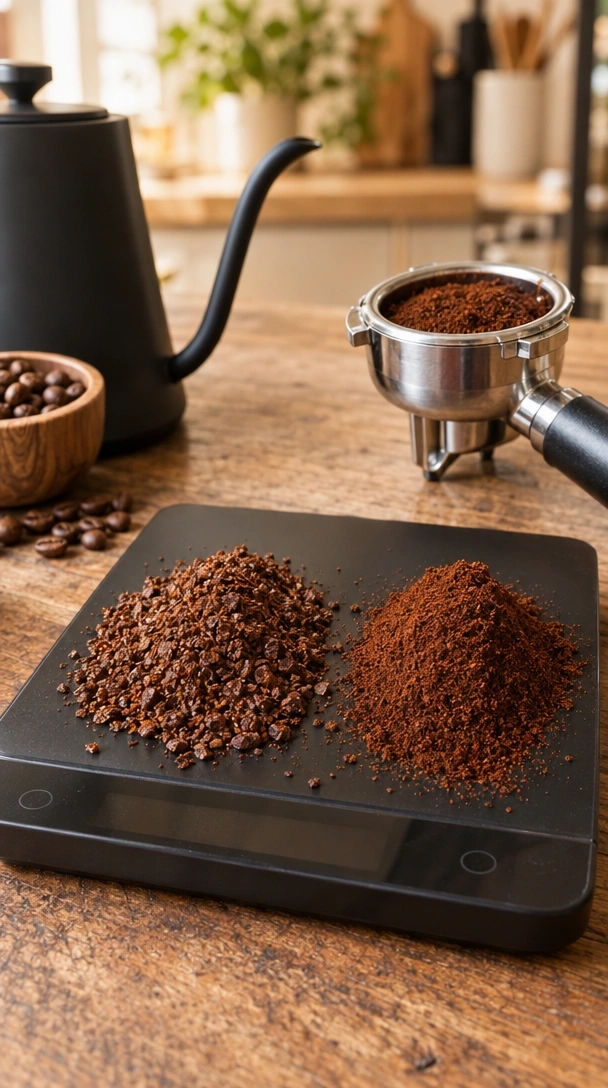
2. Weighing Coffee Dosage to Nail the Water to Coffee Brew Ratio

Save this golden brew ratio cheat sheet for your morning coffee routine!
Weighing coffee dosage accurately is the only way to consistently nail your target water to coffee brew ratio. This mathematical relationship determines your brew ratio + total dissolved solids (TDS) measurement, dictating the ultimate concentration of your beverage. You cannot rely on volumetric scoops; a precise coffee to water ratio calculator mentality is required.
Espresso utilizes a tight 1:2 ratio (e.g., 18g of coffee to 36g of water) to produce a highly concentrated espresso shot. Pour over relies on a wider 1:15 to 1:17 ratio to yield a light delicate body. If you fail to measure accurately, you will inevitably face a weak watery pour over cup correction scenario.
Tools Required
- Precision smart scale with 0.1g accuracy and built-in timer
- Coffee dosing cup for clean portafilter transfers
- Specialty coffee beans (single origin for pour over, blend for espresso)
- Ceramic Hario V60 or 58mm espresso portafilter
Instructions
- Place your empty dosing cup or portafilter on the scale and tare it to zero.
- Weigh exactly 18 grams of coffee dosage for a standard double espresso shot.
- Weigh exactly 20 grams of coffee dosage for a standard 300ml single-serve pour over.
- Calculate your target yield: aim for 36 grams of liquid espresso or 300 grams of water for pour over.
- Monitor the water weight as you brew to ensure you hit the exact target.
An often-overlooked strategy: Understanding bypass brewing ratio calculations is essential for manual percolation. Water that escapes down the sides of the paper filter without extracting coffee significantly lowers your overall TDS. This makes precise pouring technique just as vital as your starting dosage.

3. Distributing Grounds WDT to Prevent Channeling and Ensure Flavor Clarity

Don’t let channeling ruin your espresso—pin this WDT technique for perfect extractions!
Distributing grounds WDT (Weiss Distribution Technique) is your primary defense against channeling holes dry coffee spots. Because espresso machines operate at high pressures, water aggressively seeks the path of least resistance. Proper puck preparation technique is mandatory for avoiding coffee puck channeling.
While a manual pour over dripper simply requires leveling the coffee bed before blooming, espresso demands meticulous internal distribution. If clumps remain in your portafilter, high-pressure water will fracture the puck, leading to a messy spraying bottomless portafilter fix scenario and a highly uneven, bitter extraction.
Tools Required
- WDT tool with 0.3mm to 0.4mm acupuncture needles
- Magnetic espresso dosing funnel to prevent grounds spillage
- 58mm bottomless portafilter and precision basket
- Gentle tap mat or tamping station
Instructions
- Attach the magnetic dosing funnel securely to the top of your portafilter basket.
- Grind your calibrated dose directly into the center of the basket.
- Insert the WDT tool deeply, touching the bottom of the basket, and distribute grounds using small circular motions.
- Gradually work your way from the bottom to the top surface, raking the grounds evenly to break up all clumps.
- Give the portafilter one firm vertical tap on the counter to collapse any air pockets.
What most guides miss: While WDT is heavily associated with espresso, we highly recommend agitating coffee slurry with a chopstick or bamboo stirrer during a pour over bloom. This ensures the interstitial void ratio in the coffee bed is fully saturated, eliminating hidden dry pockets that ruin flavor clarity.

4. Tamping Espresso Puck vs Rinsing Paper Filter for Ideal Extraction

Pin this guide to perfecting your pre-brew rituals for flawless coffee every time!
Tamping the espresso puck effectively builds the structural resistance required for pressure extraction, while rinsing the paper filter prepares the environment for gravity percolation. These final physical preparation steps are critical before water ever touches the roasted grounds.
Tamping creates necessary coffee puck resistance; a barista applies roughly 30 lbs of pressure to compress the grounds into a solid puck capable of withstanding 130 PSI of water pressure. Conversely, paper filter extraction requires no compression. Instead, heavily rinsing the paper filter removes unpleasant papery tastes, preheats the brewing vessel, and ensures the filter adheres to the walls, leading to a clean paper filtered cup.
Tools Required
- Calibrated, spring-loaded espresso tamper (for repeatable pressure)
- Unbleached or oxygen-bleached paper filters (V60 or Chemex)
- Glass or ceramic pour over dripper
- Heat-resistant pouring vessel for discard water
Instructions
- For pour over, unfold the paper filter, place it in the dripper, and rinse generously with near-boiling water to eliminate papery residue.
- Discard the rinse water from your carafe to ensure the brewing vessel is thoroughly preheated.
- For espresso, place your leveled portafilter on a tamping mat to protect your countertops.
- Hold the tamper like a doorknob and press with perfectly even, downward pressure until the grounds fully compress.
- Polish the puck with a gentle spin of the tamper, ensuring a flat, level surface with zero micro-fractures.
Expert insight: An un-level tamp drastically alters the hydraulic conductivity of the coffee puck, causing water to rush through the thinnest side. Using a self-leveling, spring-loaded tamper eliminates this human error entirely, ensuring consistent extraction every single morning.

5. Blooming Coffee Bed vs Pre-Infusing Coffee Puck Dynamics

Watch your coffee come alive—save this bloom technique for the freshest morning cup!
Blooming the coffee bed in a manual pour over serves the exact same chemical purpose as pre-infusing the coffee puck in mechanical espresso brewing. Both techniques involve saturating the grounds with a small amount of water to rapidly expel trapped carbon dioxide.
Freshly roasted coffee beans hold immense amounts of CO2. If you skip this degassing phase, the gas acts as a physical barrier, repelling water and preventing proper solubility kinetics of coffee compounds. Modern dual boiler machines mimic the manual pour over “muffin” expansion by applying low-pressure pre-infusion pressure profiling before ramping up to the full 9 bars.
Tools Required
- Variable temperature control gooseneck kettle (for precise pouring)
- Freshly roasted coffee beans (within 14-30 days of roast date)
- Timer or stopwatch
- Espresso machine with pre-infusion capabilities (if brewing espresso)
Instructions
- Start your timer and begin pouring concentric circles with 40-60 grams of water (double your coffee weight) evenly over the dry grounds.
- Stop pouring and watch the blooming coffee bed expand rapidly as carbon dioxide escapes; wait for 30 to 45 seconds.
- If brewing espresso, activate your machine’s pre-infusion mode to gently saturate the puck at 2-3 bars of pressure.
- Allow the pre-infusing coffee puck to swell for 5-8 seconds.
- Resume your main pour or allow the pump pressure to ramp up only once the initial bubbling ceases.
What most guides miss: If you are conducting stale coffee degassing troubleshooting and your coffee bed does not visibly bubble, your beans are too old. Chlorogenic acid lactones extraction and volatile aromatic compound retention degrade rapidly after 30 days, resulting in a lifeless cup regardless of flawless technique.


6. Timing Brew Drawdown vs Fast Extraction Speed for Balanced Acidity

Master your extraction time with this simple brew drawdown guide—pin for later!
Timing the brew drawdown correctly is essential for pour over, requiring a long contact brew time, whereas espresso dictates a remarkably fast extraction speed. Time acts as the ultimate controller for balancing sweet sugars, sour acids, and bitter tannins.
Because espresso uses intense mechanical pressure, it forcefully strips flavor compounds in roughly 25-30 seconds. Conversely, manual percolation relies on monitoring water flow rate over 2.5 to 3.5 minutes to highlight delicate floral acidity. If an espresso shot pulling too fast occurs, it tastes incredibly sour. If you suffer a clogged pour over paper filter drawdown, the brew chokes, over-extracting harsh, astringent flavors.
Tools Required
- Hario V60 or similar conical pour over dripper
- Digital shot timer (or scale with built-in timer)
- Medium-coarse ground specialty coffee
- Gooseneck kettle for precision flow control
Instructions
- After the bloom, begin monitoring water flow rate by pouring in a slow, controlled, concentric motion.
- Pour in distinct phases (pulses) to maintain a consistent water level in the dripper, keeping the slurry temperature stable.
- Finish your final pour by the 1:45 to 2:00 minute mark.
- Allow the water to completely drain, closely timing the brew drawdown.
- The coffee bed should run dry between 2:30 and 3:30 total time; if it takes over 4 minutes, your grind is too fine.
An often-overlooked strategy: If you suffer from an astringent dry aftertaste diagnosis, your drawdown likely took too long. Percolation channeling dynamics often cause fine dust to migrate to the bottom of the paper filter. This chokes the flow, over-extracting bitter tannins. Grind slightly coarser to speed up contact time.

7. Measuring Extraction Yield to Maximize Caffeine Content Comparison

Wondering which brew gives you more energy? Pin this caffeine and TDS breakdown!
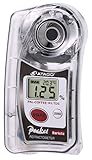
Measuring extraction yield reveals the surprising truth about the caffeine content comparison between these two popular methods. By utilizing a calibrated digital coffee refractometer, we can definitively prove how total dissolved solids percentage dictates perceived strength versus actual caffeine intake.
Most consumers assume a concentrated espresso shot holds the highest caffeine. While espresso does boast a higher caffeine density per ounce (yielding 8-12% TDS), the serving volume is incredibly small (1-2 oz). A standard 10-12 oz pour over operates at a much lower concentration (1.2-1.5% TDS) but utilizes significantly more water and a long contact brew time. Consequently, the caffeine in 8 oz pour over vs double shot espresso leans heavily in favor of the manual filter method.
Tools Required
- Calibrated digital coffee refractometer (for advanced home baristas)
- Disposable pipettes for taking clean liquid samples
- Finished double espresso shot (approx. 36g)
- Finished pour over coffee (approx. 300g)
Instructions
- Stir your finished coffee thoroughly to ensure the liquids are completely homogenized before sampling.
- Use a clean pipette to draw a few drops of liquid from your cup or carafe.
- Place the drops onto the lens of the calibrated digital coffee refractometer.
- Press measure and record your total dissolved solids TDS measurement.
- Use a coffee to water ratio calculator app to input your dose, yield, and TDS to find your exact extraction yield percentage.
Expert insight: Trigonelline degradation profiles aside, caffeine is a highly water-soluble compound. Because a manual dripper uses drastically more water volume and features prolonged contact time compared to rapid pressure extraction, it washes out significantly more total caffeine into your final morning mug.
Key Takeaways: Your Quick Guide to Pour Over vs Espresso
Navigating the complex difference between pour over and espresso can feel overwhelming, but mastering these fundamentals rapidly elevates your daily brewing ritual. To help you evaluate which setup aligns with your workflow, taste preferences, and budget as we move through 2026, we have distilled this comprehensive pour over vs espresso summary into the most vital, actionable key points.
- Grind Size Dictates the Method: You must use a fine grind particle size for espresso to build resistance against 9 bars of pressure, while pour over requires a medium coarse grind to allow gravity-fed water to flow cleanly.
- Filter Types Transform the Body: A clean paper filtered cup traps coffee oils and fines, yielding high flavor clarity, whereas the metal basket of an espresso machine allows oils through, creating a heavy viscous texture and dense crema.
- Brew Ratios Control Concentration: Espresso uses a highly concentrated 1:2 ratio (yielding 8-12% TDS), while pour over utilizes a 1:15 to 1:17 ratio (yielding 1.2-1.5% TDS) for a delicate, tea-like consistency.
- Caffeine Output is Misunderstood: While espresso has a much higher caffeine content comparison per ounce, a standard 10-12 oz pour over actually extracts more total caffeine per serving due to higher water volume and longer contact time.
- Equipment Costs Vary Wildly: An espresso machine vs pour over setup total cost comparison reveals you can achieve world-class pour over with a budget dripper and a good kettle, while entry-level capable espresso machines require hundreds of dollars.
- Puck Prep is Non-Negotiable for Espresso: Because water under high pressure is lazy, avoiding coffee puck channeling through precise WDT distribution and level tamping is mandatory for espresso, but less critical for gravity-fed slurry agitation.
- Roast Profiles Shine Differently: Pour over inherently amplifies chocolate and caramel notes (or bright fruity acids depending on the bean), making it the ideal method for tasting the nuanced terroir of light-roast single-origin specialty coffee.
FAQs About Pour Over vs Espresso
Understanding the core differences in brewing methodology naturally leads to specific questions regarding daily implementation, gear costs, and health impacts. Below, we address the most common questions about pour over vs espresso to resolve lingering uncertainties and help you make the best choice for your personal coffee journey.
Does pour over or espresso have more caffeine?
While espresso is more highly concentrated per ounce, a standard cup of pour over coffee actually contains more total caffeine.
According to laboratory caffeine testing data, a double shot of espresso (2 oz) contains roughly 80-120mg of caffeine. However, an average 10-12 oz pour over uses more water and has a longer contact time, washing out roughly 120-160mg of caffeine per serving. Espresso gives a faster caffeine spike, but pour over delivers a higher overall dosage.
Is pour over coffee stronger than espresso?
In terms of flavor intensity, mouthfeel, and total dissolved solids (TDS), espresso is significantly stronger than pour over coffee.
Espresso yields a thick, syrupy beverage measuring roughly 8-12% coffee solids to water. Pour over yields a delicate, tea-like consistency measuring only 1.2-1.5% coffee solids. Therefore, espresso provides a far more concentrated coffee strength and heavy viscous texture on the palate, even if pour over has more total caffeine.
Why is espresso equipment more expensive than pour over?
Espresso equipment is expensive because it must mechanically heat water and safely pressurize it to 130 PSI (9 bars) simultaneously.
A dual boiler espresso machine requires complex internal plumbing, precision thermostats (PIDs), commercial-grade pumps, and heavy brass group heads to maintain temperature stability under immense pressure. Conversely, a pour over dripper is simply a static cone relying on gravity, meaning the only significant investment needed is a quality burr grinder and a temperature-controlled gooseneck kettle.
Can you use espresso beans for pour over coffee?
Yes, you can brew espresso beans as a pour over, but you may experience a much darker, heavier flavor profile than you expect.
“Espresso beans” are typically just regular coffee beans roasted darker and blended specifically to cut through milk and produce thick crema. When brewed via manual drip brewing through a paper filter, these darker roasts often produce dominant chocolate, caramel, and sometimes bitter, ashy notes, rather than the bright floral acidity usually sought after in pour over brewing.
What grind size should I use for pour over vs espresso?
You must use a fine, powdery grind size for espresso and a medium-coarse, sea-salt-like grind size for pour over.
Espresso requires fine grounds (around 400-600 microns) packed tightly to create hydraulic resistance against 9 bars of pressurized water. If you use a medium coarse grind for espresso, the water will blast through instantly. Conversely, pour over relies on gravity; a fine espresso grind would cause a clogged pour over paper filter drawdown, resulting in bitter, over-extracted coffee.
Which tastes better: pour over or espresso?
Taste preference depends entirely on whether you prefer bright flavor clarity or intense body and mouthfeel.
If you enjoy tasting the nuanced, single-origin terroir and delicate fruit notes of specialty coffee, pour over is objectively superior due to paper filtration removing muddying oils. If you prefer a highly concentrated coffee brew with a dense crema, rich chocolate notes, or plan to mix your coffee with steamed milk for lattes, espresso is the better choice.
Why does espresso have crema but pour over does not?
Crema is exclusively produced by the high-pressure environment of an espresso machine emulsifying coffee oils with escaping carbon dioxide.
When hot water is forced through a tightly packed coffee puck at 9 bars of pressure, the CO2 trapped inside the roasted beans is pushed into the water, creating a dense, foamy micro-emulsion of lipids and gas. Because pour over is a gentle, gravity-fed percolation method, the CO2 simply bubbles away harmlessly into the air during the bloom phase.
Is pour over healthier than espresso coffee?
Pour over is often considered slightly better for cardiovascular health because the paper filter removes cafestol and kahweol, two diterpenes known to raise cholesterol.
Because espresso is brewed using a perforated metal basket with no paper filtration, these natural coffee oils pass directly into the cup. While both methods offer excellent antioxidants and metabolic benefits, individuals actively monitoring their LDL cholesterol levels are generally advised by health professionals to stick to clean paper filtered cups.
What water temperature is best for pour over vs espresso?
Both methods thrive in the 195°F to 205°F (90°C to 96°C) temperature range, but lighter roasts require hotter water than darker roasts.
When optimizing water temperature for origin flavor notes, use water closer to 205°F for dense, light-roast single-origin beans (common in pour over) to increase solubility. For darker espresso blends, drop the temperature closer to 195°F to prevent extracting harsh, bitter tannins from the more easily soluble dark-roasted beans.
How long does it take to brew pour over compared to espresso?
Espresso requires a fast extraction speed of 25 to 35 seconds, while pour over demands a long contact brew time of 2.5 to 3.5 minutes.
However, this only accounts for water contact time. When factoring in the total morning routine workflow—including dialing in the grinder, distributing grounds WDT, tamping, purging the steam wand, and cleaning the group head gasket—preparing an espresso often takes an experienced barista just as much total time as a manual hand-poured filter coffee.
Final Thoughts on Pour Over vs Espresso
Choosing your daily brewing ritual ultimately comes down to understanding the fundamental differences between gravity and pressure. This final thoughts on pour over vs espresso summary highlights that there is no singular superior method; rather, it is about aligning your palate and morning workflow with the correct extraction physics.
If you are captivated by the idea of exploring light roast, single-origin coffees and want to experience unparalleled flavor clarity and bright floral acidity, the pour over is your undisputed champion. It is remarkably forgiving, requires a fraction of the upfront investment, and offers the cheapest way to brew specialty coffee at home without sacrificing a drop of quality. Conversely, if you crave a concentrated coffee brew with a heavy, syrupy mouthfeel, dense crema, and the foundational strength required to punch through steamed milk for café-quality lattes, you must invest in an espresso setup. The learning curve is undoubtedly steeper, requiring meticulous puck preparation technique, precise dialing in of grind size, and a willingness to understand extraction physics. However, pulling a flawless shot of espresso on a machine you have mastered is one of the most rewarding experiences in the culinary world.
Whether you opt for the meditative, slow-pouring routine of a morning V60 or the fast-paced, high-pressure science of a bottomless portafilter, applying these essential taste and brew secrets will instantly elevate your cup. The journey to the perfect extraction is endless, and when deciding pour over versus espresso which is best, the answer is simply the one that brings you the most joy every morning.
Which brewing method are you leaning toward for your home setup, and what’s the biggest challenge you currently face when trying to dial in your morning coffee? Let me know in the comments below!
Last update on 2026-10-22 / Affiliate links / Images from Amazon Product Advertising API
