As an Amazon Associate CoffeeXplore.com earns from qualifying purchases.
Brilliant Mad Hatter Tea Party Ideas For A Whimsical Event
Feeling a bit mad planning your party? It can feel like tumbling down a rabbit hole.
A Mad Hatter Tea Party is a whimsical event based on Lewis Carroll’s Alice in Wonderland. You want a magical, creative party, but the planning can feel overwhelming and stressful.
A brilliant Mad Hatter tea party combines three key elements: a whimsical atmosphere with mismatched decor, curious themed food and drinks with ‘Eat Me’ and ‘Drink Me’ tags, and absurd, Wonderland-inspired games and activities. This guide will give you brilliant, actionable ideas to make it happen. Let’s create some wonderful madness together.
Feeling a Bit Mad Planning Your Party? Let’s Tumble Down the Rabbit Hole
Planning a party that’s wonderfully bonkers shouldn’t make you feel like you’re losing your head. The desire for a magical, surreal event often clashes with the stress of bringing it to life. This guide is your secret map through Wonderland, transforming chaotic party planning into curated, whimsical brilliance. We’ll cover everything from surreal decorations to curious food and absurd games, giving you clear, actionable steps. Let’s leave the stress behind and focus on the fun.
Hosting a brilliant Mad Hatter tea party involves three key elements: 1) creating a whimsical atmosphere with mismatched decor and surreal details, 2) serving curious themed food and drinks with “Eat Me” and “Drink Me” tags, and 3) engaging guests with absurd, Wonderland-inspired games and activities.
9 Brilliant Mad Hatter Tea Party Ideas for a Wonderfully Whimsical Event
Ready to create an unforgettable unbirthday? Here are nine brilliant, step-by-step ideas that cover everything you need to host a wonderfully whimsical event. These ideas are curated to be thematically authentic to Lewis Carroll’s world, blending classic motifs with modern party trends. They range from simple DIY tipss to show-stopping centerpieces, catering to all budgets and skill levels.
1. Build a Mismatched Teacup Tower Centerpiece
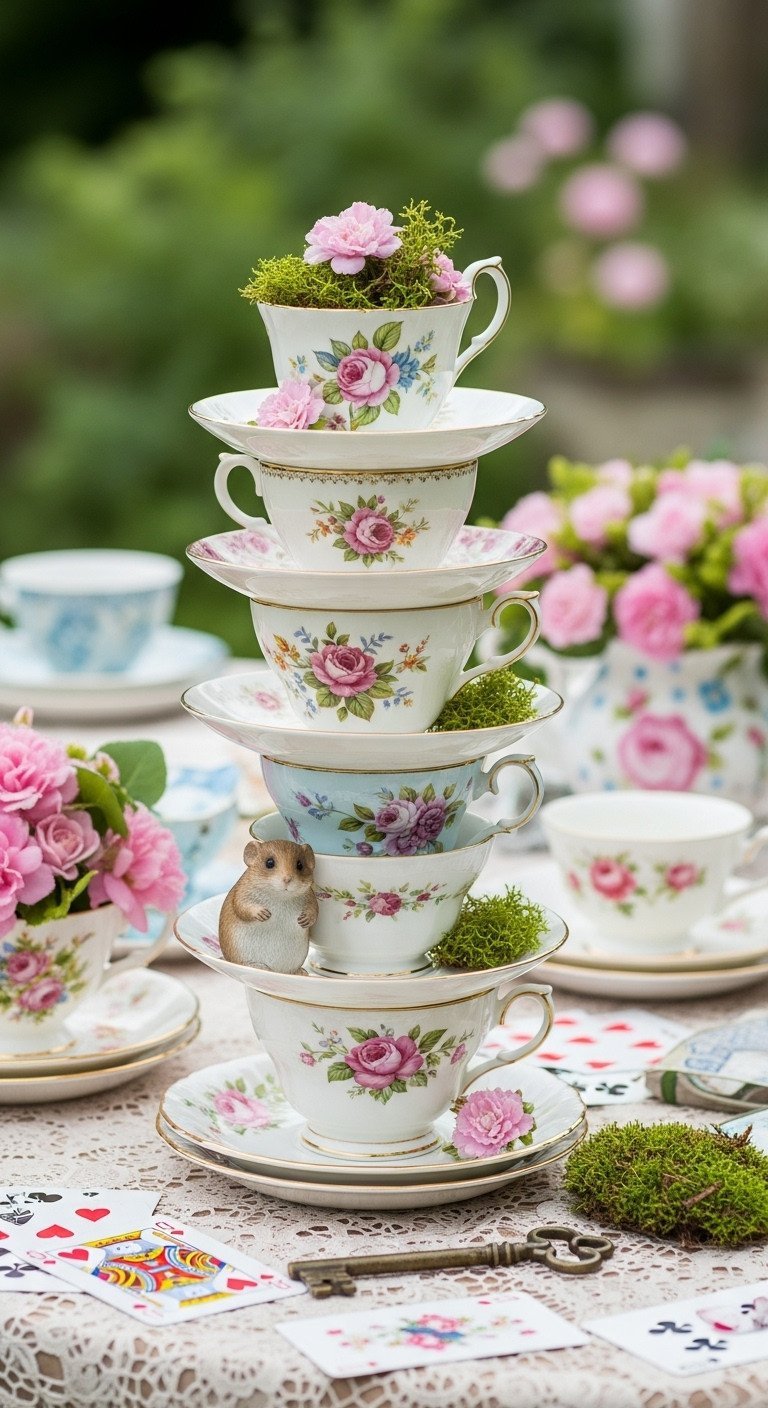
Pin this stunning centerpiece idea to your ‘Wonderland Party’ board!
Materials Needed:
- 6-8 Mismatched vintage-style teacups and saucers (thrift stores are perfect for this)
- High-strength clear craft adhesive or a hot glue gun with clear glue sticks
- A small, weighted base (like a flat stone or ceramic tile)
- Optional: Faux moss, a tiny dormouse figurine, or artificial flowers for decoration
Step-by-Step Directions:
- Clean and Prep: Thoroughly wash and dry all teacups and saucers to ensure the adhesive will bond properly.
- Build the Base: Glue your first, largest saucer securely to the weighted base. This ensures your tower won’t topple over.
- Stack and Tilt: Apply a generous ring of adhesive to the bottom of your first teacup and place it on the saucer. Continue stacking, alternating between a saucer and a teacup. Glue each piece at a slight, whimsical tilt to create a “mad” look.
- The Final Cup: Place the final teacup at the very top, ready for a special detail.
- Decorate: Once the adhesive is fully cured (check instructions), carefully tuck small pieces of faux moss into the crevices. If using, place your dormouse figurine peeking out of the top teacup.
Lesson Learned: Use a high-quality, clear-drying adhesive. Hot glue is fast, but a stronger craft glue like E6000 will create a much more permanent and stable centerpiece. Always build on a protected surface.
2. Curate a Curious ‘Drink Me’ Potion Bar
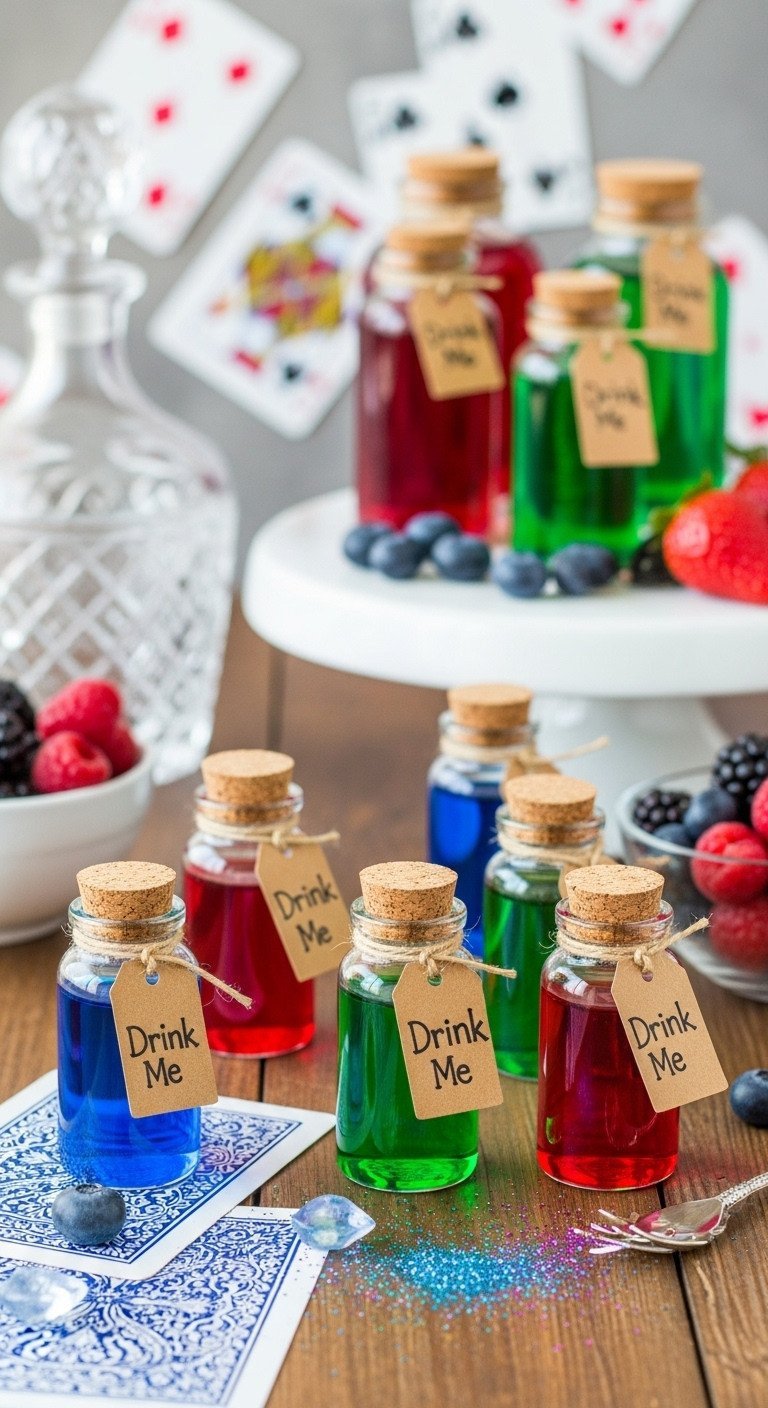
Save this magical drink station idea for your next party!
What You Need:
- An assortment of small glass bottles with corks or swing tops
- Printable “Drink Me” tags and twine
- Various colorful beverages: Butterfly pea flower tea (changes color with lemon!), hibiscus iced tea (deep red), and a green-colored lemonade (use a drop of food coloring or spirulina)
- For adults: Offer miniature bottles of flavored gin or vodka as “Poisons”
- Fun extras: Edible glitter, fresh berries, sliced citrus, and fun paper straws
How to Set It Up:
- Prepare the Potions: Brew your teas and make your lemonade ahead of time. Let them cool completely in the refrigerator.
- Tag the Bottles: Print or handwrite your “Drink Me” tags and tie one around the neck of each empty glass bottle.
- Assemble the Bar: Arrange the empty, tagged bottles on a table. Pour the chilled, colorful drinks into larger glass decanters or pitchers.
- Add the Extras: Set out small bowls with your garnishes like edible glitter, mint leaves, and fruit so guests can customize their own potions.
- Instruct the Guests: Place a small, whimsical sign that reads, “Choose Your Potion, If You Dare!” This encourages guests to mix and match the drinks and garnishes.
Pro-Tip: To make the butterfly pea flower tea “magical,” set out a small pitcher of lemon juice. When guests add it to the blue tea, it will instantly change to a vibrant purple/pink!
3. Craft an Absurdist ‘This Way, That Way’ Signpost

Pin this iconic Wonderland decoration for your party entrance!
Materials Needed:
- One 5-6 foot tall wooden garden stake or sturdy pole
- 4-5 Unfinished wooden arrow signs or scrap wood cut into arrow shapes
- A variety of acrylic craft paints in whimsical colors
- Paintbrushes and a black permanent marker for lettering
- Wood screws or a nail gun
- Clear, weatherproof sealant (if using outdoors)
Step-by-Step Directions:
- Paint the Signs: Paint each wooden arrow in a different, bright color. Don’t worry about being perfect; a slightly rustic, handmade look is ideal. Let them dry completely.
- Add the Words: Using a pencil first, lightly sketch out your nonsensical phrases (“This Way,” “That Way,” “Up,” “Down,” “Tea Party,” “Wrong Way”). Once you’re happy, trace over them with a black permanent marker.
- Attach to the Post: Arrange the arrows on the central post, pointing in contradictory and confusing directions. Secure each one firmly with wood screws or a nail gun.
- Seal for Weather: If your party is outdoors, apply a thin coat of clear sealant over the entire signpost to protect it from the elements.
- Install: Stake the finished signpost firmly into the ground at the entrance to your party to immediately set the whimsical tone.
Pro-Tip: For an easier, indoor version, use sturdy cardboard for the arrows and a tall cardboard tube (like one from wrapping paper) for the post. It’s lightweight and perfect for a living room corner.
4. Design an ‘Eat Me’ Grazing Dessert Board
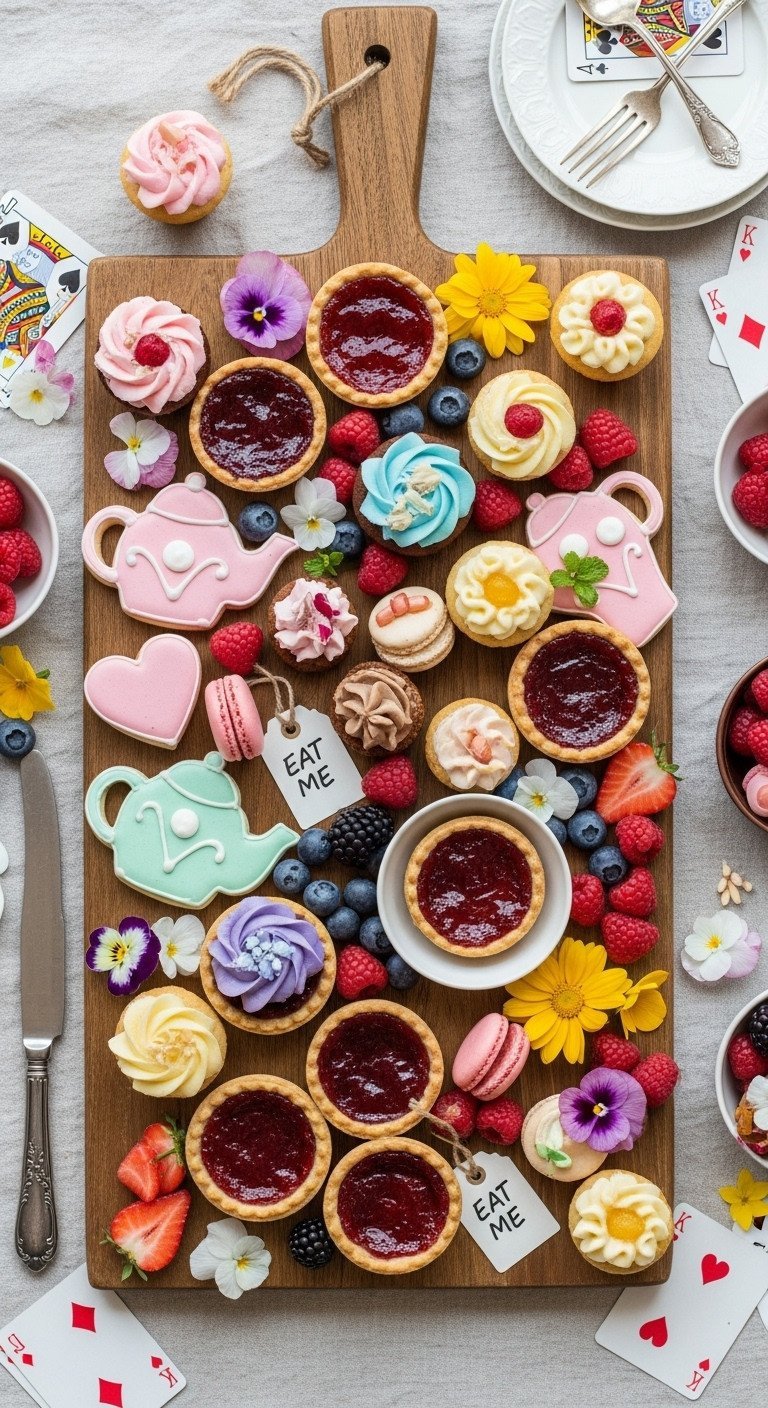
Save this delicious dessert idea for a truly sweet party!
What You Need:
- A large wooden board or platter
- Store-bought mini cupcakes and macarons in various colors
- Queen of Hearts’ Jam Tarts (store-bought or simple homemade)
- Plain sugar cookies and a set of Alice in Wonderland cookie cutters (teapot, heart, key)
- Edible food coloring markers or pre-made frosting tubes
- Assorted fresh berries (strawberries, raspberries, blueberries)
- Small, printable “Eat Me” tags
Step-by-Step Directions:
- Start with Anchors: Place your larger items, like a small cluster of cupcakes or jam tarts, in different spots on the board to create visual anchors.
- Decorate the Cookies: If using plain cookies, use the edible markers to write “Eat Me” or draw simple patterns on them. This is a great activity for kids to help with.
- Fill the Gaps: Arrange the decorated cookies, macarons, and other treats in flowing “rivers” and clusters around your anchor points. Don’t be afraid to let things overlap and look abundant.
- Add Freshness: Tuck fresh berries into all the empty spaces. This adds a pop of color and freshness to balance the sweetness.
- Final Thematic Touches: Place a few “Eat Me” tags strategically among the desserts. You can also sprinkle a few edible flowers for a final touch of whimsy.
Pro-Tip: The key to a great grazing board is variety in color, shape, and texture. Combine soft cupcakes, crisp cookies, and juicy berries for a dynamic and appealing spread.
5. Organize a Game of Queen of Hearts’ Flamingo Croquet
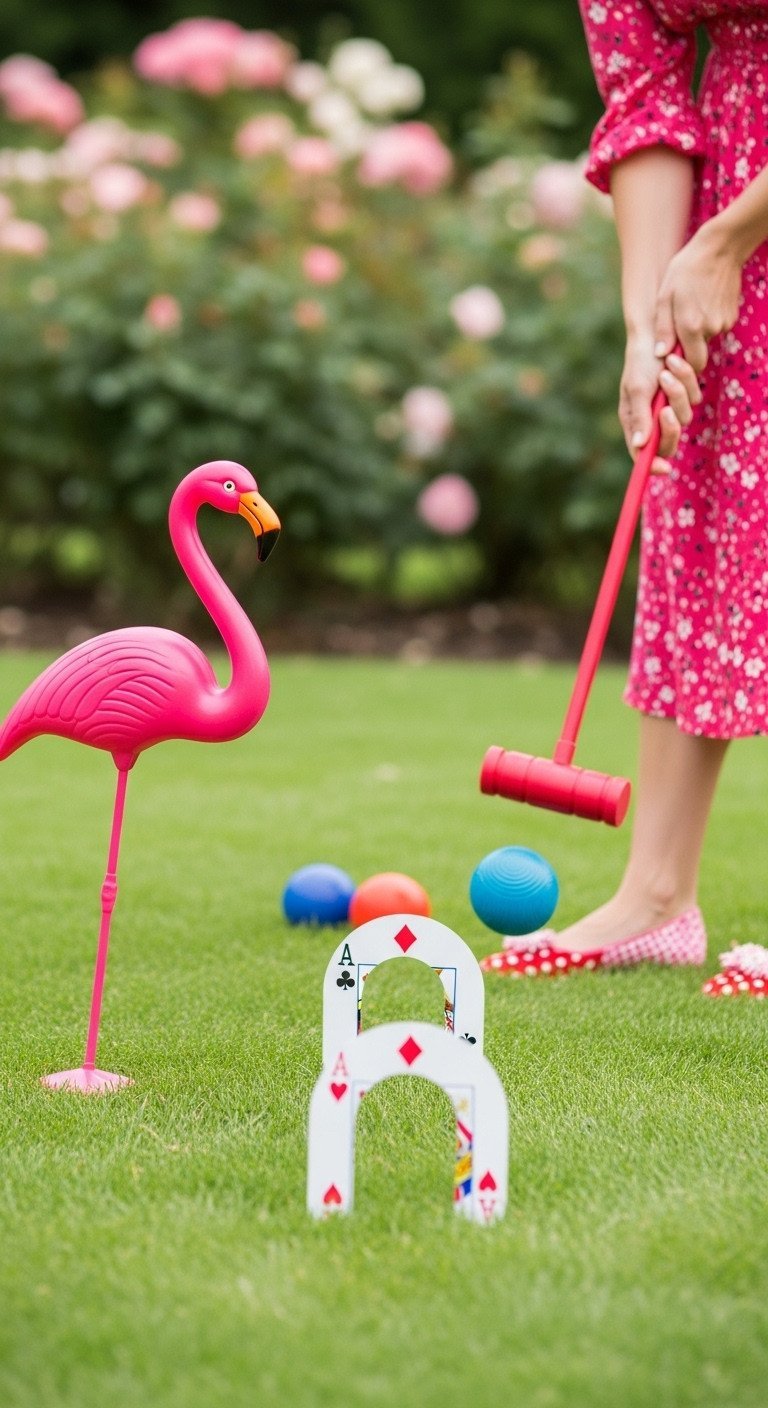
Pin this hilariously fun party game idea!
Materials Needed:
- A standard children’s croquet set (for the balls and stakes)
- 2-4 Plastic lawn flamingos (one for each team/player)
- A deck of oversized playing cards
- Optional: Red spray paint for the croquet balls
Step-by-Step Directions:
- Create the Wickets: Take the oversized playing cards (Aces and Kings of Hearts work well) and bend them into an arch. Use the small metal wickets from the croquet set to hold them in place by sliding the card over the metal arch.
- Set Up the Course: Arrange your playing card wickets in a nonsensical pattern across your lawn. This isn’t a serious game, so make the course winding and unpredictable.
- Prepare the Mallets: The plastic lawn flamingos will serve as your croquet mallets. Guests will hold them upside down to strike the balls.
- Explain the (Lack of) Rules: Announce that the Queen of Hearts is in charge, so the rules can change at any moment. Encourage silliness, trick shots, and playful cheating. The goal is to have fun, not to win.
- Play Ball! Use the croquet balls (or “hedgehogs,” as the Queen would call them) and start playing. The first person to navigate the absurd course wins the Queen’s favor.
Lesson Learned: Standard plastic flamingos are lightweight. This makes the game more challenging and fun, as hitting the ball requires more finesse than force. It’s a great equalizer for kids and adults playing together.
6. Host a DIY ‘Mad As A Hatter’ Top Hat Station
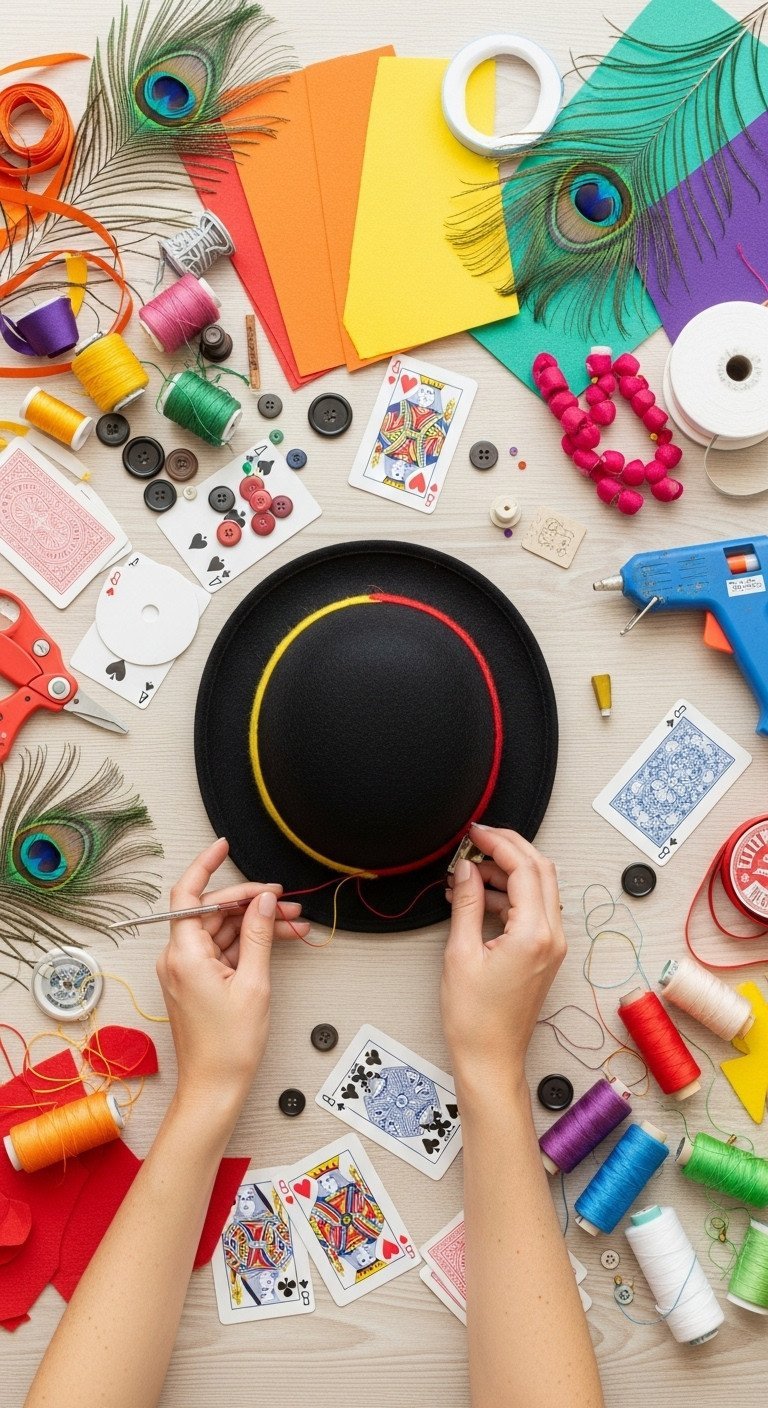
Save this amazing interactive party activity!
Supplies Needed:
- Inexpensive plain top hats or headbands (one per guest). Black felt top hats are ideal.
- An assortment of wide ribbons in various colors and patterns
- A collection of craft feathers, faux flowers, and buttons
- A few decks of playing cards
- A hot glue gun (with adult supervision) and craft glue dots for kids
- Scissors
- A small tag with “10/6” written on it for each hat
How to Set It Up:
- Designate a Craft Zone: Cover a table with a disposable tablecloth to protect it from glue and glitter.
- Organize the Supplies: Arrange all the decorative materials in open bowls or trays so guests can easily see their options. Sort ribbons, feathers, and flowers by color.
- Provide the Base: Stack the plain top hats or headbands at one end of the table.
- Set Up the Gluing Station: If using a hot glue gun, place it at a specific “gluing station” to be managed by a designated adult for safety. Provide glue dots or craft glue for younger guests.
- Let the Madness Begin: As guests arrive, direct them to the station to create their own unique Mad Hatter masterpiece. It’s a perfect icebreaker activity. Don’t forget to help them tuck the “10/6” tag into their hat band for an authentic touch.
Pro-Tip: This activity doubles as a fantastic party favor. Provide small bags so guests can safely transport their custom-made hats home at the end of the party.
7. Plan a Cheshire Cat Disappearing Scavenger Hunt
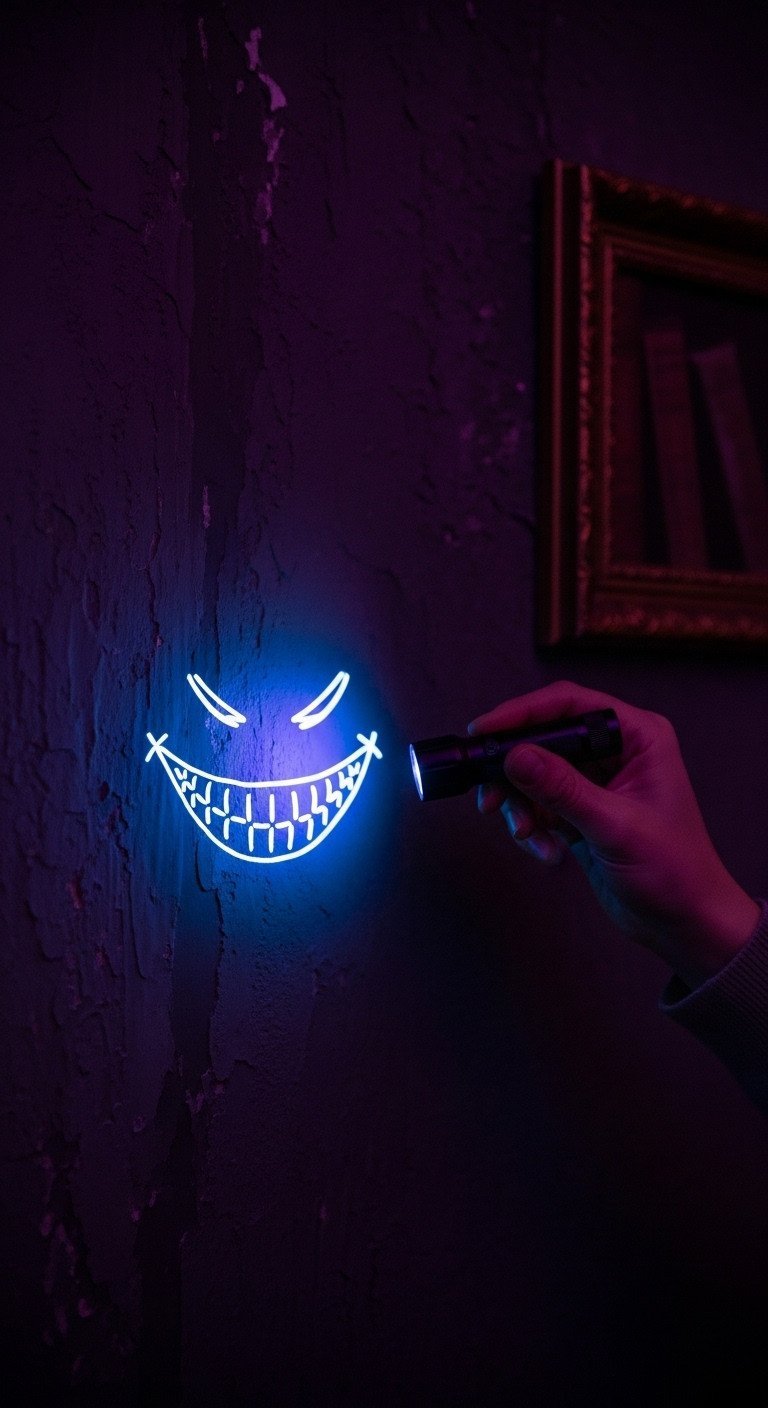
Pin this clever and mysterious party game idea!
What You Need:
- Several invisible ink pens that come with a built-in UV blacklight
- Paper or cardstock for writing clues
- A final “treasure” or prize (e.g., a bag of chocolate coins, a themed storybook)
- A list of simple, riddle-based clues related to your party space
Step-by-Step Directions:
- Write the Riddles: Create 5-7 simple riddles that lead guests from one location to another. For example: “I have a face but no eyes, hands but no arms. What am I?” (Answer: A clock).
- Create the Clues: On separate pieces of paper, use the invisible ink pen to write the answer to the current riddle and the riddle for the next location. For added fun, draw a big Cheshire Cat grin next to each clue.
- Hide the Clues: Place each clue in its corresponding location. For the clock riddle, the next clue would be hidden on or near a prominent clock in your party space. The first clue can be handed to the players to start the game.
- Hide the Treasure: Place your final prize at the location indicated by the very last clue.
- Start the Hunt: Give the players the first riddle and one of the UV light pens. Explain that the Cheshire Cat has left a series of disappearing clues for them to find. Watch as they solve the riddles and use the light to reveal the next step.
Lesson Learned: Test your pens and the visibility of the ink on your chosen paper before the party. Some surfaces work better than others. This game works best in a slightly dimmed area to make the UV light more effective.
8. Create a White Rabbit’s ‘Frozen Time’ Clock Wall

Save this brilliant photo backdrop idea for your party!
Materials Needed:
- A collection of 7-10 old or inexpensive clocks (check thrift stores and dollar stores). They don’t need to work!
- Removable wall hooks or double-sided mounting tape
- Optional: A few oversized prop pocket watches
- A blank wall in your party area
Step-by-Step Directions:
- Collect Your Clocks: Gather a variety of clocks in different shapes, sizes, and styles. A mix of analog wall clocks, old alarm clocks, and even clock faces printed on paper works well. Remove the batteries from any working clocks.
- Plan Your Layout: Lay the clocks on the floor in front of the wall to arrange them in a visually pleasing, gallery-style cluster. Mix large and small items to create balance.
- Set the Time: Before hanging, set each clock to a different, random time. This creates the feeling that time has stopped, just like at the Mad Hatter’s perpetual tea party.
- Hang the Collection: Using removable wall hooks or strong mounting tape, carefully hang each clock on the wall according to your planned layout.
- Add Accents: Intersperse a few prop pocket watches or large skeleton keys among the clocks to add more texture and interest to your photo wall.
Pro-Tip: This “clock wall” makes an incredible backdrop for a photo booth. Set up a ring light and provide a few simple props like top hats and teacups for guests to use.
9. Give ‘Take Me’ Enchanted Garden Party Favors

Pin this charming and unique party favor idea!
Materials Needed:
- Small craft paper envelopes or pre-made seed packets
- A packet of easy-to-grow flower seeds, like pansies or zinnias
- A printer or a rubber stamp with a floral design
- Twine and small, pre-punched tags
- A pen for handwriting the tags
Step-by-Step Directions:
- Prepare the Packets: If you don’t have pre-made seed packets, you can easily fold small envelopes from kraft paper.
- Decorate: Print or stamp a vintage-style image of a pansy or another flower onto the front of each packet to represent the “talking flowers” from the Garden of Live Flowers.
- Fill with Seeds: Carefully portion a small number of flower seeds into each packet and seal it closed.
- Write the Tags: On each small tag, write a whimsical phrase like “Take Me” or “For Your Own Garden of Live Flowers.”
- Assemble: Use a piece of twine to tie the handwritten tag around each seed packet.
- Display: Arrange the finished party favors in a basket or on a tray near the exit for guests to take as they leave the party.
Lesson Learned: Choose seeds that are known to be easy for beginners to grow. Pansies are a perfect thematic choice as they are often called “heartsease” and have faces, fitting the theme perfectly.
Key Takeaways: Your Quick Guide to a Perfectly Mad Party
- Embrace the Mismatch: The golden rule of Wonderland decor. Nothing should match perfectly, from your teacups to your chairs. This creates effortless, chaotic charm.
- Label Everything: Use “Eat Me,” “Drink Me,” and “Take Me” tags on food, drinks, and favors. It’s a simple detail with a huge thematic impact.
- Create an Interactive Element: A party is more than decor. A DIY hat station or a simple game like Flamingo Croquet gets guests involved and creates memories.
- Think Beyond the Hatter: Incorporate other characters for more depth. Use playing cards for the Queen of Hearts, riddles for the Cheshire Cat, and clocks for the White Rabbit.
- It’s All About Fun: The ultimate goal is to create a playful, nonsensical atmosphere. If you’re having fun as the host, your guests will too. The only rule is to break the rules!
People Also Ask About a Mad Hatter Tea Party
What do you serve at a Mad Hatter tea party?
Serve whimsical twists on classic tea party fare. This includes finger sandwiches with curious fillings, “Eat Me” decorated cupcakes or cookies, Queen of Hearts’ jam tarts, and scones. For drinks, offer a variety of teas and colorful “Drink Me” potions made from juices or lemonade.
How do you decorate for a Mad Hatter tea party on a budget?
Focus on DIY and thrifted items. Use mismatched teacups from thrift stores, create signs from cardboard, scatter playing cards on tables, and hang homemade paper lanterns. The chaotic, handmade aesthetic is central to the theme, making budget decorating easy and effective.
What do guests wear to a Mad Hatter party?
Encourage guests to be “whimsical and creative.” The easiest instruction is to ask everyone to wear a fun, strange, or “mad” hat. Bright colors and patterns are also encouraged. Full character costumes are a fun option but shouldn’t be required for guests to feel included.
What are good Mad Hatter party games for adults?
Adapt classic games with a Wonderland twist. Flamingo Croquet is a hit with all ages. A “Cheshire Cat’s Riddles” contest, a blind tea tasting challenge, or a competition for the “maddest” decorated hat from a DIY station are all excellent options for an adult party.
Final Thoughts
The true magic of a Mad Hatter’s tea party isn’t about perfection. It’s found in embracing creativity, celebrating silliness, and making wonderful, nonsensical memories with the people you love. The goal is to have fun, so let your imagination run wild and don’t be afraid to be a little mad.
Now you’re ready to host a party that’s entirely bonkers! Which of these wonderfully mad ideas are you most excited to try for your own tea party? Share your favorites in the comments below.
Last update on 2026-01-29 / Affiliate links / Images from Amazon Product Advertising API

