
As an Amazon Associate CoffeeXplore.com earns from qualifying purchases.
Coffee and Juice Station Ideas: 7 Chic Space-Saving Setups
Are you struggling to fit both a blender setup and an espresso machine on your kitchen counters? A limited counter space solution is essential for maintaining a stress-free morning routine. Figuring out coffee and juice station ideas shouldn’t feel like a constant battle against clutter.
A coffee and juice station is a multi-functional residential beverage hub that combines hot coffee brewing infrastructure with cold juice preparation equipment. The most effective setups utilize dual-zone refrigeration, dedicated 20-amp circuits for high-power blenders and espresso machines, and space-saving layouts like appliance garages to maintain a sleek modern look.
Drawing from comprehensive analysis of current data and verified design methodologies, this guide reveals proven spatial architectures. You will discover how to balance electrical safety with beautiful interior design to create the ultimate built-in beverage bar. Get ready to transform your morning workflow with these actionable structural frameworks.
To design a chic, space-saving coffee and juice station, consider these expert setups: Build a hidden appliance garage, integrate dual-zone under-counter refrigeration, mount floating shelves for vertical storage, configure a flexible rolling cart bar, design a modern farmhouse hutch, set up a budget-friendly DIY console, and reclaim corner space with a prep zone.
Creating a seamless kitchen juice and coffee station requires balancing heavy electrical demands with strict spatial ergonomics. Before diving into these small space kitchen beverage station layouts, grab a tape measure and assess your available counter depth. Knowing your exact physical constraints ensures your new coffee bar cabinet integrates perfectly with your existing kitchen layout while supporting dual functions. Let us explore how to configure your layout and strategically maximize vertical storage using these precise architectural blueprints.
Contents
show
1. Build a Hidden Appliance Garage to Hide Bulky Appliances

Pin this genius hideaway hack to your Dream Kitchen board!
Designing a hideaway appliance garage for blenders and espresso makers is the ultimate strategy to hide bulky appliances. This built-in cabinet approach prevents cluttered spaces while keeping your heavy daily-use tools accessible. Maintaining a sleek modern look is difficult when commercial-grade motors dominate your surfaces. By installing this hideaway setup, your counters remain pristine while safely housing a powerful cold press juicer.
Materials Needed
- Appliance garage pocket doors hardware kit or tambour door system
- Pre-cut matching cabinet wood panels
- Power strip with surge protection (ensure it is electrical code compliant)
- Compact design espresso machine measuring under 15 inches tall
- Cold press juicer with a narrow profile
- Waterproof surfaces silicone mat for the cabinet interior
Step-by-Step Directions
- Configure your layout by measuring the tallest appliance to ensure a minimum 18-inch internal height clearance.
- Set up electrical outlets at the rear of the cabinet space, tying into a dedicated 20-amp circuit to prevent overloaded electrical circuits.
- Install the retractable door tracks along the inner side walls following the hardware manufacturer’s exact specifications.
- Mount the front door panel and test the sliding mechanism to ensure it avoids internal appliance cords.
- Place a protective silicone mat on the marble vs quartz base to prevent acidic coffee stains and protect against moisture.
- Organize the cabinet by placing the heaviest espresso boiler on one side and the cold press juicer on the other, routing all cluttered cords neatly backward.
Pro-Tip: As an interior designer recommended practice, always factor in the coefficient of spatial ergonomics by leaving at least 3 inches of breathing room above your appliances for proper ventilation. This disperses the residual thermal output from espresso boilers safely.

2. Integrate a Dual-Zone Refrigeration Under-Counter Fridge

Pin this built-in beverage center idea to your Kitchen Renovation board!
To truly optimize morning routine flow, you must integrate an under-counter fridge directly beneath your prep surface. A standard refrigerator requires you to cross the kitchen repeatedly. By utilizing dual-zone refrigeration, you simplify ingredient access instantly. This creates a highly functional under cabinet beverage station with lighting that mimics luxury commercial setups. Exploring iced coffee and fresh juice bar concepts means acknowledging the distinct temperature needs of produce versus dairy.
Materials Needed
- Dual-zone refrigeration unit (24-inch standard width)
- Pre-cut cabinet opening (24.5 inches for ventilation)
- Clear bamboo fruit basket organizers for internal shelves
- Clear glass canisters for pre-cut juicing ingredients
- Dedicated 115V electrical outlet
- Leveling tools and bracket hardware
Step-by-Step Directions
- Designate a prep zone directly above the intended fridge location to streamline waste disposal and minimize floor dripping during juice prep.
- Measure your cabinet cutout, ensuring you leave a 1/4 inch gap on all sides for ventilating closed cabinets and proper air circulation.
- Slide the under-counter fridge near the opening and plug it into the dedicated outlet, verifying power before full installation.
- Carefully push the unit into the cavity, using a carpenter’s level to adjust the legs until perfectly flush with adjacent cabinetry.
- Organize the internal cooling zones: set the warmer zone (45°F) for fresh oranges in a bamboo fruit basket, and the colder zone (35°F) for milk and cold-brew.
- Install LED under-cabinet lighting above the countertop to highlight the prep space directly above your new appliance.
Pro-Tip: According to commercial safety standards, understanding dual-zone cooling dynamics is crucial. Keeping your citrus fruits separate from dairy adheres to proper sanitation guidelines, prevents premature spoiling, and ensures your coffee + juice ingredients remain at optimal flavor extraction temperatures.

3. Mount Floating Shelves to Maximize Vertical Storage

Pin this vertical storage solution to your Home Organization board!
When evaluating the open shelving vs appliance garage debate, many homeowners choose to mount floating shelves for their visual appeal. This approach seamlessly helps to maximize vertical storage without consuming precious counter depth. Building industrial pipe shelf coffee bar setups keeps your beautiful mugs and glassware visible and easily accessible. Displaying flavored syrups in uniform containers instantly transforms bare walls into a curated, functional focal point.
Materials Needed
- Heavy-duty rustic wood floating shelves (minimum 2 inches thick)
- Concealed steel mounting brackets (rated for 50+ lbs)
- Stud finder, drill, and masonry bits (if mounting to tile)
- Clear glass canisters for coffee beans and sugar
- Ceramic fruit bowls for dry goods
- Matching mugs and glassware for display
Step-by-Step Directions
- Configure your layout by measuring the height of your tallest appliance and marking the wall 20 inches above the countertop for safe clearance.
- Use a stud finder to locate wall studs; if mounting into a tile backsplash, apply masking tape over the mark and use a specialized tile bit.
- Secure the heavy-duty concealed steel brackets directly into the studs, checking for perfect level across the span.
- Slide the wooden shelves onto the bracket posts and secure them from beneath with the provided set screws.
- Arrange coffee mugs on the lower shelf for easy morning access, hanging them from under-mount hooks if desired.
- Style with canisters on the upper shelves, decanting syrups and beans into uniform clear glass canisters for a cohesive, organic earthy style.
Pro-Tip: From my experience in expert kitchen renovation, never rely on drywall anchors for beverage stations. Mugs and glassware add up quickly. Securely mounting brackets into wall studs ensures your shelving meets the necessary countertop weight load capacity and commercial safety standards.

4. Configure a Rolling Cart Bar for Limited Counter Space

Pin this mobile space-saving cart to your Apartment Living board!
If you are researching how to design a coffee corner in an apartment, a rolling coffee cart offers unmatched flexibility. This limited counter space solution bypasses the need for permanent cabinet installation. When comparing a rolling cart versus built-in cabinet, mobility wins for renters needing small space coffee solutions. A heavy-duty rolling cart bar easily supports heavy appliances while optimizing morning routines in tight quarters.
Materials Needed
- Heavy-duty rolling cart bar (minimum 50lb weight capacity per tier)
- Locking caster wheels
- Compact design espresso machine
- Silicone anti-vibration appliance mats
- Decorative cord-hiding box or zip ties
- S-hooks for hanging mugs on the cart sides
Step-by-Step Directions
- Configure your layout by assembling the heavy-duty cart, ensuring the locking caster wheels are installed tightly to prevent rolling.
- Place thick silicone anti-vibration mats on the top and middle tiers to isolate motor vibrations when your blender or juicer runs.
- Position your heaviest appliance on the top tier directly over the wheels to maintain a low center of gravity.
- Organize the lower shelves of the cart with a bamboo fruit basket for juicing produce and airtight containers for beans.
- Manage your cluttered cords by zip-tying them to the rear legs, directing them into a decorative cord-hiding box on the bottom shelf.
- Reclaim corner space by rolling the cart into an unused dining room corner near a wall outlet, locking the wheels firmly.
Pro-Tip: When utilizing a rolling coffee cart, managing appliance noise is vital. Tested by home chefs, placing a thick rubber mat under your centrifugal vs cold press juicer drastically reduces rattling against the metal frame, ensuring quiet early-morning operation.

5. Design a Modern Farmhouse Coffee and Smoothie Station

Pin this cozy modern farmhouse setup to your Kitchen Decor board!
A modern farmhouse coffee and smoothie station perfectly blends aesthetic charm with heavy-duty appliance functionality. Utilizing a rustic wood finish dining room sideboard transforms underused furniture into a stunning hutch drink bar. Adding elements like a chalkboard menu board and a pot filler faucet brings high-end utility to everyday routines. This style excels at integrating eco-friendly bamboo aesthetics while securely coordinating with your primary cabinetry.
Materials Needed
- Rustic wood finish sideboard or buffet cabinet
- Easy-to-clean countertop mat or butcher block sealant
- White ceramic or clear glass canisters for ingredients
- Bamboo fruit basket for fresh produce
- Matte black hardware (pulls and knobs)
- High-powered blender setup for smoothies
Step-by-Step Directions
- Renovate kitchen counters or your chosen sideboard by sanding down the top and applying a food-safe, waterproof butcher block sealant.
- Update the cabinet aesthetic by replacing standard hardware with matte black pulls to match modern farmhouse paint colors.
- Install a pot filler directly above the station to easily refill your espresso machine’s water reservoir without walking to the sink.
- Designate a prep zone on one half of the cabinet exclusively for your smoothie station ideas, setting up the blender near a wall outlet.
- Organize messy pods and tea bags using wooden drawer inserts inside the sideboard drawers to maintain a clutter-free surface.
- Style with canisters and a bamboo fruit basket on the countertop, creating an inviting, organic earthy style display.
Pro-Tip: Interior designer recommended farmhouse setups often utilize a dining room sideboard. However, ensure the sideboard’s internal shelving can support the countertop weight load capacity of heavy ceramic dishware and water-filled appliances before committing to a pot filler plumbing layout.

6. Set Up a Budget-Friendly DIY Coffee Bar Table

Pin this affordable DIY setup to your Budget Home Makeovers board!
Learning how to build a cheap diy coffee station saves thousands compared to full renovations. A diy coffee and juice bar utilizing a freestanding console delivers high functionality without permanent construction. This budget-friendly setup relies on modifying affordable furniture, such as a diy coffee bar table with storage drawers, to house your gear. By implementing simple cord-management and trash bin integration, you elevate inexpensive pieces into custom-looking beverage hubs.
Materials Needed
- Freestanding console table with storage drawers
- Hole saw drill attachment (2-inch diameter)
- Plastic desk grommets for cord management
- Waterproof polyurethane sealant spray
- Small trash bin integration slide-out kit
- Coffee station organizer trays for drawers
Step-by-Step Directions
- Prepare your freestanding console by spraying the top surface with a waterproof polyurethane sealant to create an easy-to-clean countertop.
- Use a 2-inch hole saw to drill a cord-management hole at the rear center of the console tabletop.
- Insert a plastic desk grommet into the hole to protect cords from sharp wood edges and hide cluttered cords neatly behind the table.
- Integrate an under-counter fridge or install a small pull-out trash bin integration kit inside a lower cabinet for easy disposal of fruit peels.
- Organize the cabinet drawers using slim organizer trays to separate your espresso tampers, spoons, and juicer cleaning brushes.
- Position the table against a wall with accessible outlets, routing all appliance power cords down through your drilled grommet.
Pro-Tip: In my experience comparing diy options versus pre-assembled furniture, standard console tables often lack cord routing. Modifying a budget-friendly setup with a simple hole saw instantly elevates it to look like custom built-in cabinetry, according to expert kitchen renovation standards.


7. Reclaim Corner Space with a Dedicated Prep Zone

Pin this brilliant corner space utilization to your Small Kitchen Hacks board!
The smartest way to enact a kitchen island expansion is to reclaim corner space. By maximizing narrow kitchen corners, you convert notoriously dead zones into high-traffic beverage hubs. You must firmly designate a prep zone to handle the distinct sink + waste bin workflow needs of dual appliances. Placing your milk frother and knock box in an L-shaped format ensures you navigate both coffee brewing and juice extraction effortlessly.
Materials Needed
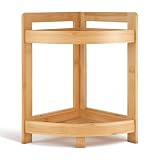
- Tiered corner shelving unit or lazy Susan organizer
- Small stainless steel knock box for coffee grounds
- Silicone tamping mat
- Countertop compost bin for fruit/veg scraps
- Microfiber cloths for quick water spill protection
- Standalone milk frother
Step-by-Step Directions
- Configure your layout by pushing the deepest appliance directly into the corner vertex, utilizing the hardest-to-reach depth of the countertop.
- Designate a prep zone to the immediate left or right of the appliances for slicing fruit and tamping coffee.
- Place a silicone tamping mat on the counter edge to prevent damage to the stone and to provide water spill protection.
- Set up a sink + waste bin workflow by placing a countertop compost bin near the juicer for peels, and a knock box near the espresso machine.
- Maximize vertical space in the corner by adding a tiered corner shelf to hold your milk frother, cups, and flavored syrups.
- Clean your juicer immediately after use, utilizing the proximity to the main kitchen sink to prevent pulp from hardening.
Pro-Tip: For a true barista-approved workflow, architectural layout tips emphasize that corner stations excel because they create a pivot-point layout. You can stand in one spot, prep ingredients, dispose of waste, and access refrigeration with minimal foot travel.
After exploring these diverse home beverage station ideas, synthesizing the technical requirements is crucial for success. Whether installing a compact design or a large built-in cabinet, adhering to strict layout principles optimizes your daily workflow and guarantees electrical outlet safety.
- Zone Your Workflows for Efficiency: Keep your hot espresso machine prep distinct from your cold press juicer area, utilizing a space-saving layout that accounts for different waste streams (coffee grounds vs. fruit peels).
- Prioritize Electrical Load Management: Ensure you set up electrical outlets that are tied to a dedicated 20-amp circuit, as running a commercial blender and an espresso boiler simultaneously can easily cause overloaded electrical circuits.
- Utilize Vertical and Hidden Space: Implement a hidden appliance garage to maintain a sleek modern look while using floating shelves above to maximize vertical storage for your mugs and glassware.
- Incorporate Dual-Zone Refrigeration: Integrating an under-counter fridge with dual-zone cooling dynamics is essential to keep milk/creamers cold while storing fresh produce at slightly warmer optimal temperatures.
- Protect Your Surfaces: Whether you choose marble vs quartz, always use silicone mats to ensure water spill protection and prevent acidic coffee stains from damaging your kitchen juice and coffee station.
Finding the perfect beverage layout often brings up specific spatial and technical questions. Whether you are wondering about proper electrical outlets or how to correctly store fresh fruit, navigating these details is critical. The following expert insights simplify ingredient access and clarify the exact requirements needed to build your ultimate beverage station.
How to set up a coffee and juice station?
To set up a coffee and juice station, designate a minimum 36-inch counter space, install a dedicated 20-amp electrical circuit, and divide the area into a hot brewing zone and a cold juicing zone. Begin by mapping out your appliance footprint. Place your espresso machine and blenders near wall outlets to hide cluttered cords. Incorporate an under-counter fridge beneath the prep area to optimize morning routine, and use vertical floating shelves to store your clear glass canisters and mugs.
What should be included in a coffee station?
A complete home coffee station should include an espresso machine or coffee maker, a quality burr grinder, airtight storage canisters for beans, filtered water access, and a dedicated knock box for waste. Additionally, you should integrate an under-counter fridge for milks and creamers, a collection of mugs and glassware, and a silicone tamping mat to provide water spill protection for your easy-to-clean countertop.
What are some ideas for a coffee and smoothie bar design?
Top ideas for a coffee and smoothie bar design include building a hidden appliance garage, utilizing a modern farmhouse sideboard, or installing a dual-zone built-in beverage center. You can also configure your layout using an industrial rolling cart bar for a mobile budget-friendly setup. The key is to blend smoothie station ideas (like bamboo fruit basket storage) with coffee aesthetics (like clear glass canisters for beans) cohesively.
How do you organize a kitchen coffee station?
Organize a kitchen coffee station by utilizing vertical space with floating shelves for mugs, and using drawer inserts to separate pods, tampers, and stirrers. To maintain a sleek modern look, hide your bulky appliances inside an appliance garage pocket doors setup. Group like items together: keep your flavored syrups on a dedicated tray and decant your dry goods into uniform containers to prevent cluttered spaces.
Where is the best place to put a beverage station?
The best place to put a beverage station is just outside the primary kitchen cooking triangle, such as a dining room sideboard, a walk-in pantry, or an unused kitchen corner. This placement enables efficient workflow because it prevents family members grabbing morning drinks from colliding with whoever is cooking meals. A kitchen island expansion is also a popular space-saving layout.
How much space do you need for a juice bar?
A functional home juice bar requires a minimum of 24 inches of linear counter width and 18 inches of vertical clearance to accommodate a standard cold press juicer and prep space. If you are designing a commercial coffee and fresh juice stand setup, you will need significantly more room—typically 4 to 6 feet—to accommodate multiple blenders, a large prep sink, and commercial sanitation guidelines.
Can you put a juicer and espresso machine together?
Yes, you can put a juicer and espresso machine together, provided they are plugged into a robust electrical circuit (preferably 20-amp) that can handle both heavy motor loads simultaneously. From a layout perspective, this coffee + juice pairing works beautifully if you zone them properly—keep the wet, sticky fruit prep on one side of a central sink or trash area, and the dry coffee grounds on the other.
How do you hide appliances in a coffee bar?
Hide appliances in a coffee bar by installing an appliance garage with retractable pocket doors or tambour rolling doors directly at countertop level. This built-in cabinet solution allows you to slide your blender setup and coffee makers out of sight instantly. For a budget-friendly setup, you can store appliances in lower cabinets fitted with heavy-duty pull-out sliding drawer shelves.
What electrical outlets are required for a coffee bar?
A coffee bar requires at least two 115V GFCI-protected outlets, ideally wired to a dedicated 20-amp circuit to safely run high-wattage espresso boilers and blender motors. If you plan to integrate an under-counter fridge, it requires its own separate outlet. Ensuring your setup is electrical code compliant prevents overloaded electrical circuits when operating your centrifugal vs cold press juicer and coffee maker simultaneously.
How to store fresh fruit at a juice station?
Store fresh fruit at a juice station using a dual-zone under-counter fridge set to 45°F for perishable items, and open bamboo fruit baskets for room-temperature citrus and bananas. Keeping ingredients visible yet organized is key for an iced coffee and fresh juice bar concepts layout. A dedicated under-counter fridge drastically reduces fruit fly issues while keeping your produce perfectly chilled for extraction.
Designing the perfect kitchen juice and coffee station is about striking a seamless balance between heavy-duty functionality and elegant interior design. Whether you are working with a sprawling kitchen island or a tight apartment corner, the core principles of a successful dual coffee juice bar remain the same. You must manage your electrical loads safely, zone your hot and cold prep areas effectively, and utilize vertical storage to maintain a clean aesthetic.
By implementing these coffee and juice station ideas—from the luxurious built-in beverage bar with an appliance garage to a clever, mobile budget-friendly setup—you can dramatically optimize morning routines. Remember that the best home beverage station ideas always start with measuring your appliances and confirming your electrical outlet safety before purchasing cabinetry. Relying on professional design advice ensures your new space avoids overloaded circuits while maximizing spatial ergonomics.
Which of these 7 chic space-saving layout concepts are you planning to implement in your home? Pin your favorite beverage station layout from this guide and start mapping out your ultimate morning refreshment hub today!
Last update on 2026-10-23 / Affiliate links / Images from Amazon Product Advertising API
