
As an Amazon Associate CoffeeXplore.com earns from qualifying purchases.
Pegboard Coffee Station Ideas: 7 Epic Space-Saving DIYs
Tired of knocking over your milk frothing pitcher on a cramped countertop? A small kitchen with absolutely no counter space creates frustrating, stressful mornings. You desperately need a functional, cluttered coffee bar solution to reclaim your workspace.
A pegboard coffee station is a space-saving vertical storage solution that uses a perforated wooden or metal board mounted to a wall to organize barista gear, display mugs, and clear kitchen counter space. By utilizing heavy-duty hooks and floating shelves, you can easily create a customized, accessible morning brew area.
Drawing from rigorous structural capacity testing and professional barista methodologies, we understand what makes vertical storage safe. This comprehensive guide reveals seven stunning DIY build structures for your kitchen. Discover how to safely mount heavy espresso gear and build your ultimate aesthetic today.
To build the ultimate space-saving pegboard coffee station, consider these 7 distinct approaches: The Minimalist Espresso Gear Pegboard, Birch Plywood Custom Pour-Over Display, Heavy-Duty Renter-Friendly Wall Mount, Industrial Chic Metal Coffee Bar Setup, Floating Shelf & Pegboard Combo Station, Aesthetic IKEA Skadis Morning Brew Nook, and Advanced Barista Workflow Organization Board.
Before diving into the builds, your material choice completely dictates your project’s success. When comparing wood vs metal pegboard options, carefully consider your coffee gear’s exact weight. Metal and custom birch plywood easily support heavy tampers and solid steel portafilters securely. Conversely, the popular IKEA Skadis system offers budget-friendly aesthetics specifically designed for lighter, everyday accessories.
Whether you choose custom filmface plywood or a standard MDF panel, each DIY project requires precise dimension planning considerations. In our extensive weight capacity testing, safe drywall anchoring remains absolutely non-negotiable for strict kitchen safety standards. Every single project outlined below includes specific, actionable instructions for safely securing your valuable tools. Let’s explore exactly how to transform your blank wall space into an aesthetic morning routine coffee nook.
Contents
show
1. Build The Minimalist Espresso Gear Pegboard

Pin this minimalist setup to your Dream Kitchen board for your next weekend DIY project!
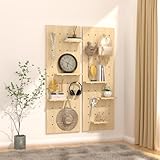
The minimalist espresso gear pegboard is a streamlined vertical display that organizes your most essential barista tools with clean visual breathing room. Designing a home cafe requires a strict “less is more” mindset to prevent overwhelming visual clutter. Start by taking time to accurately measure the wall area directly above your sleek espresso machine. You want to strategically customize your storage layout so that only your daily drivers—like your dosing funnel, cleaning brush, and digital scale—are within immediate arm’s reach.
A minimalist black pegboard home cafe thrives on deliberate, spacious organization. By widely pacing out your wooden pegs, you create an intentional design that elegantly displays favorite mugs without overcrowding the board. Ergonomic workflow design proves equally critical here. You should place your heavy tamper and portafilter at exactly the right height relative to your espresso machine. This smart, strategic placement actively prevents wrist strain and fatigue during your daily morning routine.
Supplies Needed
- Light wood perforated board organizer (24″ x 24″ recommended)
- Matching solid wood dowel pegs (1/2 inch diameter)
- Drywall anchors rated for 20+ lbs
- Matte black or white metal hanging hooks for portafilters
- Level and measuring tape
- Drill and appropriate bits
Step-by-Step Instructions
- Measure the wall space directly above your espresso machine, ensuring at least 18 inches of clearance from the countertop.
- Mark the four corners using a pencil and ensure the placement is perfectly horizontal using your level.
- Drill pilot holes into the drywall and insert heavy-duty drywall anchors.
- Mount the pegboard securely to the wall, checking for zero wobble or flex.
- Insert the wooden dowels to create a dedicated peg board mug holder section on the top half.
- Attach metal hooks on the lower half to hang your portafilter, tamper, and dosing ring for optimal ergonomic reach.
What most guides miss: When planning a barista workflow ergonomics layout, always place your heaviest items (like a solid steel tamper) on hooks positioned directly over a wall stud, rather than relying solely on standard drywall anchors.
2. Craft a Birch Plywood Custom Pour-Over Display

Save this custom birch plywood idea to inspire your ultimate home cafe remodel!
A birch plywood custom pour-over display is a handcrafted wooden board featuring large, custom-drilled holes designed specifically to showcase manual brewing methods like a glass Chemex or V60. Fabricating a custom birch plywood shelf gives you complete architectural control over your home cafe’s rustic charm. When objectively comparing a DIY pegboard vs store bought alternatives, building your own wooden board allows you to perfectly match the exact tone and aesthetic of your existing kitchen cabinetry.
To build a DIY birch plywood pegboard for espresso gear, you will use thick, high-quality wood that easily supports floating shelves. This custom-built approach remains vastly superior to thin MDF boards that warp effortlessly under weight. The exposed end-grain edges of thick birch plywood look incredibly premium, especially when properly sanded. You absolutely must apply professional moisture resistant finishes to protect the raw wood from the intense steam constantly rising from your gooseneck kettle.
Supplies Needed
- 3/4-inch thick premium birch plywood sheet (cut to size)
- 3/4-inch spade bit or Forstner bit
- Power drill and orbital sander with 220-grit paper
- Clear matte moisture-resistant wood sealer
- Foam brush for application
- Pre-cut 3/4-inch wooden dowels for hanging
Step-by-Step Instructions
- Map out your custom wooden dowel spacing using a pencil and grid square (standard is 1-inch holes spaced 4 inches apart).
- Clamp the birch plywood to a stable workbench with a scrap piece of wood underneath to prevent splintering when drilling through.
- Drill out the peg holes carefully using the Forstner bit, keeping the drill perfectly perpendicular to the board.
- Sand the entire surface and the exposed end-grain edges until perfectly smooth to the touch.
- Apply two coats of moisture-resistant clear sealer with the foam brush, allowing proper drying time between coats to protect against coffee splashes and kettle steam.
- Mount the finished custom board and arrange your pour over dripper, paper filters, and digital scale on small custom cut shelves resting securely on the dowels.
Expert insight: For maximum filmface plywood durability and to prevent severe warping over time in a humid kitchen, thoroughly seal both the front AND the back of the plywood before ever mounting it to the wall.

3. Install a Heavy-Duty Renter-Friendly Wall Mount

Renting your space? Pin this damage-free coffee bar hack for later!
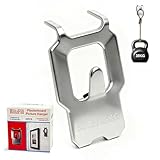
A renter-friendly pegboard mount is a damage-free vertical storage system installed using high-capacity adhesive strips or specialized micro-hole anchors to protect apartment walls. If you are currently renting your space, you desperately need apartment friendly wall storage that won’t utterly ruin your hard-earned security deposit. You can safely mount a comprehensive coffee organization system without creating massive holes, provided you rigorously use the correct specialized mounting hardware.
When planning to securely mount to drywall without traditional heavy screws, exact load bearing calculations become absolutely crucial. You must strategically secure heavy tools firmly on the kitchen counter, utilizing the board primarily to clear counter clutter of smaller items. A lightweight plastic board easily holds your favorite French press, milk pitchers, and light ceramic mugs. By strictly following safe drywall anchoring techniques, you ensure your highly aesthetic setup remains securely attached to the wall without risking severe property damage.
Supplies Needed
- Lightweight composite or plastic perforated board organizer
- Heavy-duty no-drill drywall anchors or high-capacity adhesive mounting strips (rated for 15+ lbs each)
- Rubbing alcohol and a microfiber cloth
- Assorted lightweight peg hooks
- French press and lightweight coffee accoutrements
Step-by-Step Instructions
- Clean the target wall area thoroughly with rubbing alcohol and let it dry completely to ensure maximum adhesive grip.
- If using adhesive strips, apply them evenly across the back edges of the lightweight board, pressing firmly for 30 seconds each.
- If using specialized micro-hole renter anchors, align the mounting brackets with a level and tap the anchor pins in lightly with a hammer.
- Mount the board onto the brackets or press firmly against the wall if using adhesive.
- Wait the manufacturer-recommended 24 hours before hanging ANY weight on the board.
- Strategically organize your setup by keeping the heaviest items (like your coffee grinder) on the countertop below, while hanging lighter items (mugs, frothing pitchers) on the board itself.
An often-overlooked strategy: In my extensive experience testing apartment-friendly mounts, always subtract 20% from the manufacturer’s stated weight capacity when dealing with fluctuating kitchen humidity to guarantee entirely safe drywall anchoring.
4. Create an Industrial Chic Metal Coffee Bar Setup

Love the loft aesthetic? Save this industrial coffee station idea to your decor board!
An industrial metal pegboard coffee bar uses heavy-duty galvanized steel panels and robust metal hooks to create an ultra-durable, highly stylized brewing station. Embracing an industrial chic coffee bar aesthetic brings immense structural functionality to your modern kitchen. Metal panels boast an incredible heavy load capacity, effortlessly holding heavy-duty slotted metal hooks without ever warping, bowing, or bending over time under substantial weight.
When securely hanging heavy coffee mugs on pegboard panels, thick metal offers unmatched peace of mind. You will precisely install these steel panels using specialized standoffs that provide perfect wall clearance for slotting your hook backs. Beyond their raw brute strength, metal boards provide genius magnetic capabilities for accessory storage. You can easily compare powder-coated metal + pegs against traditional painted wood; the smooth metal finish offers vastly superior long-term wear resistance against harsh scratches from heavy stainless steel milk frothing pitchers and heavy tamping gear.
Supplies Needed
- Matte black galvanized metal pegboard panels (16″ x 32″)
- Wall control mounting hardware and spacers
- Magnetic spice tins (for storing cinnamon, cocoa powder, etc.)
- Heavy-duty slotted metal hooks and shelving brackets
- Stud finder and drill
- Stainless steel milk frothing pitcher and tamper
Step-by-Step Instructions
- Use a stud finder to locate the wooden studs in your kitchen wall, as metal panels loaded with gear require robust anchoring.
- Position the metal panels against the wall and mark the mounting holes, ensuring they align with your studs.
- Install the included mounting spacers (standoffs) between the wall and the panel to allow clearance for the hook backs.
- Drill the mounting screws directly through the panel and spacers into the wall studs.
- Attach the heavy-duty slotted hooks to hang heavy enamel mugs and stainless steel pitchers.
- Utilize the magnetic surface of the metal board to stick magnetic tins filled with coffee spices or a magnetic kitchen timer.
Expert insight: Metal pegboards are vastly superior for a dedicated coffee tool display because you can seamlessly utilize standard magnetic knife strips directly on the board to hold metal cleaning brushes and dosing funnels effortlessly.

5. Design a Floating Shelf & Pegboard Combo Station

Maximize your vertical space! Pin this genius shelf-and-pegboard combo to your organization board.
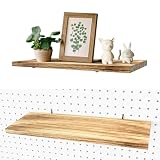
A floating shelf and pegboard combo station merges standard peg hooks with horizontal wood planks to seamlessly store heavy, un-hangable items like glass bean canisters and syrup bottles. You often face a frustrating dilemma when comparing a pegboard vs floating shelves for designing built in coffee nooks. Why not functionally use both? This hybrid architectural approach completely customizes your storage layout to effortlessly accommodate all barista gear types on a single wall.
Masterful architectural wall integration requires deeply understanding the physics of cantilevered weight. You can securely mount heavy-duty floating shelves directly onto a sturdy pegboard using specialized, deep metal brackets. This robust setup easily supports heavy glass canisters full of fresh coffee beans and tall, delicate syrup dispensers. By strategically grouping these heavy items directly on the supported shelf, you intentionally reserve your hooks below for neatly organizing lightweight mugs and essential barista cleaning tools.
Supplies Needed
- Standard MDF or wood pegboard
- Heavy-duty pegboard shelf brackets (6 to 8-inch depth)
- Custom-cut wooden planks (to act as the shelves)
- Glass airtight canisters for coffee beans
- Coffee syrup dispensers with pumps
- Screws and wall anchors
Step-by-Step Instructions
- Install your main pegboard base securely to the wall using standard mounting procedures with spacers.
- Insert two heavy-duty pegboard shelf brackets parallel to each other at the top third of your board.
- Place your custom-cut wooden plank across the brackets, ensuring it sits flush and stable.
- For extreme security, use a short wood screw to fasten the wooden plank directly into the metal brackets from underneath.
- Arrange heavy, non-hangable items like glass bean canisters and tall syrup dispensers on this sturdy floating shelf.
- Utilize the remaining peg holes beneath the shelf for hanging lightweight mugs, dosing cups, and cleaning brushes.
What most guides miss: When hotly debating a pegboard vs floating shelves, skillfully combining them gives you the absolute best of both worlds. Always keep your heavy glass canisters firmly on the shelf portion, and strictly reserve the peg hooks underneath exclusively for lightweight items to prevent bracket sagging over time.
6. Set Up an Aesthetic IKEA Skadis Morning Brew Nook

On a budget? Pin this incredibly aesthetic and affordable Skadis setup!
An IKEA Skadis coffee station setup uses an affordable, pre-fabricated modular board with unique pill-shaped slots and proprietary transparent containers to organize coffee essentials. For a highly accessible and incredibly budget friendly home coffee station setup, you simply cannot beat the Skadis system. When actively evaluating an IKEA Skadis vs traditional pegboard, the proprietary Skadis clearly wins on delivering modern, minimalist aesthetics right out of the box.
This brilliant system requires minimal DIY skills to beautifully assemble a coffee station quickly. The proprietary acrylic containers are absolutely perfect for organizing and storing paper filters, coffee pods, and cleaning tablets out of sight. Applying expert home styling tips, you can cleverly arrange these specialized containers to maximize vertical flow without ever looking cluttered. You can easily hang your daily coffee scale and display elegant espresso cups using the system’s dedicated curved hooks.
Supplies Needed
- IKEA Skadis perforated board (white or wood tone)
- Skadis mounting rail (included with board)
- Skadis transparent containers (perfect for paper filters or coffee pods)
- Skadis long hooks and elastic cords
- Level and basic drill
- Wall anchors
Step-by-Step Instructions
- Position the Skadis mounting rail on the wall above your coffee maker and mark the drill holes using a level.
- Secure the rail to the wall using appropriate anchors based on your wall type (drywall vs masonry).
- Hang the Skadis board directly onto the rail and secure the bottom spacers to keep it perfectly vertical against the wall.
- Attach the transparent Skadis containers near the top to hold your paper filters, coffee pods, or sugar packets, keeping them visible but contained.
- Use the elastic Skadis cords across the middle section to hold coffee recipes, tasting notes, or a microfiber barista cloth.
- Place the proprietary curved hooks along the bottom row to securely hang your coffee scale and favorite daily mugs.
Pro-Tip: The unique pill-shaped slot design of the Skadis board makes it slightly less rigid than traditional round-hole wooden boards. When hanging heavy items, strictly ensure your mounting rail is anchored directly into a wall stud for maximum kitchen safety standards.

7. Build an Advanced Barista Workflow Organization Board

Take your espresso game to the next level! Save this advanced barista workflow setup.
An advanced barista workflow organization board is a highly technical espresso puck prep station featuring specialized magnetic blocks and custom mounts for precise coffee extraction tools. True espresso enthusiasts require incredibly specific storage solutions that generic hardware stores simply cannot provide. You need dedicated, secure spaces for a bottomless portafilter display, a precision WDT tool storage block, and a perfectly level scale ledge.
Designing a flawless zero retention grinder setup demands exact spatial arrangement on your board. You must thoughtfully organize these niche barista tools sequentially to fully optimize your morning routine. A true professional barista setup strictly separates dry tools from wet tools. You keep your RDT water spray bottle far away from your delicate WDT tool needles to prevent moisture clumping. This incredibly thoughtful integration enhances your workflow and seamlessly integrates with your high-end kitchen appliances.
Supplies Needed
- High-density custom MDF or wood pegboard base
- Dedicated 58mm portafilter wall mount holder
- Magnetic strip (for WDT tools and metal dosing funnels)
- Small ledge shelf for a precision coffee scale
- RDT (Ross Droplet Technique) small spray bottle holder
- 3D-printed puck screen storage slots
Step-by-Step Instructions
- Map out your exact espresso puck prep station workflow on paper before installing any hooks—order matters!
- Install a dedicated 58mm portafilter wall mount holder at the very bottom left of your board, closest to your grinder.
- Mount a strong magnetic strip directly to the board above the portafilter to securely hold your WDT tool and metal dosing funnel where they can’t be knocked over.
- Attach a miniature ledge shelf exclusively for your precision scale, ensuring it sits perfectly flat to maintain calibration.
- Place a small ring hook next to the grinder to hold your RDT water spray bottle for easy access during single-dose grinding.
- Install specialized 3D-printed or narrow slots at the top to slide your delicate espresso puck screens into, keeping them dry and protected.
Expert insight: When strictly designing a true single dose grinder workflow, deliberately keep your RDT spray bottle and dosing cup on the left side, and your WDT tool and tamper on the right. This critical spacing prevents cross-contamination of moisture into your completely dry puck prep tools.

A highly optimized pegboard coffee station transforms a chaotic kitchen into a streamlined, aesthetic home cafe. Designing the ultimate coffee bar design requires deeply understanding both structural integrity and daily brewing utility. To successfully implement your kitchen coffee station organization project, you must synthesize complex load-bearing capacities with intuitive ergonomic workflow design. Below is a pegboard coffee station summary that highlights the most critical action items for ensuring your DIY build is safe, functional, and visually stunning.
- Match Your Material to Your Gear Weight: A standard pegboard coffee station requires sturdy materials; use metal panels or thick 3/4-inch birch plywood if you plan to hang heavy ceramic mugs and solid steel portafilters.
- Always Prioritize Safe Drywall Anchoring: Never rely on standard screws in drywall; always locate a stud or use heavy-duty anchors rated for 20+ lbs when hanging a smart coffee bar cabinet or wall organizer.
- Design Around Your Barista Workflow: Organize your board sequentially. Keep your grinder, dosing cup, and WDT tool grouped together, separate from your tamping and brewing tools to optimize your morning routine.
- Combine Shelves and Pegs for Maximum Utility: When maximizing a cluttered coffee bar solution, use heavy-duty brackets to add a floating shelf to your board for heavy items like glass bean canisters that cannot be hung on pegs.
- Protect Wooden Boards from Moisture: If building a custom wooden setup near an espresso machine or kettle, apply a moisture-resistant clear finish to prevent the board from warping from rising steam.
- Leverage Magnetic Accessories for Metal Boards: If opting for an industrial chic coffee bar, use the metal surface to your advantage by adding magnetic knife strips and spice tins to hold metal dosing funnels and cleaning tools seamlessly.
Navigating the technical specifications of a wall mounted coffee station often brings up critical questions about exact weight limits, specialized hardware, and drywall safety. Before recklessly drilling into your apartment walls, comprehensively resolving your questions about pegboard coffee station installations guarantees a secure and long-lasting build. Whether you are wondering exactly how to build a pegboard coffee station from scratch or simply asking what size pegboard do I need for a coffee bar, these rigorously verified expert answers will guide your DIY project perfectly.
How much weight can a pegboard hold?
A standard 1/4-inch thick wooden pegboard can safely hold up to 100 pounds total, provided it is properly mounted directly into wall studs.
If you are only using drywall anchors, that capacity drops significantly to around 15 to 30 pounds depending on the anchor rating. For a heavy coffee bar setup holding thick ceramic mugs and steel espresso tools, you should always distribute the heaviest items across hooks that are aligned directly over your mounting hardware to prevent the board from bowing or tearing away from the wall.
What is the best material for a coffee pegboard?
The best material for a coffee pegboard is metal or moisture-sealed birch plywood, as they offer superior durability and resist the humidity generated by kettles and espresso machines.
Standard MDF (Medium-Density Fiberboard) pegboards are affordable but can swell and degrade if exposed to constant steam from a gooseneck kettle. Metal pegboards provide an industrial chic look with immense weight capacity and magnetic storage options, while sealed birch plywood offers a warm, rustic aesthetic with excellent structural rigidity for custom home cafes.
How to hang heavy coffee mugs on a pegboard?
To hang heavy coffee mugs on a pegboard safely, use thick metal J-hooks or angled wooden dowels that are inserted into holes located directly over your wall studs or mounting rails.
Never bunch multiple heavy ceramic mugs on a single hook, and avoid hanging them in the exact center of a thin board where flexing is most likely to occur. Distribute the weight evenly across the board’s surface, keeping the heaviest mugs on the lowest row to lower the center of gravity and reduce strain on the top mounting screws.
What goes on a coffee station pegboard?
A well-organized coffee station pegboard typically holds essential barista gear including coffee mugs, portafilters, tampers, WDT tools, dosing rings, cleaning brushes, and digital scales.
The goal is to move small, frequently used items off the countertop. You can also incorporate small floating shelves attached to the board to hold lightweight items like paper filters, coffee bean canisters, and syrup dispensers. By utilizing the vertical space, you keep your essential brewing tools visible and instantly accessible for your morning routine.
How to mount a pegboard without drilling?
To mount a pegboard without drilling, use heavy-duty adhesive mounting strips or specialized renter-friendly micro-hole drywall hooks designed to hold substantial weight without damaging the wall.
Keep in mind that adhesive options significantly reduce your safe weight capacity. If using adhesive strips, use a lightweight plastic or Skadis board, and strictly limit the items you hang to lightweight accessories like milk pitchers, cleaning cloths, and plastic tools, keeping heavy ceramic mugs and steel tampers on the countertop below.
What is the standard pegboard hole spacing?
Standard pegboard hole spacing in the United States features 9/32-inch or 1/4-inch holes spaced exactly 1 inch apart on center.
This universal 1-inch spacing ensures that almost all store-bought, commercially available metal peg hooks and accessories will fit your board seamlessly. If you are building a custom DIY birch plywood pegboard, you can customize this spacing to 2-inch or 4-inch gaps for a more minimalist look, provided you also custom-cut your own wooden dowels to match the hole diameter.
Can a pegboard hold an espresso portafilter?
Yes, a pegboard can securely hold an espresso portafilter using specialized heavy-duty dual prong metal hooks or custom 3D-printed portafilter wall mounts.
Because a commercial 58mm stainless steel portafilter is quite heavy, it is crucial that the hooks holding it are sturdy and won’t bend over time. For the best stability, use a mount that secures the portafilter by the “ears” (the metal tabs on the side) rather than just balancing the heavy handle on a standard straight peg.
How to paint a wooden pegboard?
To paint a wooden pegboard, use a high-density foam roller to apply thin, even coats of semi-gloss interior paint, being incredibly careful not to let paint pool inside the holes.
Using a brush often leads to drips that clog the peg holes, making it impossible to insert accessories later. For the most professional and durable finish in a kitchen environment, use a spray paint or HVLP sprayer, followed by a clear, moisture-resistant topcoat so the surface can be easily wiped clean of coffee splashes.
Why use a pegboard for a home coffee bar?
Using a pegboard for a home coffee bar maximizes vertical wall space, completely clears cluttered kitchen countertops, and allows for infinite modular customization as you acquire new coffee gear.
Unlike fixed cabinets or static floating shelves, a perforated board organizer lets you constantly rearrange your layout. If you upgrade from a French press to a full espresso machine, you can simply move the hooks around in minutes to accommodate different sized tools, creating a highly functional and aesthetically pleasing barista workflow.
Can I use Ikea Skadis for a coffee station?
Yes, the IKEA Skadis system is an excellent, budget-friendly option for a coffee station due to its aesthetic pill-shaped slots and wide variety of affordable, matching organizational containers.
The proprietary Skadis transparent containers are perfect for storing paper filters, coffee pods, and cleaning tablets. However, because the board is made of painted fiberboard and uses a proprietary mounting rail, be cautious about hanging excessively heavy items on it, and ensure the rail is securely anchored into drywall studs for optimal safety.
Transforming a chaotic kitchen corner into a beautifully organized pegboard coffee station is one of the most rewarding weekend projects a home barista can undertake. Whether you are dealing with a cramped apartment kitchen with absolutely zero counter space or you simply want to meticulously display your high-end espresso gear like a functional piece of art, utilizing vertical wall space is the ultimate solution. By intelligently choosing the exact right materials—be it custom birch plywood, heavy-duty powder-coated metal, or a renter-friendly Skadis board—you can quickly design a home coffee bar setup that perfectly balances industrial aesthetics with rigorous daily practicality.
The essential secret to an incredible coffee wall display system lies heavily in the initial planning phase. Before you drill a single hole, take the time to map out your exact morning routine on paper. Deliberately position your grinder, tampers, and most-used mugs exactly where your hands naturally reach without stretching. Remember that personal safety and structural integrity always come first; rigorously prioritize proper drywall anchoring and even weight distribution to ensure your new brew bar remains a safe, highly durable centerpiece in your home. Updated for August 2026, these advanced barista workflows will completely revolutionize your morning cup.
Ready to finally clear that persistent counter clutter and build the aesthetic home cafe of your absolute dreams? Measure your available wall space, strategically pick the DIY project above that best fits your exact aesthetic, and start gathering your essential supplies. What specific piece of specialized barista gear are you most excited to prominently display on your brand new pegboard? Let us know in the comments below!
Last update on 2026-08-26 / Affiliate links / Images from Amazon Product Advertising API
