As an Amazon Associate CoffeeXplore.com earns from qualifying purchases.
9 Genius Coffee Recipes To Master Lattes And Save Money
Tired of that daily $5 coffee habit draining your wallet? You know you can make great coffee at home, but it never tastes quite the same.
Coffee recipes are simply sets of instructions for creating specialty drinks. The real problem is that most online guides skip the crucial barista techniques that make the difference.
The secret to saving money without sacrificing flavor is mastering a few foundational skills. This guide will show you the exact science, gear tipss, and step-by-step recipes to become your own home barista and craft drinks that rival your favorite coffee shop.
Stop Wasting Money: The Barista Secrets to Affordable, High-Quality Home Coffee
That daily latte or cold brew adds up quickly, often becoming a significant monthly expense. The high price isn’t just for the coffee itself; you’re paying for specialized equipment, barista training, and brand overhead. The good news is that you can replicate that high-quality experience for a fraction of the cost. The key isn’t buying a thousand-dollar machine, but understanding the core principles of coffee science that professionals use every day.
Mastering concepts like extraction, water quality, and grind consistency is the foundation of delicious DIY coffee drinks. When you understand why coffee turns bitter or why milk foam collapses, you can troubleshoot and perfect your technique. This guide will demystify these barista secrets, empowering you to fix common issues like bitter or watery coffee and finally achieve that coffee shop taste right in your own kitchen.
Foundational Mastery: Essential Science & Gear Hacks
Before diving into specific recipes, you need to understand the three pillars of quality coffee: precise ratios, temperature control, and the right gear (or clever substitutes). Professionals rely on standards from organizations like the Specialty Coffee Association (SCA) to ensure consistency, and you can apply these same principles at home. For example, a true espresso shot follows a 1:2 ratio of coffee grounds to liquid yield, and milk for lattes achieves its sweet, velvety microfoam texture when heated to a perfect 145°F. You don’t need a professional espresso machine to start; a simple Moka pot can produce a strong, concentrated base, and a digital scale is your most powerful tool for consistency.
Microfoam: A coffee-making term for perfectly steamed milk with a smooth, velvety texture and no large, airy bubbles. Microfoam is essential for creating the mouthfeel of a professional latte or cappuccino and is the required texture for pouring latte art.
Here is a list of essential, budget-friendly home barista gear:
* A digital scale accurate to 0.1 grams
* A burr coffee grinder for consistent grind size
* A Moka pot or other espresso substitute
* A handheld electric milk frother
* Airtight containers for beans and syrups
The Cold Brew Concentration Ratio Guide
One of the biggest financial wins in home brewing is mastering cold brew concentrate. Because the slow, cold-water steeping process reduces acidity by up to 60% compared to hot brewing, it produces an incredibly smooth base. By making a large batch of concentrate, you create a grab-and-go foundation for dozens of drinks, saving immense time and money. For consistent, robust flavor, a 1:8 coffee-to-water ratio is the professional standard for a concentrate that holds up to dilution. Once brewed, you can store it for over a week and simply mix it with water or milk for an instant iced coffee.
Mastering Microfoam: Milk Frothing Without a Steamer
The number one frustration for aspiring home baristas is failed milk foam. Achieving that silky, stable microfoam without a high-pressure steam wand seems impossible, but it’s all about technique and temperature. The secret is heating your milk (or a high-quality “barista blend” oat milk) to between 135°F and 155°F. Exceeding this temperature breaks down the milk proteins, causing the foam to collapse instantly. You can create excellent foam using a simple French Press (by plunging rapidly), a sealed jar (by shaking vigorously), or, most effectively, an inexpensive handheld electric frother.
The Moka Pot Espresso Substitute Blueprint
For lattes, cappuccinos, and macchiatos, you need a strong, concentrated coffee base that can cut through the richness of the milk. While a true espresso machine is the gold standard, a stovetop Moka pot is a fantastic and affordable substitute. It uses steam pressure to force water through coffee grounds, creating an “espresso-like” shot. The key to success is using a medium-fine grind size—coarser than espresso but finer than drip coffee—to prevent clogging and bitterness. A properly brewed Moka pot shot provides the perfect foundation for all the hot milk-based drinks in this guide.
9 Genius Coffee Recipes To Master Lattes And Save Money
1. Master Cold Brew Concentrate: The 75% Savings Base
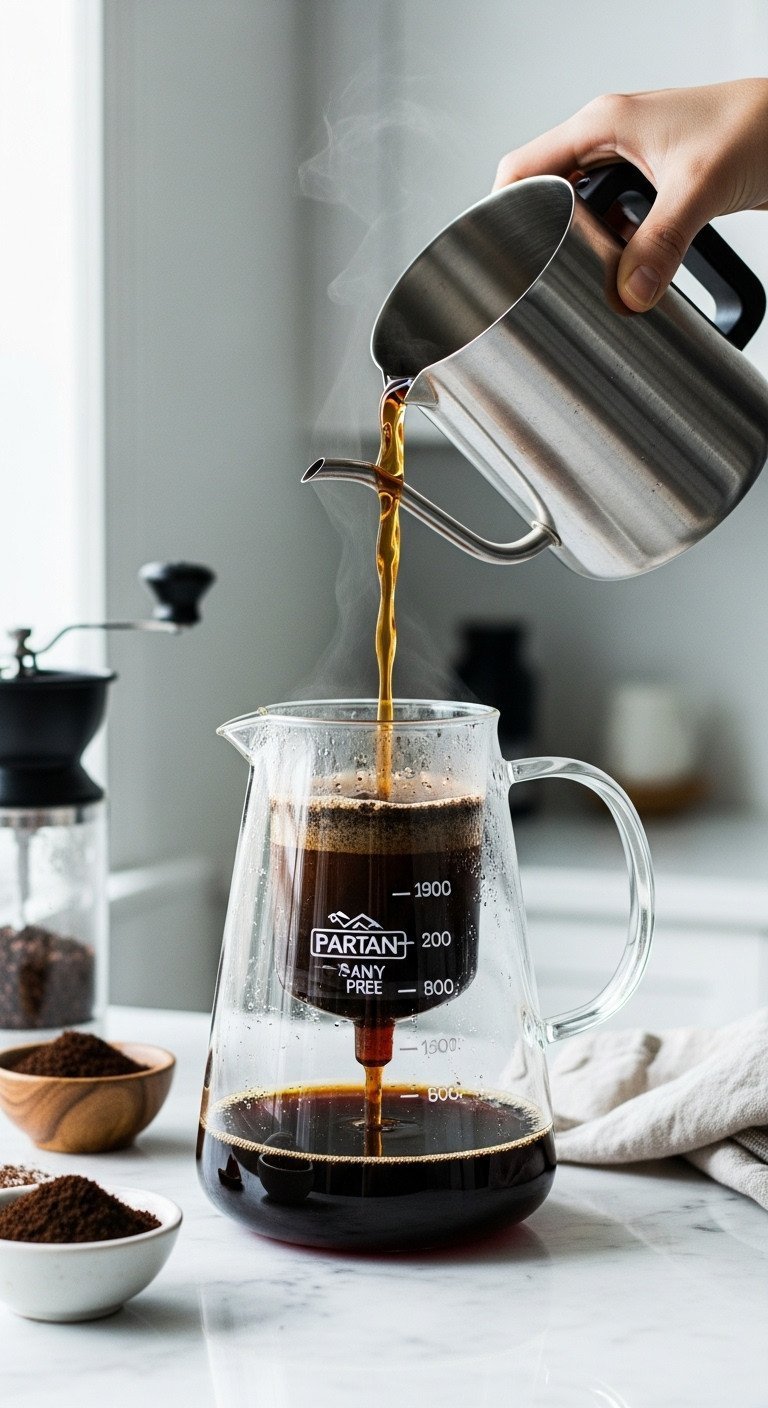
Pin this genius tips to your ‘Dream Coffee’ board!
H4: Materials Needed:
- 1 cup Coarsely Ground Dark Roast Coffee (Use a burr grinder for consistency)
- 8 cups Filtered Water (High-quality filtered water is key for flavor)
- Large Cold Brew Maker Pitcher with fine mesh filter system
- Fine-mesh sieve or cheesecloth for double filtering
H4: Step-by-Step Directions:
- Combine the coarsely ground coffee and filtered water directly into the cold brew maker pitcher, ensuring all grounds are submerged.
- Seal the pitcher and place it immediately into the refrigerator, letting it steep for exactly 16 hours (this prevents over-extraction and bitterness).
- Carefully remove the filter basket containing the saturated grounds.
- Pour the resulting concentrate through a secondary filter (cheesecloth over a sieve) into an airtight storage container to ensure zero sediment remains.
- Store the concentrate refrigerated for up to 10 days, using a 1:1 or 1:2 dilution ratio (concentrate to water/milk) for daily drinks.
Pro-Tip: Use coffee ice cubes made from leftover drip coffee instead of water ice cubes. This ensures zero dilution, keeping your cold brew robust until the very last sip.
2. Vanilla Iced Latte Copycat: Barista-Quality at $1.50

Save this clever organization idea!
H4: Materials Needed:
- 2 shots Strong Espresso Substitute (or 4oz of Cold Brew Concentrate)
- 2-3 tbsp Homemade Vanilla Simple Syrup (Recipe provided below)
- 6 oz Cold Whole Milk or Oat Milk (Use high-fat content milk for richness)
- Ice Cubes (preferably coffee ice cubes)
- Tall serving glass
H4: Step-by-Step Directions:
- Prepare the espresso substitute (via Moka pot or Nespresso) and allow it to cool slightly, or retrieve 4oz of Cold Brew Concentrate.
- In the serving glass, combine the vanilla simple syrup and the cooled espresso/concentrate. Stir until fully integrated.
- Fill the glass completely with ice cubes.
- Top the mixture with 6oz of your chosen cold milk, stirring gently only once or twice near the top to maintain the color separation.
- Serve immediately with a straw, ensuring the syrup is evenly dispersed throughout the base.
Pro-Tip: The secret to Starbucks’ distinct vanilla is often a high concentration of the flavor. Use quality vanilla extract in your homemade simple syrup for the best copycat results.
3. Velvety Microfoam Oat Milk Cappuccino (Non-Steamer Method)

This is how to get café foam at home!
H4: Materials Needed:
- 2 oz Espresso Shot (or Moka Pot Substitute)
- 4 oz Barista Blend Oat Milk (Essential for high-quality foam)
- Handheld Electric Milk Frother or French Press
- Digital Thermometer (optional, but highly recommended)
H4: Step-by-Step Directions:
- Pour the oat milk into a small saucepan or microwave-safe container and heat slowly until it reaches 135°F–145°F (Do not exceed 155°F).
- Immediately transfer the warm milk to a clean, tall container (if using a saucepan) and use the handheld frother just beneath the surface to incorporate air for 15-20 seconds.
- Submerge the frother fully and continue mixing gently for 30 seconds to distribute the foam throughout the milk, creating a uniform, velvety microfoam texture.
- Pour the espresso shot into your cappuccino cup.
- Gently pour the foamed milk, holding back the thickest foam with a spoon, until the cup is half-full of liquid milk.
- Spoon the remaining thick, stable microfoam on top, aiming for a 1-inch layer (equal volume to milk and espresso).
Lesson Learned: The key to stable oat milk foam is temperature control. If the milk is too hot, the proteins break down, and the foam collapses instantly.
4. 5-Minute Dalgona Whipped Coffee (Instant Coffee Hack)
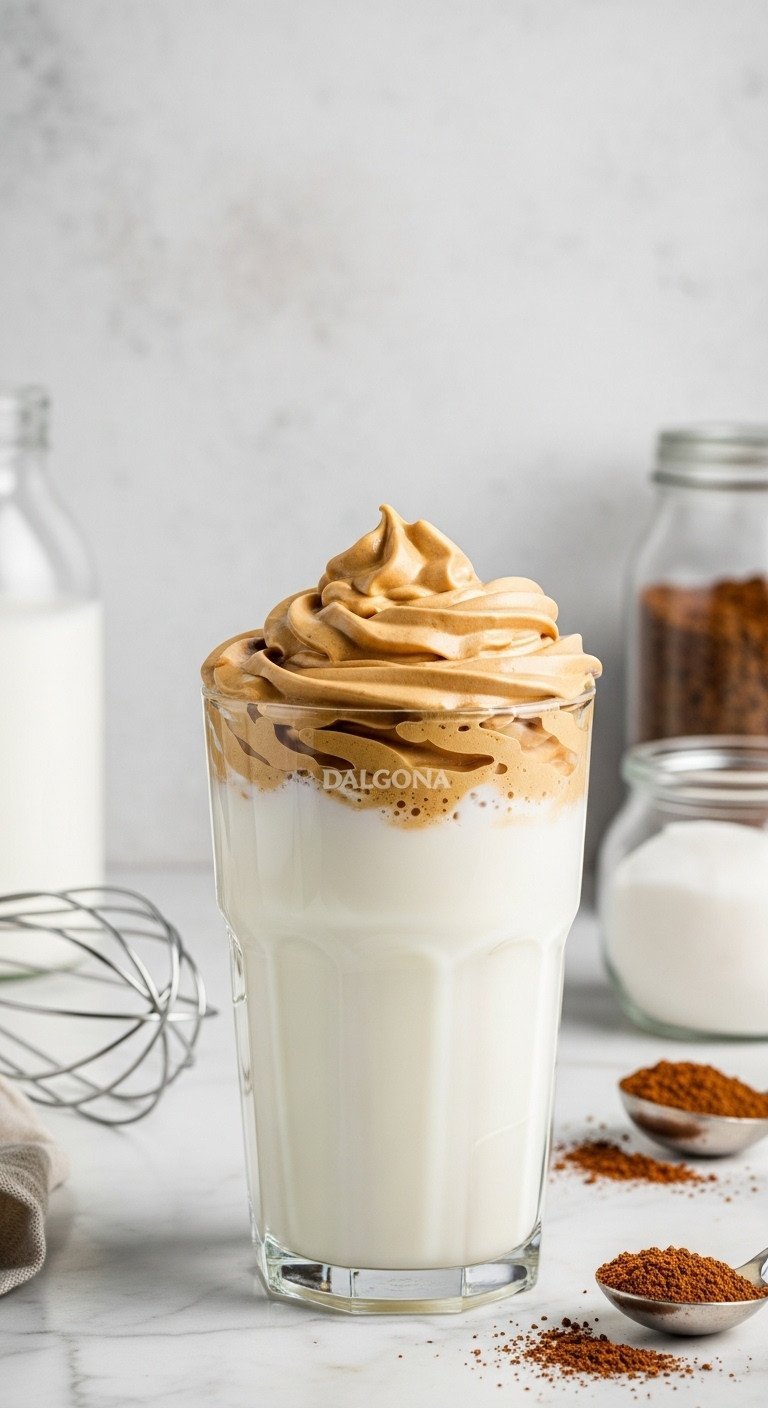
This whipped coffee recipe is viral for a reason!
H4: Materials Needed:
- 2 tbsp High-Quality Instant Coffee Powder (Essential: must be powder, not grounds)
- 2 tbsp Granulated White Sugar (Necessary for foam structure)
- 2 tbsp Boiling Hot Water (Temperature is critical)
- 1 cup Cold Milk (Dairy or non-dairy)
- Handheld Electric Mixer or Stand Mixer with whisk attachment
H4: Step-by-Step Directions:
- In a small mixing bowl, combine the instant coffee powder, granulated sugar, and boiling hot water.
- Using the handheld electric mixer on high speed, whip the mixture continuously. This should take 2-4 minutes.
- Continue whipping until the mixture triples in volume, turns a pale caramel color, and holds stiff peaks (the foam should not collapse when you stop mixing).
- Fill a serving glass with ice and cold milk.
- Gently spoon the stiff whipped Dalgona foam over the top of the milk.
- Serve immediately. (The foam will slowly mix into the milk as you drink).
Pro-Tip: If using a manual whisk, switch back and forth between two whisks taped together for maximum speed. Manual whisking can take 8-10 minutes.
5. DIY Vanilla Simple Syrup (Better Than Store-Bought)

Pin this simple syrup recipe for perfect flavor!
H4: Materials Needed:
- 1 cup Granulated White Sugar (or cane sugar)
- 1 cup Filtered Water (Crucial for flavor clarity)
- 1 whole Vanilla Bean (slit lengthwise to expose seeds) OR 2 tsp Pure Vanilla Extract
- Airtight glass bottle for storage
H4: Step-by-Step Directions:
- Combine the sugar and filtered water in a small saucepan over medium heat.
- Stir constantly until the sugar is completely dissolved and the liquid is clear (do not allow the mixture to boil vigorously).
- Remove the pan from the heat immediately. If using a vanilla bean, drop it into the warm syrup and allow it to steep as the mixture cools. If using extract, stir it in now.
- Allow the syrup to cool completely to room temperature before pouring it into the airtight glass storage bottle.
- Store refrigerated for up to four weeks.
Pro-Tip: For a richer, longer-lasting syrup (often called Rich Simple Syrup), use a 2:1 sugar-to-water ratio. This prevents crystallization and extends shelf life.
6. Low-Calorie Cinnamon Iced Americano

Try this low-calorie coffee shop staple!
H4: Materials Needed:
- 2 shots Espresso (or Moka Pot Substitute)
- 6 oz Cold Filtered Water
- 1/4 tsp Ground Cinnamon
- Sweetener of choice (Stevia or monk fruit drops optional)
- Tall glass and ice
H4: Step-by-Step Directions:
- Fill the serving glass completely with ice.
- Pour the 6 oz of cold filtered water over the ice.
- Immediately pull the two espresso shots (ensuring proper extraction time of 25-30 seconds if using a machine or Moka pot).
- Pour the hot espresso shots directly over the water and ice mixture. The quick cooling prevents oxidation and bitterness.
- Stir in the ground cinnamon and any desired low-calorie sweetener.
Lesson Learned: For the best Americano, always add the espresso after the water. This is the authentic method (unlike a “long black”) and creates a thin, beautiful layer of crema on top.
7. Layered Caramel Macchiato Magic
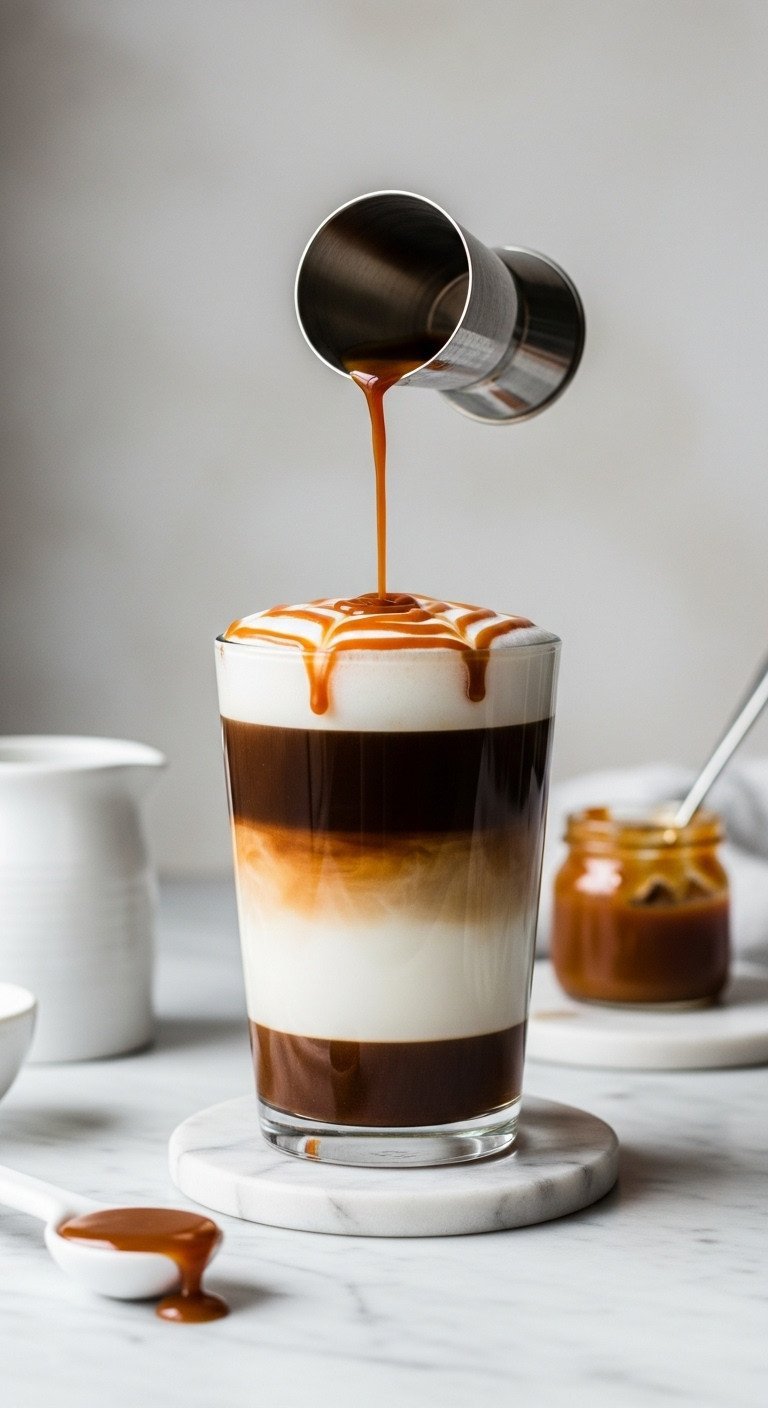
Get the perfect layer every time!
H4: Materials Needed:
- 2 shots Espresso (Moka Pot or Machine)
- 8 oz Cold Whole Milk
- 2 tbsp Caramel Syrup (viscous, high density syrup recommended)
- Ice Cubes
- Clear, heat-safe glass
H4: Step-by-Step Directions:
- Pour the 2 tablespoons of caramel syrup into the bottom of the glass (this is the densest layer and should go first).
- Fill the glass 3/4 full with ice cubes.
- Pour the cold milk over the ice until the glass is almost full (leaving room for the espresso).
- Pull the hot espresso shots and immediately pour them VERY SLOWLY over the back of a spoon held just above the milk surface. This controlled pour allows the lighter espresso to layer beautifully between the cold milk and the caramel syrup.
- Finish with a small drizzle of caramel sauce on the top (this acts as the ‘mark’ or “macchiato”). Do not stir!
Barista Secret: The espresso must be poured slowly and last. If you pour hot espresso directly onto the cold milk, the temperature difference will cause the layers to blend instantly.
8. The Rich Hot Chocolate Mocha

Perfect cozy mocha recipe for a cold January morning!
H4: Materials Needed:
- 2 shots Espresso (or 4oz very strong drip coffee)
- 1 tbsp High-Quality Unsweetened Cocoa Powder OR 2 tbsp Rich Dark Chocolate Syrup
- 6 oz Steamed Milk (Whole or Oat recommended)
- Sweetener to taste (if using cocoa powder)
- Optional: Whipped cream and chocolate shavings
H4: Step-by-Step Directions:
- In the bottom of your mug, combine the espresso shots and the cocoa powder/chocolate syrup.
- Whisk vigorously until the chocolate component is fully dissolved into the hot coffee, forming a thick, dark base.
- Steam or heat the milk to approximately 140°F–155°F using your preferred frothing method (see Technique 3).
- Pour the steamed milk directly into the chocolate-espresso base.
- Top with whipped cream and a sprinkle of cocoa powder or chocolate shavings for presentation.
Pro-Tip: If using cocoa powder instead of syrup, make sure to mix it into the hot espresso first to dissolve all the solids, preventing a grainy texture in your final drink.
9. Beginner’s Simple Iced Pour-Over
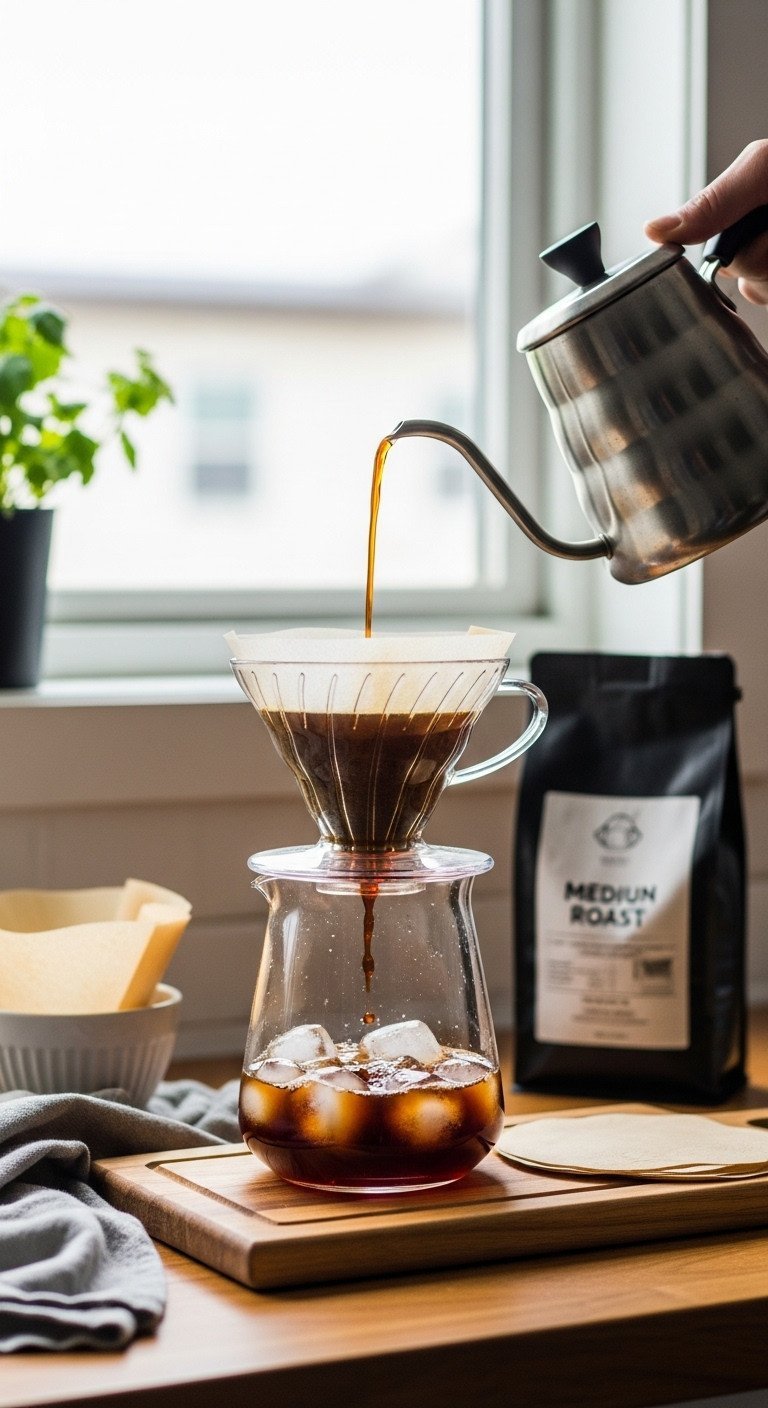
This is the perfect iced coffee base for beginners!
H4: Materials Needed:
- 20g Medium Grind Coffee Beans (Freshly ground is best)
- Simple Pour Over Coffee Cone (Hario V60 or similar)
- Paper Filter
- 180g Hot Water (200°F–205°F)
- 100g Ice Cubes
H4: Step-by-Step Directions:
- Place the coffee cone and filter directly over your final serving glass. Add the 100g of ice cubes to the glass.
- Place the 20g of medium ground coffee into the filter.
- Pour a small amount of hot water (40g) over the grounds to evenly saturate them (“bloom”). Wait 30 seconds.
- Slowly pour the remaining 140g of hot water over the grounds in concentric circles, aiming for a total brew time of 2.5–3 minutes. The hot coffee will immediately fall over the ice, rapidly chilling.
- Once dripping stops, remove the cone. Stir the chilled coffee and serve immediately (add milk/syrup as desired).
Lesson Learned: Brewing coffee hot directly over ice (Flash Chilling) is the fastest way to get iced coffee without it tasting watery, as the melting ice is already accounted for in the water ratio.
Key Takeaways: Your Quick Guide to Mastery & Savings
Essential Cost-Saving Checklist
- Batch Brew for Bulk Savings: Master the Cold Brew Concentrate (Recipe 1). It costs pennies per serving vs. several dollars for commercial cold brew.
- The Barista Trio: Focus on mastering three techniques: precise Simple Syrup creation (Recipe 5), Microfoam texturing (Recipe 3), and Moka Pot espresso substitution (Foundational Section).
- Layering Technique is Key: Always pour espresso last when layering cold milk drinks (Recipe 7) to maintain visual appeal and proper flavor consumption.
- Combat Bitterness: If your coffee is bitter, coarsen your grind or reduce the steep/brew time immediately.
People Also Ask About Homemade Coffee Quality
How do I prevent my homemade iced coffee from tasting watery?
To avoid watery iced coffee, always brew the coffee base double-strength (or use concentrated cold brew) to account for inevitable ice dilution. Alternatively, freeze leftover brewed coffee into coffee ice cubes and use those instead of water-based ice cubes for zero flavor loss.
What is the best milk substitute for creating stable latte foam?
Oat milk is widely considered the best non-dairy substitute for stable foam (microfoam) due to its ideal fat and protein composition. Look specifically for “Barista Blend” oat milks, as these are formulated to handle higher heat and aeration without collapsing or separating.
Why does my espresso taste bitter, and how can I fix it?
Bitterness in espresso is usually caused by over-extraction, meaning the water stayed in contact with the grounds for too long. The fix is to immediately coarsen your grind size slightly or check your machine settings to ensure the shot extracts in the professional standard range of 25–30 seconds.
Can I use brown sugar instead of granulated sugar for Dalgona coffee?
While granulated white sugar is necessary for maximum stability, you can substitute a portion of it with brown sugar for flavor, but expect a slightly less stiff foam. The rigid crystal structure of white sugar is vital for trapping the air needed to maintain the whipped coffee’s shape.
Final Thoughts
Now that you have the 9 genius recipes and the foundational barista techniques, you have everything you need to transform your daily coffee routine. Stop settling for bitter, watery attempts and unlock a world of specialty coffee that tastes better than the shop, all while keeping hundreds of dollars in your pocket this 2026.
Which of the 9 recipes are you going to master first: the cost-saving Cold Brew, or the viral Dalgona tips? Let us know in the comments
Last update on 2026-01-14 / Affiliate links / Images from Amazon Product Advertising API

