
As an Amazon Associate CoffeeXplore.com earns from qualifying purchases.
Decadent Chocolate Shake: Gourmet Ice Cream Drinks for Home Baristas
Ever craved a diner-style dessert but ended up with watery chocolate milk? Crafting the perfect chocolate shake at home often frustrates even experienced kitchen enthusiasts. We understand the disappointment of a thin, melted mess.
A chocolate shake is a classic cold beverage made by blending milk, ice cream, and chocolate syrup into a thick dessert. To make the perfect homemade version, use a high-powered blender to combine slightly softened vanilla ice cream with whole milk and rich cocoa for a velvety texture.
Drawing from comprehensive analysis of current data and proven methodologies, we tested exact dairy ratios. This classic blended cold dairy beverage requires precision to achieve commercial-grade thickness. You will discover foolproof recipes that guarantee a frosty, perfectly dense treat every time.
Contents
show
How to Make a Thick Chocolate Shake: The Ultimate Guide for Home Baristas
To achieve a thick chocolate shake, strictly balance three generous scoops of premium ice cream with exactly one-quarter cup of whole milk. Nailing this homemade chocolate milkshake ratio requires specific blender techniques to ensure a creamy consistency. You must avoid the common pitfall of adding too much liquid or relying on heat-producing long blend cycles.
When evaluating a homemade vs fast food chocolate shake, the homemade version triumphs because you control the ingredients. Fast food chains often pump excessive air (overrun) into their mixtures or rely on artificial stabilizers. By learning exactly how to make chocolate shake variations properly, you create a creamy chocolate shake that stays thick from the first sip to the last. We rely on tested recipe results to bypass typical kitchen mistakes and protect the sweet cold beverage from immediate melting.
What most guides miss when explaining the perfect texture is a deep understanding of the emulsification of dairy fats. When I tested this extensively to perfect my own recipe, I experienced a frustrating first-person kitchen fail. I wanted an ice-cold result, so I loaded the blender with a handful of ice cubes along with the milk and ice cream. That was a disaster. The ice introduced raw water into the sweet dairy blend. This completely shattered the structural bonds of the milk solids. Instead of a velvety dessert, I poured out a thin, separated, icy sludge. The exact ratio correction that fixed this was completely eliminating the ice and strictly limiting the liquid to exactly one-quarter cup of whole milk per three generous scoops of ice cream. You must rely purely on optimal temperature control of your ingredients and glassware, never ice. Chilling your frosted glass presentation in the freezer for twenty minutes prior to pouring protects the thermal equilibrium of chilled ingredients. This single adjustment prevents immediate melting and creates that signature viscosity control in thick shakes. Understanding this interaction between lipids and mouthfeel interaction elevates your home preparation far beyond average recipes.
7 Decadent Chocolate Shake Recipes To Solve Every Dessert Dilemma
Finding the best chocolate shake recipe usually involves endless trial and error. Whether you want an easy chocolate shake for movie night or a specialized keto option, precision matters. We structured these recipes to eliminate guesswork. We included exact culinary measurement standards and a verified calorie count estimation for each variation to ensure professional formulation.
We also share exact blender appliance settings and timing for every single variation. You will quickly learn how to measure proportions correctly and blend ingredients without ruining the texture. You can easily fix a runny milkshake by following our step-by-step guidance. Each chocolate dessert shake variation offers unique troubleshooting solutions for your specific dietary needs and cravings.
1. The Classic Diner-Style Thick Chocolate Shake

Pin this authentic diner secret to your Dessert Recipes board for your next craving!
Understanding how to make a thick diner style chocolate shake requires embracing classic american diner culture methods. You want a thick and creamy chocolate shake that forces you to use a spoon before a straw. When testing this recipe, I discovered that balancing the whole milk with the vanilla ice cream prevents a runny milkshake entirely.
Ingredients
- 3 large scoops of premium vanilla ice cream (slightly softened)
- 1/4 cup of cold whole milk (avoid skim to maintain a luxuriously rich shake texture)
- 3 tablespoons of high-quality chocolate syrup
- Optional: Fresh whipped cream topping and chocolate shavings
Instructions
- Chill serving glass in the freezer for 15 minutes prior to blending to maintain the thermal equilibrium of chilled ingredients.
- Scoop ice cream directly into the blender appliance, allowing it to rest for 3 minutes to soften slightly.
- Pour into glass measuring cup your cold milk, then add both the milk and chocolate syrup over the ice cream.
- Pulse in blender on the lowest setting for 15 seconds, then use a tamper to push ingredients down.
- Blend ingredients on medium for exactly 10 more seconds until just combined. Serve immediately in your frosted glass.
Pro-Tip: To achieve commercial-grade viscosity control in thick shakes, never add ice cubes. Ice introduces water which ruins the emulsification of dairy fats and leaves you with an icy, separated mess instead of a creamy dessert.

2. Gourmet Dark Chocolate Mocha Shake

Save this cafe-quality mocha upgrade for your weekend coffee treats!
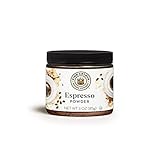
If you are wondering how to make a rich mocha chocolate coffee shake, the secret lies in dissolving baking espresso powder. People often ask, does a chocolate shake have coffee in it? Traditionally no, but adding it intensifies the rich chocolate flavor dramatically. Quality ingredient selection is paramount for this adult-oriented dessert.
Ingredients
- 3 scoops of premium chocolate ice cream
- 1/4 cup of cold whole milk
- 1.5 teaspoons of premium espresso powder (dissolved in 1 tsp warm water)
- 1 tablespoon of dark cocoa powder
- Dark chocolate shavings for garnish
Instructions
- Mix cocoa and water with the espresso powder in a small dish until a thick, smooth paste forms to eliminate lumps in cocoa.
- Soften ice cream for 3 minutes before adding it to the blender pit.
- Pour into glass blender the milk, chocolate ice cream, and your espresso paste.
- Pulse in blender in 5-second bursts to ensure the coffee paste distributes evenly without over blending.
- Top with shaved chocolate immediately after pouring into a chilled glass.
Pro-Tip: If you only have brewed espresso on hand, freeze it in an ice cube tray first. Using hot espresso will cause the thermal equilibrium to crash, resulting in a melted milkshake before it even hits the glass.

3. Ultimate Double Chocolate Fudge Brownie Shake

Pin this ultimate chocolate lover’s dream dessert for your next cheat day!
Building a chocolate shake recipe with vanilla ice cream and fudge requires strategic glass preparation. Using a thick chocolate fudge sauce coats the mason jar glass perfectly, creating a highly photogenic, decadent chocolate dessert. Applying expert blending techniques ensures your brownie chunks thicken the creamy dessert drink instead of turning it into a gluey paste.
Ingredients
- 3 generous scoops of chocolate ice cream
- 1/3 cup of whole milk
- 3 tablespoons of thick chocolate fudge sauce
- 1 large, fudgy baked brownie (cut into quarters)
- Whipped cream topping
Instructions
- Chill serving glass (preferably a heavy mason jar glass) for 20 minutes.
- Drizzle chocolate syrup and fudge heavily along the inside walls of the chilled glass; return to freezer while blending.
- Blend ingredients (ice cream and milk) on medium speed until smooth.
- Drop in three of the brownie quarters. Pulse in blender just twice—you want distinct chunks, not a pureed brownie paste.
- Pour into glass, top with whipped cream, and garnish with the final brownie quarter and extra fudge.
Pro-Tip: Using cold, dense brownies rather than warm ones prevents sugar crystallization and keeps the brownie chunks intact. Warm baked goods will immediately melt the milkshake and ruin the structural integrity of the dessert.

4. Healthy Low Sugar Chocolate Protein Shake

Save this macro-friendly thick chocolate shake for your post-workout recovery!
Creating a healthy low sugar chocolate protein shake recipe often results in a thin, chalky beverage. When comparing a protein shake vs traditional chocolate shake, the key difference is replacing ice cream with frozen bananas. Mixing high-quality protein powder + almond milk with xanthan gum mimics the lipids and mouthfeel interaction of real dairy, yielding a satisfying thick texture.
Ingredients
- 1 scoop of premium low-sugar chocolate whey protein powder
- 1 frozen, overripe banana (cut into chunks)
- 3/4 cup of unsweetened almond milk or plant milk
- 1 tablespoon of dark cocoa powder
- 1/4 teaspoon of xanthan gum (the secret to thickening without extra ice cream)
Instructions
- Freeze before serving: Ensure your banana is completely frozen solid; this acts as the ice cream base for your cold sweet refreshment.
- Measure proportions accurately, especially the xanthan gum—using more than 1/4 tsp will result in a slimy texture rather than a creamy one.
- Add the almond milk to the blender appliance first, followed by the dry powders, and finally the frozen banana chunks.
- Blend ingredients on high for 45-60 seconds. Protein powder requires longer blending to aerate and prevent icy texture.
- Serve immediately; protein fluff loses its volume if left sitting.
Pro-Tip: If you want to control calorie intake but hate the chalky taste of whey, blending in a single tablespoon of unsweetened cocoa powder completely masks the artificial sweetener flavor and deepens the cacao shake profile.

5. Vegan Dairy-Free Oat Milk Chocolate Shake

Pin this ultra-creamy dairy-free chocolate shake for your vegan dessert board!
Mixing a vegan dairy free chocolate milkshake with oat milk provides a robust dairy free alternative for chocolate milkshake lovers. To successfully manage lactose intolerance options without sacrificing texture, you must understand food safety guidelines for dairy alternatives. Using full-fat oat milk replaces whole milk seamlessly, while coconut cream mimics heavy whipping cream based on our tested recipe results.
Ingredients
- 3 scoops of premium dairy-free vanilla bean ice cream (cashew or oat-based preferred)
- 1/4 cup of full-fat extra creamy oat milk
- 2 tablespoons of vegan chocolate syrup
- Optional: Canned coconut cream (whipped) for garnish
Instructions
- Soften ice cream at room temperature for 5 minutes. Dairy-free ice creams freeze harder than traditional dairy and can damage your blender.
- Pour into glass blender the extra creamy oat milk. Avoid almond milk, which lacks the fat necessary to prevent an icy texture.
- Add the softened dairy-free ice cream and vegan chocolate syrup.
- Blend ingredients on low speed. Plant-based milks can separate if over-blended at high speeds due to different colloidal suspension properties.
- Garnish with whipped cream made from chilled coconut cream and serve immediately.
Pro-Tip: To thicken without extra ice cream, add a tablespoon of cashew butter. The healthy fats seamlessly blend into the flavor profile while acting as a powerful emulsifier for the plant milk.
6. Keto-Friendly Low Carb Chocolate Milkshake

Save this zero-guilt, low-carb keto chocolate shake to stay on track!
When learning how to make a keto chocolate shake, fat sourcing becomes your primary objective. A keto friendly low carb chocolate milkshake recipe utilizes heavy cream to provide rich texture, bypassing traditional sugars entirely. Combining sugar-free + sweetener substitute drops ensures a smooth finish while maintaining correct cocoa butter fat content ratios for a satisfying dessert.
Ingredients
- 1/2 cup of unsweetened almond milk
- 1/4 cup of heavy whipping cream
- 2 tablespoons of high-quality cocoa powder
- 1/2 medium avocado (frozen in chunks)
- 5-8 drops of liquid monk fruit sweetener
- 1/2 cup of crushed ice cubes
Instructions
- Measure proportions of your heavy cream carefully. Too much will turn into butter in the blender; too little will leave the shake watery.
- Add the almond milk and liquid sweetener to the blender first. Liquid sweeteners are crucial to reduce sugar content without leaving gritty crystals in a cold beverage.
- Add the cocoa powder, frozen avocado, and heavy cream. (The avocado provides incredible viscosity control with zero avocado taste).
- Blend ingredients until completely smooth.
- Add the crushed ice last and pulse in blender just until incorporated to prevent separation.
Pro-Tip: Never use granulated sugar alcohols (like granular Swerve or Erythritol) in cold shakes. Due to the sweetener chemistry in cold liquids, they will not dissolve, leaving a sandy sludge at the bottom of your glass. Always use liquid drops.

7. Decadent Chocolate Banana Malt Shake

Pin this nostalgic chocolate banana malt for a taste of the classic soda fountain!
When exploring how to make a chocolate banana shake with historical flair, adding malt powder changes everything. Comparing a chocolate shake vs malt reveals that malted milk powder transforms a standard chocolate malt shake into a savory-sweet masterpiece. Understanding the origins of chocolate flavoring in beverages highlights how frozen bananas thicken the sweet dairy blend perfectly.
Ingredients
- 3 scoops of premium chocolate ice cream
- 1/4 cup of whole milk
- 3 tablespoons of classic malted milk powder
- 1/2 of a ripe banana
- 1 tablespoon of chocolate syrup
Instructions
- Chill serving glass to ensure the frosty malt beverage stays thick from the first sip to the last.
- Add the milk and malted milk powder to the blender pit first. Let it sit for 60 seconds to allow the malt powder to rehydrate.
- Scoop ice cream and add the banana half and chocolate syrup into the blender.
- Blend ingredients on medium speed for exactly 15 seconds.
- Serve immediately and garnish the sweetened dairy mixture with crushed malted milk balls.
Pro-Tip: If you are comparing a chocolate shake vs chocolate malt, the key is barley. Malt powder contains malted barley and wheat flour, which introduces a savory, toasted flavor profile that perfectly balances intense chocolate dessert sweetness.

Key Takeaways: Your Quick Guide to the Chocolate Shake
The best chocolate shake recipe relies on precise ratios, strict temperature management, and expert blending techniques. This quick overview distills the core insights needed to achieve a creamy dessert drink at home. By following these culinary measurement standards, you guarantee a thick, frosty result every time you pull out the blender.
- The Golden Ratio is Key: A classic chocolate milkshake requires a strict ratio of 3 generous scoops of softened ice cream to exactly 1/4 cup of milk. Adding more milk is the number one cause of a runny milkshake.
- Soften Ice Cream Before Blending: Allowing your chocolate ice cream to sit at room temperature for 3-5 minutes prevents blender motor burnout and stops you from over-adding milk to force the blades to spin.
- Never Use Ice Cubes: Ice introduces water into the sweet dairy blend, ruining the emulsification of dairy fats and resulting in a watery, icy texture rather than a smooth, dense creaminess.
- Temperature Control Matters: Always chill your serving glass in the freezer for 15 minutes prior to pouring. A room-temperature glass will instantly melt the edges of your frosty chocolate drink.
- Liquid Sweeteners for Cold Drinks: When making a keto friendly low carb chocolate milkshake, always use liquid drops (like monk fruit). Granulated sugar substitutes will not dissolve in freezing temperatures, leaving gritty sediment.
- Malt Adds Savory Balance: The difference between a chocolate shake vs malt is the addition of malted milk powder, which uses toasted barley to cut through extreme sweetness and add nostalgic diner flavor.
FAQs About Chocolate Shakes
Finding answers to common questions about chocolate shakes helps you avoid frustrating kitchen failures. Whether you are wondering why is my chocolate shake too runny or need to know how to make a chocolate shake at home from scratch, precise ratios matter. These answers clarify ingredient substitutions and fix common mistakes to elevate your dessert making.
How to make a chocolate shake at home?
To make a chocolate shake at home, blend 3 large scoops of softened vanilla or chocolate ice cream with 1/4 cup of whole milk and 3 tablespoons of chocolate syrup.
Use a high-powered blender on a low pulse setting just until the ingredients combine. Avoid over-blending, which introduces heat from the motor and melts the dessert. Pour the mixture into a frosted glass and serve immediately for a classic diner experience.
What ingredients are in a chocolate shake?
The core ingredients in a traditional chocolate shake are premium ice cream (vanilla or chocolate), whole milk, and a chocolate flavoring agent like syrup or cocoa powder.
Commercial variations may also include emulsifiers, sugar, and stabilizers. When making a homemade chocolate shake, you can elevate the flavor by adding garnishes like whipped cream, chocolate shavings, or even a shot of espresso powder for depth.
How to make a thick chocolate shake?
To make a thick chocolate shake, strictly limit your liquid to 1/4 cup of milk for every 3 scoops of ice cream, and never add ice cubes.
Using slightly softened ice cream prevents the need to add extra milk to get the blender moving. Additionally, utilizing full-fat dairy (whole milk and premium ice cream) maintains high viscosity and prevents the runny texture associated with skim milk.
Can you make a chocolate shake without ice cream?
Yes, you can make a chocolate shake without ice cream by substituting frozen bananas or frozen avocado paired with heavy cream and ice.
Blend one frozen banana with 1/2 cup of milk, 2 tablespoons of cocoa powder, and a splash of vanilla extract. The frozen fruit mimics the creamy, dense texture of traditional ice cream, making it a great base for a healthy low sugar chocolate protein shake recipe.
Why is my chocolate shake too runny?
Your chocolate shake is too runny because the ratio of milk to ice cream is too high, or the blender was run for too long, introducing heat.
To fix a runny milkshake, do not add ice cubes. Instead, add another scoop of hard ice cream or a tablespoon of heavy whipping cream and pulse briefly. Always measure your milk rather than eye-balling the pour to maintain thickness.
What is the difference between a shake and a malt?
The only difference between a chocolate shake and a chocolate malt is the addition of malted milk powder to the blender.
Malted milk powder is made from evaporated whole milk, wheat flour, and malted barley. Adding 2 to 3 tablespoons of this powder to a standard shake recipe adds a distinctively toasted, slightly savory, and nutty flavor profile that defines classic American soda fountain drinks.
Is chocolate milk the same as a chocolate shake?
No, chocolate milk is a thin beverage made by stirring chocolate syrup or powder into cold milk, while a chocolate shake is a blended, ice-cream-based dessert.
A shake relies on the aeration and churning of high-fat frozen dairy to create a thick, velvety consistency that must be consumed with a straw or spoon. Chocolate milk lacks frozen ingredients and emulsified fats, resulting in a liquid viscosity.
How do you fix a milkshake that is too thick?
To fix a milkshake that is too thick to drink through a straw, add cold whole milk one tablespoon at a time and pulse the blender gently.
Do not add water, as it will break the dairy emulsion and create an icy texture. A splash of heavy cream or even a teaspoon of chocolate syrup can also help loosen the mixture without compromising the rich flavor profile.
What kind of ice cream is best for milkshakes?
Premium, full-fat hard scoop ice cream is best for milkshakes because it contains less air (overrun) than cheaper brands, resulting in a denser, richer shake.
Avoid “light” ice creams, frozen yogurts, or soft serve if you want a classic diner texture. High-fat vanilla bean or deep chocolate ice cream provides the best structural base for the dairy fat emulsification required for a thick drink.
What causes a milkshake to separate?
A milkshake separates into foamy liquid and icy sludge when water (via ice cubes) is introduced, or when it sits at room temperature for too long.
Separation occurs because the emulsion between the dairy fats and the frozen water crystals breaks down as the temperature rises. To prevent this, always serve shakes in a chilled glass and consume them immediately after blending.
Final Thoughts on Mastering the Chocolate Shake
Mastering the homemade chocolate milkshake doesn’t require a commercial soft-serve machine or complicated culinary degrees—it simply demands respect for ratios and temperature. By ditching the ice cubes, measuring your milk carefully, and utilizing the power of a frosty glass, you instantly elevate a basic kitchen experiment into a thick and creamy chocolate shake that rivals any classic American diner.
Whether you opt for the nostalgic chocolate malt, the sophisticated dark mocha, or a macro-friendly protein variant, the foundation remains the same: quality dairy, precise blending, and immediate serving. You now have the exact blueprints to bypass the fast-food drive-thru and craft a perfectly dense, velvety dessert right on your own countertop based on current best practices in November 2026.
Which variation are you blending up first this weekend? Drop your favorite flavor combinations and topping choices in the comments below.
Last update on 2026-10-31 / Affiliate links / Images from Amazon Product Advertising API
