As an Amazon Associate CoffeeXplore.com earns from qualifying purchases.
Teacup Wreath Tutorial for Permanent Vintage China Decor
Have you ever found a beautiful vintage teacup, only to fear it would shatter in a craft project? You’re not alone.
A tea cup wreath is a decorative item made by attaching vintage china to a wreath base. The biggest challenge is preventing the delicate, non-porous teacups from falling off and breaking.
To ensure your teacups remain permanently secured, you must use a dual-attachment method: scoring the china surfaces, applying an industrial-strength adhesive like E6000, and adding mechanical reinforcement with crafting wire. This guide provides the definitive, tested method for creating a stunning piece of permanent vintage china decor that you can display with complete confidence.
Are Your Teacups Safe? Why Structural Integrity is Key for Permanent Vintage Decor
Many DIY teacup wreath tutorials fail to address the most critical issue: the sheer weight and fragility of vintage china. A simple dab of hot glue or standard craft adhesive is a recipe for disaster, leading to shattered heirlooms and wasted effort. Based on years of crafting experience, the most common failure point is adhesion failure on the smooth, glazed surface of porcelain. This is where a professional, dual-method approach becomes non-negotiable for anyone creating permanent vintage china decor.
To ensure your teacups remain permanently secured on a wreath, you must utilize a dual-attachment method: scoring the china surfaces and using industrial-strength adhesive like E6000, followed by mechanical reinforcement using crafting wire threaded securely through the wreath base to prevent movement under stress. This combination of a powerful chemical bond and a physical, mechanical lock is the only way to guarantee your upcycled teacup wreath lasts for years. Before you begin, always work in a well-ventilated area when using industrial adhesives and wear protective gloves to handle the materials safely.
Material Selection Science: Building a Foundation That Holds Weight
The success of your teacup wreath hinges on the materials you choose before you even touch a tube of glue. The foundation must be strong enough to support the combined weight of 8-12 pieces of china, while the adhesive must be chemically suited to bond with non-porous ceramic.
The best adhesive for securing teacups to a wreath base is E6000 Industrial Strength Glue, due to its flexibility and strong bond to non-porous ceramic surfaces. Grapevine is the best wreath base for its high weight capacity. While two-part epoxy creates a rigid, fast-curing bond, E6000’s flexibility is often preferred as it can better withstand minor handling and temperature fluctuations without becoming brittle. Similarly, a sturdy grapevine wreath base provides countless natural anchor points for threading reinforcement wire, a feature that weaker foam bases lack. For a successful bond, it is essential to “score” the glossy surface of the china to create texture for the adhesive to grip. According to manufacturer specifications, E6000 requires a full 72 hours to achieve its maximum, permanent bond strength.
The Definitive 9-Step Teacup Wreath Tutorial for Permanent Assembly
This is more than a set of instructions; it’s a proven protocol designed to create an heirloom-quality piece. By following these nine steps precisely, you ensure every piece of fragile china is attached with both chemical and mechanical security, resulting in a durable and beautiful piece of permanent decor. Remember to work in a well-ventilated area when handling adhesives.
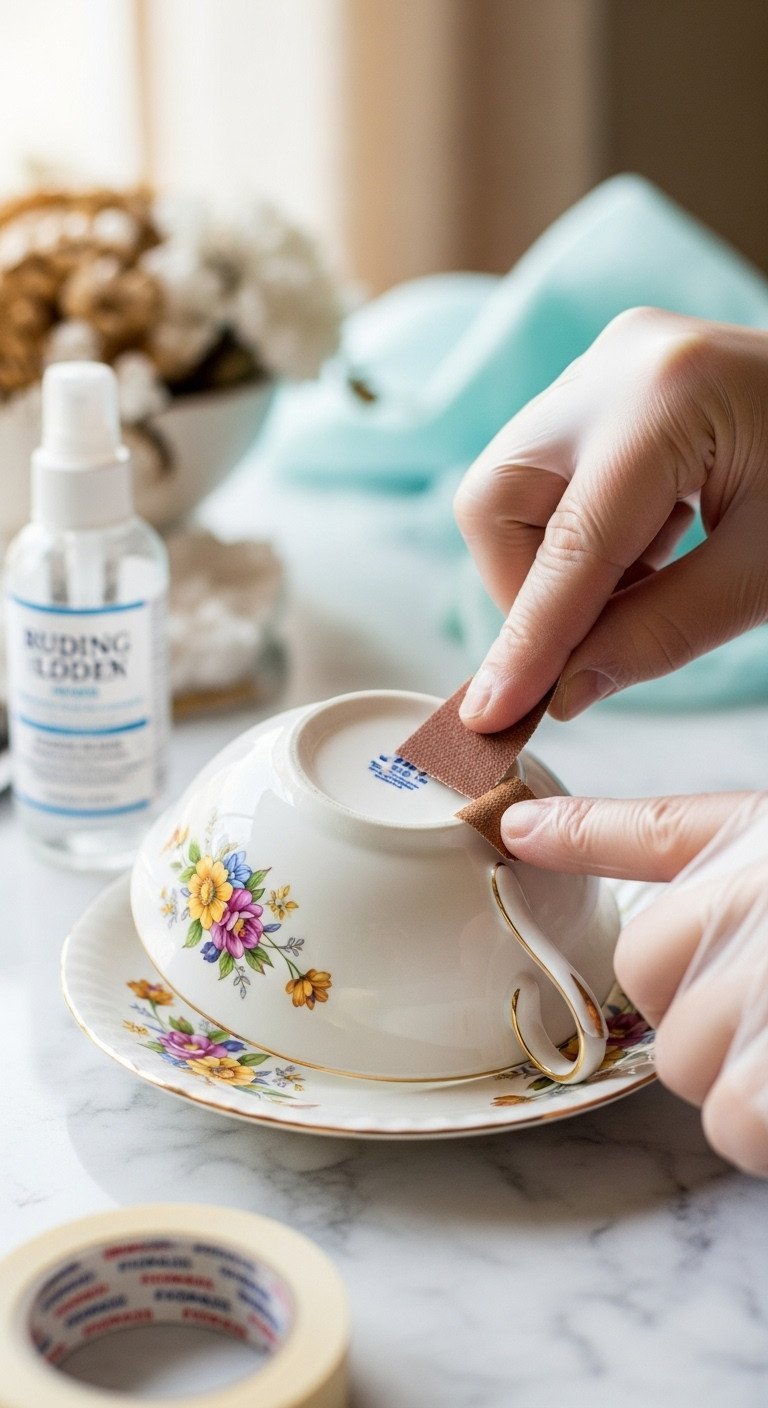
1. Preparing the Wreath Base and China Surfaces
Pin this genius tips to your ‘Vintage DIY’ board!
H4: Materials Needed:
- Grapevine Wreath Base (14-18 inch, sturdy)
- Fine-grit Sandpaper (100-220 grit)
- Isopropyl Rubbing Alcohol (90%+)
- Clean, lint-free cloth
- Chalk marker or light-colored pencil
H4: Step-by-Step Directions:
- Clean all teacups and saucers thoroughly with mild soap and water, ensuring all dust and residue are removed; allow them to fully air dry.
- Wipe down the bonding surfaces (the bottom rim of the cup and the saucer base) with rubbing alcohol to remove any residual oils.
- Using the sandpaper, lightly “score” or rough up the glossy surface of the china where the glue will be applied; this creates microscopic grooves for the adhesive to grab.
- If using a foam base, coat it first with a thin layer of complementary spray paint (white or green) to provide a better base color and texture.
Pro-Tip: Never skip the scoring step on glazed china; it’s the single most important factor for preventing adhesion failure down the line.
2. Mastering the Nested Placement Strategy
Save this clever organization idea!
H4: Materials Needed:
- 8-12 Teacups and Saucers (preferably bone china)
- Measuring Tape or ruler
- Chalk Marker or light pencil
H4: Step-by-Step Directions:
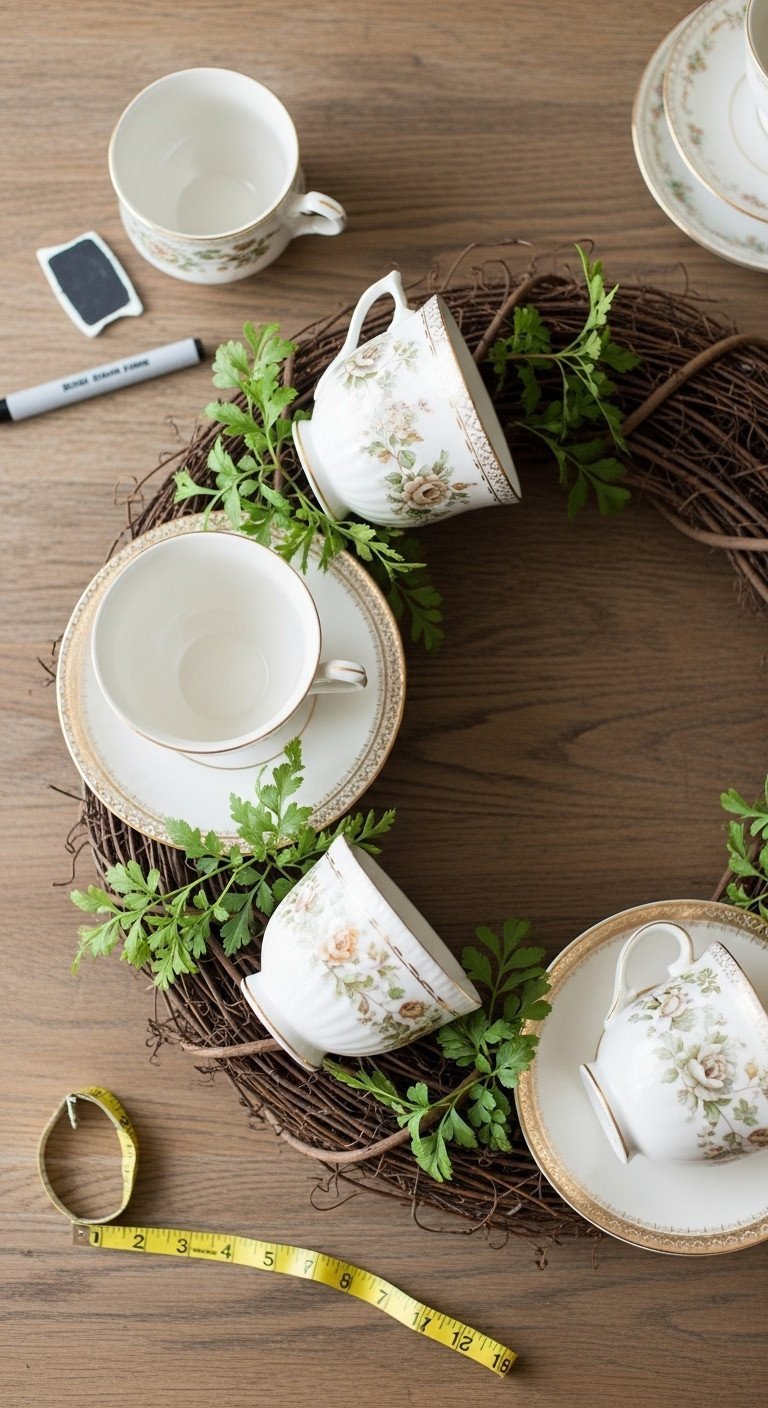
- Place the wreath base flat on your work surface. Use the chalk marker to lightly mark 8 to 12 evenly spaced intervals around the ring; this ensures balance.
- Begin placing the largest saucers first, using them as structural anchors attached directly to the wreath base (Grapevine is ideal for threading).
- Adopt the Nested Placement Strategy: Position the teacups either slightly upright (showing the handle) or tilted sideways (to reveal the interior pattern) inside or resting against the saucers.
- Avoid placing cups directly opposite each other; instead, create asymmetrical groupings (the “Rule of Three” grouping) to add visual dynamism and interest.
- Once all pieces are dry-fitted, adjust until the weight distribution feels even when you lightly lift the wreath (this prevents lopsided hanging).
Pro-Tip: Always start at the bottom center (6 o’clock position) with the heaviest or largest piece, building up and around to maintain optimal weight distribution.
3. Applying Industrial E6000 for Primary Adhesion
Pin this structural integrity tip!
H4: Materials Needed:
- E6000 Industrial Strength Adhesive (ensure a new tube)
- Disposable Nitrile Gloves
- Small craft sticks or toothpicks (for spreading/removing excess)
- CRITICAL: Adequate ventilation (open windows or fan)
H4: Step-by-Step Directions:
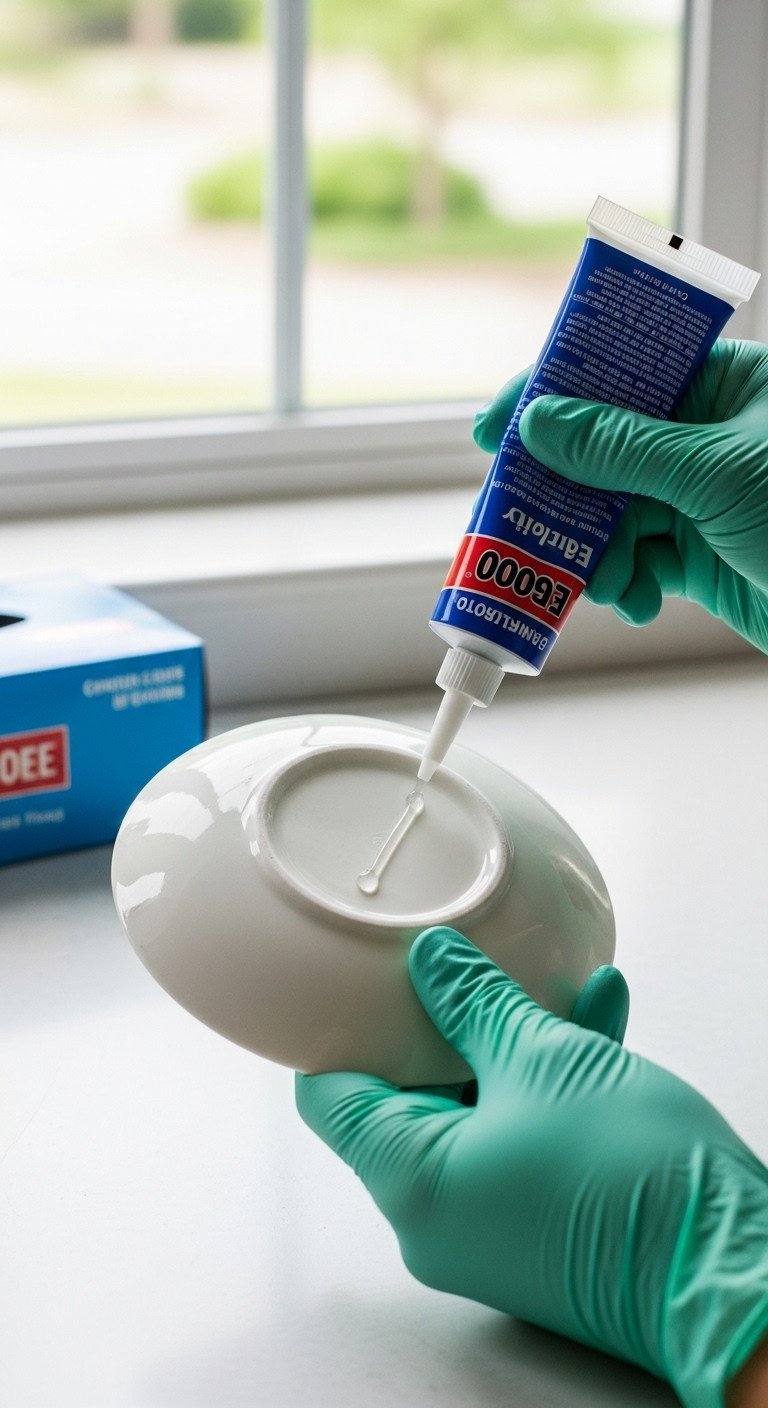
- Safety First: Don gloves and ensure your work area is well-ventilated, as E6000 fumes are strong.
- Apply a thin, even bead of E6000 to the scored surfaces of the saucer and the matching contact point on the wreath base. Avoid over-applying, which causes messy seepage.
- Press the saucer firmly onto the base, holding for 60 seconds. Rotate the wreath flat so the piece is horizontal while the glue grabs.
- Secure the position immediately using painter’s tape or small clamps, ensuring the piece cannot slide down the wreath base while you move to the next step.
Lesson Learned: Never use hot glue or standard super glue for the china itself; they are too brittle and lack the flexibility needed to withstand handling and temperature changes.
4. The Essential Wiring Reinforcement Technique
Save this professional securement method!
H4: Materials Needed:
- 22-Gauge Green or Brown Floral Crafting Wire
- Wire Cutters and Needle-Nose Pliers
- Optional: Floral Tape
H4: Step-by-Step Directions:
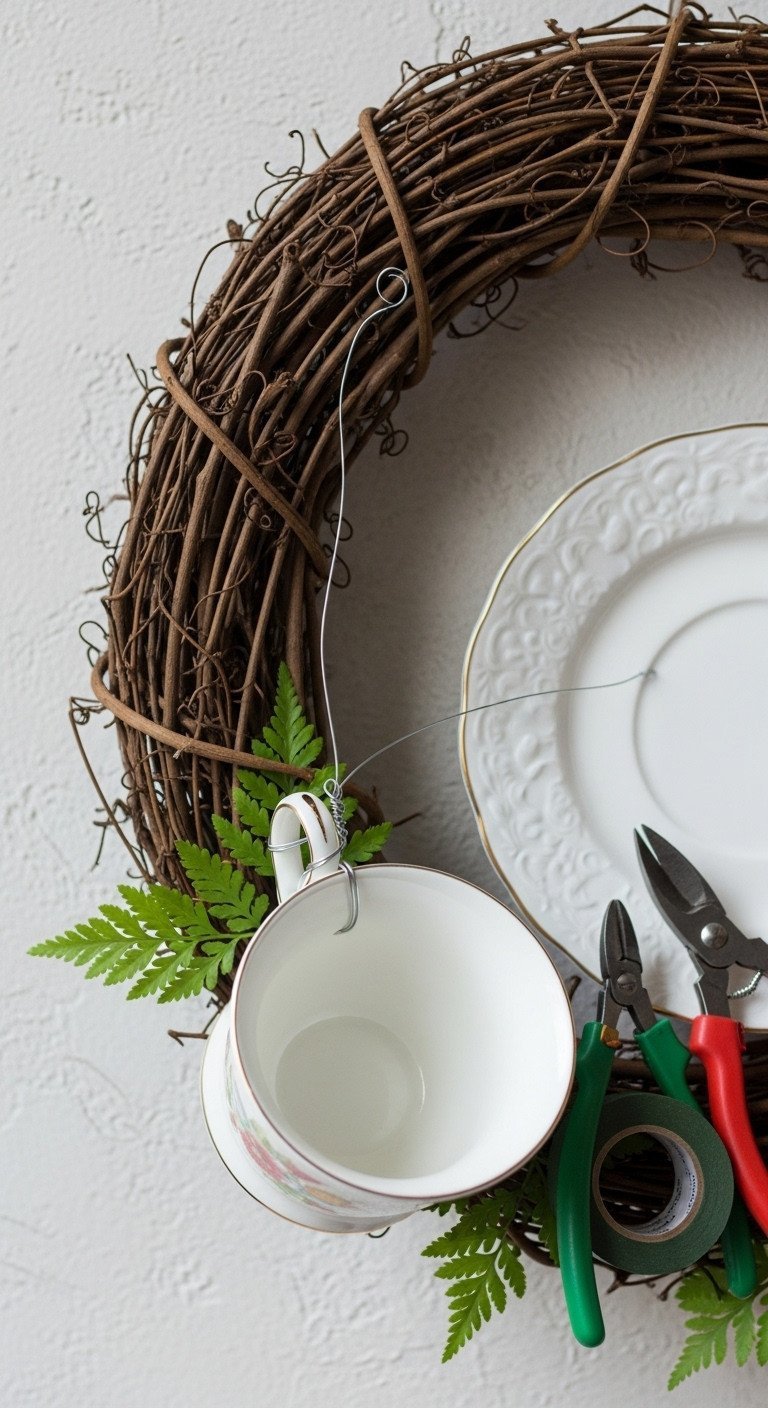
- Cut a 10-12 inch length of crafting wire for the piece you are reinforcing (mandatory for all saucers and optional for cups secured in handles).
- For saucers, loop the wire around a sturdy part of the wreath base underneath the saucer’s edge before gluing, threading the wire ends through to the back of the wreath.
- For teacups, loop the wire around the handle, carefully twist the ends together, and thread both ends through the wreath base, positioning the cup carefully to not disrupt the wet adhesive.
- On the back of the wreath, pull the wire tightly and twist the ends together securely with pliers. Cover the twisted wire ends with floral tape to prevent scratching the hanging surface.
Pro-Tip: Always use wire to reinforce the pieces positioned at the bottom curve of the wreath (5 and 7 o’clock positions), as these points carry the most gravitational stress.
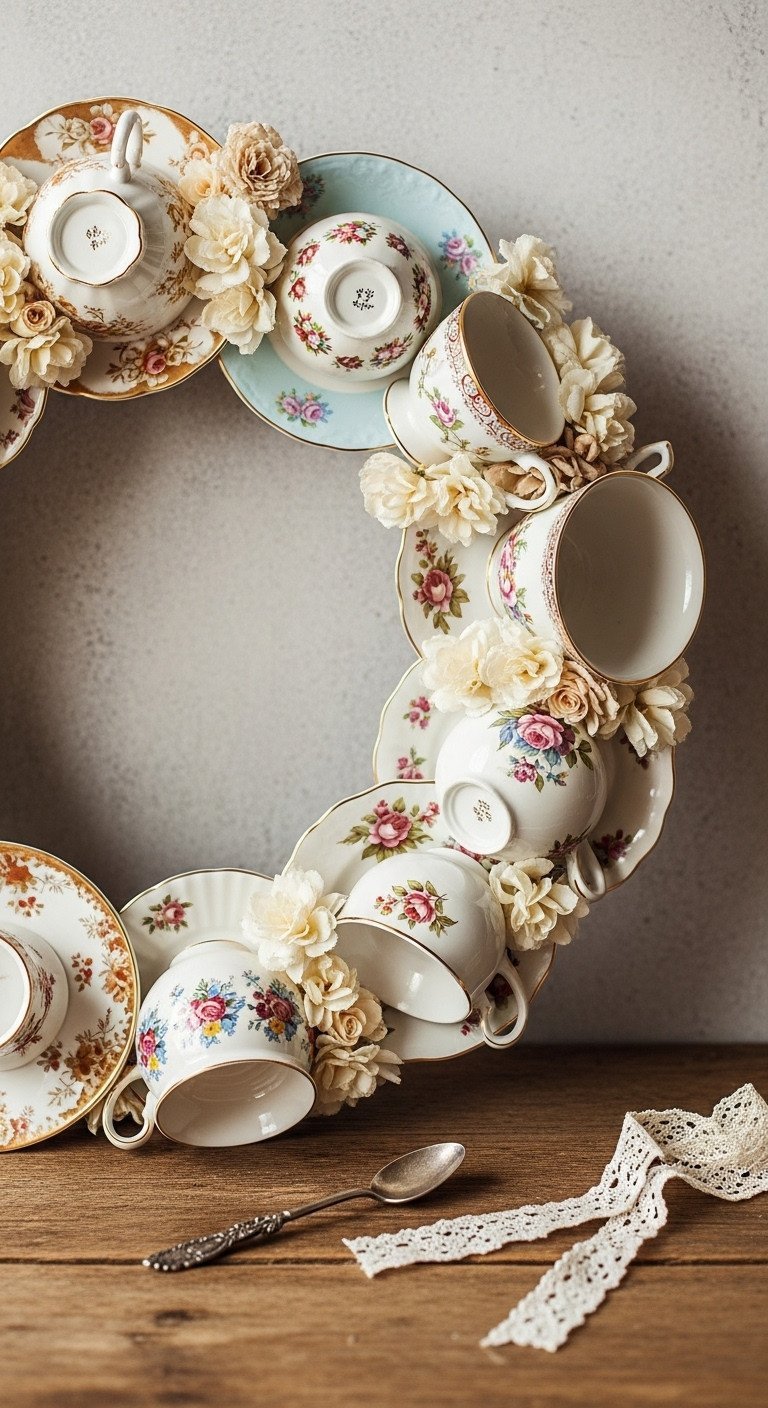
5. Integrating Mismatched China for Aesthetic Flow
Pin this shabby chic design inspiration!
H4: Materials Needed:
- Collection of 8-12 Mismatched Teacups and Saucers
- Primary Color (dominant hue in your china, e.g., rose pink or gold)
- Secondary Color (subtle accent color, e.g., sage green)
H4: Design Principles:
- Establish a Core Color: Look for the dominant color in your china collection (e.g., gold rims, blue floral accents). Use this color as your ribbon or floral accent color to tie the mismatched pieces together visually.
- Vary Textures, Not Size: Use a mix of materials (bone china, porcelain, ceramic) and textures (smooth glaze, crackle finish), but try to keep the overall cup/saucer dimensions relatively consistent to avoid jarring visual weight differences.
- Use the “Gap Filler” Rule: Place the most visually busy or intricate pieces first (the stars), and use the simpler, solid-colored pieces (the fillers) to balance the spaces between them.
- Highlight the Rims: Ensure the gold or patterned rims of the teacups face outward or upward to catch the light and emphasize the luxury of the vintage china.
Lesson Learned: When thrifting, always buy one or two extra plain white saucers. They are often cheap and act as excellent neutral “bridges” between overly busy patterned cups.
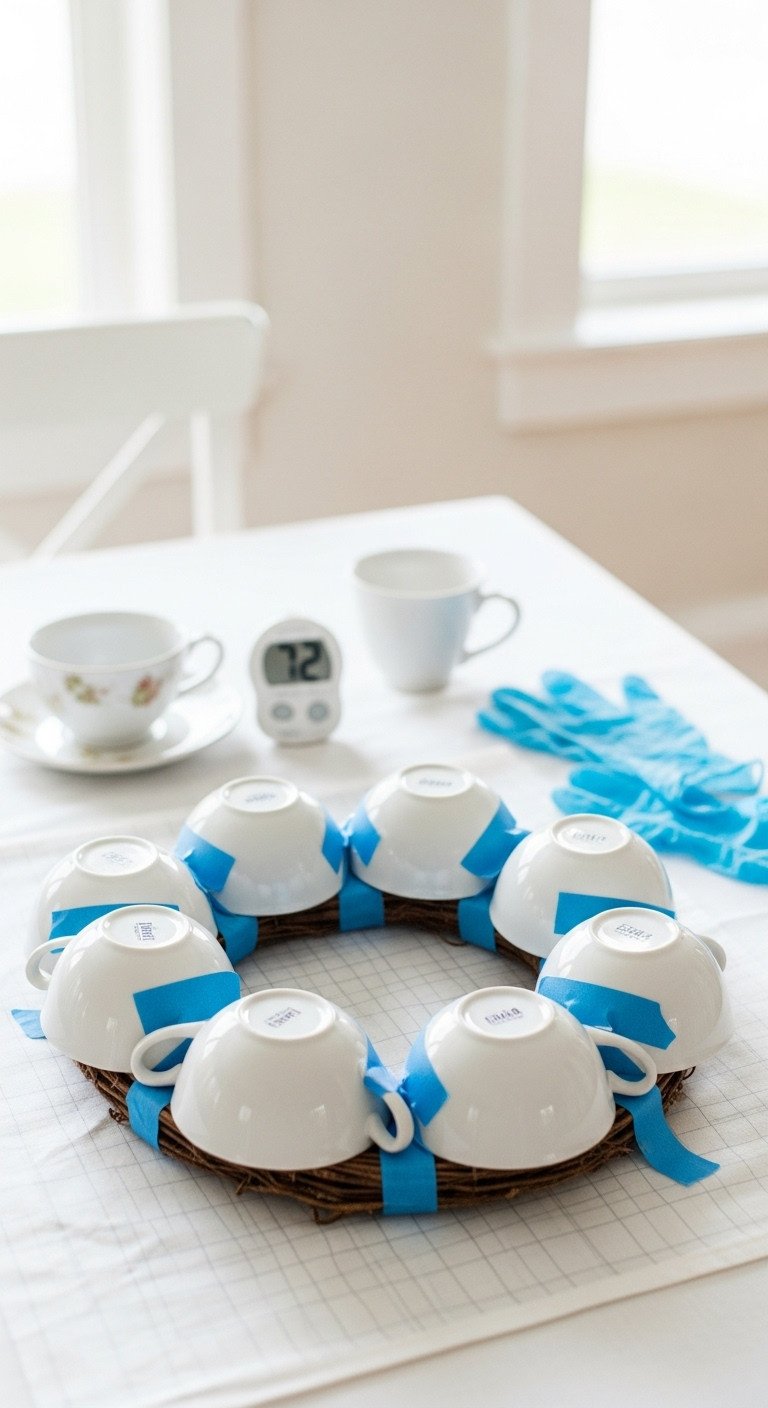
6. The Critical 72-Hour Curing Protocol
Save this curing checklist!
H4: Materials Needed:
- Blue Painter’s Tape (low tack)
- Flat, level surface
- Well-ventilated area
H4: Step-by-Step Directions:
- Once all teacups and saucers are glued and wired, place the wreath flat on a large, level surface protected by a drop cloth or newspaper.
- Use small strips of painter’s tape to secure any wobbly or tilted pieces for the first 24 hours; the tape acts as an external clamp to prevent slippage while the glue achieves initial set.
- Crucially, allow the wreath to cure untouched for a minimum of 72 hours (3 full days) in a climate-controlled, well-ventilated space. Do not attempt to move, lift, or test the pieces during this time.
- After 72 hours, gently remove all painter’s tape and perform a light stress test by gently nudging each piece. If you hear any clicking or feel movement, the piece must be re-secured and re-cured.
Pro-Tip: Temperature fluctuations can weaken the adhesive. Avoid curing the wreath in a cold garage or hot attic; room temperature (65-75°F) is ideal for maximum bond.
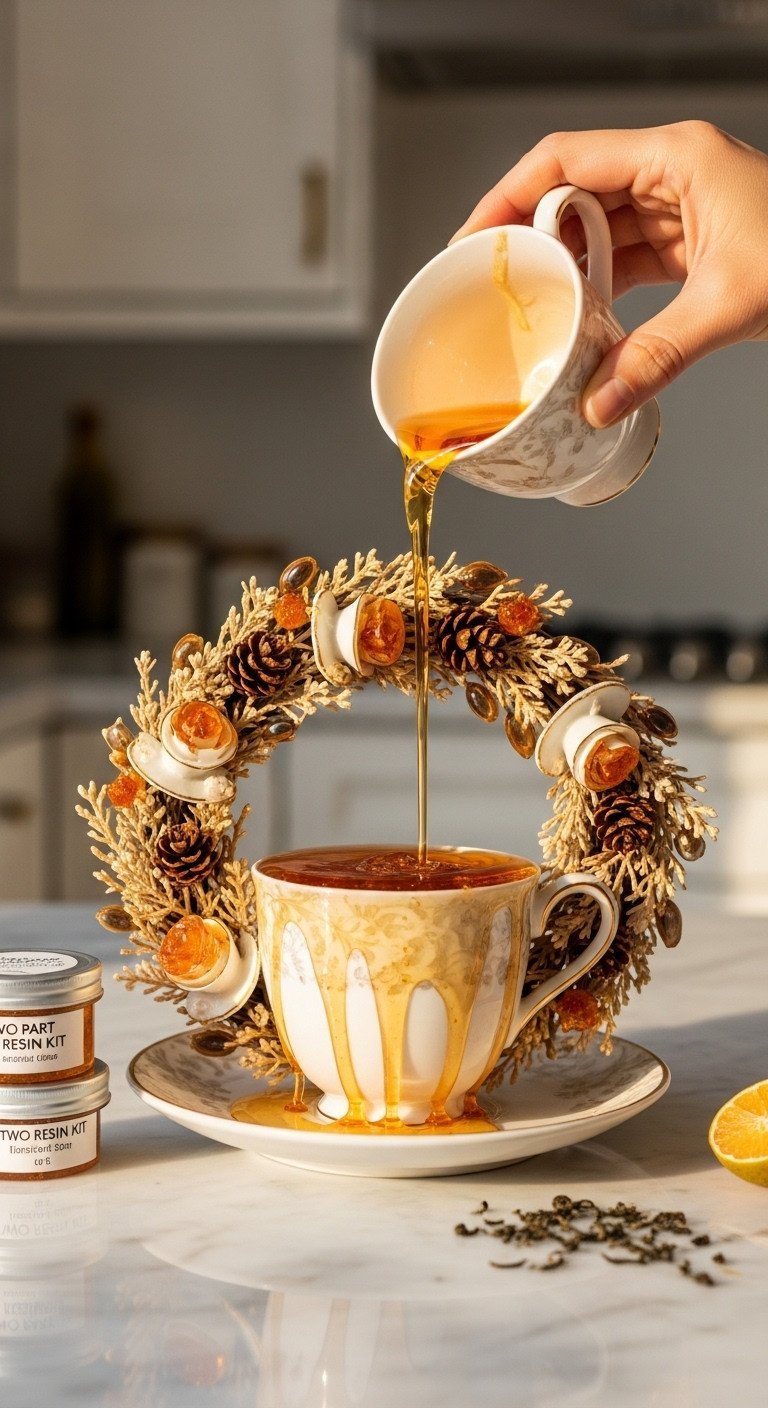
7. Adding the Whimsical Faux Tea Resin Effect
Pin this advanced visual detail to your ‘Crafting Goals’ board!
H4: Materials Needed:
- Clear, non-toxic 2-Part Epoxy Resin Kit
- Small amount of Amber or Brown Liquid Resin Pigment
- Disposable mixing cups and stir sticks
- Disposable pipettes
H4: Step-by-Step Directions:
- Ensure the teacups have been fully cured to the wreath for 72 hours before starting this step, as the resin process is sensitive to movement.
- Mix the two parts of the epoxy resin exactly according to the manufacturer’s instructions in a disposable cup. Add a tiny amount of amber pigment to achieve a light, realistic tea color.
- Using a pipette, carefully fill the teacup interiors with the faux tea resin, ensuring the resin sits at an aesthetically pleasing level (e.g., halfway up the tilted cup).
- Allow the resin to fully cure (usually 12-24 hours, check manufacturer details). Place a dome or lid over the wreath during this time to prevent dust from settling in the liquid.
Pro-Tip: To enhance the illusion, drop one or two miniature faux tea leaves or glitter pieces into the resin right after pouring, before it begins to set.
8. The Art of Hiding Gaps with Florals and Ribbon

Save this tip for a professional finish!
H4: Materials Needed:
- High-Quality Silk or Preserved Florals (hydrangeas, small roses, boxwood)
- Wire-Edged Ribbon (2-3 inches wide, coordinating color)
- Floral Picks and Wire Pins
- Hot Glue Gun (low temp recommended)
H4: Step-by-Step Directions:
- Identify all visible gaps between the teacups and the wreath base, particularly where the wire reinforcement is visible.
- Use a hot glue gun (ONLY for florals, never for china) to secure small, dense clusters of greenery (like boxwood) directly onto the grapevine base to fill the negative space.
- Insert larger floral accents (roses or hydrangeas) sparingly around the chinaware, ensuring they do not obscure the patterns of the cups themselves.
- Create a large, professional-looking bow using wire-edged ribbon. Secure the bow at the desired top center (12 o’clock) or bottom center (6 o’clock) position using floral wire wrapped tightly around the base and hidden beneath the bow’s loops.
Lesson Learned: Use lightweight florals. Heavy artificial flowers can cause strain on the delicate teacup pieces, even after curing.
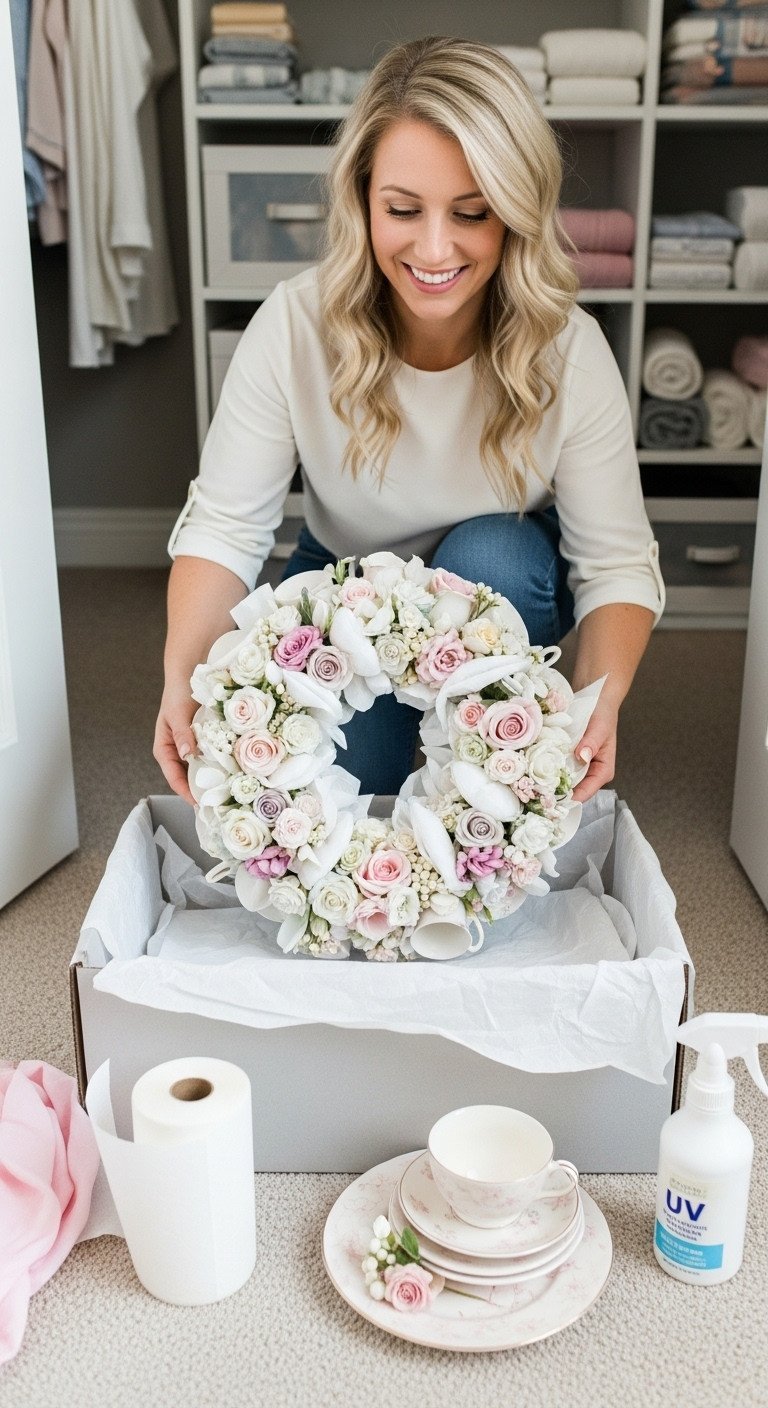
9. Longevity Protocol: Safe Storage and Weatherproofing
Pin this long-term care guide!
H4: Materials Needed:
- Large, flat, acid-free storage box
- UV-resistant clear spray sealant (if displaying outdoors)
- White, acid-free tissue paper or bubble wrap
- Soft makeup brush or dusting cloth
H4: Step-by-Step Directions:
- Weatherproofing (If Necessary): If you plan to hang the wreath on an exterior door, apply a coat of UV-resistant clear spray sealant to the florals and ribbon to prevent fading. Ensure the china remains uncovered.
- Routine Cleaning: For simple dusting, use a soft makeup brush or a can of compressed air to gently remove dust from the china and crevices between the floral pieces. Never use water on the wreath.
- Off-Season Storage: The safest way to store the wreath is always flat. Place the wreath inside a large, flat storage box.
- Cushion the piece thoroughly: Gently place crumpled tissue paper or bubble wrap between the most fragile components (handles, rims) and fill any empty air pockets in the box before sealing.
- Critical Storage Environment: Store the box in a climate-controlled area (closet, spare room). Avoid placing it in attics or garages where extreme temperature swings can cause the E6000 bond to weaken and fail.
Pro-Tip: Avoid wrapping the wreath too tightly in plastic—this can trap moisture and weaken the adhesive bond over several months.
Key Takeaways: Your Quick Guide to Permanent China Wreaths
For a successful and long-lasting teacup wreath, focus on these non-negotiable elements. This quick guide ensures you remember the most critical steps for durability and securement.
- Three Pillars of Permanent Teacup Wreath Success:
- Structural Priority: Always choose a heavy, rigid wreath base like grapevine and reinforce every piece of china using both industrial adhesive (E6000) and mechanical crafting wire.
- Surface Integrity: Thoroughly clean and score the contact surface of the china with fine-grit sandpaper and rubbing alcohol to maximize the bond.
- Patience Protocol: Allow a full 72 hours of uninterrupted curing time, laid flat in a well-ventilated, room-temperature environment, before hanging or adding any final floral accents.
People Also Ask About Teacup Wreath Longevity
What is the strongest glue to attach teacups to a wreath?
The strongest and most recommended adhesive is E6000 Industrial Strength Glue, or a specialized two-part epoxy formulated for ceramics and non-porous materials. While hot glue can be used for florals, it is far too weak and brittle to safely secure heavy china or porcelain cups for a permanent piece.
Can I use a teacup wreath as outdoor decor?
Yes, provided the wreath is protected from direct elements (like rain and snow) and extreme temperature swings. For semi-outdoor display (covered porch), you must use wire reinforcement on all pieces and treat the florals with a UV-resistant clear sealant to prevent sun fading over time.
Where is the best place to find affordable vintage teacups?
The most cost-effective sources are thrift stores, flea markets, and estate sales, where you can often find mismatched or incomplete sets for $1-$3 per cup. Look for sales focusing on quantity over perfection, as minor imperfections can be hidden by florals or used strategically in the design.
How do I fix a teacup that has fallen off my finished wreath?
If a cup falls off, carefully chip away any remaining old adhesive from both surfaces, then thoroughly clean and re-score the china and the base. Reapply E6000 and, critically, add mechanical wire reinforcement to that piece immediately, ensuring it cures for the full 72 hours before re-hanging.
Final Thoughts
You now possess the definitive techniques to transition your vision from delicate china to permanent, heirloom-quality decor. By prioritizing the structural integrity of the base, the chemical strength of the adhesive, and the security of mechanical wiring, you have created a piece that is truly built to last. Go forth and display your magnificent creation with confidence—your teacups are finally safe!
What vintage china pattern or color scheme did you choose for your permanent teacup wreath? Share your design plans in the comments below!
Last update on 2026-01-19 / Affiliate links / Images from Amazon Product Advertising API

