As an Amazon Associate CoffeeXplore.com earns from qualifying purchases.
Teacup Chandelier DIY Secrets Wiring Safety And Porcelain Drilling
Searching for a light fixture that’s truly one-of-a-kind? You want something that tells a story and breaks the mold of generic home decor.
A teacup chandelier is a custom decorative light fixture made by suspending vintage teacups from a chandelier frame. The biggest challenges are often drilling the fragile porcelain without it cracking and handling the electrical wiring safely.
A teacup chandelier is a whimsical, upcycled lighting project that transforms antique china into a stunning centerpiece. This guide will walk you through the seven secrets to building a safe, beautiful fixture, from sourcing vintage teacups to mastering the art of drilling porcelain. Get ready to create a masterpiece.
DIY Dream Fixture: Why the Teacup Chandelier Craze Won’t Fade
A teacup chandelier is more than just a lighting fixture; it’s a piece of functional art, a nod to shabby chic decor, and a testament to creative upcycling. This whimsical lighting project captures a unique blend of nostalgia and personality, using the delicate forms of vintage teacups and saucers as its primary decorative material. The appeal lies in its ability to transform something old, perhaps even chipped or forgotten, into a new, radiant focal point.
The beauty of this DIY project is its deep customization. You can create an aesthetic that ranges from a fairytale tea party to an elegant, rustic centerpiece. However, this craft demands precision. Success requires not only careful handling of fragile porcelain but also a strict adherence to residential electrical safety guidelines to ensure your stunning creation is also completely safe and structurally sound.
The 7 DIY Secrets to Building a Safe and Stunning Teacup Chandelier
Creating a teacup chandelier is an incredibly rewarding project. The key is to approach the most challenging parts—drilling porcelain and handling the electrical components—with the right techniques and a safety-first mindset. These seven steps, tested and verified for both structural integrity and electrical code adherence, will guide you through building a stunning and safe fixture.
1. Sourcing Vintage China Wisely: Quality and Cost
Pin this genius tips to your ‘Dream Lighting’ board!
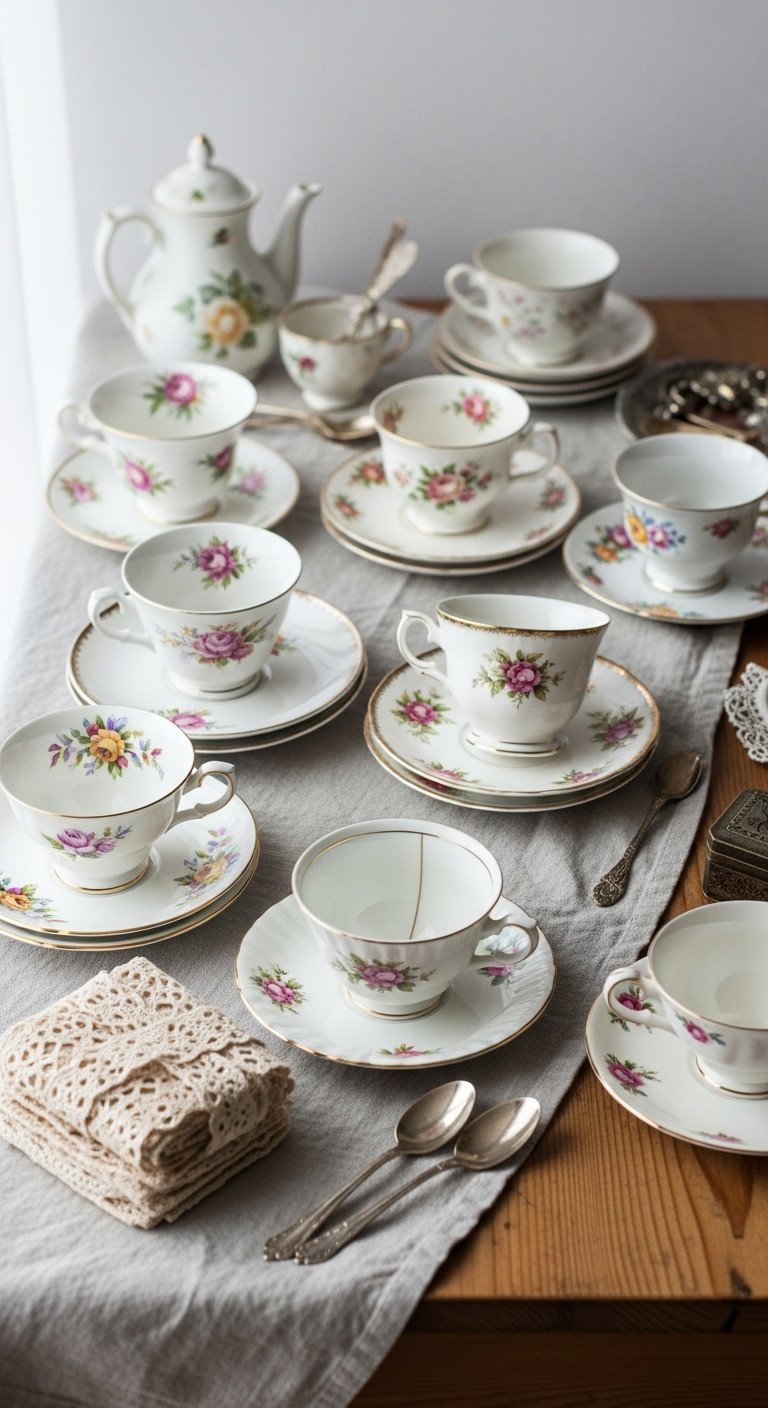
The soul of your chandelier lies in the china you choose. Look for mismatched vintage teacups and saucers on platforms like eBay, Etsy, or at local thrift stores. The most whimsical and compelling fixtures often come from varied patterns that share a complementary color palette.
Materials Needed:
- Vintage China Sets: 15-20 teacups and matching saucers (look for ‘for parts’ or ‘chipped’ lots for maximum savings). Prioritize porcelain or bone china for durability.
- Chandelier Base: An existing fixture frame (3-light or 5-light candelabra base) or a specialized DIY chandelier wiring kit with E12 sockets.
- Safety Goggles and N95 Mask: Essential personal protective equipment for ceramic dust protection.
Step-by-Step Directions:
- Assess Material: Confirm your chosen china is high-fired porcelain or bone china, as softer ceramics chip easily. These materials measure 6-7 on the Mohs hardness scale, making them durable enough for drilling.
- Inspect for Damage: Check every piece for pre-existing hairline cracks. These pieces should be stabilized with epoxy before you attempt to drill them, as pressure can cause the cracks to spread.
- Vet the Base: If you’re repurposing an old chandelier base, ensure the metal is structurally sound and free of rust. You should always plan to replace all existing wiring for safety.
- Calculate Quantity: Lay out your base and plan the arrangement. Aim for 3-4 cups per chandelier arm to create a full, cascading look.
Pro-Tip: Always buy more cups than you need. A 10-15% breakage rate is common, even with expert drilling, and having spares is crucial for any future repairs.
2. Mastering Porcelain Drilling: The Chip-Free Wet Method
Save this clever organization idea!
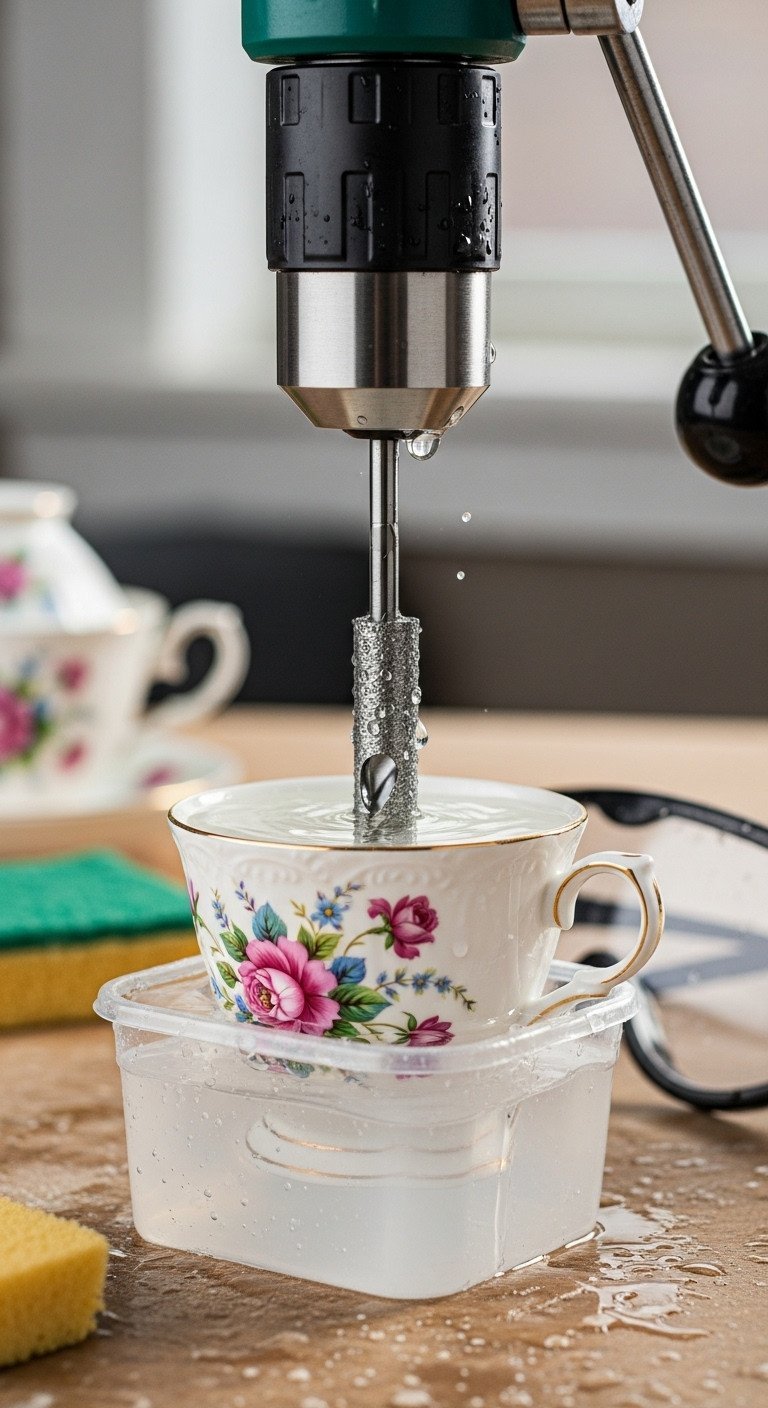
This is the step that intimidates most DIYers, but it’s completely manageable with the right tools and technique. The secret to drilling porcelain without chips is lubrication and patience.
Materials Needed:
- Diamond Core Drill Bit: You must use a diamond-tipped core bit or hole saw. The size should be just large enough to thread your suspension wire or chain through (usually 5mm-8mm).
- Coolant: Cold water or specialized cutting oil.
- Duct Tape or Plumber’s Putty: For creating a small dam to hold the coolant.
- Drill Press or High-Torque Hand Drill: Must be able to operate at a very low RPM.
Step-by-Step Directions:
- Mark and Dam: Use a permanent marker to dot the center point on the bottom of the cup. Build a small circular dam around the mark using plumber’s putty or tape.
- Lubricate: Fill the dam with cold water. The ceramic surface must remain wet throughout the entire drilling process to prevent heat buildup.
- Start Slow: Begin drilling at a 45-degree angle to gently score the hard outer glaze. Once the bit has started to cut into the porcelain, slowly bring it to a vertical 90-degree angle.
- Low Pressure, Constant Coolant: Maintain minimal, consistent downward pressure. Never increase the drill speed; allow the diamond grit to grind away the material slowly. Stop and re-lubricate immediately if you see any smoke or steam.
- Drill Saucers: Repeat the exact same wet drilling process for the saucers if you are hanging them below the teacups for a tiered look.
Lesson Learned: Using too high a speed or insufficient water lubrication will cause friction, burning the ceramic and resulting in immediate, catastrophic cracking. Go slower than you think is necessary for a perfect, chip-free hole.
3. Structural Assembly: Choosing and Attaching Suspension Mechanisms
See how to properly secure your china!
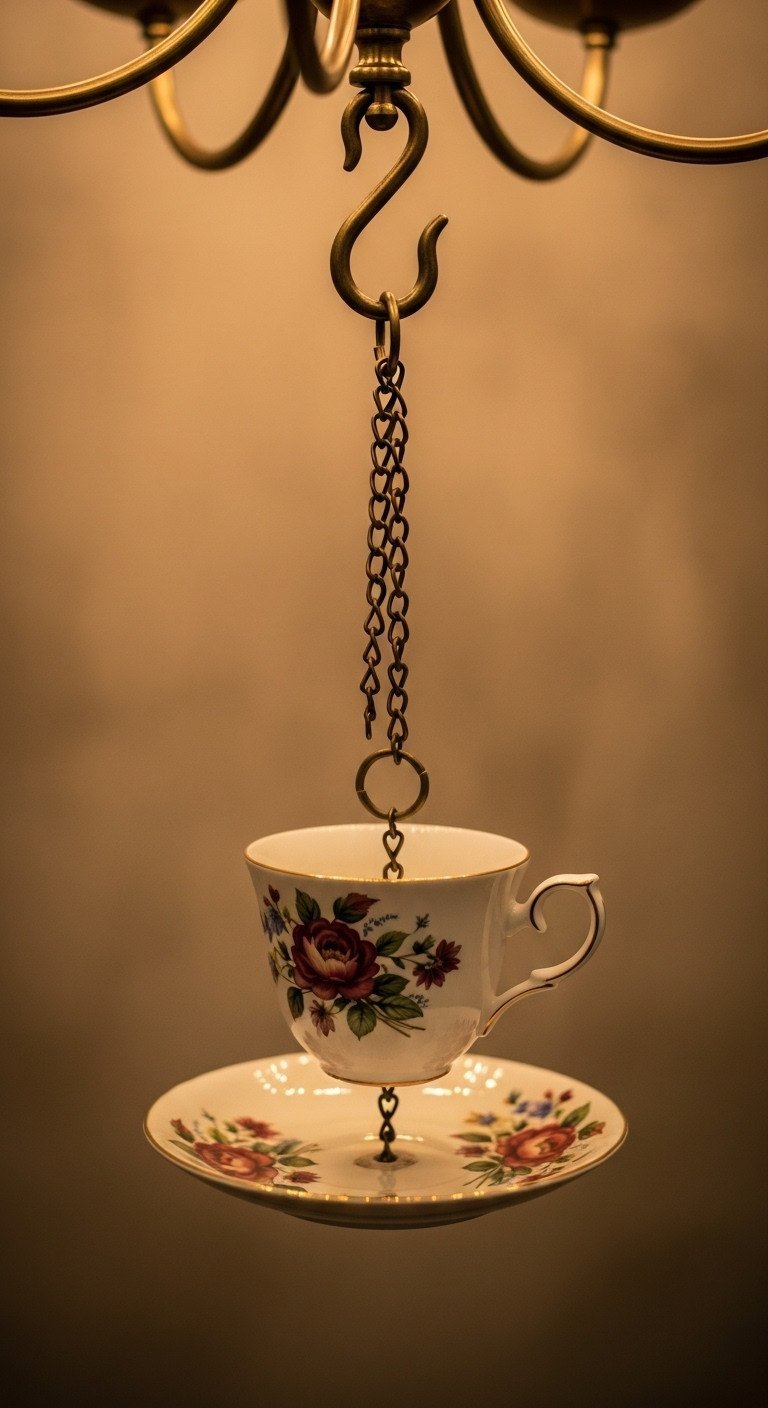
Once your china is drilled, you need a secure and aesthetically pleasing way to attach it to the chandelier base. The choice between wire, chain, or ribbon depends on your desired look and the weight of your teacups.
Materials Needed:
- Suspension Material: High-gauge jewelry wire, delicate metal chain (brass or silver tone), or heavy-duty monofilament fishing line.
- Fasteners: Small S-hooks, crimp beads, or specialized jewelry clasps.
- Ceramic Epoxy/Adhesive: High-strength, clear bonding agent (e.g., E6000) for optionally securing saucers to cups.
Step-by-Step Directions:
- Select Method: Choose metal chain or heavy-duty jewelry wire for the best durability, especially with heavy china. Non-flammable ribbon can create a light, whimsical aesthetic but is only suitable for very lightweight cups.
- Measure and Cut: Determine your desired drop length for each cup. Cut suspension materials to slightly varying lengths to create a more natural, cascading effect.
- Thread and Secure: Thread the wire or chain through the drilled hole in the cup and saucer. Secure the bottom end with a tightly fastened crimp bead or knot, ensuring the suspension component bears the full weight, not an adhesive.
- Attach to Frame: Use small S-hooks or create loops with your wire to attach the secured teacup components to the chandelier base arms or designated loops.
- Test Alignment: Temporarily hang all the components to check for levelness and symmetrical spacing before moving on to the electrical work.
Pro-Tip: If using ribbon, choose a high-quality, synthetic, non-flammable type. However, for any permanent fixture, metal chain or wire is significantly more secure and is the professionally recommended choice for long-term structural integrity.
4. Safe Electrical Wiring: Replacing the Harness and Grounding
Critical safety steps: Wire your chandelier like a pro!
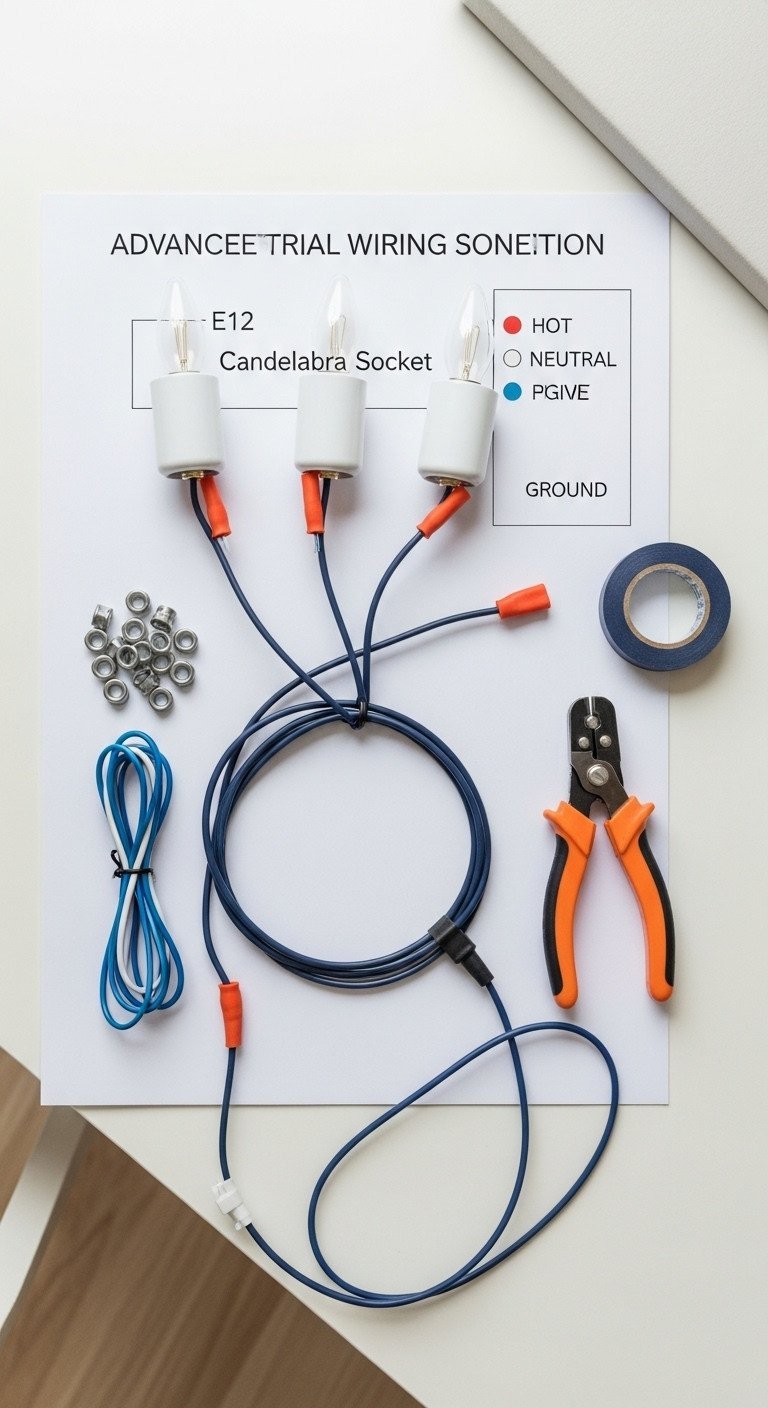
This step is non-negotiable for safety. Whether you’re using a new DIY kit or repurposing an old fixture, you must ensure the electrical components are new, certified, and installed correctly.
Materials Needed:
- New Wiring Harness/Kit: Purchase a new, UL-listed chandelier wiring kit or quality electrical wire (ensure proper gauge) and new candelabra (E12) sockets.
- Connectors: Wire nuts of the correct size for your wire gauge.
- Tools: Wire strippers, a non-contact voltage tester, and electrical tape.
- E-E-A-T Requirement: CONSULT A CERTIFIED ELECTRICIAN.
Step-by-Step Directions:
- ALWAYS Cut Power: Before touching any wiring, locate the circuit breaker that controls the fixture and switch it off. Use a non-contact voltage tester to verify that the power is completely off at the ceiling junction box.
- Replace Old Wires: If you’re using a vintage base, completely strip out all of the old, potentially compromised wiring. Never reuse old electrical components.
- Wire Sockets: Connect your new E12 sockets in parallel to the main harness wires. Twist the stripped ends of the wires together (hot to hot, neutral to neutral) and secure them firmly with the correct size of wire nut. Ensure no bare wire is visible outside the nut.
- Attach Grounding: The ground wire (usually green or bare copper) is a critical safety feature. Securely attach it to the metal chassis of the chandelier frame. This wire will connect to the ground wire in your ceiling box during final installation.
- Insulate: Use electrical tape to wrap around and secure all wire nuts. Also, insulate any areas where the wiring runs through metal arms to prevent fraying or short circuits over time.
Pro-Tip (YMYL Safety Disclaimer): Because this project involves high-voltage residential electricity, it is critically recommended that you have a licensed electrician review your final internal wiring before permanent installation, and especially for the final connection to the household junction box. Use only UL-listed components to mitigate fire risk.
5. Optimizing Bulb Selection: Low-Heat LED Mandate
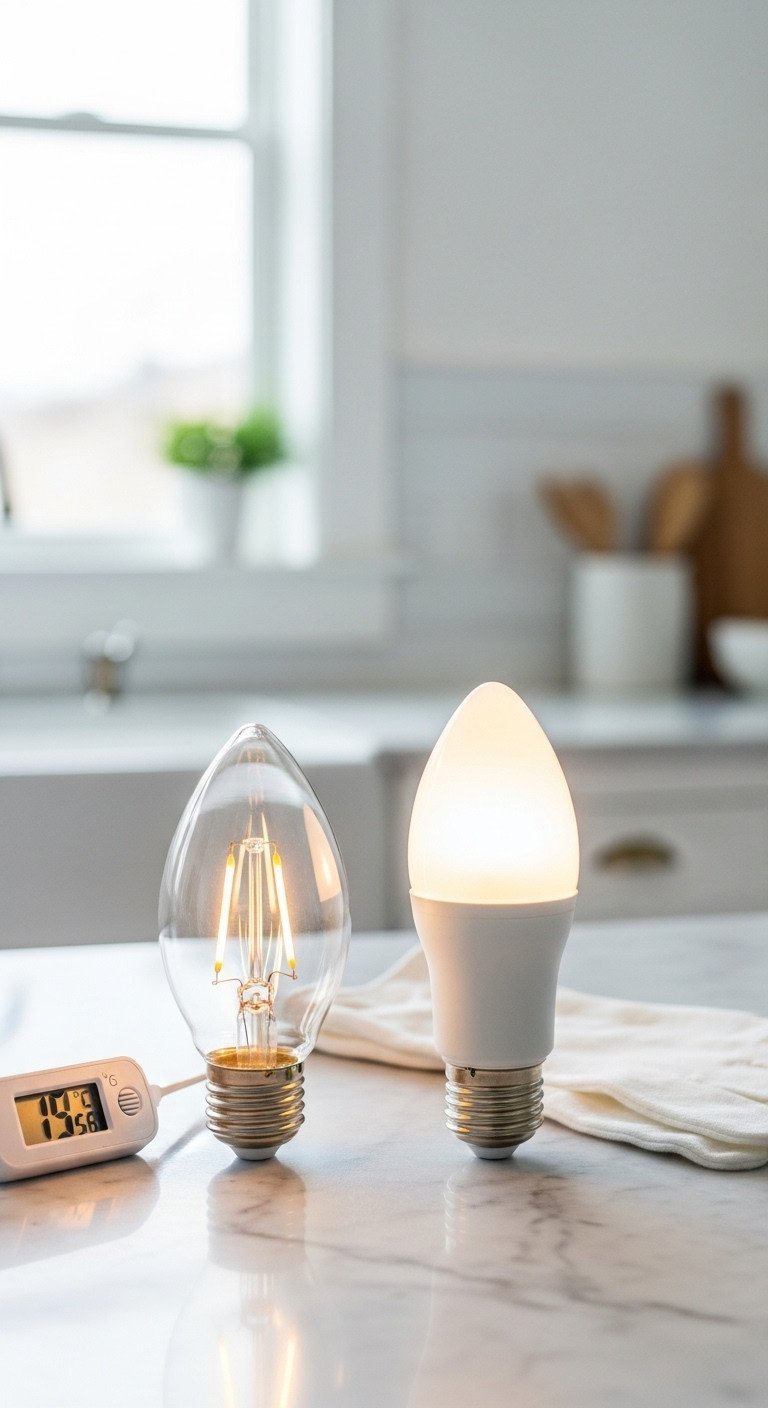
Use this bulb type for safety!
The right light bulb is not just an aesthetic choice—it’s a critical safety decision. The heat from traditional bulbs can damage your creation.
Materials Needed:
- Low-Heat LED Bulbs: Candelabra base (E12) bulbs are standard for this type of fixture. Select your desired color temperature (2700K produces a warm, soft light, while 5000K is a cooler, brighter white).
- Bulb Wattage: Look for LED equivalents in the 3W to 5W range. This will minimize heat output, regardless of the socket’s maximum rating.
- Optional: Small, battery-operated LED fairy lights for a hidden, ambient glow inside some of the cups.
Step-by-Step Directions:
- Prioritize LED: Under no circumstances should you use traditional incandescent bulbs. They generate significant heat that can crack the porcelain, degrade the wiring insulation over time, or melt any adhesives used.
- Check Wattage: Ensure the LED equivalent wattage is very low (less than 5W). This drastically reduces the heat load on the fixture and the delicate china.
- Verify Fit: Confirm the bulbs fit neatly within or around the cup and saucer elements without touching the ceramic. Direct contact could lead to localized heat buildup.
- Test Light Quality: Before mounting the entire fixture, power it on briefly to check the illumination. The goal is soft, ambient light, not harsh task lighting.
Lesson Learned: Even with low-heat LEDs, you should monitor the fixture during its first few uses. If any part of the metal base or china feels warm to the touch after an hour, you should reduce the bulb wattage further.
6. Structural Integrity: Calculating Final Weight Load
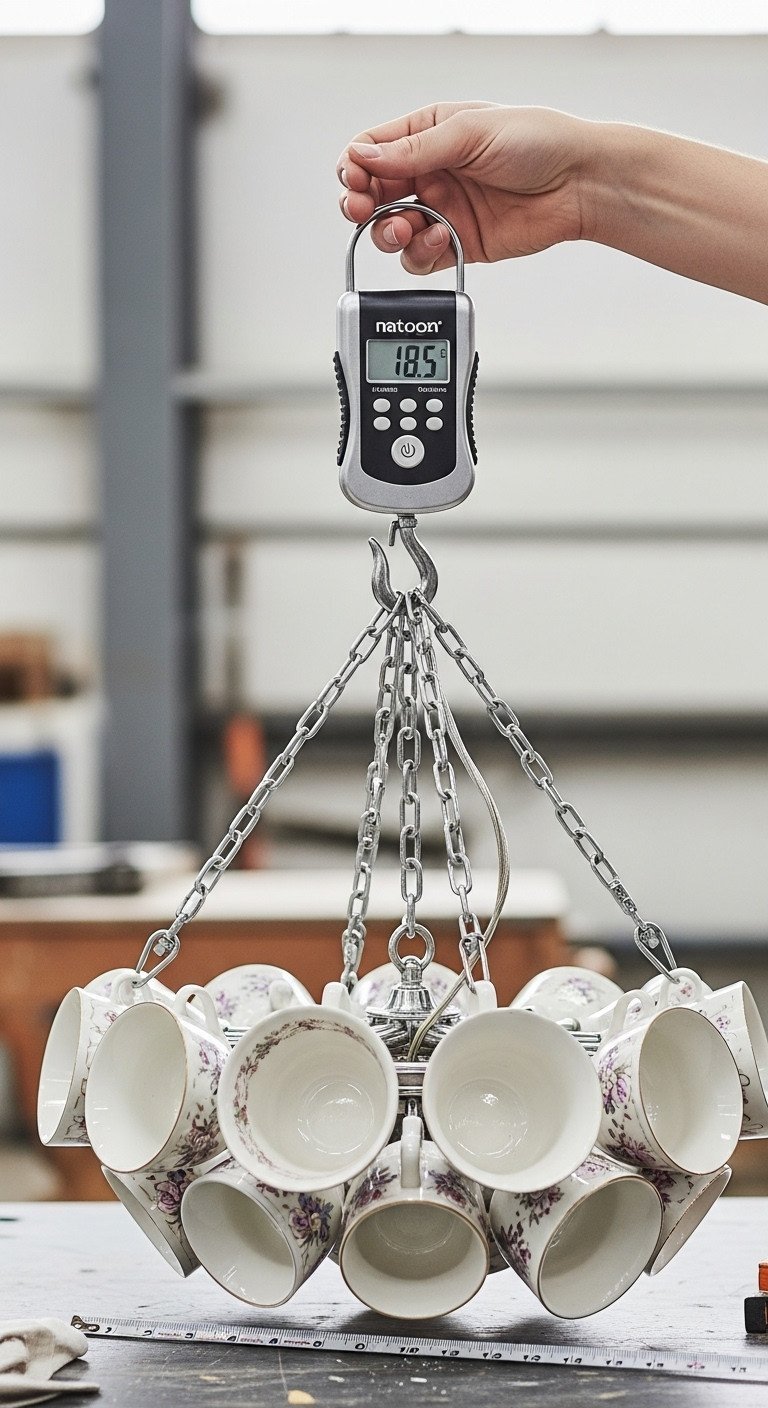
Calculate the load before you hang it!
This is a critical safety step most guides overlook. The combined weight of the metal base and all that ceramic can be surprisingly heavy, and your ceiling needs to be prepared to support it.
Materials Needed:
- Digital Hanging Scale: A heavy-duty scale capable of accurately measuring the total weight of the fully assembled fixture.
- Ceiling Support Bracket (if needed): A structural reinforcement bracket or ceiling fan support kit designed to distribute heavy loads across ceiling joists.
Step-by-Step Directions:
- Estimate Weight: A standard vintage teacup and saucer unit weighs about 0.4 lbs. Multiply this by the total number of units, then add the weight of the chandelier base (usually 5-8 lbs).
- Measure Final Weight: Once the chandelier is fully assembled (but before you attach the ceiling cap), use a digital hanging scale to measure the exact final weight.
- Check Ceiling Box Rating: Standard residential electrical junction boxes are typically only rated for 35-50 pounds. As a rule of thumb, if your fixture exceeds 25 pounds, you must plan to reinforce the mounting point.
- Install Reinforcement: If the weight is too high for your junction box, you must install a ceiling fan support bracket or a wooden blocking structure between the joists above the box. This allows you to anchor the chandelier directly into the solid structure of your ceiling.
Pro-Tip (Structural Safety): Due to the significant weight of the ceramic, you should always treat your teacup chandelier installation like a ceiling fan installation. Never rely solely on a standard plastic junction box to bear the full weight of a heavy fixture.
7. Final Installation and Aesthetic Finishing Touches

Complete the look with these finishing details!
With the hard work done, it’s time to hang your creation and enjoy the warm, whimsical glow. This final step is all about careful mounting and small aesthetic tweaks.
Materials Needed:
- Installation Hardware: Long mounting screws that are suitable for anchoring into your structural support (the ceiling joists or blocking).
- Level: To ensure the ceiling cap and chandelier base hang perfectly straight.
Step-by-Step Directions:
- Connect to Power: Following the advice of your electrician, connect the fixture’s wires to the corresponding house wires inside the junction box (black to black, white to white, ground to ground) and secure them with wire nuts.
- Secure Mounting Plate: Attach the fixture’s mounting plate firmly to the reinforced ceiling support, not just the junction box.
- Lift and Secure: Carefully lift the chandelier and attach the ceiling cap to the mounting plate. Ensure all wiring is fully tucked inside the box and that there is no stress placed on the electrical connections.
- Final Check: Step back and use a measuring tape to check the drop length of several teacups. Make minor adjustments to the suspension wires or chains to ensure all cups hang evenly for a professional look.
- Test and Clean: Restore power at the circuit breaker and test the light. Dust the china gently with a feather duster to complete the project.
Pro-Tip: If your cups are made of slightly translucent bone china, consider hiding small, battery-operated fairy lights inside certain cups to create extra points of localized glow and add more depth to the fixture.
Buy vs. DIY: Considering Pre-Made Teacup Chandelier Alternatives
While the satisfaction of a DIY project is immense, it requires time, skill, and a commitment to safety. For those who love the aesthetic but are hesitant about the technical work, purchasing a pre-made or custom artisan teacup chandelier is an excellent alternative.
DIY allows for extreme personalization and saves 50-75% on cost but requires advanced technical safety measures, while pre-made fixtures offer guaranteed structural and electrical compliance at a higher price.
Purchasing from a professional maker on a platform like Etsy provides peace of mind. These fixtures are built by experienced craftspeople who understand structural loads and use professionally wired, UL-listed components. While you may have less control over the specific china used, you receive a safe, durable, and professionally finished product without the risk or labor of doing it yourself.
Key Takeaways: Your Quick Guide to a Successful Teacup Chandelier Project
To ensure your project is a stunning success, keep these five core principles in mind:
- Safety First (YMYL): Always use new, UL-listed wiring kits and low-heat LED bulbs. We strongly recommend consulting a certified electrician for the final installation, especially when connecting the fixture to your household circuit.
- Master the Drill: Use a diamond core bit and the wet drilling method—constant water or oil lubrication, low speed, and low pressure—to drill through porcelain without cracking it.
- Weight Management is Critical: Weigh the finished fixture. If the total weight exceeds 25 pounds, you must install structural reinforcement like a ceiling fan bracket or wooden blocking. Never rely on a standard plastic junction box alone to support a heavy ceramic fixture.
- Choose Suspension Wisely: Use strong jewelry wire or small metal chains for long-term structural integrity. Ribbon is beautiful but should be reserved only for very lightweight, temporary decor.
- Aesthetic Sourcing: Prioritize antique markets and online “for parts” china lots to find beautifully mismatched china. This enhances the whimsical style and is far more cost-effective than buying perfect sets.
People Also Ask About Teacup Chandelier Safety and Maintenance
Is it safe to use ceramic cups near electrical components?
Yes, it is safe, provided stringent precautions are taken. Because ceramic is non-flammable and a poor conductor of electricity, the main risk is heat. This risk is mitigated by exclusively using low-wattage LED bulbs, which produce minimal heat compared to old incandescent bulbs, ensuring the surrounding china, adhesives, and wiring remain cool and stable.
How long will a DIY teacup chandelier typically last?
A well-constructed teacup chandelier can easily last 10+ years. Its longevity depends entirely on the security of the structural mounting and the quality of the components used. Using high-strength epoxy, durable wire or chain suspension, and professional-grade electrical wiring ensures the fixture remains safe and visually intact for decades.
How do I clean and dust the delicate teacups without dislodging them?
The best cleaning method is a light dusting with compressed air or a soft, static-attracting feather duster. Avoid using wet cleaning solutions or cloths, as they can cause residue buildup between the china and the suspension components, potentially weakening adhesives over time or causing water spots.
What is the maximum number of teacups I should hang from one base?
The limit is determined by the total weight of the fixture, not the number of cups. A good rule of thumb for a standard 5-light base is to limit the total fixture weight to 20 pounds to leave a generous margin of safety for the ceiling structure. You can typically hang between 15 and 25 average-sized teacups and saucers within this weight limit.
Final Thoughts
The teacup chandelier is a transformative DIY project that allows you to infuse your space with whimsical personality and repurposed elegance. By approaching the process with respect for the fragility of the china and an absolute adherence to electrical safety standards, you can create a centerpiece that is not only stunningly unique but also structurally sound and entirely safe for your home. Now that you have the secrets to safe drilling, professional wiring, and smart sourcing, your biggest decision is simply which stunning vintage pattern you’ll choose first.
What is the one safety or technique tip you are most excited to implement in your own teacup chandelier project this 2026?
Last update on 2026-01-19 / Affiliate links / Images from Amazon Product Advertising API

