As an Amazon Associate CoffeeXplore.com earns from qualifying purchases.
Brilliant Small Business Interior Ideas That Look Expensive
Does walking into your office, shop, or studio feel a little lackluster? You pour your heart and soul into your business, offering a top-tier product or service, but the four walls around you seem to whisper “startup budget” instead of “thriving enterprise.” It’s a common struggle for entrepreneurs: how to project an image of success and professionalism when your interior design funds are limited.
You know that a well-designed space can boost productivity, impress clients, and create an inviting atmosphere, yet everywhere you look, high-end inspiration seems to come with a high-end price tag. You’re stuck in the gap between the polished, professional aesthetic you crave and the practical financial constraints you face. The fear is that your physical space doesn’t accurately reflect the quality and passion behind your brand.
But creating an expensive-looking interior for your small business is about strategic design, not extravagant spending. By focusing on key elements like lighting, texture, and smart decor choices, you can achieve a high-end aesthetic that impresses clients and inspires productivity on any budget. It’s about working smarter, not spending more, to build a space that truly represents your brilliant business.
The Core Principle: Curated Style Over Costly Splurges
The secret to a high-end look on a budget is shifting your mindset from buying expensive things to making intentional, curated choices. Luxury is less about the price tag and more about the feeling a space evokes. By focusing on foundational design principles, you can create an atmosphere of sophistication and custom detail without a huge investment.
- Decluttering is the Ultimate Luxury: The most effective and completely free way to elevate any space is to remove clutter. A clean, organized environment immediately looks more spacious, intentional, and high-end. Before you buy a single new item, ruthlessly edit what you already have.
- A Cohesive Palette is Powerful: A limited, cohesive color palette makes a space feel calmer and more thoughtfully designed. You don’t need expensive paint; you need a clear color story. This creates a harmonious backdrop that allows your key decor pieces to shine.
- Thoughtful Details Make the Difference: An expensive-looking interior is built on layers of thoughtful details. It’s the difference between a standard plastic light switch plate and a $5 metal one, or a generic cabinet knob and a unique brass pull. These small, inexpensive swaps add up to a custom, designer-led feel.
7 Brilliant Ideas to Make Your Business Interior Look Expensive for 2025
To achieve a high-end look for your business, you need to focus on specific, high-impact strategies that deliver the most bang for your buck. These are the interior design tipss that professionals use to create spaces that feel custom, luxurious, and deeply intentional, all while adhering to a strict budget. From mastering the art of lighting to adding architectural character with simple DIYs, these seven ideas are your roadmap to a more sophisticated space.
- Master Strategic Layered Lighting
- Elevate with Luxe Textiles & Textures
- Create Depth with Statement Mirrors
- Add Character with Architectural Details
- Upgrade Hardware for a Custom Look
- Use Large-Scale Art to Your Advantage
- Bring Life and Luxury with Greenery
1. Master Strategic & Layered Lighting
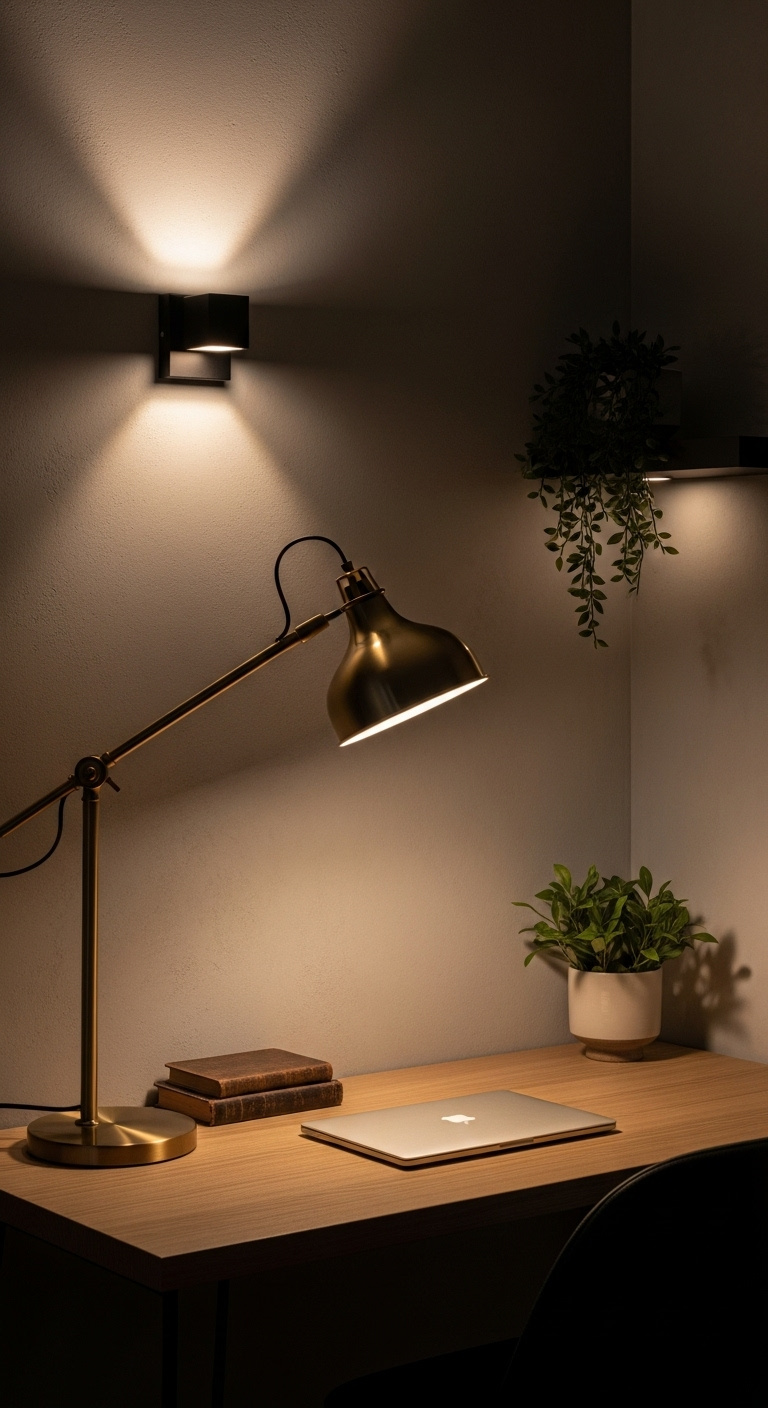
Save this lighting inspiration to your ‘Office Glow Up’ board!
A single, harsh overhead light can make any room feel cheap and sterile, which is why layering multiple light sources is the most crucial step to creating an expensive-looking atmosphere. By combining ambient, task, and accent lighting, you add depth, warmth, and functionality to your small business workspace.
- Materials Needed: 1-2 plug-in wall sconces, 1 floor or desk lamp, 1 overhead fixture (optional), dimmer switches (optional).
- Step-by-Step Directions:
- Assess Your Base: Start with your primary overhead (ambient) light. If it’s harsh fluorescent lighting, consider swapping the fixture for something more stylish. At a minimum, adding a dimmer switch gives you immediate control over the mood.
- Add Task Lighting: Place a desk lamp or an elegant floor lamp right where the work happens, such as next to a client chair or over your primary workspace. This creates a functional, focused glow that is both practical and chic.
- Incorporate Accent Lights: This is the secret layer. Use affordable plug-in wall sconces or small, strategically placed picture lights to highlight a piece of art, a bookshelf, or an interesting architectural feature. This adds drama and makes the room feel custom-designed.
- Vary Heights: Ensure your light sources are at different levels (ceiling, wall, floor). This design technique draws the eye around the room, making it feel larger and more dynamic.
Pro-Tip: Don’t be afraid to go slightly oversized with one statement fixture, like a floor lamp or pendant light. It acts like jewelry for the room and instantly looks more custom and expensive.
2. Elevate with Luxe Textiles & Textures
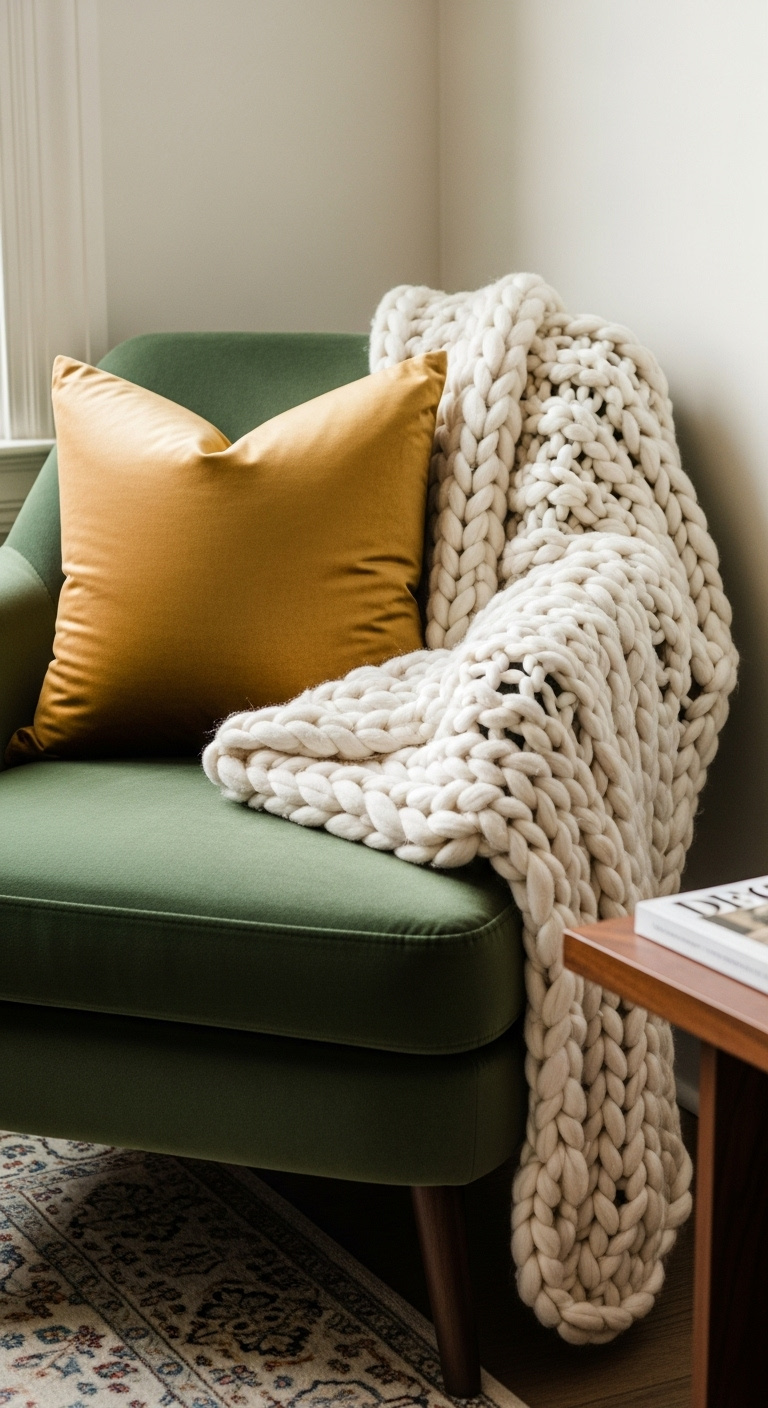
Pin this texture combination for your chic workspace!
Adding rich textures is an easy way to introduce a sense of comfort, depth, and perceived value into your business interior. A space filled only with flat, hard surfaces can feel cold and uninviting. Layering different textiles like velvet, wool, and linen makes the room feel more sophisticated and welcoming.
- Materials Needed: 2-3 throw pillows in varied textures (e.g., one velvet, one linen), 1 plush throw blanket, 1 appropriately-sized area rug.
- Step-by-Step Directions:
- Start with an Anchor: Choose an area rug that properly fits the space. For a seating area, the front legs of all furniture should sit comfortably on the rug. This simple rule makes the entire arrangement look more deliberate and high-end.
- Layer on Furniture: Drape a tactile throw blanket, like faux fur or a chunky knit wool, over an accent chair or the arm of a small sofa. It instantly adds a touch of cozy luxury.
- Mix Pillow Textures: This is where you can have fun. On a chair or sofa, add throw pillows in contrasting materials. Pair a smooth, luxe-feeling velvet or silk pillow with a more organic, textured linen or cotton one to create compelling visual and tactile interest.
- Consider Window Treatments: If your budget allows, swap flimsy, cheap-looking blinds for substantial curtains. Hang the curtain rod high and wide—several inches above and outside the window frame—to make the window appear larger and the ceiling taller.
Pro-Tip: For an instant “luxury hotel” vibe in a breakroom or bathroom, stick to crisp, all-white linens or towels. The uniformity creates a clean, high-end spa-like feel.
3. Create Depth & Light with a Statement Mirror
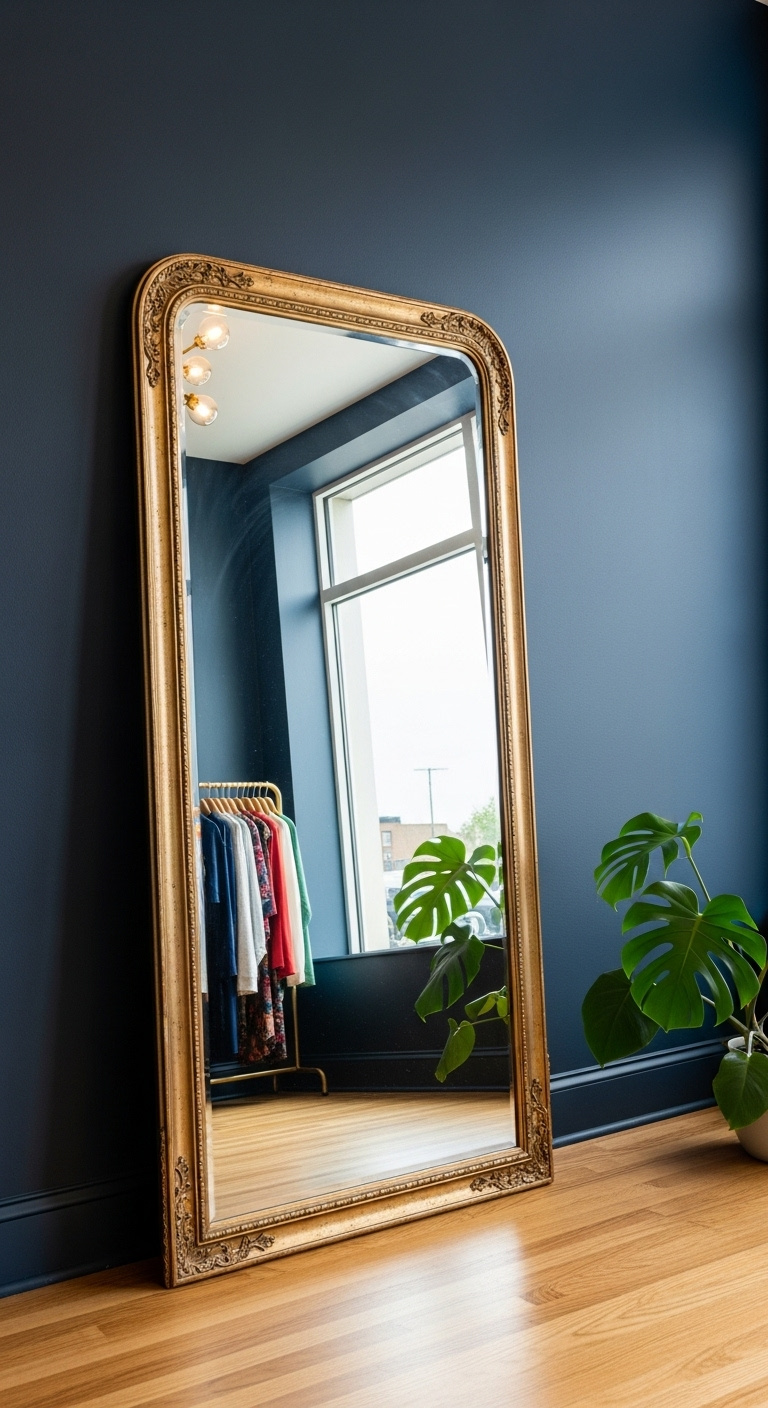
Love this look? Save it to your ‘Small Shop Design’ board!
A large mirror is one of the most powerful and affordable tools in an interior designer’s arsenal because it can make a small room feel larger and brighter instantly. By reflecting light and scenery, a statement mirror acts like another window, adding depth, opulence, and a dramatic focal point to any space.
- Materials Needed: One large mirror (check thrift stores first!), measuring tape, level, appropriate hanging hardware or wall anchors.
- Step-by-Step Directions:
- Identify the Best Wall: The most effective placement for a mirror is on a wall opposite a window. This will capture and reflect the maximum amount of natural light, brightening up the entire room. Entryways and the end of narrow hallways are also perfect spots to create an illusion of spaciousness.
- Go Big: When it comes to mirrors, bigger is almost always better. Choose the largest mirror that your budget and the wall space will allow. A single, large mirror makes a much more expensive-looking impact than several small ones.
- Frame it Right: Hunt for mirrors with unique, substantial frames at thrift stores or flea markets. If you find a cheap, frameless mirror, you can easily add your own decorative wood trim from a hardware store to give it a custom look.
- Hang or Lean: For a classic look, securely hang the mirror on the wall. For a more modern, relaxed vibe that’s perfect for a creative studio or boutique, lean a large floor mirror against a feature wall.
Pro-Tip: Grouping several smaller, mismatched mirrors with interesting frames can create a unique gallery wall effect. This adds artistic character and reflects light in interesting, fragmented ways.
4. Add “Custom” Character with Architectural Details
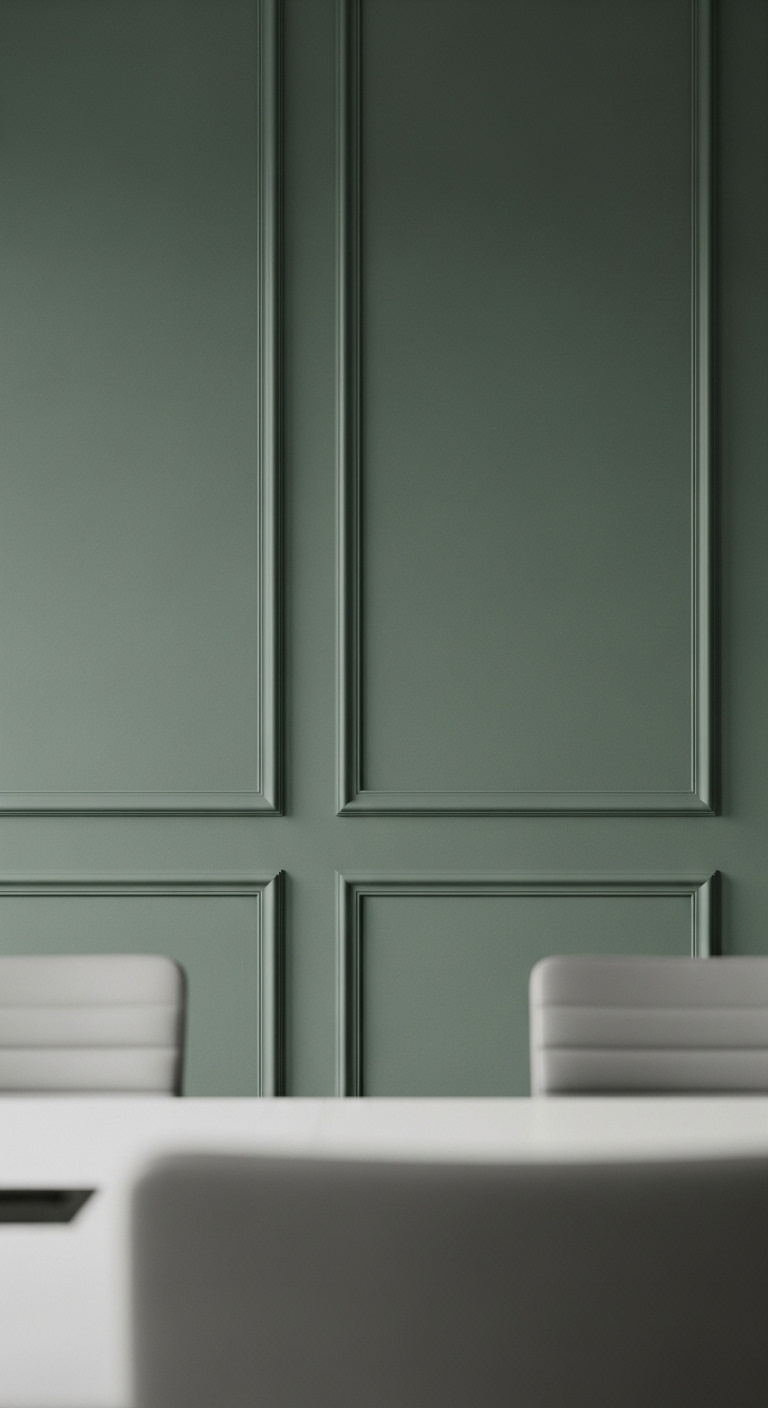
Pin this high-end DIY for your next office refresh!
Expensive homes and high-end commercial interiors often feel special because of their architectural character, but you can recreate that custom-built feeling with simple, affordable DIYs. Adding details like picture frame molding to a plain wall instantly adds dimension, charm, and a sense of history that makes a space feel anything but basic.
- Materials Needed: Lightweight wall molding, measuring tape, level, miter box/saw, construction adhesive, caulk, paint.
- Step-by-Step Directions:
- Design Your Layout: Plan your design on paper or directly on the wall. A series of classic rectangles or squares is a great, timeless starting point. Use painter’s tape to map out the layout and visualize the final look before you make any cuts.
- Measure and Cut: Carefully measure the lengths you need for your design. Use a simple miter box and saw to cut the corners of your molding strips at 45-degree angles. This will allow them to fit together perfectly like a picture frame.
- Attach to Wall: Apply a thin bead of strong construction adhesive to the back of the molding pieces. Press them firmly onto the wall, using a level to ensure every piece is perfectly straight.
- Caulk and Paint: Once the adhesive is fully dry, use a paintable caulk to fill any small gaps between the molding and the wall for a seamless finish. Then, paint the molding. For the most sophisticated, modern look, paint the molding the exact same color and finish as the wall itself.
Pro-Tip: Painting interior doors a bold, contrasting color like matte black or a deep navy is a quick, low-cost project that makes a space feel instantly more custom and designer-led.
5. Upgrade Hardware & Fixtures for a Polished Finish
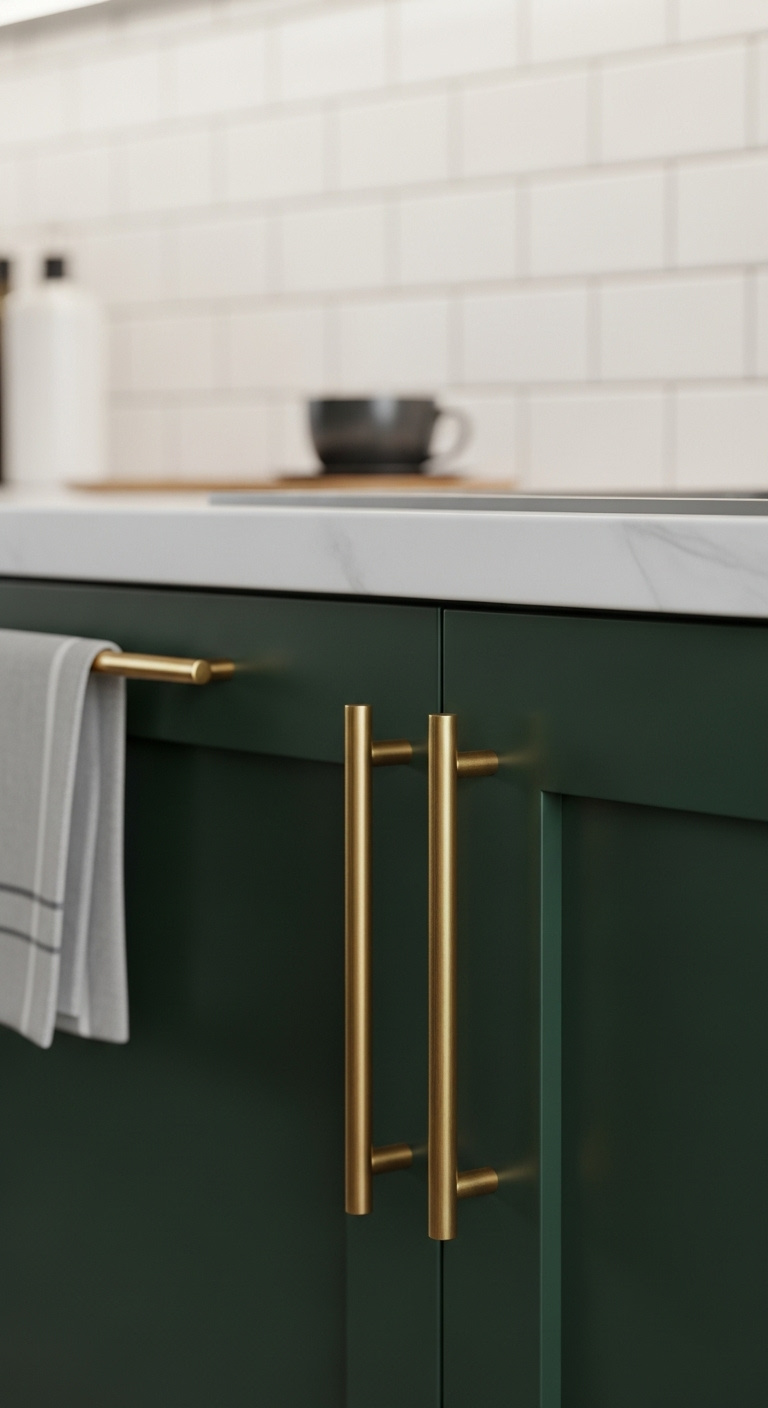
An easy upgrade! Save this idea for your office kitchen or bathroom.
One of the fastest and most impactful budget upgrades involves swapping out generic, builder-grade hardware for something more stylish. Think of hardware as the jewelry of your space. Changing the knobs on a cabinet, the faucet in a kitchenette, or the handles on a door can dramatically alter the look and feel of the entire room.
- Materials Needed: New cabinet hardware (knobs/pulls), screwdriver, measuring tape (if changing handle sizes).
- Step-by-Step Directions:
- Count and Measure: First, count exactly how many knobs and pulls you need to replace. If you are swapping out handles (pulls with two screws), be sure to measure the center-to-center distance between the screw holes to ensure your new ones will fit without drilling new holes.
- Choose a Cohesive Finish: Select a hardware finish that complements your overall design aesthetic. Matte black offers a modern and bold look, while brushed brass adds warmth and timeless elegance. For a cohesive, high-end look, stick to one metal finish throughout the space.
- Unscrew the Old: Using a simple screwdriver, remove the existing hardware. The screws are typically found on the inside of the cabinet doors and drawers.
- Install the New: Screw your new hardware into place. This incredibly simple swap can often be completed in under an hour and provides a massive return on investment, making standard furniture or cabinetry look custom.
Pro-Tip: Don’t forget about lampshades! Swapping a dated, generic lampshade for a new one in a modern shape (like a crisp drum shade) or an interesting texture is a cheap trick to make an old lamp look brand new and expensive.
6. Make a Statement with Large-Scale Art (Without the Large Price Tag)
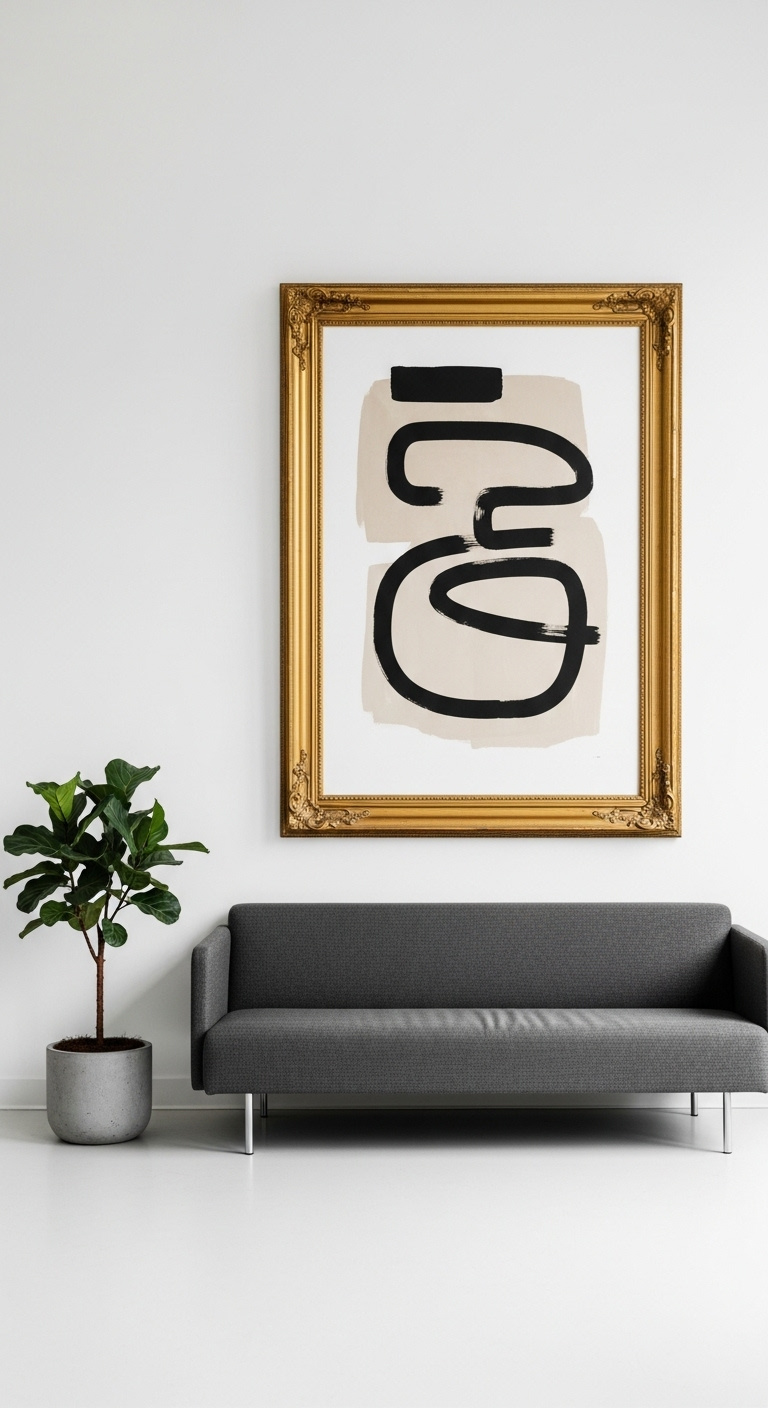
Get this high-impact, low-cost art idea on your ‘Office Decor’ board!
A single piece of large-scale art creates a powerful focal point and makes a room feel more curated and luxurious than a cluster of small frames. While oversized art from a gallery is incredibly expensive, you can achieve the same high-impact look for a fraction of the cost with a little creativity.
- Materials Needed: Large thrift store frame, poster putty or nails for hanging, a large art print (or canvas and paint for DIY).
- Step-by-Step Directions:
- Source Your Frame First: Begin your project at thrift stores, flea markets, or estate sales. Look for the largest, most interesting and ornate frame you can find. Ignore the ugly art that’s inside it; you’re only interested in the frame.
- Find Your Art: Search online museum archives for “public domain art.” You can find thousands of stunning, high-resolution vintage paintings, sketches, and illustrations that are free to download and print. Have your chosen piece printed at a local print shop to fit the dimensions of your thrifted frame.
- Alternative – Go DIY: If you prefer a modern look, buy a large, blank artist’s canvas that fits your frame. Create your own simple, minimalist abstract art using just 2-3 colors from your room’s color palette. You don’t have to be a professional artist; simple, bold brushstrokes or geometric shapes look incredibly modern and intentional.
- Frame and Hang: Place your new art in its vintage frame and hang it in a prominent location, such as over a sofa in a waiting area, above a credenza, or on the main wall of your office to create an immediate “wow” factor.
Pro-Tip: Adding a mat to any picture, even a small one, instantly makes it look more professional and important. Buy pre-cut mats or have one custom-cut at a craft store for a luxurious and easy upgrade.
7. Bring Life and Luxury with Greenery
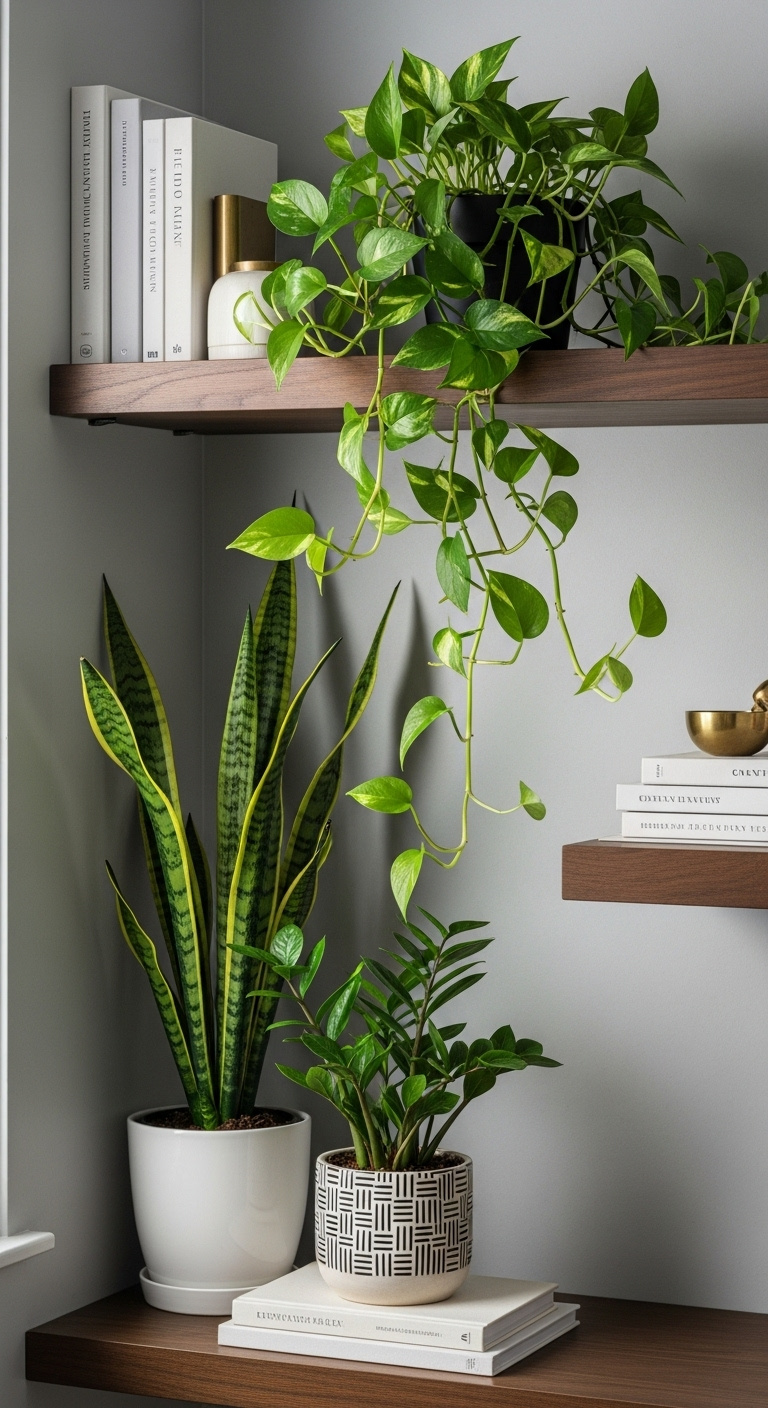
Save this plant styling inspiration for a breath of fresh air!
Plants are a designer’s secret weapon for making a space feel finished, fresh, and sophisticated because they add life, sculptural form, and a touch of natural luxury. A few well-placed houseplants can transform a sterile office into a vibrant and calming sanctuary, boosting moods and purifying the air.
- Materials Needed: 2-3 low-maintenance houseplants (see list below), stylish pots with drainage holes, potting soil if needed.
- Step-by-Step Directions:
- Choose Easy-Care Plants: You don’t need a green thumb. Start with hardy plants that are known to thrive in typical office environments with lower light. Great, nearly indestructible options include Snake Plants, ZZ Plants, Pothos, and Spider Plants.
- Invest in Good Pots: This is key. Skip the flimsy plastic nursery pots they come in and transfer your plants to more substantial ceramic, terracotta, or fiberstone pots that coordinate with your decor. This small detail makes a huge difference in how polished the final look is.
- Vary Height and Shape: Select a mix of plant varieties to create more visual interest. Combine something tall and sculptural (like a Snake Plant), something full and bushy, and something that trails elegantly (like a Pothos placed on a high shelf).
- Style in Groups: For the most impactful look, group plants in clusters of three at varying heights. This is a classic design trick called the “rule of thirds.” You can also place them strategically to fill empty corners, style bookshelves, or add life to a reception desk.
Pro-Tip: Always pot your plants in containers that have drainage holes at the bottom. This is the number one key to keeping them healthy and preventing root rot. You can place the functional pot inside a prettier, decorative cachepot that doesn’t have holes.
https://www.pinterest.com/pin/modern-home-decor-ideas–848295279844277624/?short_form_video
Key Takeaways: Your Quick Guide to a High-End Business Interior
- Focus on Impact: Prioritize large-scale items like a correctly sized area rug, a single statement mirror, or one piece of oversized art over lots of small, cheap decor items. One great piece has more power than ten mediocre ones.
- Layer Everything: Layer your lighting (ambient, task, accent), layer your textures on furniture (velvet, wool, linen), and layer old items (like a thrifted frame) with new items for a curated, sophisticated look that feels collected over time.
- Mind the Details: The smallest upgrades often provide the biggest bang for your buck. New cabinet hardware, stylish lampshades, and modern light fixtures are what create that polished, custom feel.
- Declutter Relentlessly: A clean, organized, and uncluttered space is the absolute foundation of any expensive-looking room. It costs nothing but has the greatest and most immediate effect.
FAQs About Small Business Interior Inspiration
What are the 7 basics of interior design?
The seven basic elements of interior design are Space, Line, Form, Light, Color, Texture, and Pattern. A well-designed room achieves harmony by successfully balancing these core principles. For a business, this means creating a functional layout (Space), using strong vertical or horizontal lines (Line & Form), layering illumination (Light), setting a specific mood with a cohesive palette (Color), adding physical and visual depth (Texture), and introducing visual interest with art or textiles (Pattern).
What is the 70/30 rule in interior design?
The 70/30 rule is a simple, beginner-friendly guideline for creating a balanced color palette. It suggests that 70% of your room should be a dominant color (usually found on walls and large furniture), and 30% should be a secondary, accent color (used for cushions, art, decor, and accent chairs). This prevents the space from feeling overwhelming and is a perfect starting point for designing your business interior.
How can I make my small office look professional on a budget?
To make a small office look professional on a budget, focus on three key areas. First, relentlessly declutter and organize everything for a clean, polished foundation. Second, implement a layered lighting scheme with a mix of overhead, desk, and accent lights to create warmth and ambiance. Third, invest in one single statement piece, like a comfortable and stylish client chair or a large piece of interesting art, to create an impactful and memorable focal point.
Final Thoughts
Transforming your small business space from “budget” to “brilliant” has very little to do with the amount of money you spend. It’s about the thoughtful, strategic choices you make. By focusing on the high-impact principles of lighting, texture, scale, and detail, you can create a professional, inviting, and expensive-looking interior that truly reflects the quality of your brand. You have the creativity and resourcefulness to run a business—now you have the tools to design a space that’s just as impressive.
What’s the best budget-friendly design trick you’ve used in your own workspace? Share your wins in the comments below

