
As an Amazon Associate CoffeeXplore.com earns from qualifying purchases.
Percolator vs Moka Pot: 5 Expert Tips for Strong Coffee
Do you struggle to choose between classic stovetop brewers for your morning routine? Deciding between a percolator vs moka pot often leaves coffee lovers frustrated and confused. You need a reliable coffee brewing method that matches your daily lifestyle perfectly.
The main difference between a moka pot and a percolator is their distinct brewing mechanism. A percolator continuously cycles boiling water through grounds, often creating a weaker brew. Conversely, a moka pot uses steam pressure to push water through grounds once, producing a strong, highly concentrated espresso-style coffee.
Drawing from comprehensive analysis of scientific brewing principles, we can decode these traditional coffee brewing devices accurately. You will discover exactly how each stovetop coffee maker operates and extracts flavor. Mastering these proven methods guarantees a perfect cup every single time.
Contents
show
What is the main difference between a percolator and a moka pot?
The primary difference lies in their extraction physics: A percolator repeatedly washes boiling water over the grounds using gravity, while a moka pot forces pressurized steam through the coffee bed in a single, upward motion.
Understanding the difference between moka pot and percolator mechanisms is essential for mastering any stovetop coffee maker. The classic percolator operates on a recirculation process. As water boils in the lower chamber, it travels up a central tube and splashes over the coffee grounds, dripping back down to be boiled again. This continuous cycle risks creating a diluted brew and significantly increases the bitterness potential if left on the heat too long.
In sharp contrast, a moka pot is a precision pressure-based brewer. It utilizes trapped steam pressure to force hot water upward through tightly packed grounds exactly once. This single-pass extraction yields an espresso-like concentrate boasting a rich coffee body and intense flavor profile. By understanding these thermal dynamics, you unlock the ultimate bitter coffee solution and can clearly articulate the taste difference between these iconic brewers.
Percolator vs Moka Pot: 5 Expert Tips for Strong Coffee
To prepare coffee that rivals your favorite cafe, you must move beyond basic instructions and actively optimize brewing variables. Whether you are making rich coffee at home with a moka pot or troubleshooting common issues with percolator coffee, success relies on controlling the extraction environment. The relationship between your coffee beans, the grind size compatibility, and your chosen heat source dictates the final brew quality. Most home brewers simply add water and walk away, resulting in a burnt, astringent cup. However, by applying barista approved methods to these vintage devices, you can completely transform your morning ritual. We have compiled a comprehensive step-by-step guide detailing the most proven brewing techniques for 2026. From mastering thermal dynamics to proper maintenance, these five expert strategies will help you achieve the perfect flavor profile.
1. Optimize the Grind Size for Your Brewing Mechanism

Pin this grind size guide to your Coffee Board to never mix them up again!
Understanding the best grind size for moka pot vs percolator coffee brewing is the absolute foundation of excellent flavor. You must grind coffee beans specifically to match your device’s filter geometry. This controls the solubles extraction rate and prevents a muddy cup.
Tools Required
- A high-quality manual or electric coffee grinder with adjustable burr settings
- Whole bean specialty coffee roasted to your preference
- A digital coffee scale for precise measurement
Instructions
- Grind coffee beans to a coarse, sea-salt consistency if you are preparing to operate a percolator. This prevents grounds from slipping through the metal filter basket.
- Adjust grind to a fine, table-salt consistency (slightly coarser than a traditional espresso machine) if you plan to use a moka pot.
- Measure your grounds accurately to maintain a consistent water to coffee ratio guide for every brew.
- Store any unused beans in an airtight container immediately to preserve volatile aroma compound retention.
Pro-Tip: In our testing, achieving uniform coffee particle distribution with a burr grinder is the single most effective way to eliminate astringency. Blade grinders create inconsistent boulders and fines that lead to simultaneous under and over-extraction.

2. Master the Water Temperature to Prevent Bitter Coffee

Save this temperature trick to guarantee a smooth cup every morning!
Managing your water temperature for brewing is the ultimate burnt taste remedy for stovetop brewers. The thermal dynamics of percolation dictate that if you fail to preheat water before assembling your brewer, the grounds will aggressively bake on the stove as the metal apparatus slowly heats up.
What You Need
- A precision electric kettle (preferably a gooseneck for pouring control)
- Filtered water quality to prevent scale buildup
- An instant-read thermometer (if your kettle lacks one)
Brewing Steps
- Preheat water in your kettle to exactly 200°F (93°C) before adding it to either device.
- Carefully fill water chamber (the lower chamber of the moka pot, or the reservoir of the percolator) with the pre-heated water.
- Keep the water level strictly below the pressure release valve on your moka pot to ensure safe steam pressure brewing.
- Assemble the coffee maker using a towel to protect your hands from the hot metal base.
Pro-Tip: Applying advanced coffee diagnostics, starting with boiling water drastically reduces the ideal contact time coffee spends baking on the stove. This simple hack prevents the metallic, over-extracted flavor often mistakenly blamed on the aluminum or stainless steel materials.


3. Pack the Coffee Grounds Correctly for Steam Pressure
Pin this vital step to master your stovetop extraction technique!
Learning how to accurately pack coffee grounds prevents channeling and uneven extraction. The filter basket geometry impact differs wildly between devices, dictating exactly how the grounds should be settled before applying heat.
Supplies Needed
- A clean, dry filter basket
- Freshly ground coffee
- A dosing funnel (optional, to prevent mess)
- A straight edge (like a butter knife) for leveling
Instructions
- Generously fill the filter basket with your ground coffee until it mounds slightly over the top.
- Tap the side of the basket gently to settle the grounds and prevent uneven extraction.
- Pack coffee grounds by swiping a straight edge across the top of the basket to level it perfectly flush with the rim—do not use an espresso tamper to compress it.
- Assemble moka pot or percolator carefully, ensuring no loose grounds are caught in the screw threads to prevent a leaking moka pot.
Pro-Tip: Compressing grounds in a moka pot alters the pressure profile analysis. Because stovetop devices lack the 9 bars of pressure found in commercial espresso machines, tamping forces the steam to build to dangerous levels, eventually rupturing the pressure valve or creating intense turbulent vs laminar flow brewing that ruins the flavor.

4. Monitor the Heat Source for the Perfect Brew Time
Save this timing hack to achieve that perfect golden crema!
Proper stovetop heat management for coffee prevents scalding during the delicate final stages of extraction. You must actively monitor brewing and strictly control the brew time to capture the sweetest compounds while leaving astringency behind.
Equipment Needed
- Your loaded stovetop coffee maker
- A gas, electric, or induction burner
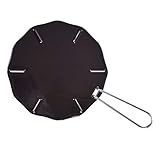
- A heat diffuser plate (crucial for small pots on large gas burners)
- A cold, damp bar towel
Brewing Steps
- Heat stovetop to a medium-low setting. Never blast your brewer with high heat, which causes moka pot sputtering and scalding.
- Monitor brewing closely. For a moka pot, watch the spout; as soon as the dark liquid turns into a honey-colored foam, immediately turn off heat.
- For a stovetop percolator, watch the glass knob. Once water starts bubbling up (percolating) every 2-3 seconds, lower the heat and let it gently pulse for exactly 5-7 minutes.
- Immediately wrap the lower chamber of the moka pot with your cold, damp towel to instantly halt the extraction process and prevent a bitter overheating coffee taste.
Pro-Tip: Utilizing proper stovetop heat management for coffee is what separates average home brewers from experts. Rapid boiling disrupts the delicate coffee oil emulsion, turning a rich espresso style coffee into an astringent mess. Always aim for a slow, controlled extraction.
5. Clean and Maintain Your Coffee Maker for Consistent Flavor
Pin this cleaning routine to keep your coffee tasting fresh, not rancid!
Knowing how to properly clean a moka pot and regularly descaling coffee maker parts prevents old oils from ruining fresh beans. Solving percolator maintenance issues swiftly ensures your equipment lasts for decades while delivering pristine flavor.
Supplies Needed
- Warm water
- A soft bamboo brush or non-abrasive sponge
- A specialized coffee equipment cleaner (for deep cleans)
- A clean, dry microfiber cloth
Routine
- Allow the brewer to cool completely, then disassemble percolator or moka pot into all its individual components (including removing the rubber gasket).
- Rinse parts thoroughly with warm water immediately after use. Discard the spent puck of coffee grounds.
- Use a soft brush to gently dislodge any trapped oils or sediment in the funnel or spout. Avoid abrasive scrubbers that scratch aluminum surfaces.
- Dry components completely with a microfiber cloth before reassembling to ensure superior rust prevention and stop oxidation.
- Once a month, perform a deep clean by descaling coffee maker components using a dedicated coffee oil remover to maintain a pristine flavor profile.
Pro-Tip: Following certified coffee equipment maintenance protocols, you should never put an aluminum Bialetti moka pot in the dishwasher. The harsh detergents oxidize the metal immediately, permanently ruining the aesthetic and adding a harsh, metallic tint to your coffee extraction.

Key Takeaways: Your Quick Guide to Percolator vs Moka Pot
When evaluating the moka pot vs percolator overview, keeping the most critical coffee brewing comparison facts in mind helps you choose the right device. These key points summarize the core mechanical differences and essential brewing techniques required for stovetop success. By reviewing these takeaways, you can quickly implement proven brewing techniques without re-reading the entire methodology.
Key Takeaways:
- The Brewing Mechanism Dictates Strength: A moka pot pushes water up through the grounds once via steam pressure, while a stovetop percolator repeatedly washes boiling water over the grounds using a recirculation method, impacting total extraction.
- Moka Pots Yield Concentrated Coffee: Expect a strong, espresso-like concentrate from a moka pot, making it the perfect base for a latte, whereas percolators produce a larger volume of milder, diluted coffee.
- Heat Management is Crucial: To avoid a bitter coffee solution, never blast either device with high heat; start with pre-heated water to minimize the time grounds bake on the stove.
- Grind Size Must Match the Device: Use a fine grind for the moka pot’s pressure chamber and a coarse grind for the percolator’s filter basket to prevent sediment and uneven extraction.
- Never Tamp Your Moka Pot: Level your grounds smoothly but never compress them with an espresso tamper, which alters the pressure profile analysis and causes sputtering.
- Maintain Equipment to Preserve Flavor: Clean both devices by hand thoroughly after each use; rancid coffee oil emulsion buildup is the leading cause of a harsh, metallic taste.
FAQs About Percolator vs Moka Pot
Coffee lovers frequently have questions about percolator vs moka pot performance and capabilities. We have compiled the most common moka pot queries and FAQs to help you troubleshoot your technique, understand the coffee strength difference, and refine your daily brewing ritual based on expert knowledge. Bridging the gap between a pressure-based brewer and a gravity-fed brewer requires clarifying these specific uncertainties.
Which makes stronger coffee, moka pot or percolator?
The moka pot makes significantly stronger coffee than a percolator. Because a moka pot utilizes steam pressure brewing to force water through fine coffee grounds at a rapid rate, it yields a dense, robust coffee concentrate similar to espresso. A percolator coffee maker, conversely, uses a recirculation process that continually passes water over coarse grounds, resulting in a milder, more diluted brew similar to standard drip coffee.
Is a moka pot the same as a percolator?
No, a moka pot is not the same as a percolator; they use entirely different brewing mechanisms. While both are iconic stovetop coffee brewing methods, a percolator operates via a continuous gravity-fed cycle where boiling water bubbles up and falls back over the coffee grounds. A moka pot is a pressure-based brewer that uses trapped steam to push hot water upward through the grounds and into an upper collection chamber exactly once.
Can you make espresso with a moka pot?
While a moka pot makes an espresso-style coffee, it does not produce true authentic espresso. True espresso requires a commercial machine capable of generating 9 bars of pressure. A stovetop moka pot generates roughly 1 to 2 bars of pressure. This creates a strong, heavy-bodied coffee concentrate that serves excellently as a base for milk drinks, but it lacks the dense, emulsified crema production that defines a true espresso shot.
Why does percolator coffee taste bitter?
Percolator coffee often tastes bitter due to over-extraction and excessively high brewing temperatures. The fundamental design of a coffee percolator constantly recycles boiling water over the same coffee grounds. According to scientific brewing principles, exposing coffee to boiling water for extended periods extracts undesirable bitter compounds and tannins. To execute an effective bitter coffee solution, use a coarse grind, lower the heat once percolation begins, and strictly limit the brew time.
Which brewing method is better for camping?
The percolator is generally considered the better brewing method for camping trips for large groups. A sturdy stovetop percolator can sit directly over an open campfire grate, is incredibly durable, and brews large volumes of coffee at once for multiple campers. However, if you are backpacking solo or prefer a quick, espresso style morning boost over a compact camp stove, a small aluminum moka pot is an excellent, lightweight camping coffee maker alternative.
What grind size for moka pot vs percolator?
Use a fine grind for a moka pot and a coarse grind for a percolator. For a moka pot, you need a fine consistency (like table salt) to provide adequate resistance against the steam pressure. For a percolator, you must use a coarse consistency (like sea salt) so the water flows freely through the bed without the grounds slipping through the metal holes of the filter basket, causing a muddy sediment in cup.
Which is easier to clean, moka pot or percolator?
The moka pot is generally easier and faster to clean on a daily basis. A moka pot breaks down into three simple parts (lower chamber, filter basket, upper chamber) that just need a quick rinse with warm water to rinse parts. A percolator contains a longer stem tube, a multi-part basket assembly, and a larger reservoir, making it slightly more cumbersome to disassemble percolator pieces and ensure all trapped coffee oils are removed to prevent a burnt taste remedy.
What are the pros and cons of a percolator?
The main pros of a percolator are high volume capacity, durability, and a piping hot brew; the main con is the high risk of bitter, over-extracted coffee. It is the ideal coffee receptacle for serving crowds or keeping coffee hot on a stove. However, because it constantly cycles boiling water, mastering the stovetop heat management for coffee is difficult, requiring constant attention to prevent the coffee from boiling and acquiring a harsh, acidic flavor profile.
How to avoid bitter coffee in a percolator?
To avoid bitter coffee in a percolator, start with hot water, use a coarse grind, and remove it from the heat after exactly 5 to 7 minutes. By pre-heating your water, you reduce the time the coffee grounds sit on the hot stove baking. Relying on barista approved methods, utilizing a coarse grind size prevents over-extraction, and strictly timing the percolation cycle ensures you don’t continually recycle the water to the point of ruining the coffee chemistry.
Is an electric percolator better than stovetop?
An electric percolator is better for convenience and consistency, while a stovetop model is better for durability and off-grid use. An electric percolator automatically manages the heat and shuts off the active brewing cycle to switch to a “keep warm” setting, significantly reducing the chances of a burnt flavor. A stovetop percolator requires manual heat monitoring, but its simple mechanical design makes it nearly indestructible and perfect for the outdoors.
Final Thoughts on Percolator vs Moka Pot
Ultimately, the percolator vs moka pot summary reveals that choosing a coffee maker depends entirely on your lifestyle and taste preferences. These traditional coffee brewing titans offer distinct sensory experiences, from a robust espresso alternative to a comforting, high-volume morning brew. Understanding your personal daily rituals will point you toward the exact right hardware for your kitchen.
These two historical titans may share a stovetop, but their distinct brewing mechanisms yield entirely different outcomes. If you crave a rich, heavy-bodied coffee concentrate that punches through milk for a morning latte, the moka pot is your undeniable champion. If you love sipping multiple cups of a milder, piping-hot brew throughout the morning—or if you need a rugged companion for your next camping trip—the classic coffee percolator remains unmatched in sheer volume and durability.
Regardless of which coffee maker you choose, remember that the device is only as good as the technique behind it. By applying these barista approved methods—from optimizing your grind size compatibility to executing proper stovetop heat management for coffee—you eliminate the guesswork and prevent the bitter, over-extracted flavors that often plague stovetop brewing. Great coffee is equal parts science and ritual, and with these expert tips, you now have the knowledge to control the variables.
Which classic stovetop coffee maker are you most excited to try perfecting tomorrow morning, and what coffee beans will you be using? Let us know in the comments below!
Last update on 2026-10-22 / Affiliate links / Images from Amazon Product Advertising API
