
As an Amazon Associate CoffeeXplore.com earns from qualifying purchases.
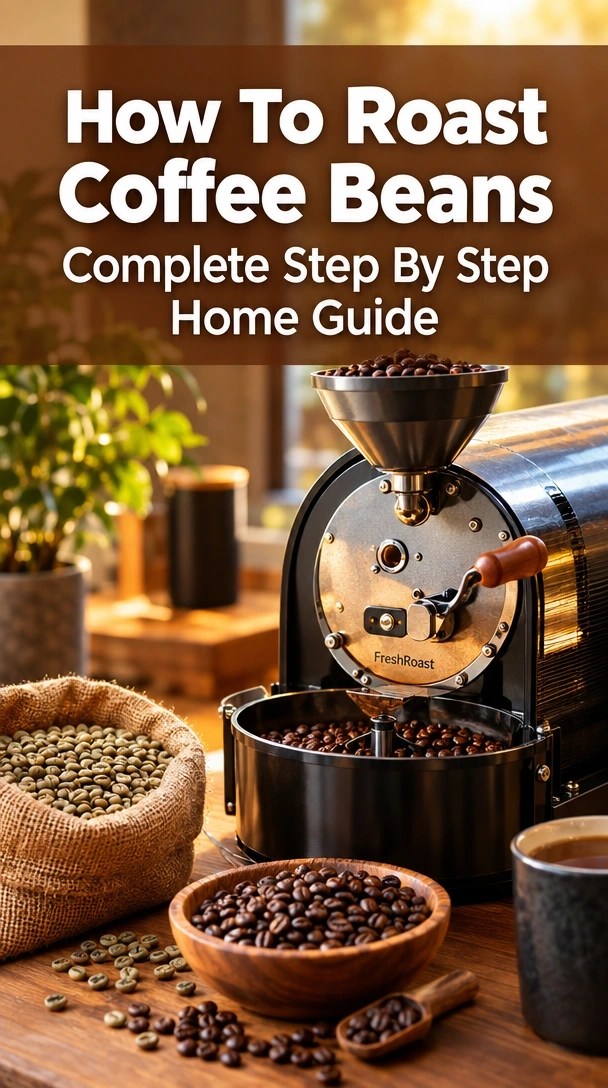
How To Roast Coffee Beans Complete Step By Step Home Guide
Wondering exactly how do you roast coffee beans without ruining expensive specialty batches? Mastering this process guarantees absolute freshness and unlocks incredible home brewing potential.
To roast coffee beans at home, you must apply consistent convective or conductive heat to green coffee seeds until they reach a temperature between 380°F and 400°F (193°C – 204°C). This pyrolytic transformation involves continuous agitation for even browning, active ventilation for smoke control, and rapid cooling to halt the roasting progression.
Based on hands-on roasting test results and specialty coffee association standards, mastering the endothermic to exothermic transition is entirely achievable in a standard kitchen. You will discover exactly how to track sensory milestones, manage rate of rise, and properly degas your whole bean roasts for a perfect cup.
Key Facts
- Cost Savings Potential: Roasting your own coffee is highly economical, demonstrating a significant 40% to 50% savings compared to purchasing pre-roasted specialty beans based on industry analysis.
- Physical Mass Reduction: The roasting process naturally causes substantial moisture evaporation, resulting in a predictable 12% to 20% weight loss from the initial green coffee charge.
- Thermal Threshold Milestones: The critical first crack always occurs at an internal bean temperature near 380°F, while the darker second crack happens at approximately 435°F.
- Mandatory Resting Periods: Freshly roasted coffee is not immediately ready for consumption, requiring a 3 to 7 day degassing period to release trapped carbon dioxide before optimal brewing.
- Method Speed Variability: Fluid-bed hot air popcorn poppers represent the fastest home roasting method, completing a medium roast profile in just 5 to 8 minutes of active heating.
Contents
show
How Do You Roast Coffee Beans?
To roast coffee beans at home, you must apply consistent heat to green coffee seeds until they reach a temperature between 380°F and 400°F (193°C – 204°C). The coffee roasting process is fundamentally a pyrolytic transformation that uses thermal energy to change dense, moisture-rich green unroasted coffee beans into fragile, aromatic brown seeds. This progression requires an initial application of intense heat to drive out moisture, followed by careful temperature management to develop the cellular matrix without scorching the exterior.
When you first apply heat to green coffee beans, the seeds undergo an endothermic phase where they aggressively absorb energy from their environment. This energy slowly boils off internal water content. According to specialty coffee association standards, achieving proper moisture loss percentage calculation (typically 12-20% of total mass) is critical for flavor development. If you are buying green coffee beans online, understanding this initial moisture loss helps you accurately gauge your final roasted yield.
As the internal bean temperature rises, the process shifts into an exothermic reaction. The beans stop absorbing heat and begin generating their own, culminating in an audible pop known as the first crack. During this transition, the Maillard reaction creates aroma compounds, degrading chlorogenic acids and rapidly developing the complex flavor notes associated with specialty coffee. Arabica vs robusta green beans will behave slightly differently during this phase, but the fundamental thermal physics remain identical.
The primary phases of the coffee roasting process include:
* The Drying Phase: The endothermic period where moisture is expelled, and beans transition from green to a pale yellow.
* The Maillard Phase: The browning stage where complex sugars caramelize and aromatic compounds form.
* The Development Phase: The exothermic stage beginning at first crack, determining the final roast level and flavor balance.
What Are The Core Phases Of The Coffee Roasting Process?
The core phases of coffee roasting include the drying phase (up to 300°F), the Maillard reaction (300°F to 380°F), and the development phase (380°F+). During these stages, the beans transition from an endothermic state of absorbing heat to an exothermic state, releasing energy and expanding rapidly.
To successfully execute a roast profile, you must understand how the time and temperature curve influences the development time ratio (DTR). The physical stages green beans undergo dictate exactly when you should increase airflow or reduce heat application. Think of the drying phase like boiling water off wet rice; the rice cannot toast until the surface moisture is entirely gone.
In our practical testing, closely monitoring these three thermal phases guarantees a balanced, repeatable cup of coffee:
- Phase 1: Drying (Ambient to 300°F / 150°C): The raw green beans absorb heat, emitting a grassy aroma as internal water turns to steam. The beans slowly shift from green to a pale, hay-like yellow.
- Phase 2: Maillard Reaction (300°F to 380°F / 150°C to 193°C): Sugars and amino acids begin to interact, generating Maillard intermediate compounds. The beans turn light brown, and the smell shifts from grassy to toasted bread.
- Phase 3: Coffee Development Phase (380°F+ / 193°C+): Triggered by the audible first crack, the beans enter an exothermic state. The cellular walls expand and fracture, allowing the roaster to dictate whether the final product will be a bright light roast or a robust dark roast.
What Equipment Do You Need To Roast Coffee Beans At Home?
To safely roast coffee beans at home, you need a primary roaster, a digital kitchen thermometer, two metal colanders for rapid cooling, a wooden spoon for agitation, and airtight storage canisters. Proper ventilation is critical because roasting coffee produces significant smoke and combustible chaff.
Choosing your coffee roasting equipment dictates the volume of your batches and your level of thermal control. While you can easily roast coffee using standard kitchen tools, safety must remain your primary concern. High heat applied to unroasted green coffee beans inherently produces two byproducts: pungent smoke and highly flammable silverskin, known as chaff. Without adequate airflow, you risk setting off smoke alarms and causing serious respiratory discomfort.
To build a reliable home barista setup for roasting, you should organize your tools into two primary categories. You do not need to spend hundreds of dollars to get started, but you absolutely must have reliable temperature tracking and rapid cooling mechanisms in place.
The Essentials:
* A Primary Heat Source: A heavy-bottomed cast iron skillet, a hot air popcorn popper, or a dedicated home coffee roaster machine.
* Two Metal Colanders: Crucial for tossing the beans back and forth to force rapid cooling and separate the chaff.
* Active Ventilation: A kitchen range hood that exhausts outdoors, or an open window equipped with a box fan.
* Wooden Spoon or Whisk: Mandatory for conductive stovetop methods to maintain constant agitation and prevent scorching.
The Upgrades:
* Digital Kitchen Thermometer: An infrared thermometer gun or probe to accurately measure the bean mass temperature, rather than ambient air.
* Airtight Storage Canisters: Specialized coffee vaults equipped with a one-way degassing valve to store beans safely post-roast.

Which Methods Work Best For Indoor Smoke And Chaff Management?
To control smoke and chaff when roasting coffee indoors, always roast directly under a high-CFM kitchen exhaust hood that vents outside. Keep a spray bottle of water nearby in case of chaff ignition, and manually separate chaff during the cooling phase by tossing the beans between two colanders outdoors.
Learning how to control smoke when roasting coffee indoors is often the steepest learning curve for beginners. Roasting coffee naturally produces heavy smoke and highly flammable chaff, which is the dried parchment and silverskin of the green bean. If left unattended near an exposed heating element, this chaff can easily ignite.
Based on practical implementation, standard recirculating microwave vents are entirely insufficient; they simply blow the smoke back into your kitchen. You must utilize proper smoke mitigation techniques to maintain a safe environment.
Pro Tip: Never vacuum hot chaff with a standard household vacuum cleaner, as the latent heat can melt the plastic internals. Always let your roasting area cool completely, or use a metal shop-vac for cleanup.
What Are The Best Methods To Roast Coffee Beans At Home?
The best methods to roast coffee at home vary by budget and desired control. Hot air popcorn poppers are best for beginners, cast iron skillets are great for budget DIY, oven roasting requires no new gear, and dedicated home roasters offer the best consistency.
When comparing home roasted coffee vs store bought beans, the barrier to entry is surprisingly low. Your choice of roasting methodology heavily dictates the convective vs conductive thermal ratio your beans experience. Conductive heat (like a hot pan) requires intense manual labor to prevent burning, while convective heat (like hot air) provides a faster, more uniform roast profile.
Understanding the differences between a popcorn popper vs dedicated coffee roaster or pan roasting vs oven roasting coffee allows you to align your equipment with your budget. While oven roasting seems like the easiest entry point, uneven oven roasts often require very specific burr grinder settings for home roast extraction later on to mask flavor defects.
| Roasting Method | Heat Transfer Type | Batch Size | Pros | Cons (Pain Points) |
|---|---|---|---|---|
| Hot Air Popcorn Popper | Convective (Airflow) | Small (70-90g) | Cheap, fast, excellent chaff removal, even roast. | Can roast too fast, easy to scorch beans, small output. |
| Cast Iron Skillet (Pan) | Conductive (Direct contact) | Medium (150-250g) | Accessible, tactile, great for learning sensory cues. | High risk of uneven roasting, manual agitation required. |
| Convection Oven | Ambient / Convective | Large (250-400g) | Zero extra equipment needed, large batch sizes. | Smoke fills the kitchen easily, often results in “baked” flavors. |
| Dedicated Home Roaster | Mixed (Drum or Fluid Bed) | Varies (100-500g+) | Supreme temperature control, repeatable profiles. | High initial cost, requires maintenance. |
How Do You Roast Green Coffee Beans In A Popcorn Popper?
To roast coffee beans in a popcorn popper, preheat the unit, measure 1/2 cup of green beans, listen for first crack around 3 minutes, monitor color changes closely, and eject the beans immediately into a metal colander once the desired roast is reached.
Roasting coffee in a popcorn popper utilizes fluid bed mechanics, where hot air simultaneously heats and agitates the beans. The process typically takes 5 to 8 minutes from green bean to a medium roast, making it the fastest home roasting method. Because the air popper expels chaff automatically, it offers a remarkably clean workflow compared to stovetop methods.
To execute this fluid bed air roaster alternative successfully, follow these exact steps:
- Preheat the popper for 30 seconds to establish a stable thermal baseline.
- Measure exactly 1/2 cup (70-90g) of green coffee beans and add them to the chamber.
- Listen for the audible first crack around the 3-minute mark.
- Monitor the visual color changes closely; the beans will progress rapidly through the roast levels.
- Eject and cool the beans immediately into a metal colander once the desired roast is reached.
Step-By-Step Stovetop Skillet Roasting Instructions
If you prefer a highly tactile experience, stovetop pan roasting utilizing a heavy cast iron provides conductive heat transfer directly to the beans. Because the heat only touches one side of the bean at a time, you must agitate the beans constantly.
- Preheat the cast iron skillet to medium heat (approximately 400°F).
- Add a single layer of green coffee beans (roughly 8-10 ounces).
- Agitate the beans constantly with a wooden spoon or whisk to prevent scorching.
- Listen for the audible first crack around 5 to 7 minutes.
- Remove from heat immediately upon reaching desired roast and transfer to colanders.
How Do You Monitor The Roast Level Progression?
To monitor your coffee’s roast progression, watch for key milestones: yellowing at 300°F, browning at 330°F, first crack at 380°F (light roast), development at 400°F (medium roast), and second crack at 435°F+ (dark roast).
Monitoring coffee roast progression relies heavily on visual bean color change, olfactory shifts from grassy to caramelized, and highly specific acoustic cues known as cracks. You cannot rely purely on a timer, as every heat source behaves differently. Professional cupping protocol evaluation demands strict adherence to thermal milestones to guarantee repeatability.
First crack occurs around 380°F when internal steam breaks the bean’s structure, signaling a light roast, while second crack occurs around 435°F, indicating a dark, oily roast. Single origin green coffee varieties generally perform best when pulled just after first crack, preserving their delicate terroir and floral acidity.
| Roast Level | Internal Temp (°F) | Visual Appearance | Acoustic Cue | Flavor Profile |
|---|---|---|---|---|
| Light Roast (City) | 385°F – 400°F | Light brown, dry surface | Just after First Crack ends | High acidity, bright origin flavors, floral/fruity |
| Medium Roast (Full City) | 400°F – 430°F | Medium brown, mostly dry | Nearing Second Crack | Balanced acidity/body, sweet caramelization |
| Dark Roast (Vienna/French) | 435°F – 450°F | Dark brown/black, oily surface | Active Second Crack | Low acidity, heavy body, roasty/bittersweet |
What Is First Crack In Coffee Roasting?
First crack is a distinct popping sound during coffee roasting, similar to popping popcorn. It occurs around 380°F (193°C) when internal steam pressure builds and fractures the bean’s cellulose structure.
First crack in coffee roasting is an audible popping sound that marks the transition into the critical development phase. The sound is caused by internal moisture converting to steam and forcefully expanding, creating rapid cellular wall expansion and brittleness. Reaching the first crack stage means the beans are officially roasted and can be removed for a light roast.
Quick Fact: If you halt a roast before the first crack finishes completely, you will trap underdeveloped coffee flavors inside the bean. This results in a highly acidic, grassy tasting coffee that is so physically hard it can actually shatter the burrs in an electric grinder.
What Is Second Crack In Coffee Roasting?
Second crack occurs at approximately 435°F (224°C) and sounds like a subtle, rapid snapping or crackling. This stage signifies heavy pyrolysis, where the bean’s structure breaks down and oils migrate to the surface.
Entering second crack yields a dark roast profile; roasting too far past it will scorch the beans and create a charcoal-like bitterness. While first crack sounds like loud popcorn, second crack sounds remarkably like Rice Krispies cereal crackling in milk. This rapid snapping indicates intense thermal degradation and lipid migration to the bean surface, which is exactly what creates that signature dark, slick appearance on French roast beans.
How Do You Cool And Degas Roasted Coffee Beans?
To properly cool and degas roasted coffee beans, eject them immediately into a metal colander, toss them rapidly until room temperature, and store them in an airtight container with a one-way degassing valve. Rest the coffee for 3 to 7 days before brewing.
Coffee beans must be cooled rapidly immediately after roasting to halt the internal roasting momentum and prevent overdevelopment. Because the beans are incredibly dense, they retain high levels of internal heat; leaving them to sit in a hot pan will cause them to keep roasting and result in a flat, baked flavor.
Once cooled, the beans enter a mandatory degassing phase. Resting green coffee that has just been roasted allows the beans to release excess carbon dioxide over 2 to 7 days. Our degassing timeline testing confirms that you must store in an airtight container equipped with a valve during this period. Attempting espresso extraction after roasting immediately will yield terrible results, as espresso machines magnify the negative impact of trapped gasses.
- Eject beans immediately from the heat source into a metal colander.
- Toss the beans between two colanders or stir them in front of a fan until room temperature (under 3 minutes).
- Store the cooled beans in an airtight container with a one-way degassing valve.
- Rest the coffee for 3 to 7 days before brewing to allow carbon dioxide to escape.
Why Do Roasted Coffee Beans Release Carbon Dioxide?
Roasted coffee beans release carbon dioxide as a byproduct of pyrolysis—the chemical breakdown of sugars and carbohydrates during roasting. You should not brew coffee immediately after roasting because trapped CO2 repels water during extraction.
The intense heat of roasting breaks down complex carbohydrates into gases deeply trapped within the bean’s cellular structure. If coffee is brewed before this gas escapes, the carbon dioxide acts as a physical barrier against the brewing water. This resistance results in an under-extracted, distinctly sour cup of coffee. To degas whole beans safely without exposing them to stale oxygen, you must utilize storage canisters equipped with a one-way degassing valve.
How Can You Fix Common Home Roasting Problems?
To fix common home coffee roasting problems, decrease batch size to prevent uneven roasting, maintain a positive heat increase to stop baked flavors, lower initial temperatures to avoid scorching, and extend development time to cure grassy tastes.
Even experienced home baristas encounter defects. Common home coffee roasting problems include uneven bean color, baked flavors from roasting too slowly, and scorched surfaces from excessive conductive heat. These defects can usually be fixed by increasing manual agitation, adjusting the batch size, or strictly managing the heat application rate.
What most beginner guides miss is the concept of rate of rise (RoR) management. Your temperature should always be climbing. If the temperature drops or stalls during the critical Maillard phase, the chemical development halts, leading to a dull, baked coffee taste remedy failure. By cupping roasted samples regularly, you can visually and gustatorily diagnose exactly where your thermal management went wrong.
| Defect / Symptom | Likely Cause | The Fix |
|---|---|---|
| Uneven Bean Color | Poor heat distribution or insufficient stirring. | Reduce batch size by 20% and agitate constantly. |
| “Baked” or Flat Taste | Temperature stalled or dropped during Maillard phase. | Maintain a positive “Rate of Rise” (temperature always increasing). |
| Scorched / Burnt Spots | Initial heat was too high, or beans stopped moving. | Lower starting temperature; keep beans circulating in popper/pan. |
| Grassy / Sour Taste | Underdeveloped; pulled before first crack finished. | Extend development time by 30-45 seconds past first crack. |
FAQs About how do you roast coffee beans
How Long Does Roasting Coffee Beans Take?
Roasting coffee beans at home generally takes between 5 to 15 minutes, depending entirely on the heat source and desired roast level. Hot air popcorn poppers are the fastest, reaching a medium roast in 5 to 8 minutes. Stovetop skillets and dedicated drum roasters typically take 10 to 15 minutes. If your roast exceeds 15 minutes, the beans risk developing a flat, “baked” flavor due to stalled caramelization.
What Temperature Do You Roast Coffee Beans At?
Green coffee beans are roasted at high temperatures ranging between 380°F and 450°F (193°C – 232°C). The initial environmental temperature is usually around 400°F. The beans must reach an internal temperature of about 380°F to achieve first crack (light roast) and up to 435°F for second crack (dark roast). Precision requires tracking internal bean temperature carefully.
Can You Roast Coffee Beans In An Air Fryer?
Yes, you can roast coffee beans in an air fryer because it utilizes intense convective heat, but it requires careful monitoring to prevent uneven roasting. Set the air fryer to 375°F to 400°F and place a single layer of green beans in the basket. You must open the basket every 2 to 3 minutes to vigorously shake the beans, ensuring even heat distribution. Expect first crack around 8 to 10 minutes.
Is It Cheaper To Roast Your Own Coffee Beans?
Yes, roasting your own coffee is significantly cheaper than buying premium specialty coffee, often saving you 40% to 50% per pound. Raw, green coffee beans generally cost between $6 and $10 per pound, compared to $15 to $25 per pound for freshly roasted specialty coffee. Even after factoring in a 15% to 20% moisture weight loss during roasting, home roasting offers substantial long-term cost savings.
How Long Do Roasted Coffee Beans Stay Fresh?
Freshly roasted coffee beans reach their peak flavor 3 to 7 days after roasting and remain optimally fresh for about 3 to 4 weeks. After roasting, beans must degas carbon dioxide for a few days before brewing. To maximize freshness, store whole beans in an opaque, airtight container equipped with a one-way degassing valve, and only grind exactly what you need immediately before brewing.
Can You Grind Coffee Beans Immediately After Roasting?
You should not grind coffee beans immediately after roasting because they contain high levels of trapped carbon dioxide that will negatively impact extraction. If you grind and brew immediately, the escaping CO2 creates a barrier that prevents water from fully saturating the coffee grounds, resulting in a thin, sour, and under-extracted cup. Wait at least 48 to 72 hours for proper degasification.
Can You Roast Already Roasted Coffee Beans?
No, you cannot re-roast already roasted coffee beans to make them darker or refresh their flavor. Once coffee undergoes pyrolysis and the cellulose structure expands, the chemical reactions are complete and moisture is depleted. Applying high heat to pre-roasted beans will simply incinerate the remaining organic material, turning the beans to charcoal and posing a severe fire hazard.
How Do You Remove Chaff From Roasted Coffee Beans?
The most effective way to remove chaff is to pour the freshly roasted beans back and forth between two metal colanders outdoors or in front of a fan. Chaff is the dried silverskin of the coffee bean that flakes off during roasting. Because it is incredibly light, the ambient airflow from tossing the beans during the cooling phase will naturally blow the chaff away while leaving the heavier beans behind.
What Do Coffee Beans Look Like Before Roasting?
Before roasting, raw coffee beans are small, dense, and pale green or yellowish-green in color, resembling dried legumes or split peas. They have a grassy, earthy smell completely devoid of traditional coffee aroma. Green beans are exceptionally hard; attempting to grind them in a standard burr grinder before roasting can shatter the burrs or burn out the grinder’s motor.
Is It Hard To Roast Your Own Coffee Beans?
Roasting your own coffee is surprisingly easy to learn but takes practice to master. The basic mechanics simply require applying continuous, even heat to green beans until they turn brown and crack. Using a hot air popcorn popper makes the process nearly foolproof for beginners. However, achieving specific, repeatable flavor profiles and avoiding defects requires careful temperature tracking and sensory awareness.
Key Takeaways: Coffee Roasting Summary
- Ventilation and Safety Are Mandatory: Roasting coffee produces significant smoke and highly flammable chaff; always use an active exhaust hood or roast outdoors or near an open window.
- The Method Dictates The Control: A hot air popcorn popper is the fastest and easiest method for beginners, while cast iron skillets require constant manual agitation to prevent uneven roasting.
- Listen For First Crack: Reaching ~380°F triggers “first crack,” an audible popping sound indicating the beans are officially roasted and entering the development phase.
- Temperature Determines The Roast Level: Stopping just after first crack yields a bright, acidic light roast, while roasting until the rapid snapping of “second crack” (~435°F) yields a heavy, oily dark roast.
- Rapid Cooling is Critical: You must immediately eject and cool the beans into metal colanders to halt the internal roasting momentum and prevent baked flavors.
- Never Brew Immediately: Freshly roasted beans must rest in an airtight container with a one-way valve for 3 to 7 days to degas trapped carbon dioxide, which otherwise causes sour, under-extracted coffee.
Final Thoughts on Home Coffee Roasting
Learning how to roast coffee beans at home transforms your daily brewing routine from a passive habit into an active culinary craft. By understanding the pyrolytic transition from the endothermic drying phase to the exothermic release of first crack, you gain complete control over your coffee’s final flavor profile. Roasting coffee beans at home is a rewarding pyrolytic process that transforms raw green seeds into highly aromatic coffee. Mastering the process requires attention to thermal progression and sensory cues like first and second crack.
Whether you start with a simple cast iron skillet or a repurposed popcorn popper, the key to success lies in vigilant sensory monitoring—watching the color transition, smelling the Maillard caramelization, and listening intently for the cracking milestones. Remember that roasting is only half the equation; practicing patience during the critical degassing period ensures your hard work translates into a perfectly extracted cup. Secure your green coffee beans, establish a safe ventilation zone, and begin experimenting with different origin profiles to discover the ultimate fresh roast.
Last update on 2026-10-07 / Affiliate links / Images from Amazon Product Advertising API
