As an Amazon Associate CoffeeXplore.com earns from qualifying purchases.
How to Make a Spooky DIY Halloween Coffee Filter Wreath for $5
Want Spooky Halloween Decor That Won’t Haunt Your Wallet?
Are you tired of staring at expensive, store-bought Halloween decorations that lack personality and break the bank? Every year, it feels like the cost of getting festive creeps higher and higher. You want your home to look spooky and stylish, but you don’t want to spend a fortune on decor you’ll only use for one month. It’s a frustrating cycle of wanting that “wow” factor without the “ouch” price tag. We’ve been there, which is why we’ve perfected the ultimate solution. We’ve made this exact wreath for under $5 using dollar store finds, and we’re sharing all the time-saving tricks we learned along the way.
What if you could create a high-end looking piece of Halloween decor that is ridiculously cheap, easy to make, and guaranteed to get compliments? You can create a stunning, full-sized DIY Halloween wreath using coffee filters for about $5 and in under two hours. This project requires just a few simple supplies like a wreath form, coffee filters, and a hot glue gun, making it the perfect budget-friendly craft for a cozy autumn afternoon. This simple guide will walk you through every step to create a spooky, fluffy wreath that looks like it came from a boutique.
Why a Coffee Filter Wreath is the Perfect Halloween DIY Project
Before you start crafting, you might wonder what makes this project so special. The secret lies in using humble, everyday coffee filters to create a surprisingly elegant and textured decoration. From our experience, keeping the plastic on a straw wreath form is a key tip to prevent messy straw bits from getting everywhere while you work.
Here’s why this is the best Halloween project you’ll tackle this season:
- Incredibly Budget-Friendly: The core materials—coffee filters and a wreath form—can often be found at the dollar store. You can easily make a large, impressive wreath for around $5, a fraction of the cost of store-bought versions.
- Surprisingly Fast: Don’t let the full, detailed look fool you. You can complete this entire project in about 1.5 to 2 hours. It’s the perfect craft to do while watching a Halloween movie.
- Beginner-Friendly: There are no complicated skills required. If you can fold a piece of paper and use a hot glue gun, you can make this wreath. The process is repetitive and relaxing.
- Highly Customizable: While we’re making a spooky Halloween version, this wreath base is incredibly versatile. You can easily swap out the embellishments to create beautiful wreaths for Christmas, Easter, or everyday decor.
How to Make Your Spooky Coffee Filter Wreath: A Step-by-Step Tutorial
Ready to create your own ghoulishly gorgeous wreath? This is the core of our tutorial, updated for 2025 with the best budget-friendly supply sources and techniques we’ve discovered. We’ve broken down the process into six simple steps, complete with pro-tips and clear photos to guide you. Follow along, and you’ll have a frustration-free crafting experience and a beautiful wreath to show for it. The basic steps are to gather supplies, prepare the coffee filters, glue them to the wreath form, layer for a full look, add spooky embellishments, and attach a hanging ribbon.
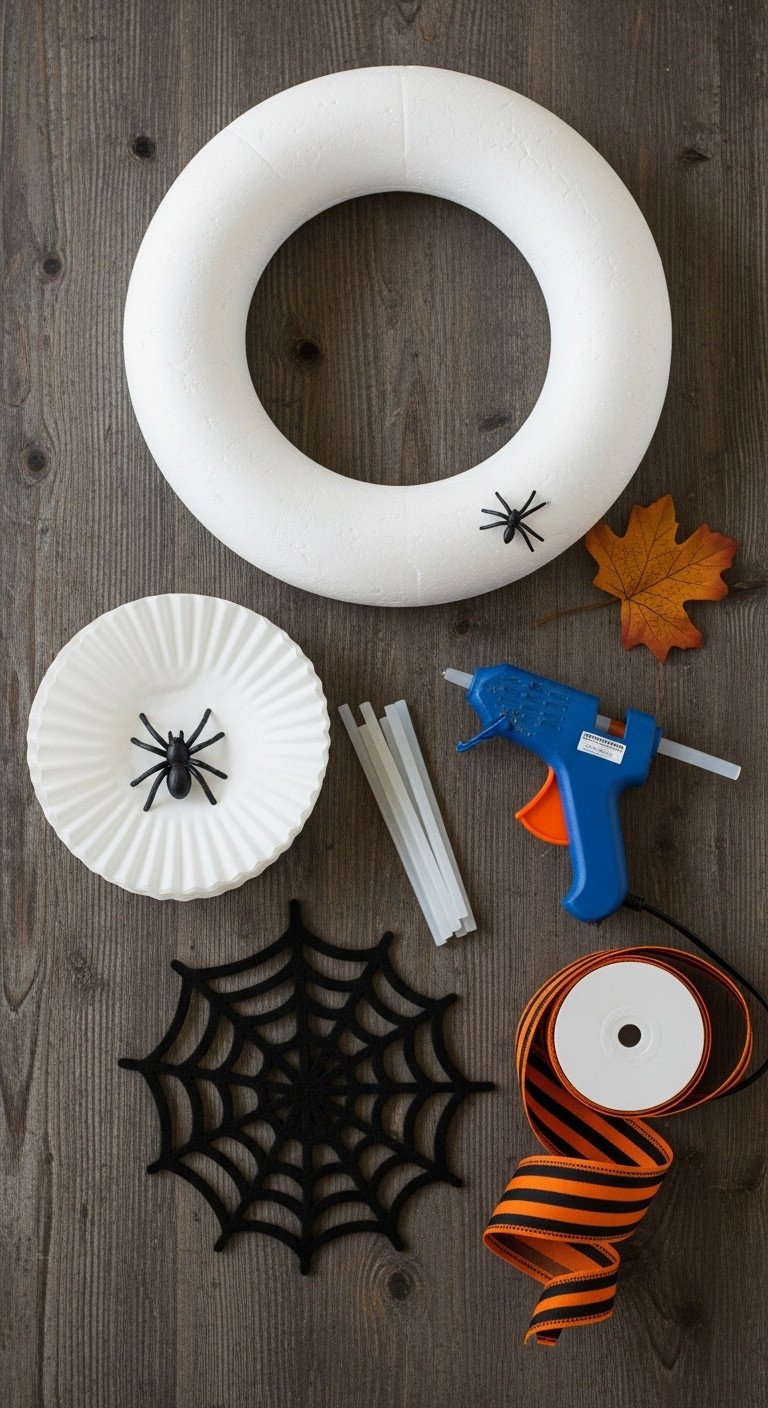
1. Gather Your Ghastly Gear (The Supplies)
Save this idea to your ‘DIY Halloween’ board!
Having all your materials ready before you start makes the process smooth and enjoyable. This list is your complete shopping guide to creating the wreath.
Materials Needed:
- Wreath Form: A 12-inch or 14-inch straw or Styrofoam wreath form is ideal. We recommend a smooth foam form as it’s easier to glue on and provides a cleaner finished look.
- Coffee Filters: You’ll need about 200-300 standard white, basket-style coffee filters.
- Hot Glue Gun & Glue Sticks: A reliable hot glue gun is your best friend for this project. Have plenty of extra glue sticks on hand; you’ll use more than you think!
- Halloween Embellishments: A large felt spiderweb, small plastic spiders, or any spooky decor you like.
- Ribbon: A wide, 2-3 inch ribbon in a Halloween color or pattern for hanging.
Pro-Tip: Check your local dollar store first! They often have wreath forms, coffee filters (in 150-packs), and glue sticks, which is the secret to keeping this project around the $5 mark.
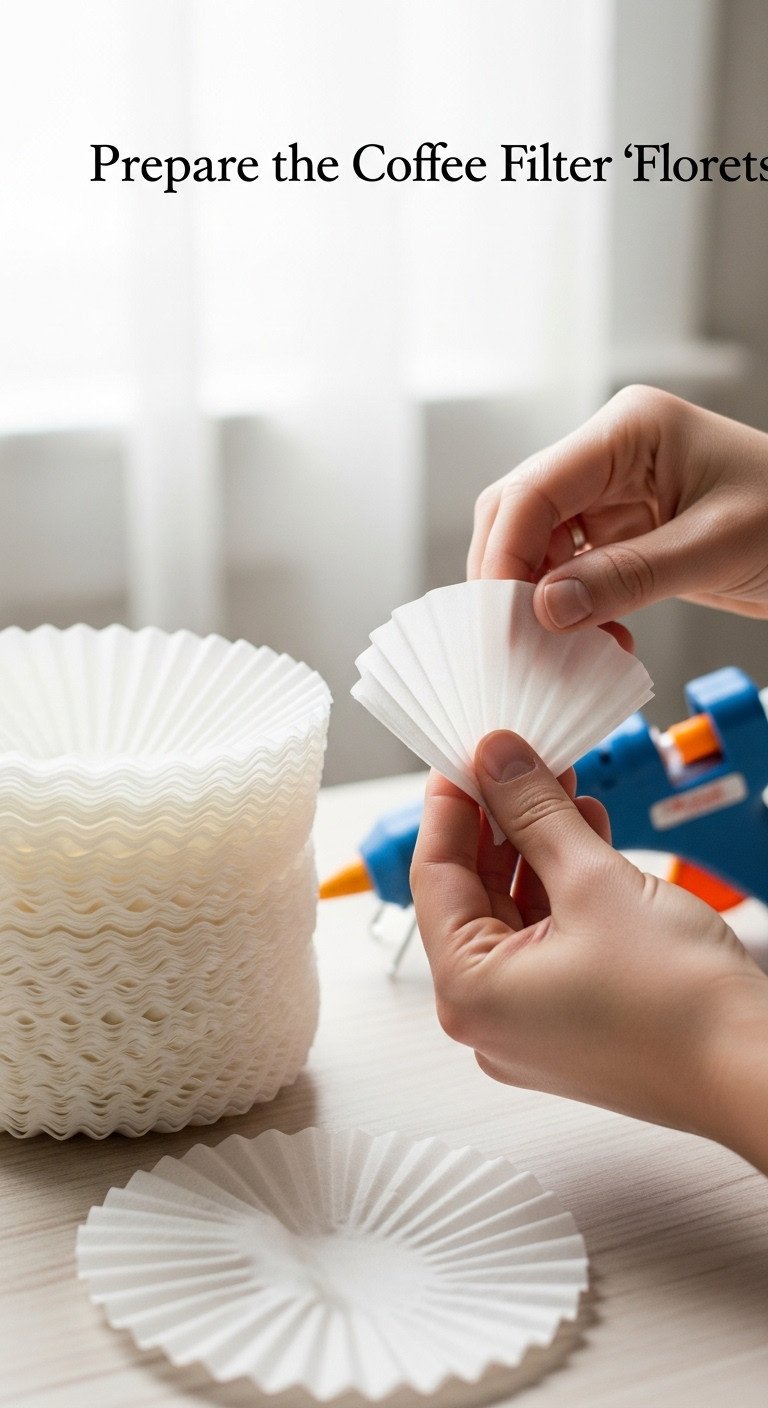
2. Prepare the Coffee Filter “Florets”
Pin this technique for later!
The key to the wreath’s fluffy texture is folding each coffee filter into a cone shape, or “floret.” This is the most time-consuming part, but it’s simple work.
Step-by-Step Directions:
- Take a single coffee filter and flatten it out on your work surface.
- Fold it in half to create a semi-circle.
- Fold it in half again to create a quarter-circle, or a “snow cone” shape. The pointed end is what you will glue to the wreath.
- Do not worry about making them perfect; slight variations in the folds will add to the wreath’s overall texture and charm.
Lesson Learned: Fold all your coffee filters before you even plug in your glue gun. It feels tedious, but doing this prep work first makes the assembly process go much faster. Put on a good Halloween movie and it’ll be done in no time!
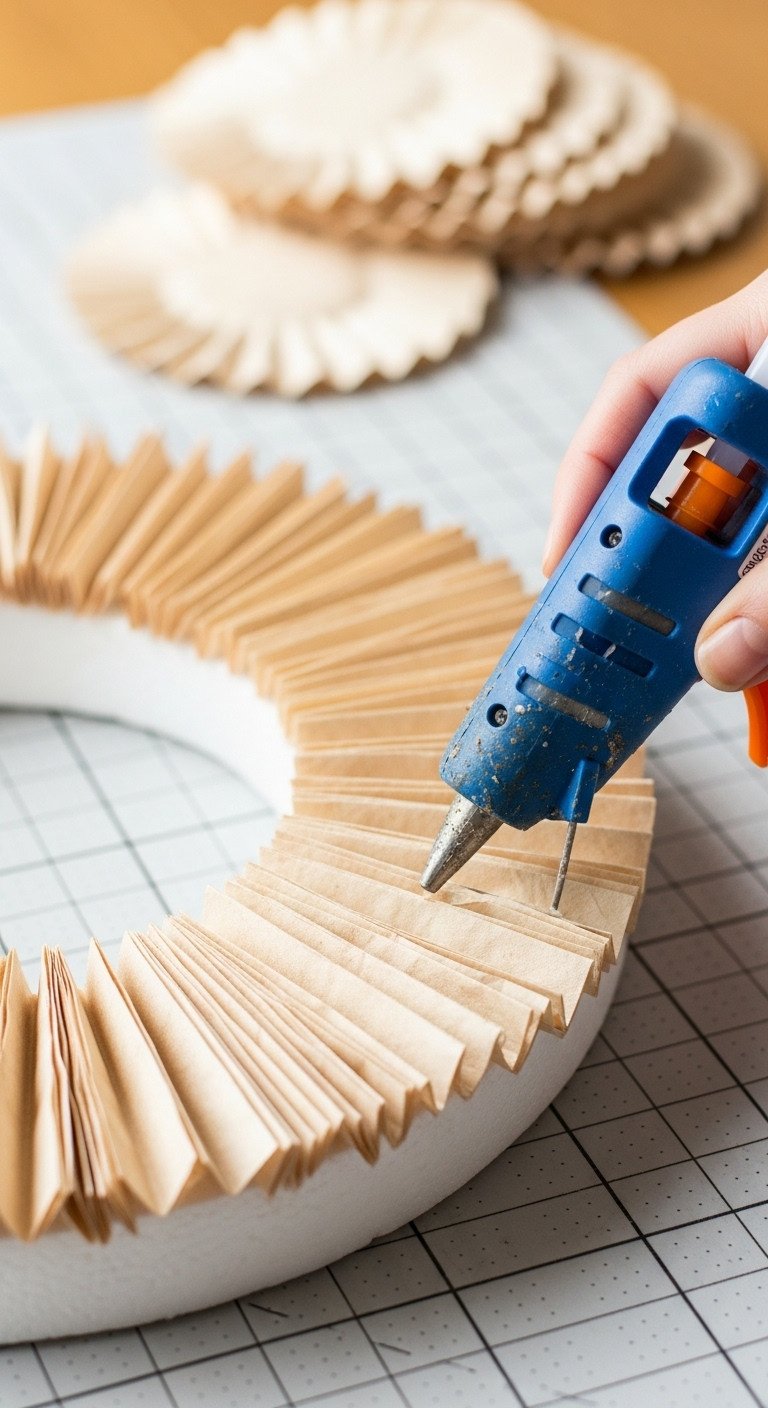
3. Begin Gluing and Attaching Filters
Save this step-by-step tutorial!
Now for the fun part! The best way to get a clean look is to start on the inside circle of the wreath form and work your way outwards.
Step-by-Step Directions:
- Plug in your hot glue gun and let it heat up. We recommend using a mini hot glue gun for better control and precision.
- Apply a small dab of hot glue directly to the pointed tip of one of your folded coffee filter florets.
- Quickly and firmly press the glued tip onto the wreath form. Hold for a second to secure it.
- Begin on the inside circle of the wreath form. Continue gluing filters right next to each other until you have completed one full circle. This creates a clean inner edge.
Pro-Tip: Place the filters very close together. It might seem like you’re using too many, but packing them in tightly is the key to getting that super full, fluffy look and preventing any of the wreath form from showing through.
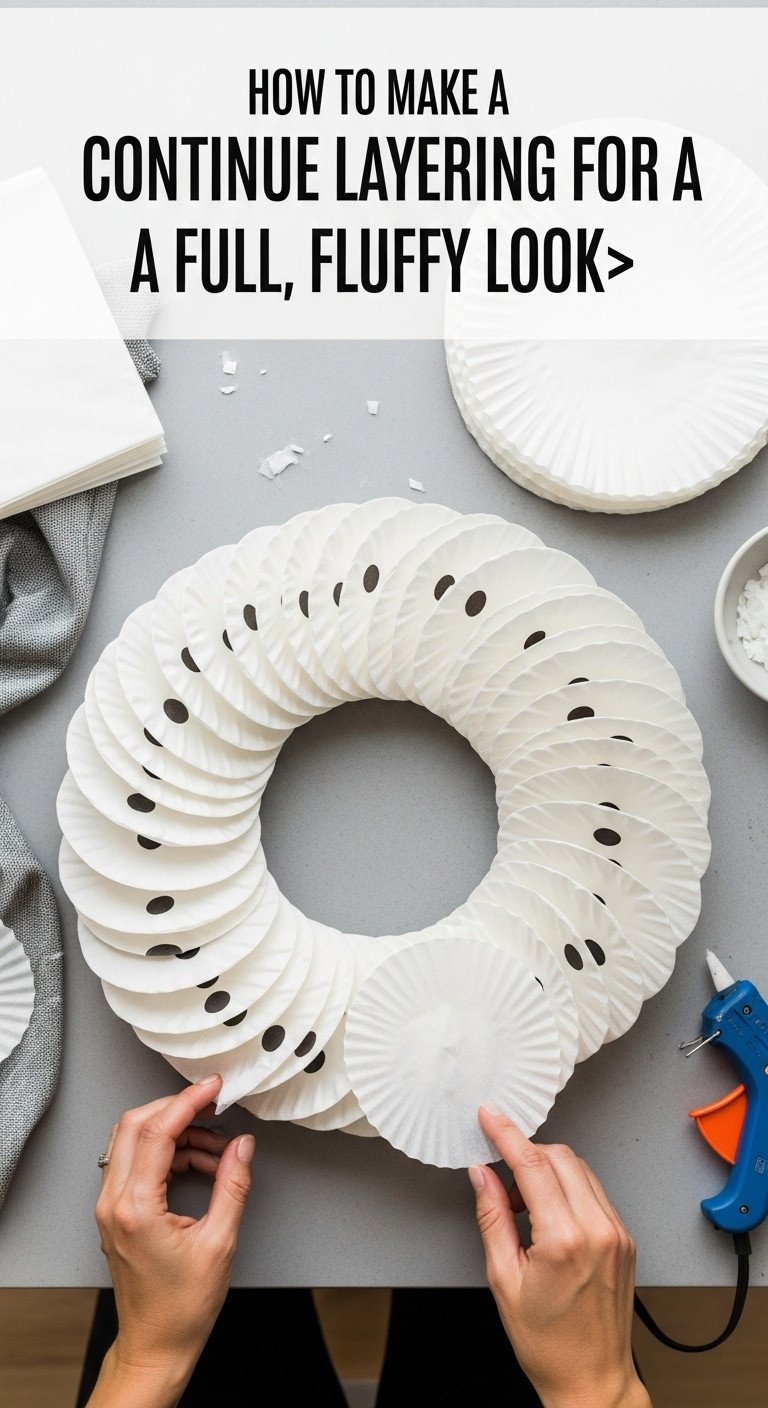
4. Continue Layering for a Full, Fluffy Look
Loving this DIY wreath idea? Save it!
To achieve that dense, cloud-like appearance, you need to build up the filters in overlapping rows. This method ensures complete coverage and maximum volume.
Step-by-Step Directions:
- Once you’ve completed the inner circle, start a new row right next to it, working toward the outside of the wreath.
- Slightly overlap the base of the new filters on the previous row. This clever trick helps hide the glued tips and creates a seamless, ruffled texture.
- Continue this process, working in concentric circles, row by row, until the entire front and sides of the wreath form are completely covered.
- Once covered, use your fingers to gently “fluff” and arrange the filters to create volume and hide any small gaps. You can leave the back of the wreath flat, as this will make it easier to hang flush against a door or wall. You’ll need plenty of hot glue gun sticks for this part!
Pro-Tip: Don’t be afraid to go back and add extra filters into any spots that look a little sparse. The goal is a dense, cloud-like appearance. You can even glue some filters onto the inner and outer sides to make it look fuller from an angle.
5. Add Your Spooky Halloween Embellishments
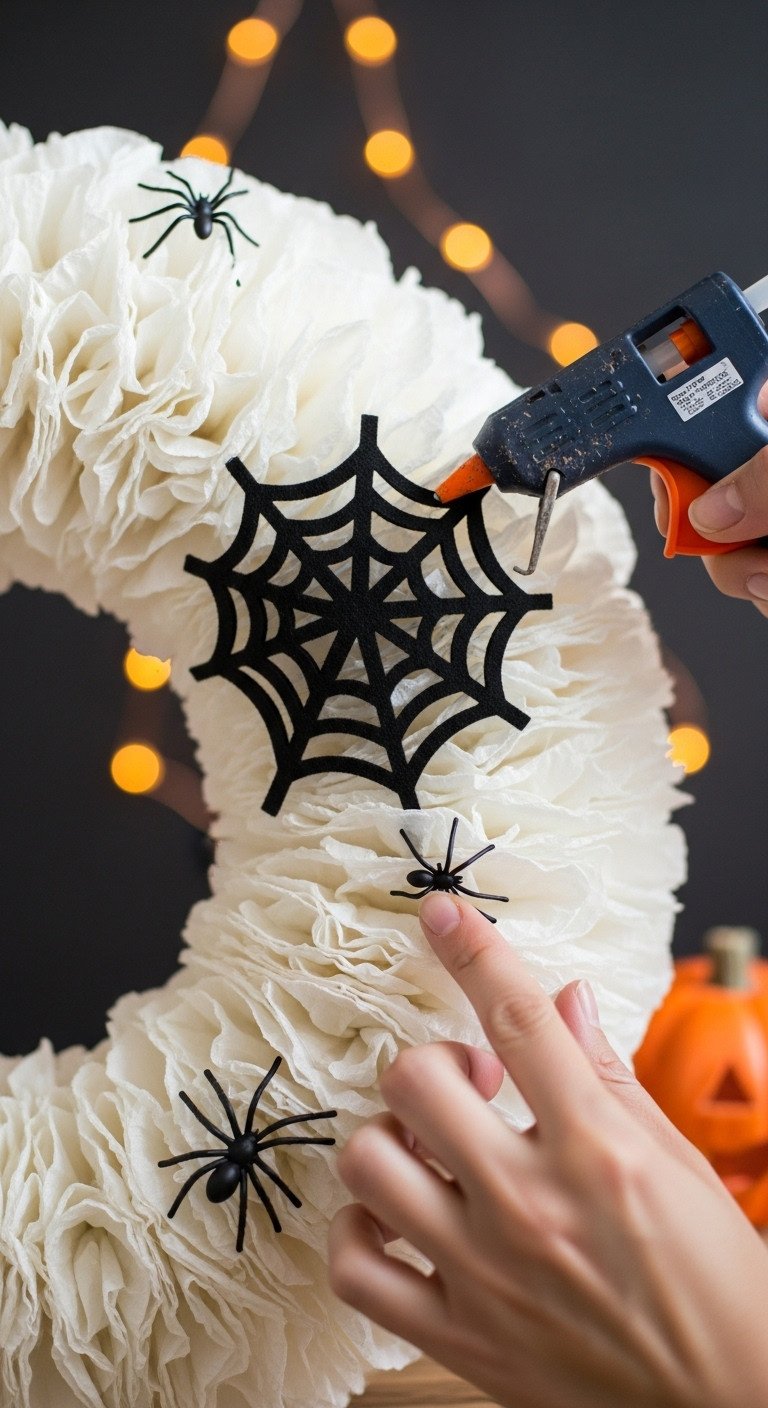
Add this spooky touch to your Halloween decor board!
This is where your creativity comes to life! To decorate your wreath, you simply hot glue your chosen embellishments directly onto the coffee filters.
Step-by-Step Directions:
- Decide on the placement for your main embellishment. A large felt spiderweb Halloween decoration draped over one side looks fantastic and adds a dramatic touch.
- Use your hot glue gun to apply glue to the back of the embellishment.
- Press it firmly into the coffee filters. Be generous with the glue to ensure it holds securely amongst the many ruffles.
- Add smaller details, like plastic spiders, crawling out from the center of the wreath or scattered around the edges for an extra creepy-crawly effect.
Pro-Tip: Lay your embellishments on the wreath before gluing to find the perfect arrangement. This avoids the mistake of having to pull hot-glued items off the delicate filters, which can cause damage.
6. Attach a Ribbon and Hang Your Masterpiece
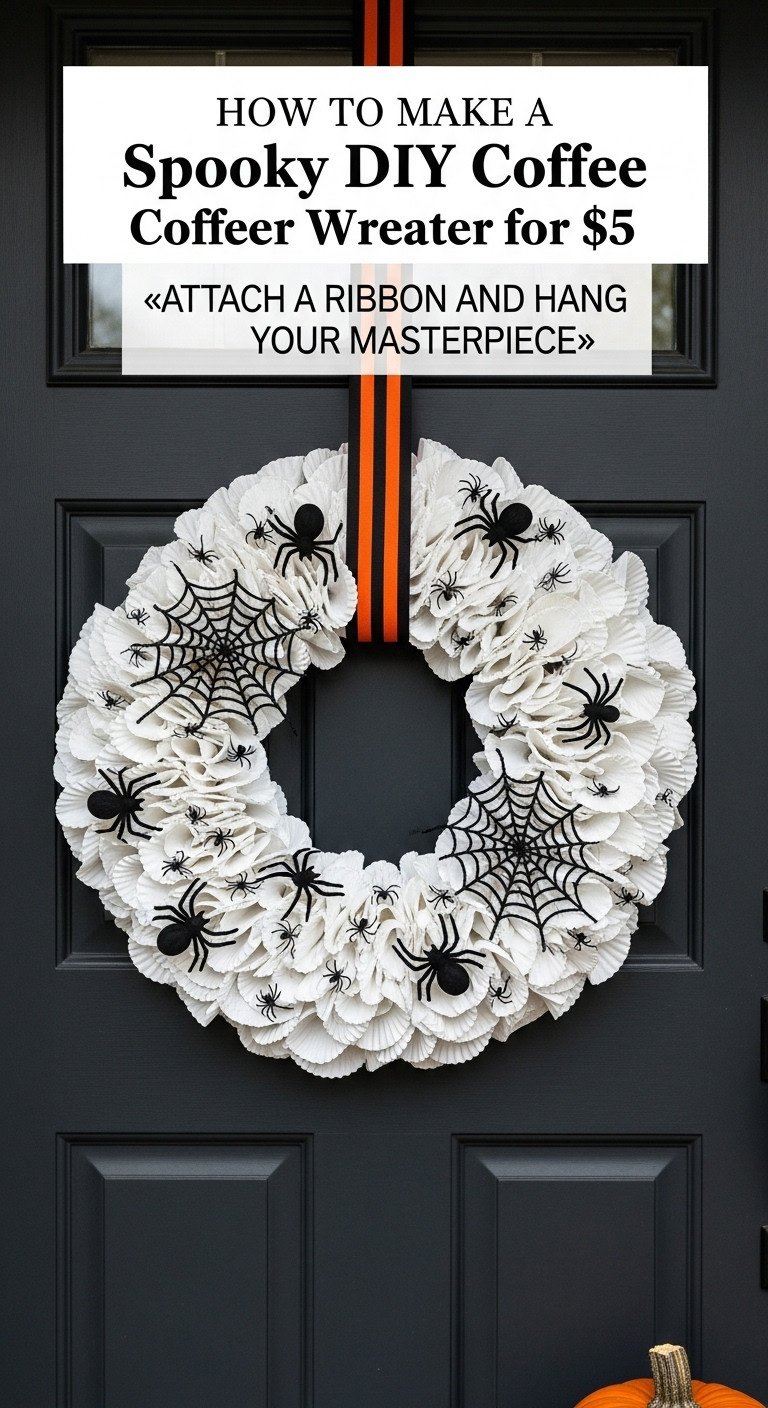
The perfect front door decor! Pin it now!
The final step is to create a hanger so you can proudly display your work. The most secure way is to loop a long piece of wide ribbon around the wreath form itself.
Step-by-Step Directions:
- Cut a long piece of your chosen ribbon (at least 24 inches, depending on how low you want it to hang). A wide black and orange striped ribbon adds a great pop of festive color.
- Loop the ribbon around the top of the wreath form, feeding it between some of the coffee filters so it’s hidden but secure.
- Tie the ends together in a strong knot or a simple, clean bow.
- Hang your spooky new creation on your door or wall using the ribbon loop and get ready for the compliments!
Lesson Learned: Don’t glue the ribbon directly to the coffee filters—it won’t be strong enough to hold the wreath’s weight. Make sure the ribbon loop goes around the sturdy wreath form itself for a secure hold that will last all season.
Key Takeaways: Your Quick Guide to a Perfect Halloween Coffee Filter Wreath
Feeling ready to craft? Here are the most important tips to remember for a successful and stress-free project. This quick summary reinforces the main points for a perfect result.
- Shop Smart: Hit the dollar store first for your wreath form, filters, and glue sticks to stay on budget.
- Prep is Key: Fold all your coffee filters into “florets” before you start gluing to make the assembly process much faster.
- Pack Them In: Place filters very close together for a full, fluffy look with no gaps. Denser is better!
- Work from the Inside Out: Start gluing on the inner circle and work your way out for a clean, professional finish.
- Secure the Hanger: Always loop your hanging ribbon around the sturdy wreath form itself, not just the delicate paper filters.
@brytan.mickelsen Just spent 13 hours and nearly 800 coffee filters making this wreath… it cost me $13 in supplies, and a small piece of my sanity. Would I do it again? Probably not. But could I afford the real one? Also no. So here we are! One day I’ll be the girl who just buys the wreath… until then, catch me DIY-ing and questioning all my life choices. Would YOU do this?? Let me know if you’re brave enough to try it! #FYP #DIYWreath #BudgetDecor #CraftFailOrWin #CoffeeFilterWreath #HomeOnABudget #WreathDIY #ThriftyLiving #TikTokCrafts #DIYStruggles #PinterestMadeMeDoIt #knotandspool
People Also Ask About DIY Halloween Coffee Filter Wreaths
It’s normal to have a few questions before starting a new craft project. We’ve answered some of the most common queries to help you get started with confidence.
How long does it take to make a coffee filter wreath?
A 12-inch coffee filter wreath typically takes between 1.5 to 2 hours to complete. The most time-consuming part is folding all the filters. Once you have a pile of folded “florets” ready, the process of gluing them onto the wreath form goes quite quickly.
Can you dye the coffee filters for a different color wreath?
Absolutely! You can easily dye white coffee filters using food coloring or fabric dye mixed with water. Simply dip the filters in the dye bath, let them dry completely on a wire rack, and then proceed with the tutorial. This is a great way to create wreaths for other holidays like Christmas (red and green) or Valentine’s Day (pink and red).
Is a coffee filter wreath durable enough for an outside door?
A coffee filter wreath is made of paper, so it is not waterproof. It is best suited for an indoor wall or a front door that is completely protected from rain and moisture by a covered porch or storm door. Direct exposure to the elements will cause the filters to wilt and disintegrate.
Final Thoughts
Now you have a spooktacular wreath that looks a million bucks but only cost you five! For just a few dollars and a couple of hours, you’ve created a piece of high-impact Halloween decor that is unique, personal, and incredibly stylish. This project proves that you don’t need a big budget to make your home feel festive and special for the holidays.
What other spooky embellishments would you add to your wreath? Let us know your creative ideas in the comments below
Last update on 2025-12-05 / Affiliate links / Images from Amazon Product Advertising API

