As an Amazon Associate CoffeeXplore.com earns from qualifying purchases.
11 DIY Halloween Coffee Bar Decor Ideas For Spooky Vibes
Do you find your morning coffee routine a little… lifeless? As the leaves start to turn and a crisp chill fills the air, that simple countertop space is practically begging for a touch of seasonal magic. Transforming it into a festive focal point can feel like a huge undertaking, but it doesn’t have to be.
You might be scrolling through Pinterest, seeing picture-perfect Halloween coffee stations, and thinking you need a massive budget or expert-level crafting skills to pull it off. The desire for a cozy, spooky vibe is strong, but the thought of complicated projects or expensive decor can be daunting, leaving you stuck with the same old setup.
The secret to a bewitching coffee corner is simpler than you think. A Halloween coffee bar is a dedicated space for your coffee maker and accessories, decorated with seasonal items. To start, select a theme (like spooky, chic, or farmhouse), gather essential decor like themed mugs, mini pumpkins, and a festive sign, and then layer in personal touches to create a cozy, autumnal vibe for the 2025 season. Based on my years of perfecting seasonal decor, I’ve curated these simple tricks that offer maximum impact for minimal effort.
Craving a Spooky Vibe for Your Morning Brew? Here’s How to Create a Bewitching Coffee Corner
That plain corner of your kitchen is a blank canvas, and with a little creativity, you can transform it into the cozy, spooky coffee hub of your dreams. The key is to start by choosing a theme that reflects your personal style. Whether you love a chic and spooky aesthetic, a cute and groovy vibe, or a rustic farmhouse feel, having a theme will make all your decor choices easier and more cohesive. It’s the foundation for building a Pinterest-worthy coffee station without the stress.
I’ve spent years experimenting with seasonal decor, learning what truly makes a space feel festive without breaking the bank. These ideas are my go-to tricks, curated to give you the most visual impact with simple, enjoyable DIY projects. This guide will walk you through 11 of my favorite ideas, perfect for transforming your coffee corner into a stylish and spooky caffeine hub for the 2025 season.
11 DIY Halloween Coffee Bar Decor Ideas For Spooky Vibes
Ready to brew up some spooky fun? This list of DIY ideas is your ultimate guide to creating a Halloween coffee bar that’s packed with personality. You can achieve a high-end, custom look by focusing on a few key DIY projects that range in style from chic and spooky to cute and groovy. Each idea is beginner-friendly and designed to be both fun to make and stunning to display.
From a statement-making sign to charmingly creepy accessories, these projects are perfect for crafting that Pinterest-worthy coffee corner you’ve been dreaming of. I’ve included some of my favorite pro-tips learned from hands-on experience to ensure your DIY journey is a roaring success. Let’s get started!
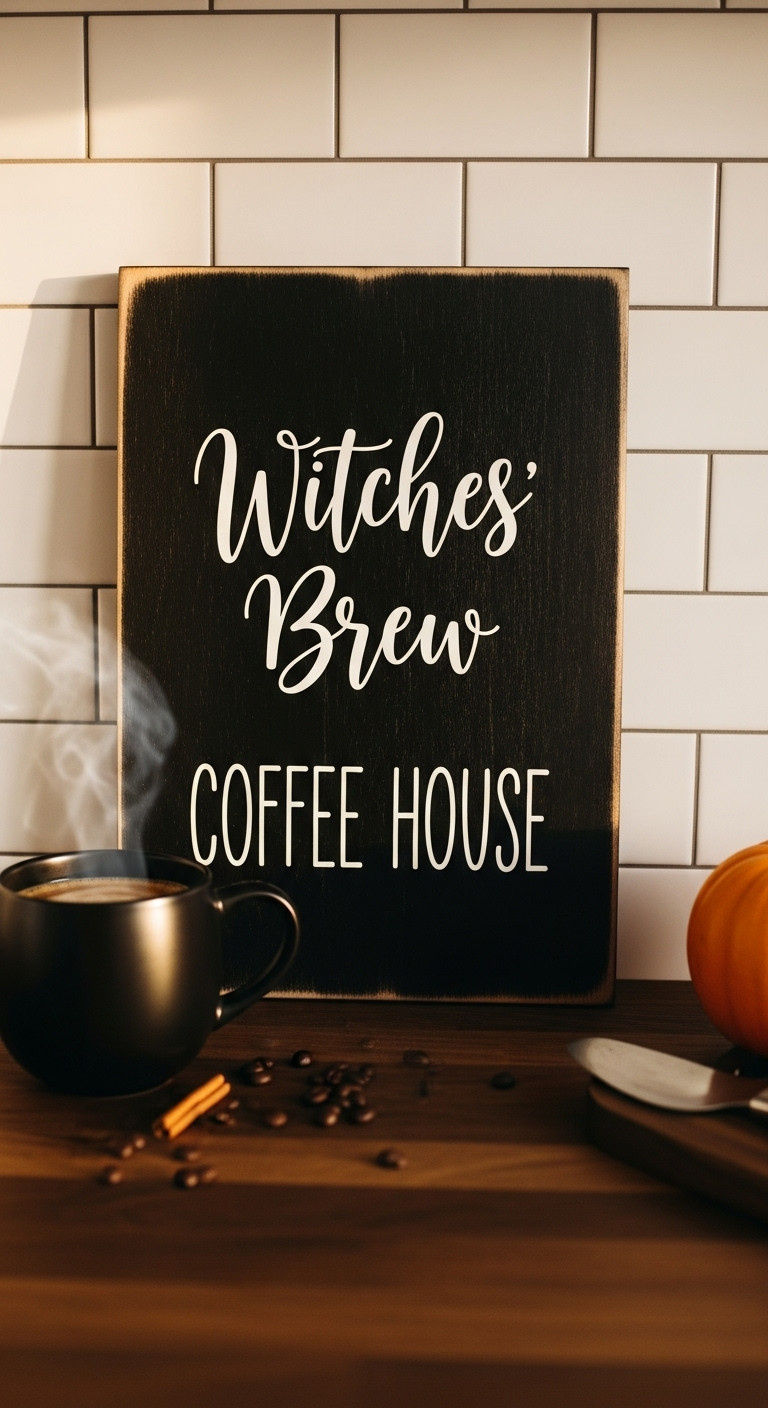
1. Craft a ‘Witches’ Brew’ Themed Sign
Pin this spooky sign idea for your Halloween decor board!
A custom-themed sign is the perfect centerpiece for your coffee bar, and you can easily create a professional-looking piece using a blank wooden board and a paint pen. This project allows you to set the entire witchy, spooky tone for your coffee house theme right from the start.
- Materials Needed: A small wooden board or pre-made blank sign, black craft paint, a white paint pen or chalk marker, fine-grit sandpaper (optional), a pencil, sealant spray (matte finish).
- Step-by-Step Directions:
- If your board isn’t already black, apply two coats of black craft paint, letting it dry completely between coats. For a rustic look, lightly sand the edges with fine-grit sandpaper to distress it.
- Use a pencil to lightly sketch out your design, such as “Witches’ Brew” or “Dead & Breakfast Cafe.”
- Carefully trace over your pencil sketch using a high-quality white paint pen. For best results, use a paint pen with a fine tip for more detailed script.
- Once the paint is completely dry, spray the sign with a matte sealant to protect the design.
- Prop it up behind your coffee maker as the perfect spooky backdrop.
Pro-Tip: If you’re not confident in your handwriting, print your design on paper, rub chalk on the back, place it on the board, and trace the letters. This will transfer a perfect chalk outline for you to follow with the paint pen.
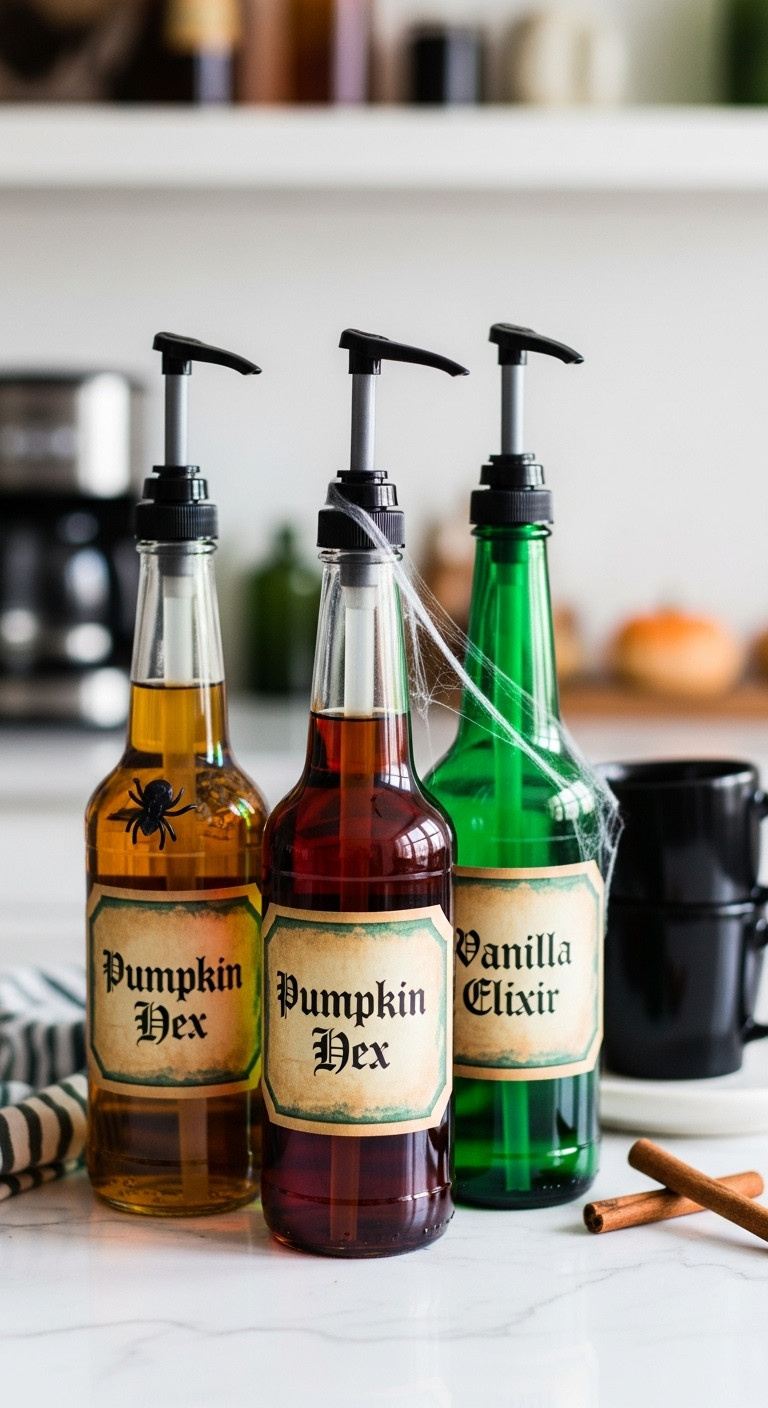
2. DIY Potion Bottle Syrup Dispensers
Save this magical idea to your DIY Halloween board!
To add a unique and functional spooky touch, you can transform ordinary glass bottles into charming potion-style coffee syrup dispensers. This project is a fantastic way to incorporate your theme into the everyday essentials of your coffee bar.
- Materials Needed: Assorted glass bottles (amber or dark colors work best), printable potion label templates, cream-colored paper, a printer, scissors, Mod Podge or glue, a foam brush, and a set of coffee syrup pumps.
- Step-by-Step Directions:
- Thoroughly clean and dry your glass bottles. Ensure the bottle openings are compatible with the syrup pumps you purchased.
- Find and print vintage-style potion labels online onto cream-colored paper. Come up with fun names like “Pumpkin Hex,” “Mocha Macabre,” or “Cinnamon Spell.”
- Cut out the labels. For an aged look, you can lightly singe the edges with a lighter (with extreme caution) or stain them with a damp tea bag.
- Apply a thin layer of Mod Podge to the back of a label and press it firmly onto the bottle. Apply another thin coat over the top to seal it.
- Fill the bottles with your favorite coffee syrups and screw on the pump tops.
Lesson Learned: Make sure you measure the neck of your bottles before ordering syrup pumps. A standard 750ml bottle pump often fits, but it’s always best to double-check to avoid a mismatched set.
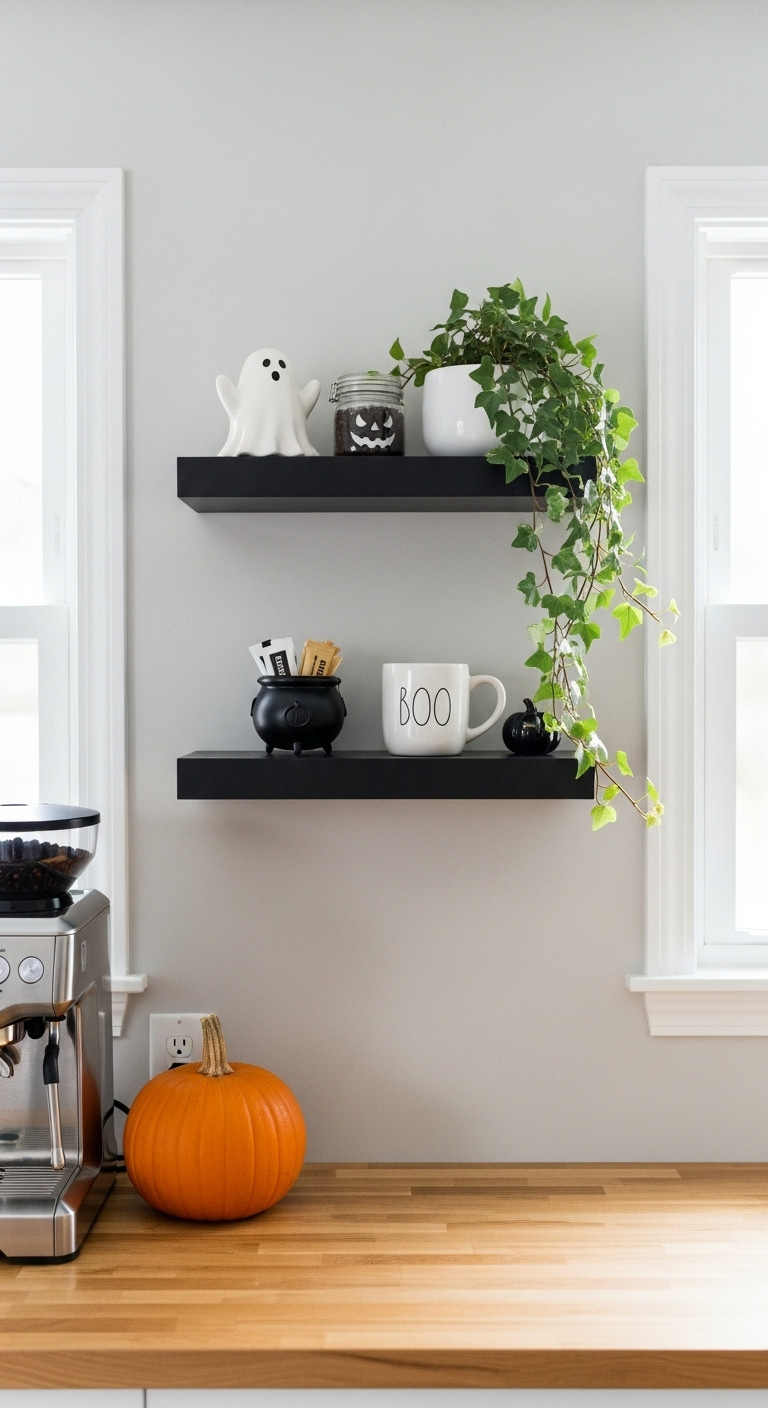
3. Create Ghostly Floating Shelves
Pin this chic shelf styling idea for later!
You can maximize your decorating space by installing simple floating shelves to create a stylish and functional display for your Halloween decor. This approach utilizes the vertical space above your coffee bar, keeping your countertop free from clutter while adding a significant festive impact.
- Materials Needed: A set of floating shelves (black or dark wood), mounting hardware, a drill, a level, and assorted small Halloween decor items.
- Step-by-Step Directions:
- Select a spot on the wall above your coffee bar. Use a level to ensure you mark the holes for a perfectly straight installation.
- Following the manufacturer’s instructions, securely install the floating shelves. You’ll need heavy-duty wall anchors if you aren’t drilling into studs, to ensure the shelves can support mugs and decor.
- Start styling! Begin with the largest items, like a stack of your favorite Halloween mugs or a small framed art print.
- Layer in smaller items. Add mini white pumpkins, cute ceramic ghosts, or a small black cauldron to hold sugar packets or coffee pods.
- Incorporate a touch of green with a small plant, like a trailing ivy or a succulent, to add life to the display.
Pro-Tip: To create a visually balanced look, use the “rule of three.” Group items in threes, varying their height and texture. This simple design principle makes any shelf display look professionally styled.
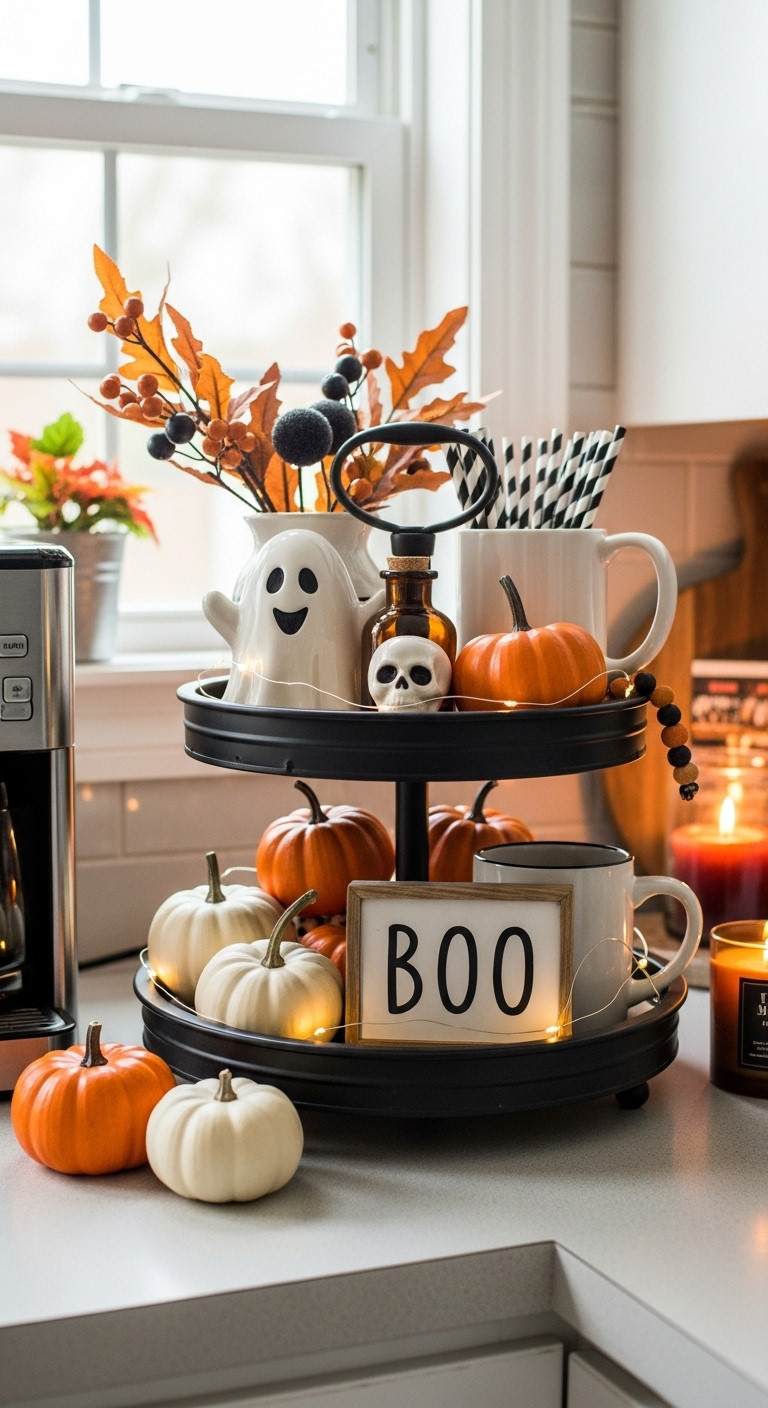
4. Assemble a Spooky Tiered Tray Centerpiece
Love this look? Pin it to your fall decor board!
A tiered tray acts as a perfect compact centerpiece, and you can create a beautiful and festive display by artfully arranging small Halloween decor items. This is a fantastic way to corral smaller pieces into one cohesive and stylish statement.
- Materials Needed: A two or three-tiered tray, a variety of small Halloween decor items (mini pumpkins, ghosts, skulls), a small sign, a themed mug, and filler items like faux leaves or wood beads.
- Step-by-Step Directions:
- Start with a clean tiered tray. A rustic wood and metal tray provides a perfect farmhouse base for fall and Halloween decor.
- Anchor the bottom tier with your largest item, such as a coffee mug or a small sign.
- Fill in the space around the anchor item with medium-sized decor like mini pumpkins and gourds. Distribute colors evenly.
- On the top tier, place smaller, more detailed items. A cute ghost figurine, a small potion bottle, or a stack of themed coasters works well.
- Fill any gaps on both tiers with small filler items. Drape a wood bead garland, tuck in some faux fall leaves, or add some cinnamon sticks for a fragrant touch.
Pro-Tip: Don’t overcrowd the tray. Leaving a little bit of “breathing room” makes the display look more curated and less cluttered. It’s better to choose a few favorite pieces than to try and fit everything on at once.
5. Design No-Carve Chic Velvet Pumpkins
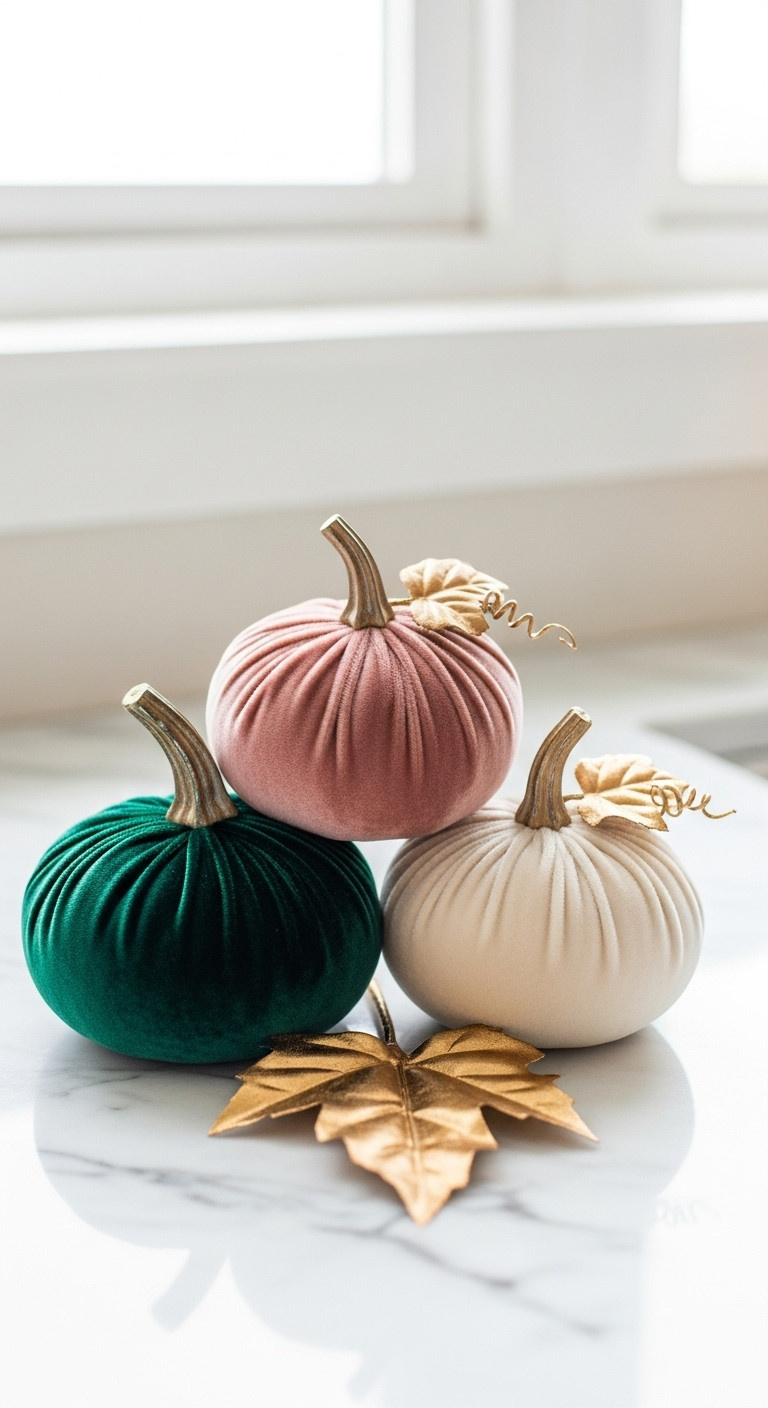
Pin this chic pumpkin idea for an elegant fall look!
For a more sophisticated and elegant take on Halloween decor, you can create stunning, reusable velvet pumpkins without any carving. This simple DIY project adds a touch of luxury and texture to your coffee bar display.
- Materials Needed: Faux craft pumpkins, stretch velvet fabric in your chosen colors, a hot glue gun, sharp scissors, and realistic-looking resin pumpkin stems.
- Step-by-Step Directions:
- Remove the original plastic stem from your craft pumpkin. It should pop off easily.
- Lay your velvet fabric flat, wrong side up. Place the pumpkin in the center.
- Cut a large circle of fabric around the pumpkin, leaving plenty of excess to wrap all the way around it.
- Start by pulling one edge of the fabric up to the stem hole and securing it inside with a generous dab of hot glue.
- Work your way around the pumpkin, pulling the fabric taut and gluing it inside the hole, creating natural-looking pleats as you go.
- Once the entire pumpkin is covered and all fabric edges are glued inside the hole, attach your new resin stem on top with hot glue.
Lesson Learned: Use stretch velvet! Non-stretch fabric is very difficult to work with and won’t give you the smooth, pleated look you want. The stretch is essential for getting a tight, professional finish.
6. Make a ‘Pink-o-ween’ Pastel Ghost Garland
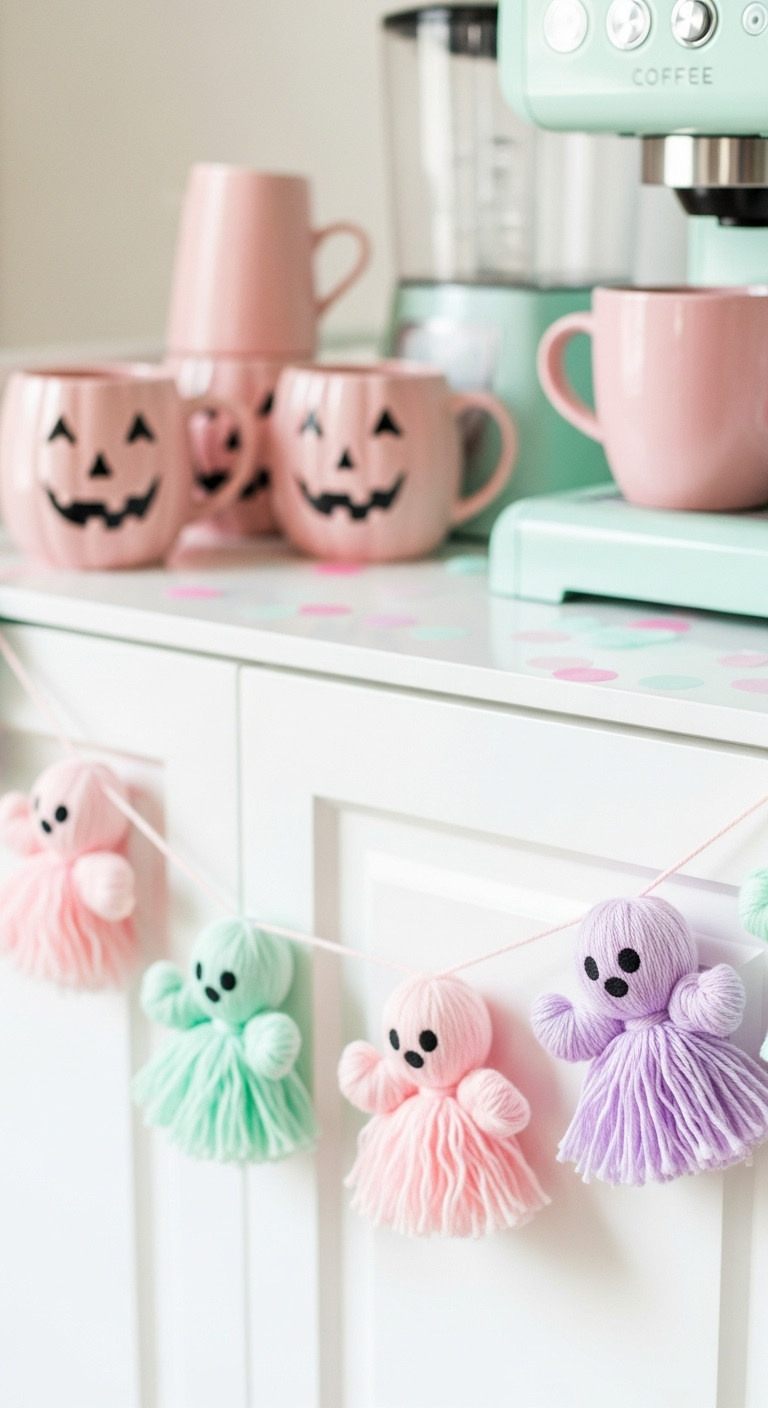
Save this adorable idea for your cute Halloween decor board!
If your style leans more whimsical and colorful, you can craft an adorable and non-scary ghost garland using pastel-colored yarn. This “Pink-o-ween” aesthetic is a trendy and fun way to celebrate the season with a unique twist.
- Materials Needed: Chunky yarn in pastel pink, lavender, and mint green; a small book or piece of cardboard; scissors; black felt; fabric glue; twine or string.
- Step-by-Step Directions:
- To make a tassel ghost, wrap your chosen yarn color around a small book about 30-40 times.
- Carefully slide the yarn off the book. Tie a small piece of yarn tightly around the top of the loop.
- About an inch down from the top tie, tie another piece of yarn tightly to form the ghost’s “head.”
- Cut the loops at the bottom of the tassel to create the ghost’s flowing body. Trim to make it even.
- Cut two tiny ovals from the black felt for eyes and attach them to the head with a dot of fabric glue.
- Repeat to create several ghosts in different pastel colors.
- Thread the ghosts onto a long piece of twine, tying them in place through the top loop, and hang your garland.
Pro-Tip: For extra fluffy ghosts, use a pet brush or a comb to gently brush out the yarn at the bottom of the tassel. This separates the fibers and makes them look much fuller and more ghost-like.
7. DIY Spooky Spiderweb Coasters
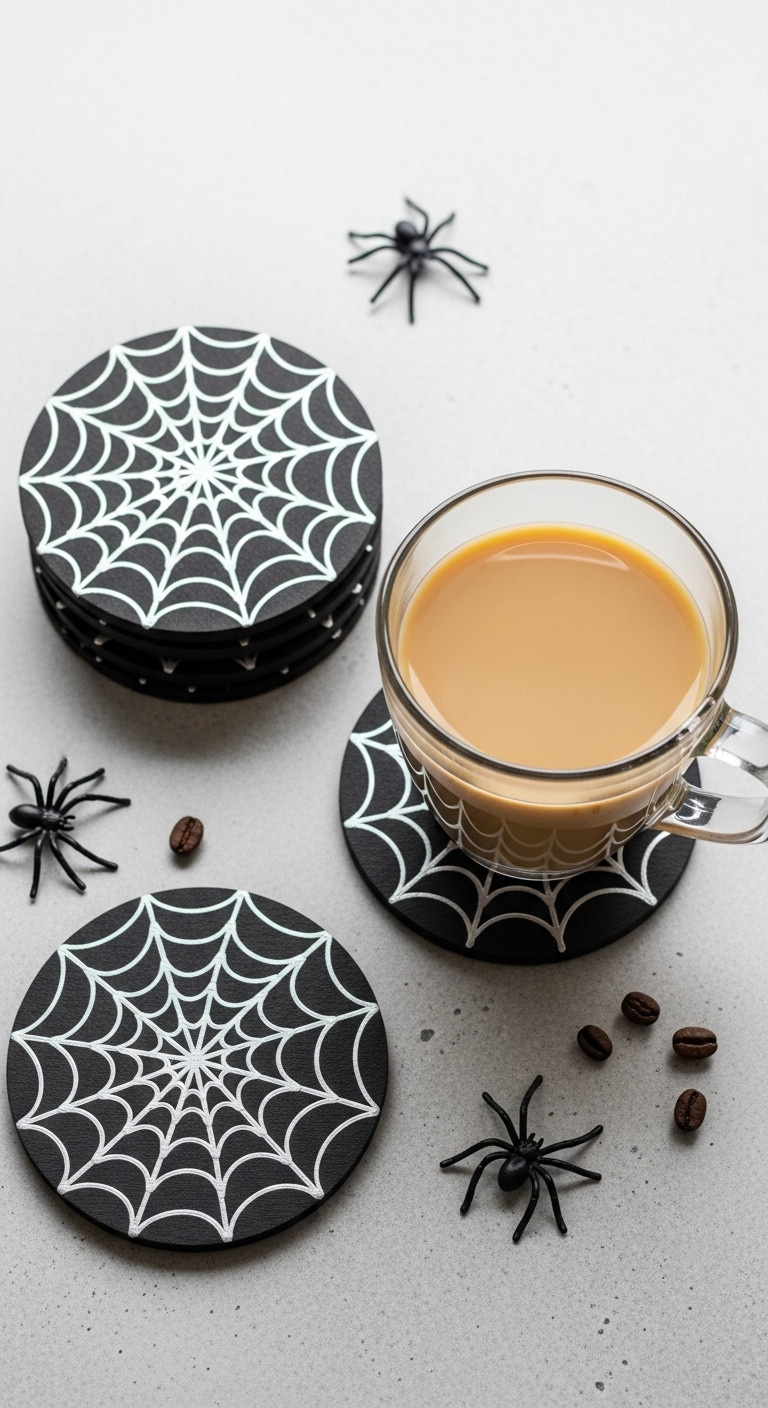
Pin this easy DIY for a touch of spooky chic!
For a small but stylish and functional project, you can design your own spooky spiderweb coasters using blank coasters and a paint pen. This is a simple craft that adds a custom, gothic touch to your coffee bar that you can use every day.
- Materials Needed: A set of blank black coasters (slate or ceramic work well), a fine-tip metallic silver paint pen, and a clear sealant spray.
- Step-by-Step Directions:
- Wipe your coasters clean with a damp cloth and let them dry completely.
- Start your spiderweb by drawing several straight lines intersecting in the center, like spokes on a wheel.
- Connect the spokes by drawing curved lines, starting from the center and working your way out. Don’t worry about making them perfect; slight imperfections look more natural.
- Let the paint pen dry according to its instructions, typically for a few hours.
- To make the coasters waterproof and durable, take them to a well-ventilated area and apply 2-3 light coats of clear acrylic sealant, letting them dry fully between coats.
Lesson Learned: Before drawing on the coaster, practice your design on a piece of scrap paper. Also, prime your paint pen thoroughly to ensure a smooth, consistent flow of paint to avoid blobs.
8. Hand-Paint Custom Halloween Mugs
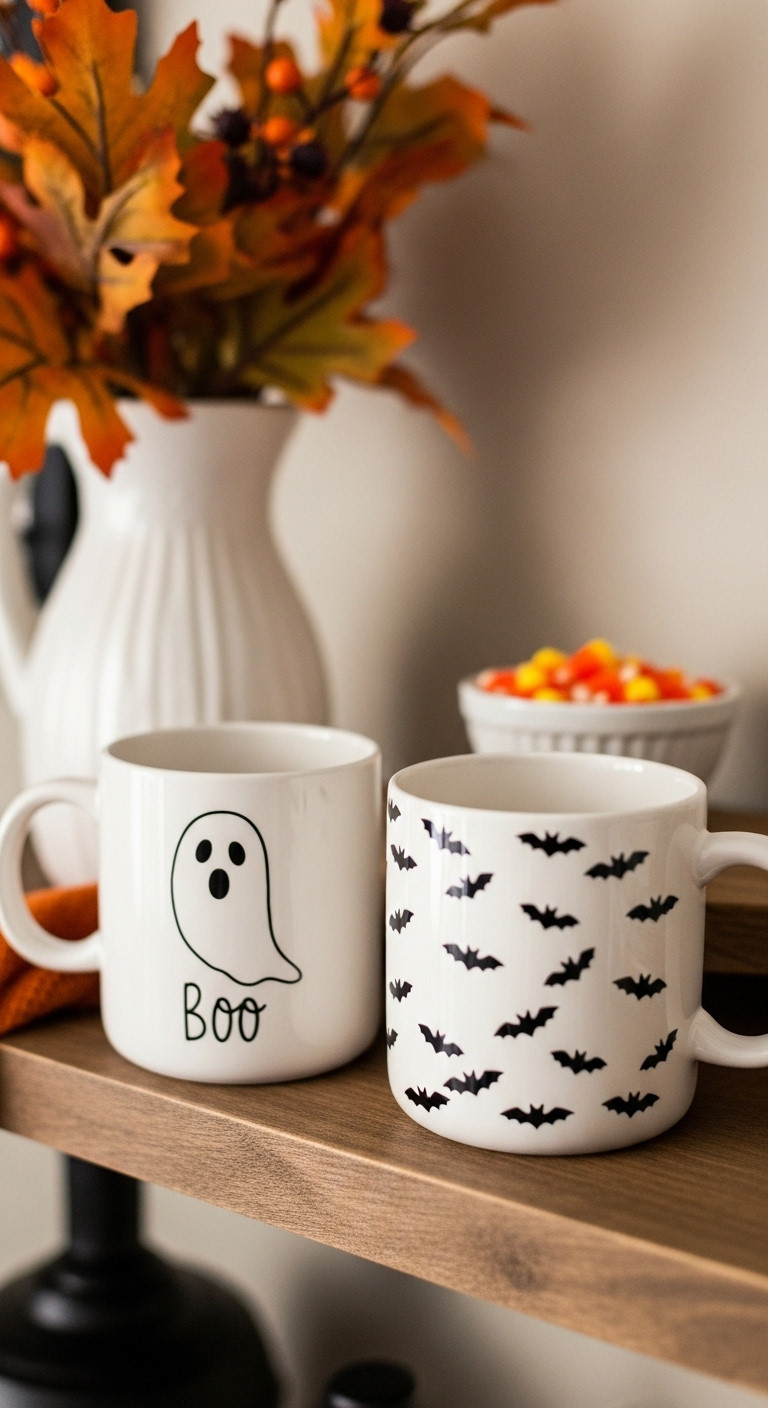
Save this fun DIY gift idea to your crafts board!
Personalized mugs are a cornerstone of any great coffee bar, and you can create permanent, dishwasher-safe designs on plain ceramic mugs using special oil-based markers. This allows you to perfectly match your mugs to your chosen Halloween theme.
- Materials Needed: Plain white ceramic mugs, oil-based paint markers (specifically for ceramics), rubbing alcohol, and cotton balls.
- Step-by-Step Directions:
- Clean the surface of the mugs thoroughly with rubbing alcohol to remove any oils or residue. Let them air dry completely.
- Draw your spooky designs directly onto the mugs. You can do simple ghosts, bats, spiderwebs, or festive phrases. If you make a mistake, you can quickly wipe it away with rubbing alcohol.
- Let the mugs air dry for at least 24 hours to allow the paint to set.
- To make the design permanent and dishwasher-safe, you need to cure it. Place the mugs on a baking sheet in a cold oven.
- Turn the oven on to 350°F (175°C). Once it reaches temperature, bake for 30 minutes.
- Turn the oven off and let the mugs cool down completely inside the oven before removing them. This prevents cracking.
Pro-Tip: It is absolutely critical to use oil-based paint markers, not regular water-based Sharpies. Regular markers will wash off, even after baking. The oil-based formula is what makes the design permanent on the ceramic surface.
9. Fashion Gothic Black Candle Holders
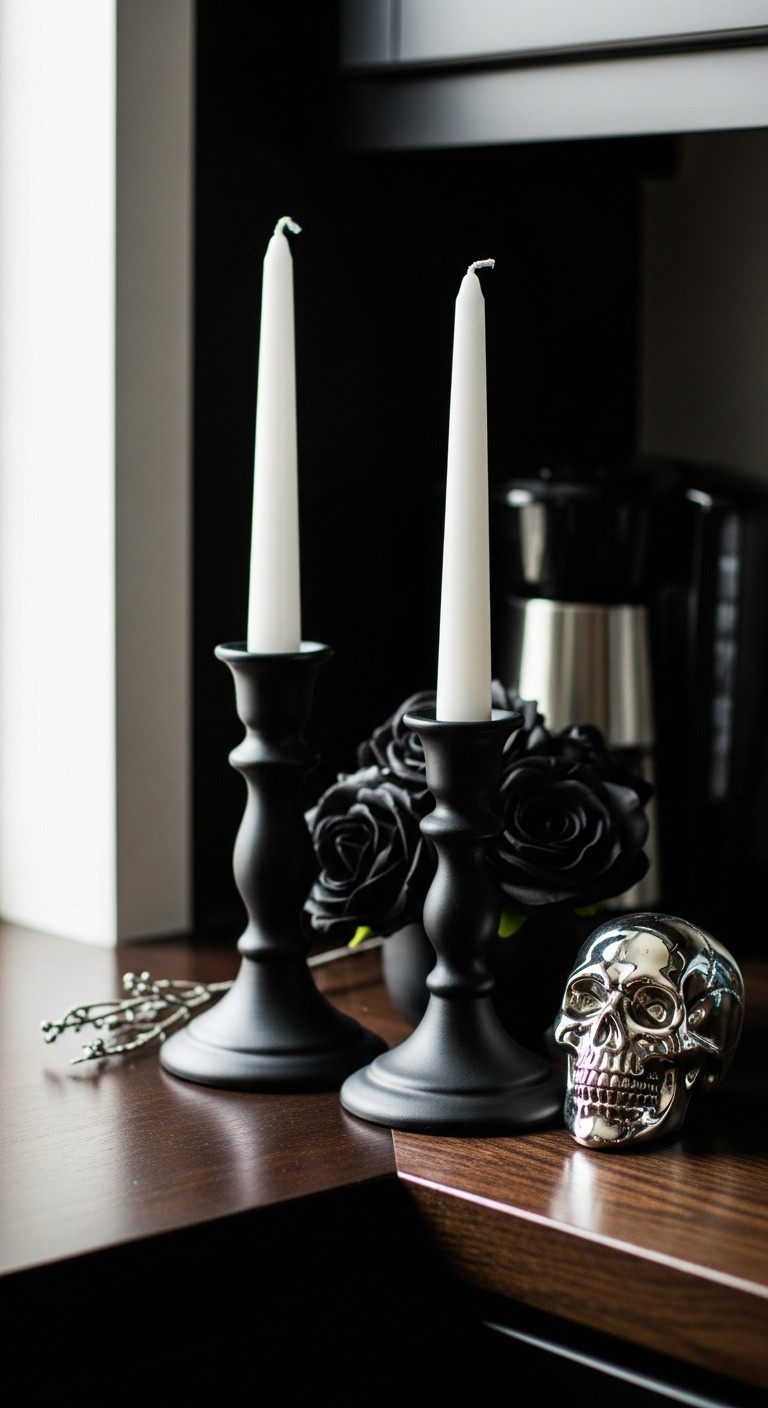
Pin this easy upcycle idea for a touch of gothic glam!
You can create elegant and spooky decor on a serious budget by upcycling mismatched thrift store candlestick holders with a coat of matte black spray paint. This simple “thrift flip” gives you a high-end, gothic look for just a few dollars.
- Materials Needed: Mismatched glass or brass candlestick holders (from a thrift store), a can of matte black spray paint and primer in one, and taper candles.
- Step-by-Step Directions:
- Clean the candlestick holders thoroughly to remove any dust or wax residue. Make sure they are completely dry.
- In a well-ventilated area (preferably outdoors), lay down some newspaper or a drop cloth.
- Apply a light, even coat of matte black spray paint to the holders. It’s better to do multiple thin coats than one thick coat to avoid drips.
- Let the first coat dry for about 20-30 minutes, then apply a second coat for full, even coverage.
- Allow the holders to dry and cure completely for at least 24 hours before handling.
- Add tall white, black, or orange taper candles and arrange them on your coffee bar.
Pro-Tip: For the best results, use a spray paint that includes a primer. This will help the paint adhere much better to the slick surface of glass or polished metal, resulting in a more durable, chip-resistant finish.
10. Suspend a Colony of Paper Bats
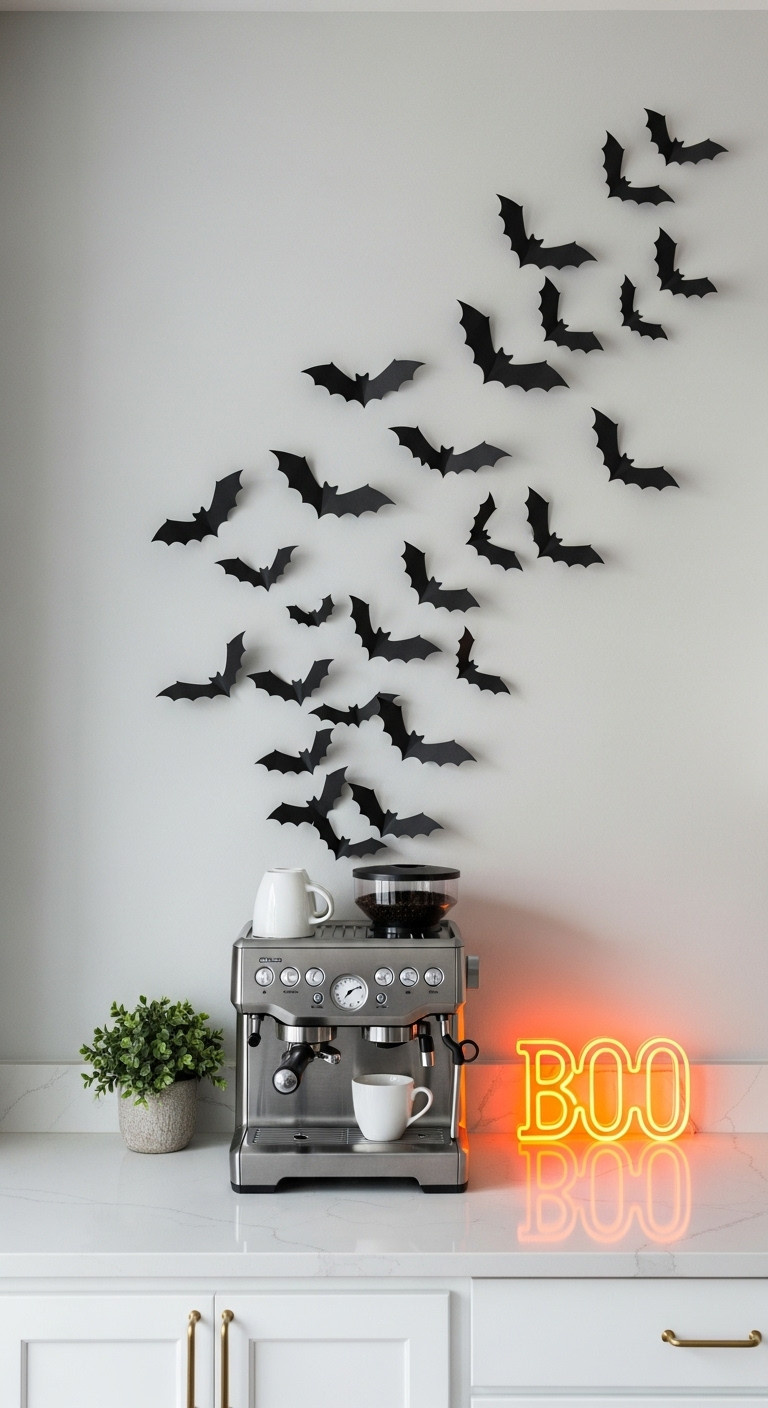
Pin this high-impact, low-cost decor idea!
For a simple, inexpensive, and visually dramatic decoration, you can create a 3D swarm of paper bats to adorn the wall space around your coffee bar. This is a classic Halloween decoration that makes a huge impact and is incredibly easy to make.
- Materials Needed: Black cardstock paper, a bat shape template (easily found online), a pencil, scissors, and removable wall mounting putty or double-sided tape.
- Step-by-Step Directions:
- Print a bat template in several different sizes and cut them out.
- Trace the bat shapes onto the black cardstock and cut them out. You’ll want a good number of them—at least 20-30 bats of various sizes.
- To give them a 3D look, fold each bat in half along its body, and then fold the wings up slightly on each side of the center crease.
- Place a small piece of removable wall putty on the back of each bat’s body.
- Start attaching the bats to the wall, creating a swooping, swarm-like pattern. Arrange them so they look like they are flying out from behind your coffee maker or from a corner.
Lesson Learned: Using removable mounting putty instead of tape is key. It’s less likely to damage your paint when you remove the decorations after Halloween, and it allows you to easily reposition the bats until you get the perfect flight path.
11. Add a ‘Groovy Ghost’ Disco Ball Accent
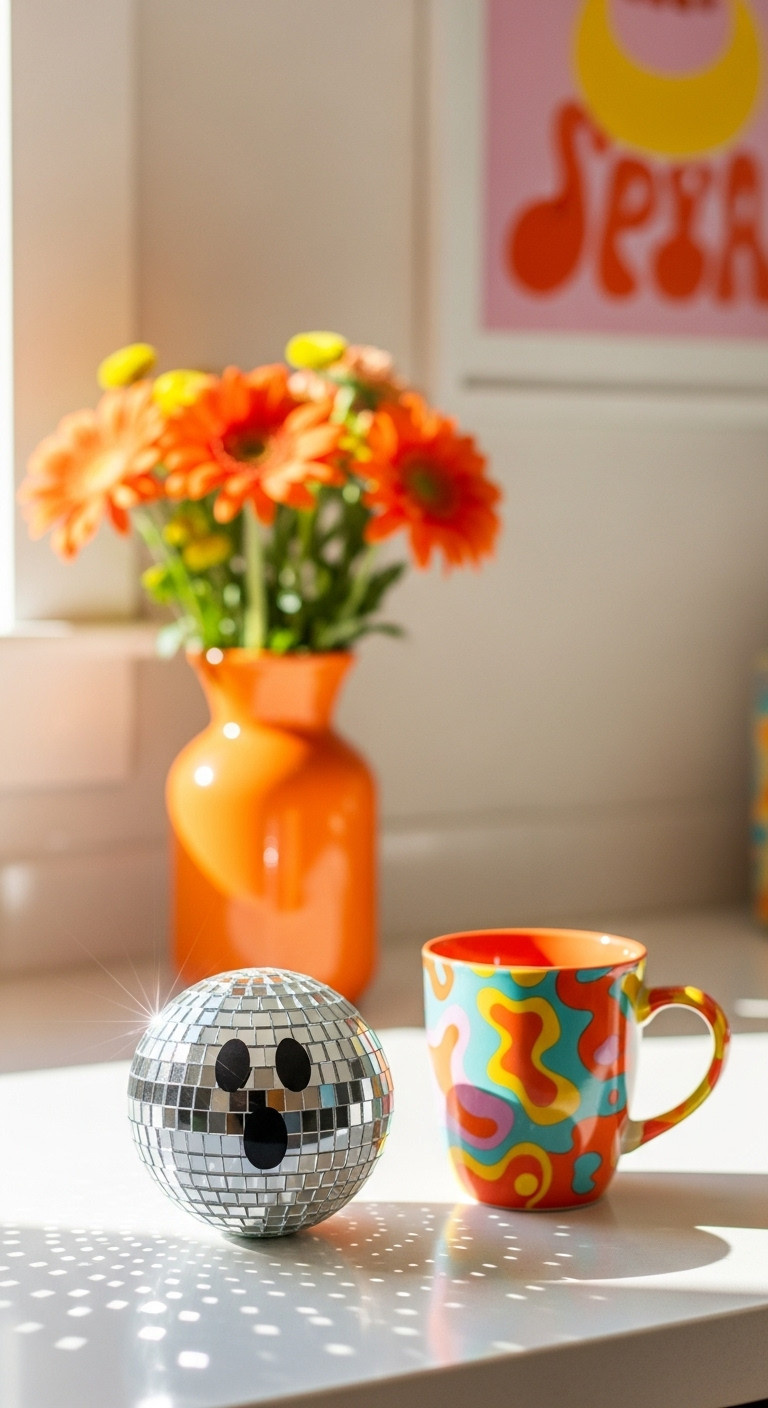
Save this groovy idea for a fun Halloween vibe!
To add a trendy, retro-inspired element to your decor, you can easily customize a small disco ball with a ghost face using removable black vinyl. This “groovy ghost” is a playful and unique accent that catches the light beautifully and adds a touch of sparkle.
- Materials Needed: A small craft disco ball, a sheet of removable black adhesive vinyl, and scissors or a craft knife.
- Step-by-Step Directions:
- Wipe down the surface of the disco ball to ensure it’s clean and the vinyl will adhere properly.
- From the sheet of black vinyl, cut out two ovals for the eyes and a slightly larger, more open oval for the mouth to create a classic ghost face.
- Carefully peel the backing off the vinyl cutouts and stick them onto the disco ball. The vinyl is forgiving, so you can reposition it if you don’t get the placement right on the first try.
- Place your groovy ghost on your coffee bar, on a shelf, or on top of your tiered tray to catch the light and add some sparkle.
Pro-Tip: If you have a Cricut or other cutting machine, you can find ghost face SVG files online for a perfectly precise cut. If cutting by hand, draw your shapes on the paper backing of the vinyl before you cut for a cleaner result.
Key Takeaways: Your Quick Guide to diy halloween coffee bar decor
Feeling inspired? Here’s a quick recap of the core strategies to help you create a festive and functional Halloween coffee bar. Remembering these points will make your decorating process smooth, fun, and successful.
- Start with a Theme: Choose a vibe—spooky, chic, cute, or groovy—to guide your decor choices and create a cohesive look.
- Focus on a Centerpiece: Anchor your coffee bar with a key DIY element like a festive sign, a styled tiered tray, or unique syrup dispensers.
- Layer in the Details: Use smaller, easy-to-make items like custom mugs, spooky coasters, and velvet pumpkins to fill out the space and add personality.
- Use Your Walls: Don’t forget vertical space! Floating shelves or simple paper bat cutouts can make a huge impact without cluttering your countertop.
- Combine Function and Fun: Incorporate the theme into everyday items like mugs and syrup bottles to make your coffee bar both festive and practical.
People Also Ask About diy halloween coffee bar decor
Have a few more questions? You’re not alone! Here are answers to some of the most common queries about creating the perfect Halloween coffee station.
How do I decorate my coffee bar for Halloween on a budget?
To decorate on a budget, you should focus on high-impact, low-cost DIYs. Upcycling thrift store candle holders with black spray paint, creating paper bat cutouts for the wall, and making a simple yarn ghost garland are all incredibly affordable ways to create a spooky atmosphere. Shopping for decor right after the season ends is a great way to stock up for next year at a deep discount.
What are the essentials for a fall coffee bar?
Beyond your coffee maker, the essentials for a fall coffee bar are all about creating a cozy mood. The key items are seasonal mugs, fall-flavored syrups, a tray for organization, and a touch of decor. Think mugs in orange or black, syrups like pumpkin spice or cinnamon, a tiered stand to keep things tidy, and finishing touches like mini pumpkins or a fall-scented candle.
How can I make my coffee station look cozy for Halloween?
To achieve a cozy Halloween vibe, you need to focus on warm textures and lighting. Incorporate elements like a wood tiered tray, soft velvet pumpkins, or a plaid napkin as a mat under your mugs. Use warm, soft lighting from a small lamp or battery-operated fairy lights. Adding natural touches like cinnamon sticks or a small vase of fall foliage also enhances that warm, inviting feeling.
Final Thoughts
Creating a DIY Halloween coffee bar is more than just decorating; it’s about infusing a little bit of festive joy into your daily routine. It’s a fun, creative way to celebrate the season and make something as simple as your morning coffee feel like a special occasion. You don’t need a huge budget or a ton of time—just a few simple ideas and a willingness to have fun with it.
What spooky or sweet additions are you planning for your coffee bar this 2025? Share your creative ideas in the comments below
Last update on 2025-12-15 / Affiliate links / Images from Amazon Product Advertising API

