As an Amazon Associate CoffeeXplore.com earns from qualifying purchases.
11 Tea Cup Upcycle Ideas Master China Drilling and Permanent Bonds
Have you ever looked at a box of inherited vintage china and felt a mix of love and frustration? Those beautiful, delicate pieces are too precious to discard, but they just don’t fit your modern life. You want to transform them, but you’re terrified of that first crack.
This is the crafter’s dilemma. Tea Cup Upcycle is the creative practice of repurposing these sentimental items into new, functional decor. But their fragility, especially with materials like bone china, makes projects like drilling or permanent bonding seem impossible without risking disaster.
This guide provides 11 stunning teacup upcycle ideas and the expert techniques to master them. You will learn how to safely drill porcelain, choose the correct industrial-strength adhesives, and create durable, professional-quality crafts that preserve your memories for years to come.
The Crafter’s Dilemma: Why Fragile Vintage China Needs Advanced DIY Techniques
Vintage teacups, whether they’re delicate bone china or sturdy porcelain, carry a unique charm and often deep sentimental value. However, this beauty comes with a challenge: extreme fragility. The very properties that make china feel luxurious—its thinness and hard, glazed surface—also make it prone to chipping and cracking under stress. This isn’t just a simple DIY project; it’s a lesson in material science.
Many crafters face disappointment when standard glues fail or a drill bit shatters a family heirloom. The non-porous glaze on most china prevents typical craft adhesives from forming a permanent bond, leading to wobbly or failed projects. Furthermore, attempting to drill a drainage hole without proper technique creates friction and heat, causing a phenomenon known as thermal shock that results in immediate, catastrophic breakage. To achieve a professional look and create durable, long-lasting items, you must move beyond basic crafting and adopt techniques that respect the material’s limitations. This guide focuses on exactly that: providing the inspiration for beautiful projects and the technical skill to execute them to professional standards.
Foundation First: Mastering the Material Science for Permanent Upcycles
Before you can transform a teacup into a bird feeder or a lamp, you must understand the foundational skills that ensure your project lasts. This isn’t just about glue and glitter; it’s about creating permanent, structural bonds and safely modifying a fragile material without destroying it. We’ll cover the three pillars of successful china upcycling: meticulous preparation, choosing the right industrial-strength adhesive, and the disciplined art of drilling porcelain. Mastering these steps is the single biggest difference between a craft that falls apart in a month and a piece of functional art you can be proud of for years. Pay close attention to the safety warnings regarding sharp edges and chemical ventilation—these are crucial for a successful and safe crafting experience.
Step-by-Step Guide to Safely Drilling Porcelain (The Drainage Hole)
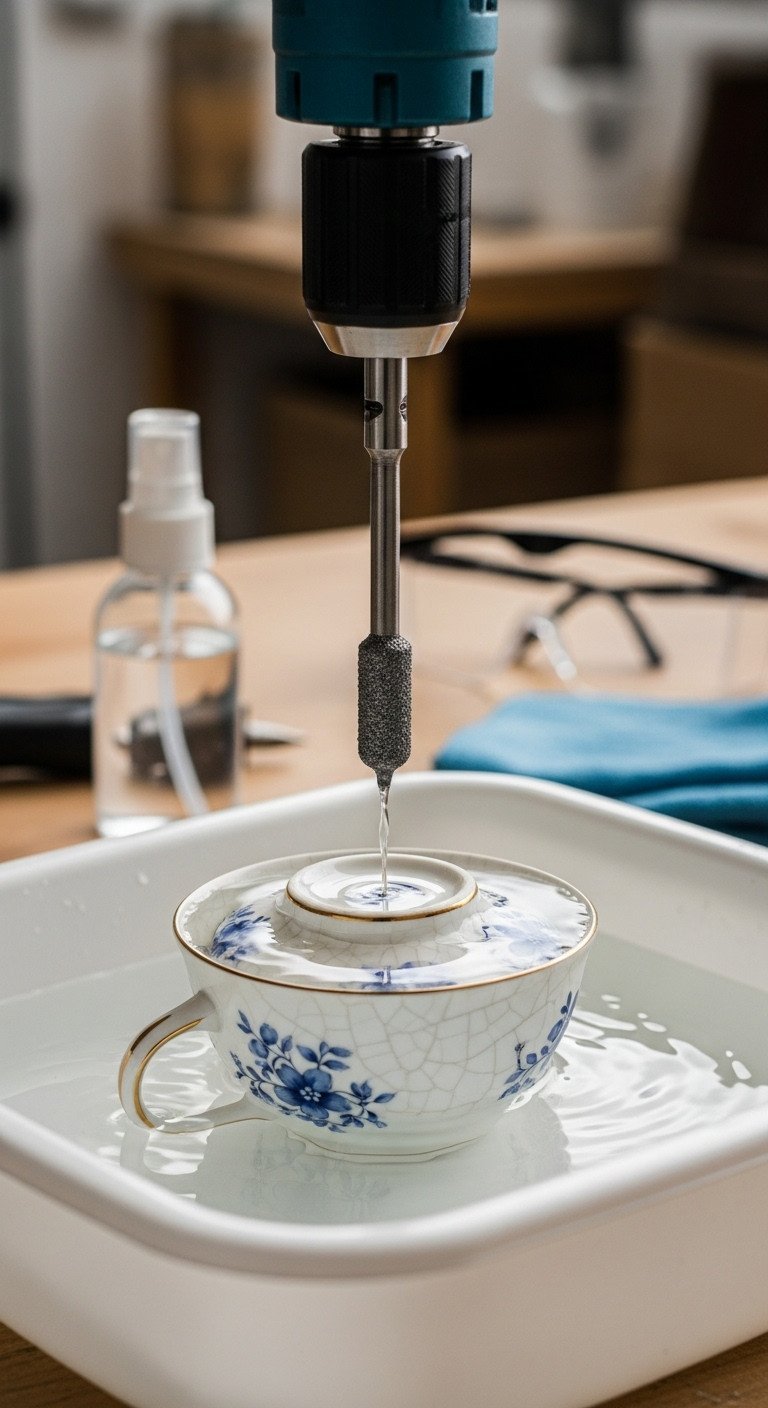
Pin this technique to your ‘DIY Mastery’ board!
Materials Needed:
- Variable Speed Rotary Tool or Drill
- Diamond-Coated Hole Saw Bit (1/4 inch or smaller, tailored to mounting/drainage needs)
- Clay or Putty (optional, for creating a water dam)
- Safety Glasses and Gloves
- Shallow container of water (or spray bottle for constant lubrication)
Step-by-Step Directions:
- Preparation & Safety: Don safety gear. Clean and dry the cup. Secure the teacup so it cannot spin (use clamps or a rubber mat).
- Lubricate: Submerge the drilling area in a shallow tray of water or create a small water dam around the mark using putty.
- Start Slow: Begin drilling at a 45-degree angle at very low speed (150-300 RPM) until the bit bites and creates a small indentation (the jig).
- Drill Vertically: Bring the drill to a 90-degree angle, maintaining low speed and constant water cooling. Do not apply heavy pressure; let the diamond coating do the work.
- Patience is Key: Drill in short bursts, lifting the drill occasionally to allow water to flow into the cut. Stop immediately if the ceramic turns to white dust (too hot/fast).
- Finish: Drill slowly through the final layer. Once complete, smooth the edges of the new hole with fine-grit sandpaper or a wet grinding stone.
Pro-Tip: Never attempt this without continuous water lubrication, especially with delicate bone china. Friction creates heat that will cause thermal shock and instant cracking.
11 Tea Cup Upcycle Ideas for Stunning Decor and Functionality
Now that you’ve mastered the foundational techniques for safely handling and modifying vintage china, it’s time for the inspiration. This list provides 11 distinct projects, ranging from simple, non-destructive decor to functional items that require the advanced adhesion and drilling skills you just learned. Each idea is a starting point for your creativity, designed to transform forgotten teacups into cherished pieces for your home and garden. Whether you’re making a gift, preserving a memory, or simply adding a touch of shabby chic style to your space, these projects link proven technique with stunning results.
1. Vintage Teacup and Saucer Candle Holders

Save this beautiful craft for your next gift-giving season!
Materials Needed:
- Vintage Teacup and Saucer (must be free of cracks/chips)
- Natural Soy or Beeswax Flakes (high-quality, clean burn)
- Pre-tabbed Cotton Wick (sized for the cup diameter)
- High-Heat Adhesive (for securing wick tab)
- Essential Oil or Candle Fragrance (optional)
Step-by-Step Directions:
- Prep the Wick: Secure the metal tab of the wick firmly to the bottom center of the teacup using high-heat glue. Use two chopsticks or a wick centering tool to keep the wick vertical.
- Melt Wax: Melt the wax in a double boiler until it reaches the specified pouring temperature (usually around 180°F or 82°C). Add fragrance oil if desired.
- Pour Slowly: Gently pour the melted wax into the teacup, avoiding spillage on the rim. Leave about 1/2 inch of space from the top.
- Cure: Allow the candle to cool completely and cure for 24-48 hours before the first burn. Trim the wick to 1/4 inch before lighting.
Pro-Tip: Match the wick size to the cup diameter to prevent wax tunneling. A wick that is too small will cause the wax to burn only in the center, wasting product.
2. Tiered Teacup Cake Stands and Server
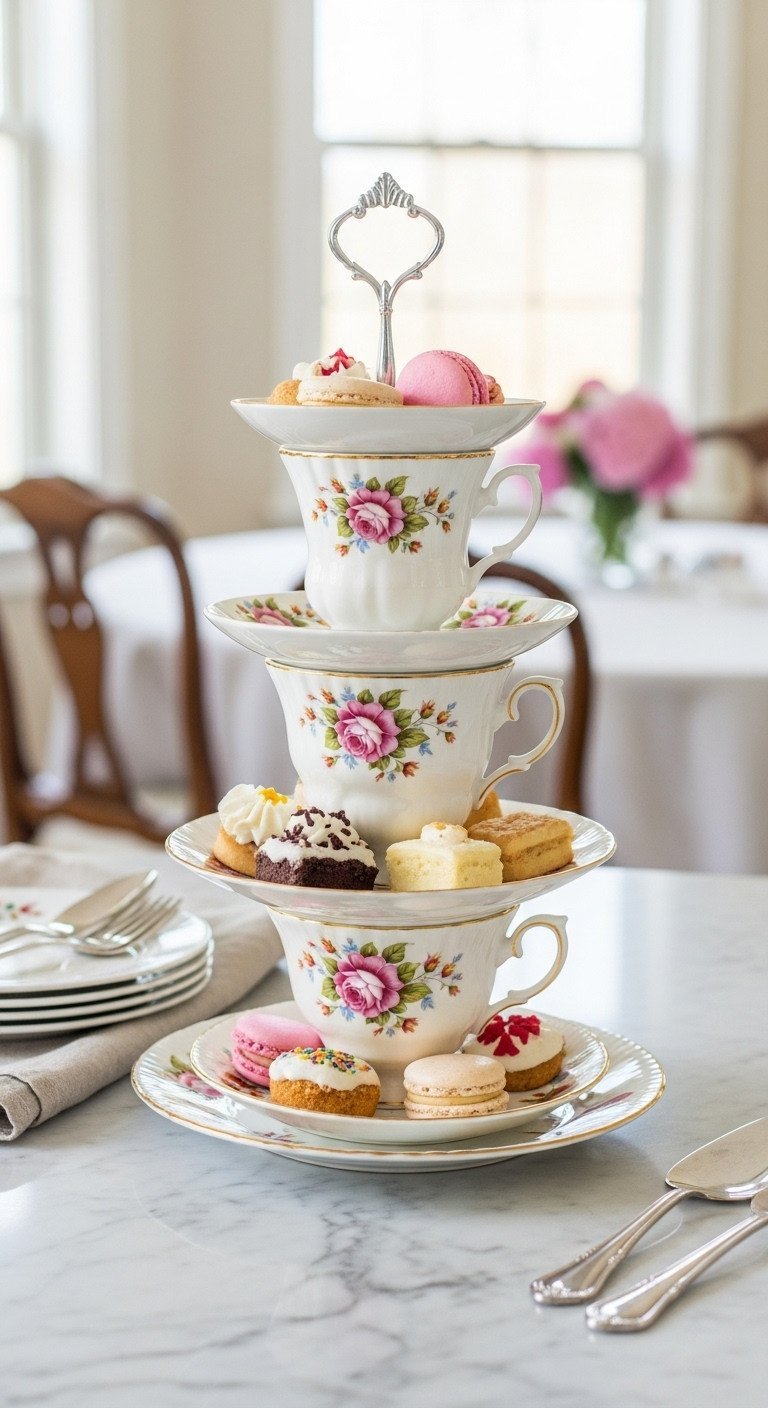
Share this elegant serving idea with your entertaining friends!
Materials Needed:
- 2-3 Vintage Saucers (graduated sizes, large on bottom)
- 2-3 Teacups (optional, or just saucers)
- Specialized Tiered Stand Hardware Kit (metal rod with washers and handle)
- Diamond Drill Bit (as per the guide above)
Step-by-Step Directions:
- Drill Centers: Following the technical guide above, drill a center hole in each saucer and in the bottom of each teacup (if using cups as risers).
- Layer Setup: Start with the largest saucer on the bottom. Thread the base rod piece through the bottom of the largest saucer, securing with a metal washer and nut underneath.
- Add Risers: If using teacups, invert the first cup and place it over the rod where the next tier will sit. If not, use the rod’s designated metal risers.
- Assemble Tiers: Continue layering the next smaller saucer, securing the metal rod pieces as you go, ensuring washers are placed between the china and the metal rod at every connection point to prevent chipping and ensure stability.
- Test Stability: Once fully assembled, gently rock the stand and adjust tightness (do not overtighten) until all tiers are level and stable.
Lesson Learned: Always use metal or rubber washers above and below the china when using hardware kits. This prevents chipping when tightening the nut and dampens wobble.
3. Succulent Planters with Integrated Drainage
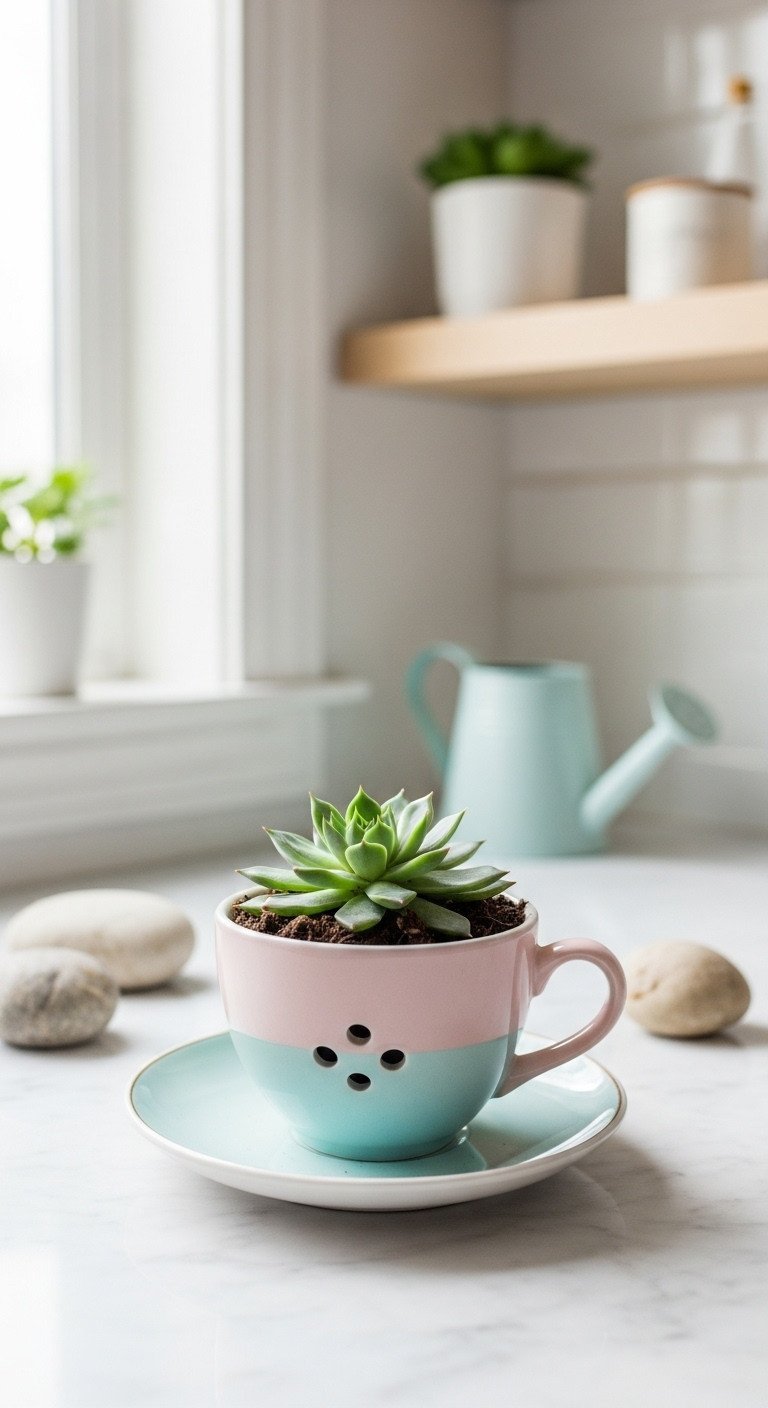
Pin this charming indoor garden idea!
Materials Needed:
- Vintage Teacup and Saucer (chipped ones work great!)
- Cactus and Succulent Soil Mix
- Small Succulent or Air Plant
- Gravel or Small Pebbles (optional drainage layer)
- Diamond Drill Bit (if opting for drilled drainage)
Step-by-Step Directions:
- Drill or Layer: Option 1 (Drilling): Safely drill one small drainage hole in the bottom center (refer to the guide above). Option 2 (No-Drill): If you skip drilling, ensure you add a 1/2-inch layer of pebbles/gravel at the bottom to create a reservoir.
- Add Soil: Fill the cup 2/3 full with succulent-specific soil mix.
- Plant: Place your small succulent, covering the roots gently with additional soil.
- Water Sparingly: Place the teacup on its saucer to catch any excess water. Water very sparingly, only when the soil is completely dry, especially if you chose the non-drilling method.
Pro-Tip: If using a high-value or sentimental cup and you fear cracking, opt for an Air Plant (Tillandsia) which requires no soil and only needs light misting.
4. Outdoor Bird Feeder with Permanent Marine Epoxy Bond
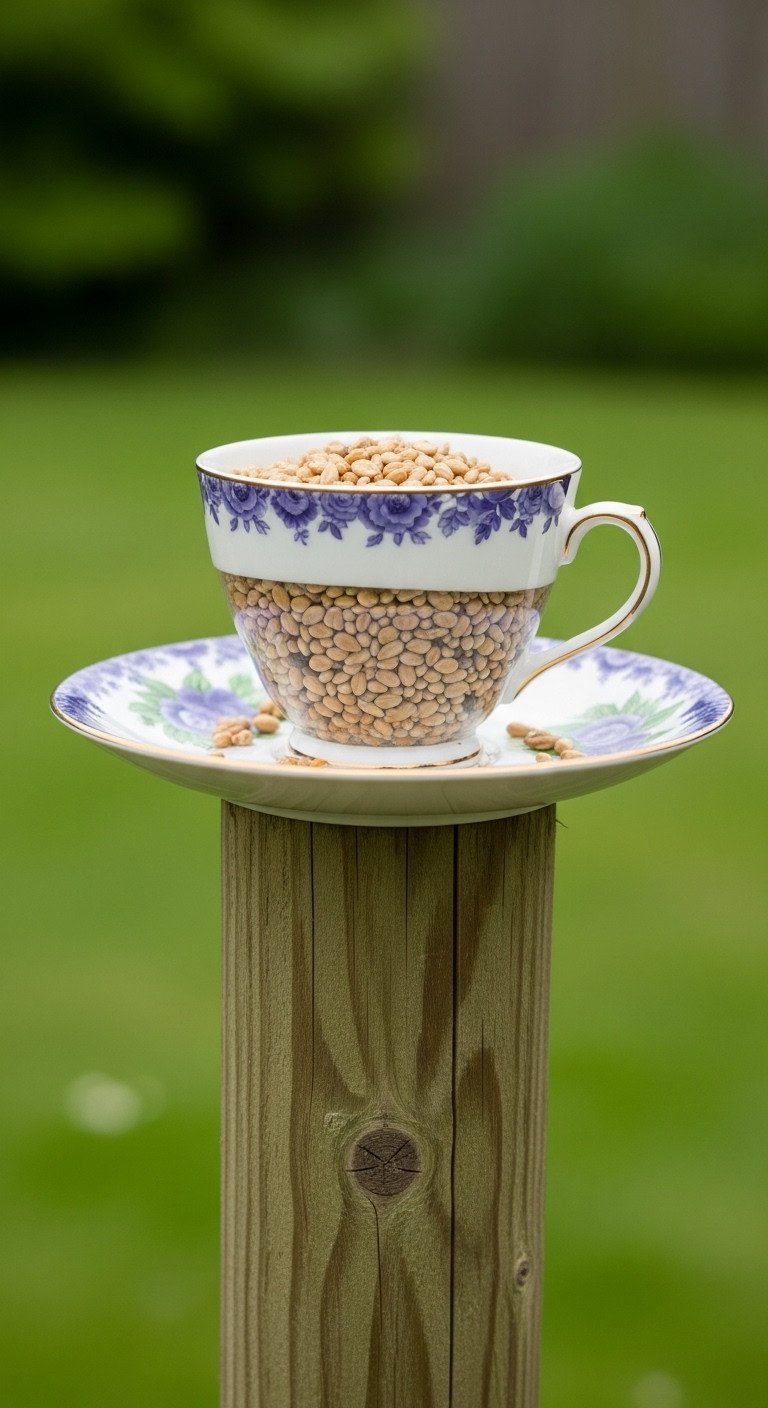
Save this project to your ‘Outdoor DIY’ board!
Materials Needed:
- Durable Teacup and Saucer (avoid hairline cracks)
- Marine-Grade Two-Part Epoxy (required for outdoor, permanent bonds)
- Wooden Post or Metal Stake (for mounting)
- Rubbing Alcohol and Fine Sandpaper
- Bird Seed
Step-by-Step Directions:
- Prep Surfaces: Lightly sand the glaze where the cup will meet the saucer and where the saucer will meet the mounting post. Clean all areas with rubbing alcohol.
- Bond Cup to Saucer: Mix the two-part epoxy exactly as directed. Apply epoxy to the side of the teacup (where the rim meets the saucer), and firmly press the teacup onto the center of the saucer. Hold securely or clamp gently until partially cured (often 15-30 minutes).
- Bond to Mount: Once the cup/saucer bond is stable (wait 24 hours), apply epoxy to the bottom of the saucer and mount it securely to your post or stake. Use clamps or heavy objects to maintain pressure.
- Cure Fully: Allow the epoxy to cure for the full 72 hours (or manufacturer’s specified time) before exposure to water or filling with bird seed.
Pro-Tip: For mounting, consider using a sturdy metal bracket attached to the post with screws, then using epoxy to bond the saucer directly to the bracket for maximum stability and wind resistance.
5. Teacup Fairy Garden and Terrarium
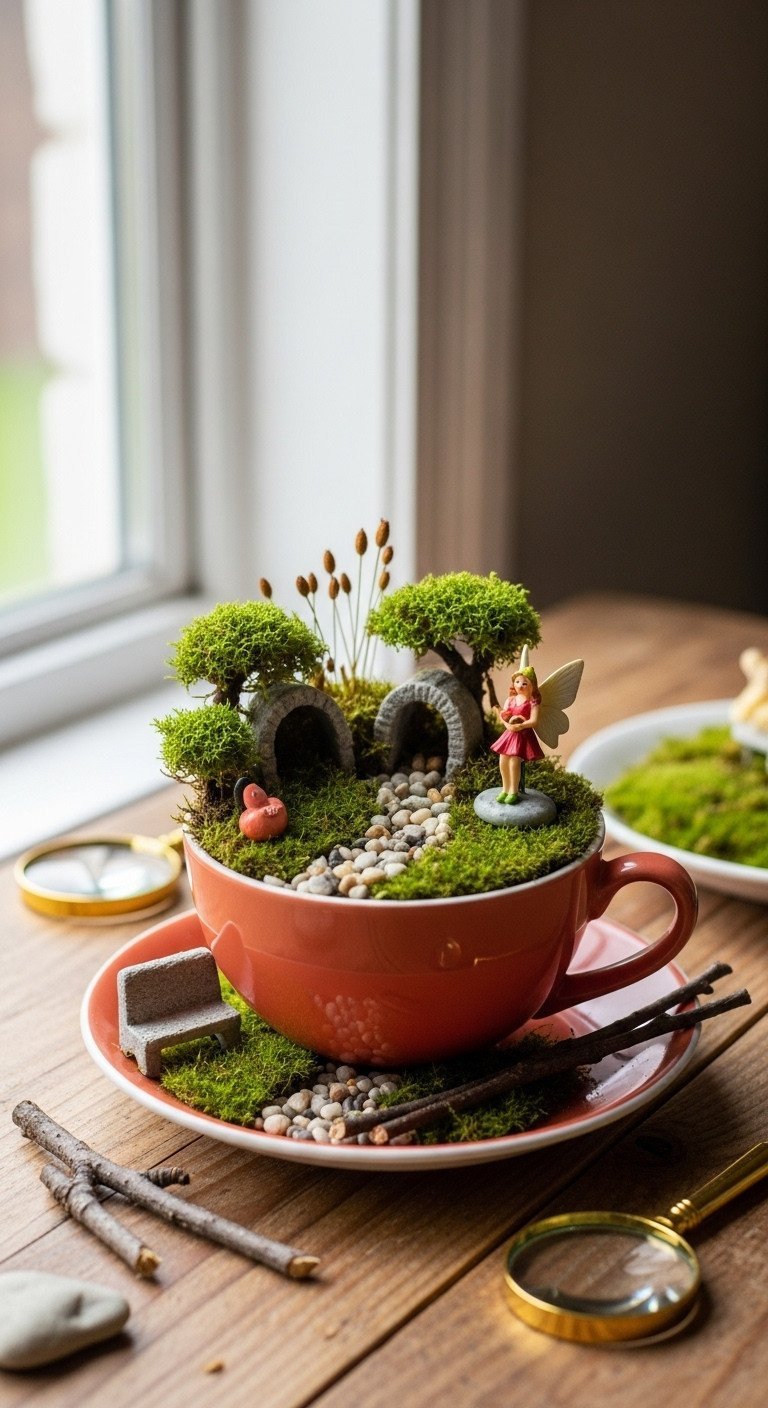
Save this magical project for your next rainy day craft!
Materials Needed:
- Teacup and Saucer (no drainage hole needed)
- Small Rocks, Pebbles, or Sand
- Moss (dried or preserved)
- Miniature Fairy Garden Accessories (tiny figures, fencing, benches)
- Craft Glue or Tacky Glue
Step-by-Step Directions:
- Layer the Base: Place a base layer of small pebbles (1/4 inch deep) in the bottom of the teacup for visual texture and a small humidity barrier.
- Add Ground Cover: Fill the cup with preserved moss, gently pressing it down to cover the pebbles. Create a slight elevation or slope if desired.
- Design the Path: Use a thin line of craft glue to attach sand or tiny flat stones to create a miniature path or walkway leading up the side of the cup.
- Install Accessories: Gently place or glue your miniature accessories (fencing, small furniture, figurines) into the scene, using the handle as a natural structural element (e.g., a vine growing up the handle).
Pro-Tip: If you want non-permanent positioning, use a small dot of museum putty under the figurines instead of glue, allowing you to change the scene seasonally.
6. Broken China Mosaic Art Piece
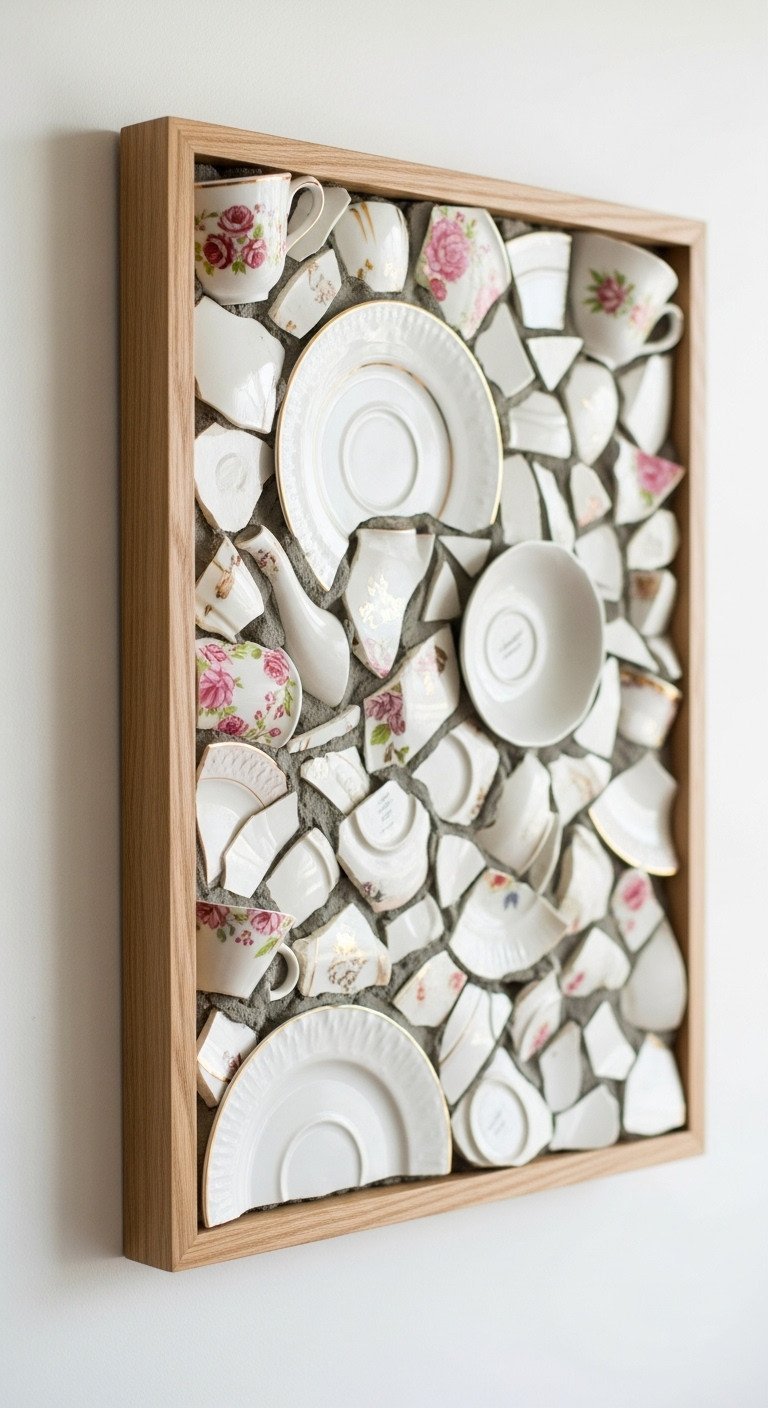
Save this genius way to fix broken memories!
Materials Needed:
- Broken Teacup and Saucer Fragments
- Sturdy Canvas or Wooden Art Panel
- Pre-mixed Tile Grout (or thin-set mortar)
- Safety Gloves and Eye Protection
- Wet Sandpaper or Grinding Stone
Step-by-Step Directions:
- Safety First: Put on gloves and eye protection. Use wet sandpaper or a grinding stone to safely dull all sharp edges of the china fragments.
- Arrange Pieces: Lay your fragments onto the canvas to visualize the design (flowers, patterns, or abstract). Use the curved rim pieces as borders.
- Adhere Fragments: Apply a thin layer of tile adhesive or thin-set mortar to the canvas. Press the china pieces firmly into the adhesive, leaving small, even gaps between them. Allow to dry completely (usually 24 hours).
- Grout and Clean: Mix and apply the grout, pressing it into all the gaps. Wipe the excess grout off the face of the china pieces using a damp sponge before it fully hardens. Buff the china once fully cured.
Lesson Learned: Always work wet when sanding or grinding china to minimize ceramic dust inhalation and reduce chipping risks.
7. Teacup Pin Cushion and Sewing Caddy
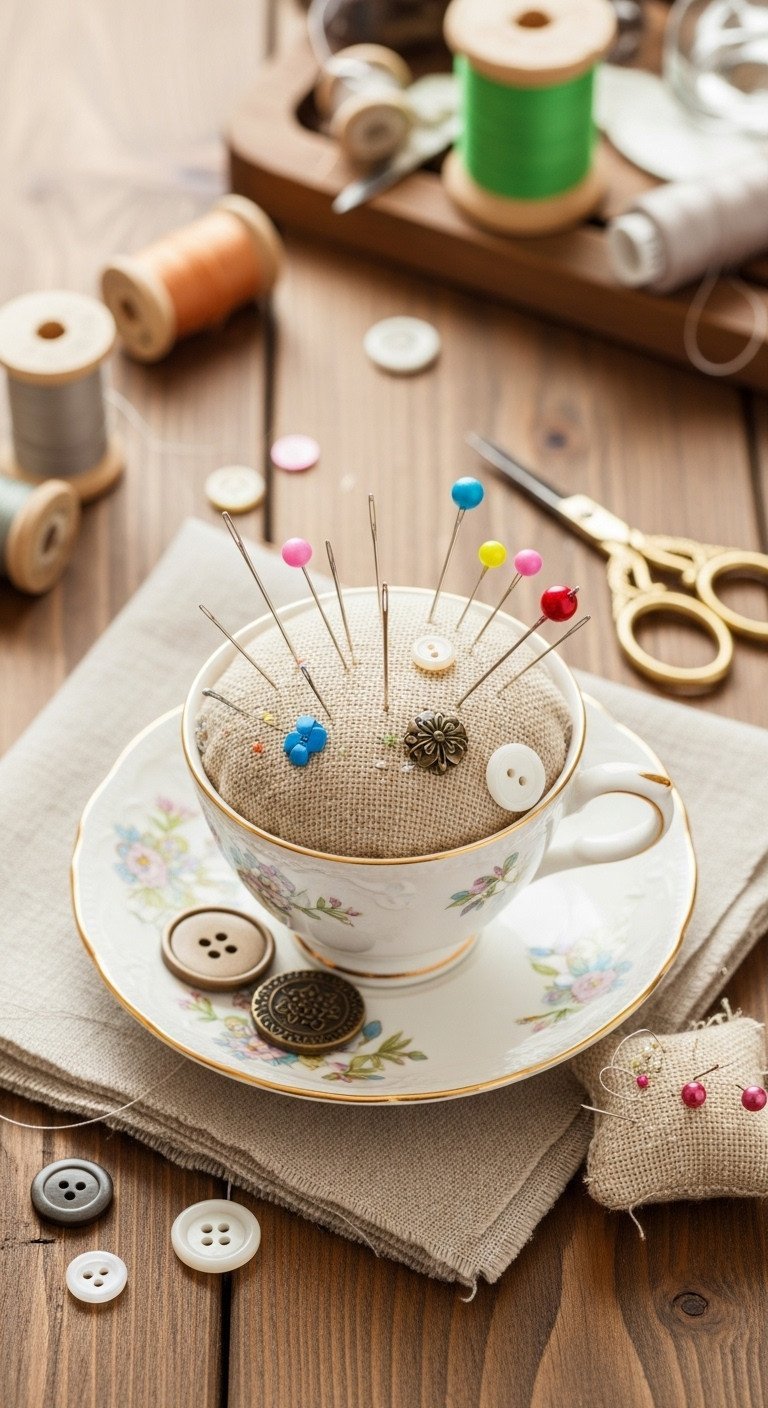
Pin this simple, non-destructive craft to your ‘Sewing Room Ideas’ board!
Materials Needed:
- Teacup and Saucer
- Scraps of Fabric (cotton or linen, 6×6 inches)
- Stuffing Material (Poly-fil or rice/crushed walnut shells for weight)
- Needle and Thread
- Hot Glue Gun (optional, for securing pin cushion)
Step-by-Step Directions:
- Cut and Sew: Cut a circle of fabric large enough to cover the top of the teacup with overhang. Sew a running stitch around the edge of the circle.
- Stuff: Gently pull the thread to start gathering the fabric, creating a pouch. Fill the pouch tightly with stuffing until firm.
- Close and Secure: Pull the thread tight to close the pouch, forming a firm ball. Tie off securely.
- Attach: Place a generous bead of hot glue inside the teacup rim and quickly press the bottom of the pin cushion ball into the cup. The saucer can be used to hold buttons or thread spools.
Pro-Tip: Fill the pin cushion with crushed walnut shells instead of poly-fil. The natural oils in the shells help keep pins and needles clean and sharp.
8. Floating Wall-Mounted Teacup Display
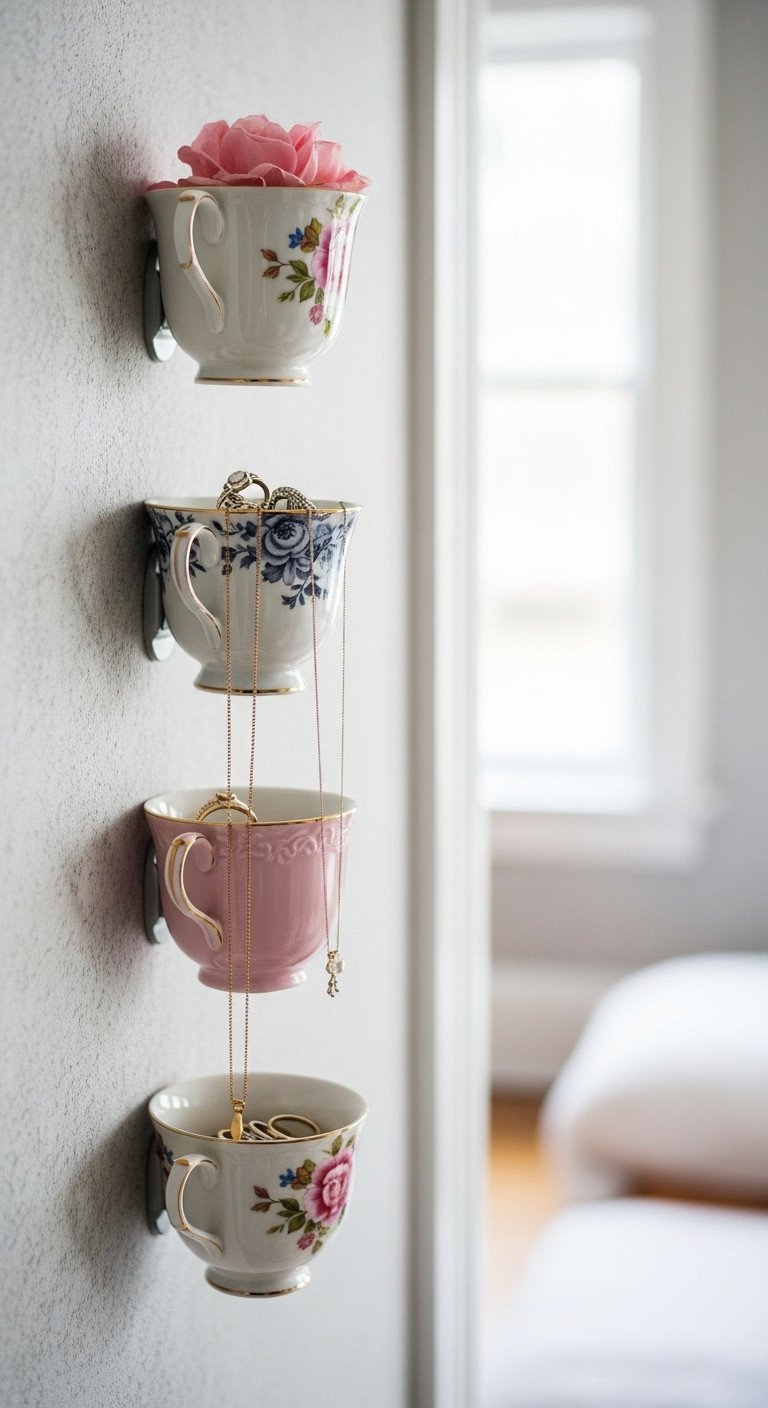
Save this clever vertical storage idea!
Materials Needed:
- Teacups and Saucers
- Heavy-Duty Structural Two-Part Epoxy (rated for ceramic/glass/metal bonds)
- Small Metal Mounting Brackets (or screw heads for epoxy bonding)
- Rubbing Alcohol and Fine Sandpaper
Step-by-Step Directions:
- Prep Cup: Decide where the mounting point will be (usually the side of the cup’s base). Lightly sand this area and clean with alcohol.
- Secure Bracket: Screw the small metal bracket (or just a heavy-duty screw) into the wall stud or drywall anchor where the cup will sit. Ensure the bracket is stable.
- Epoxy Application: Mix the structural epoxy. Apply a generous layer to the mounting area on the cup and press the cup firmly onto the bracket/screw head.
- Cure Time: Use painter’s tape to temporarily secure the cup in place until the epoxy is fully cured (up to 72 hours for structural strength). Do not place anything heavy in the cups until the full cure time has passed.
Lesson Learned: For wall mounts, avoid polyurethane glues. Only the highest tensile strength epoxy should be used to ensure the cup doesn’t fall, especially if holding items.
9. Simple Decorative Teacup Lamps
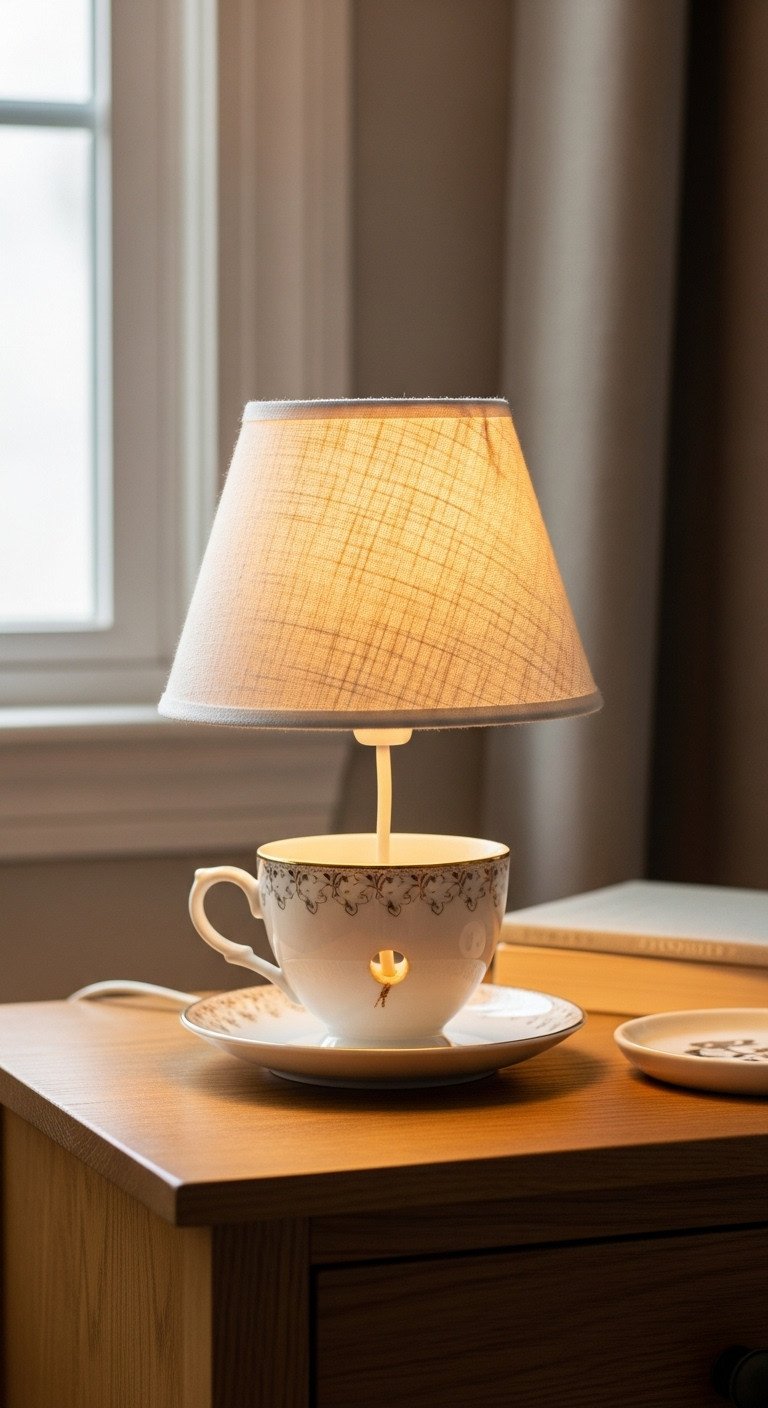
Save this stylish lighting DIY idea!
Materials Needed:
- Sturdy Teacup (with wide, stable base)
- Small Lamp Wiring Kit (socket, cord, plug)
- Small Lampshade
- Diamond Drill Bit (sized for the cord diameter)
- Felt Pad (for base)
Step-by-Step Directions:
- Drill the Base: Safely drill a hole in the absolute center of the teacup base (refer to the guide above). The hole must be large enough to thread the lamp cord through.
- Thread Wire: Thread the end of the lamp cord up through the newly drilled hole in the base.
- Assemble Socket: Following the lamp kit instructions, connect the wires to the lamp socket terminals. Secure the socket to the top of the teacup rim using the securing hardware provided, or use a strong adhesive if hardware isn’t possible (Note: ensure all electrical connections are safe).
- Finish: Attach a small, lightweight lampshade to the socket and affix a protective felt pad to the bottom of the teacup base to hide the cord entry and protect furniture.
Pro-Tip: Always use LED bulbs for teacup lamps. They produce minimal heat, protecting the ceramic from thermal stress that incandescent bulbs can cause.
10. Simple Jewelry Catch-All and Trinket Dish
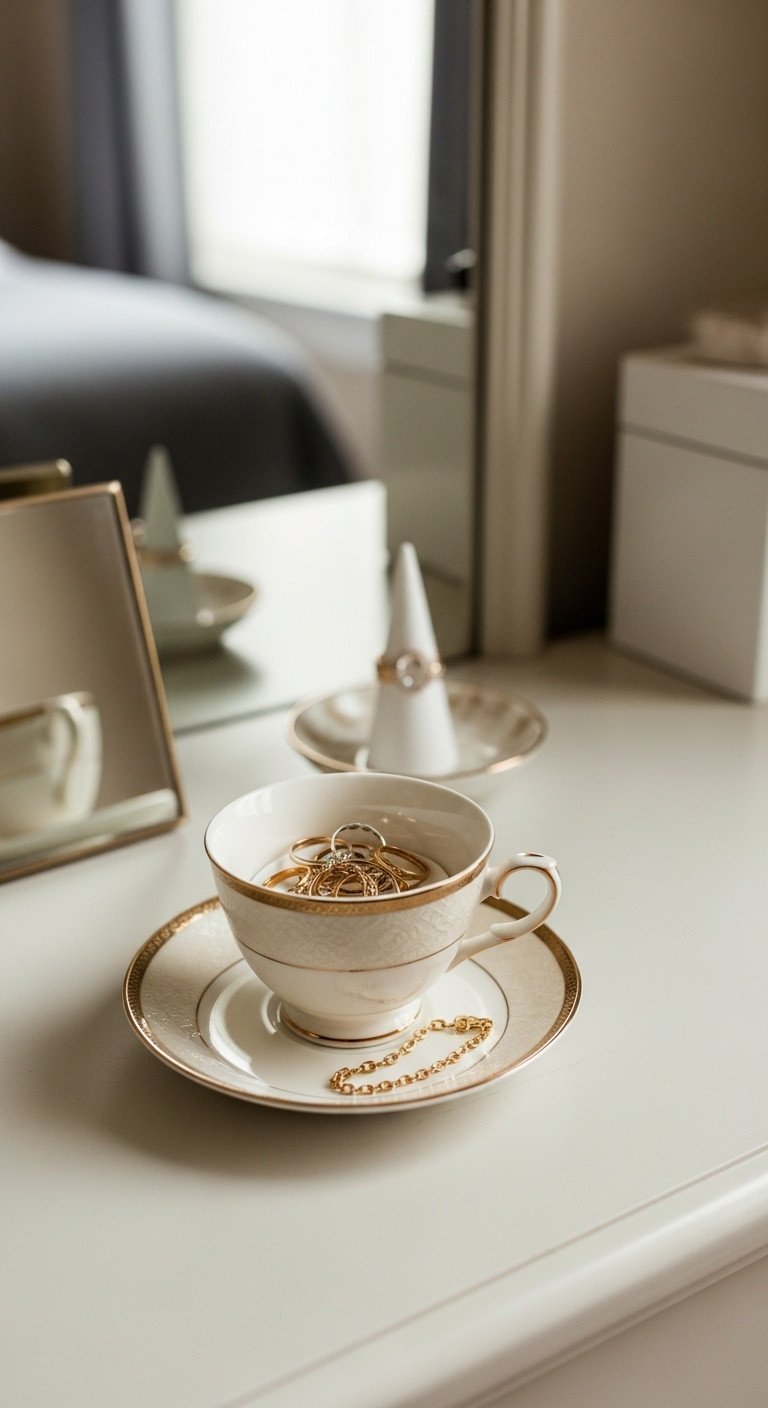
Pin this instant organization tips!
Materials Needed:
- Teacup and Saucer
- Assorted Rings, Earrings, and small Bracelets
Step-by-Step Directions:
- Clean: Ensure the teacup and saucer are perfectly clean and dust-free to prevent scratching delicate jewelry.
- Separate: Use the cup for smaller items like rings, earrings, and cuff links. The high sides keep them contained.
- Display: Use the flat surface of the saucer for larger items like watches, bangles, or necklaces that require a wider, flatter surface.
- Placement: Place the completed jewelry organizer on your dresser, nightstand, or bathroom counter for immediate access and visual appeal.
Pro-Tip: If the cup is deep, place a small piece of velvet or felt inside the bottom to cushion delicate items like pearl earrings.
11. Farmhouse Style Laundry Soap Scoop
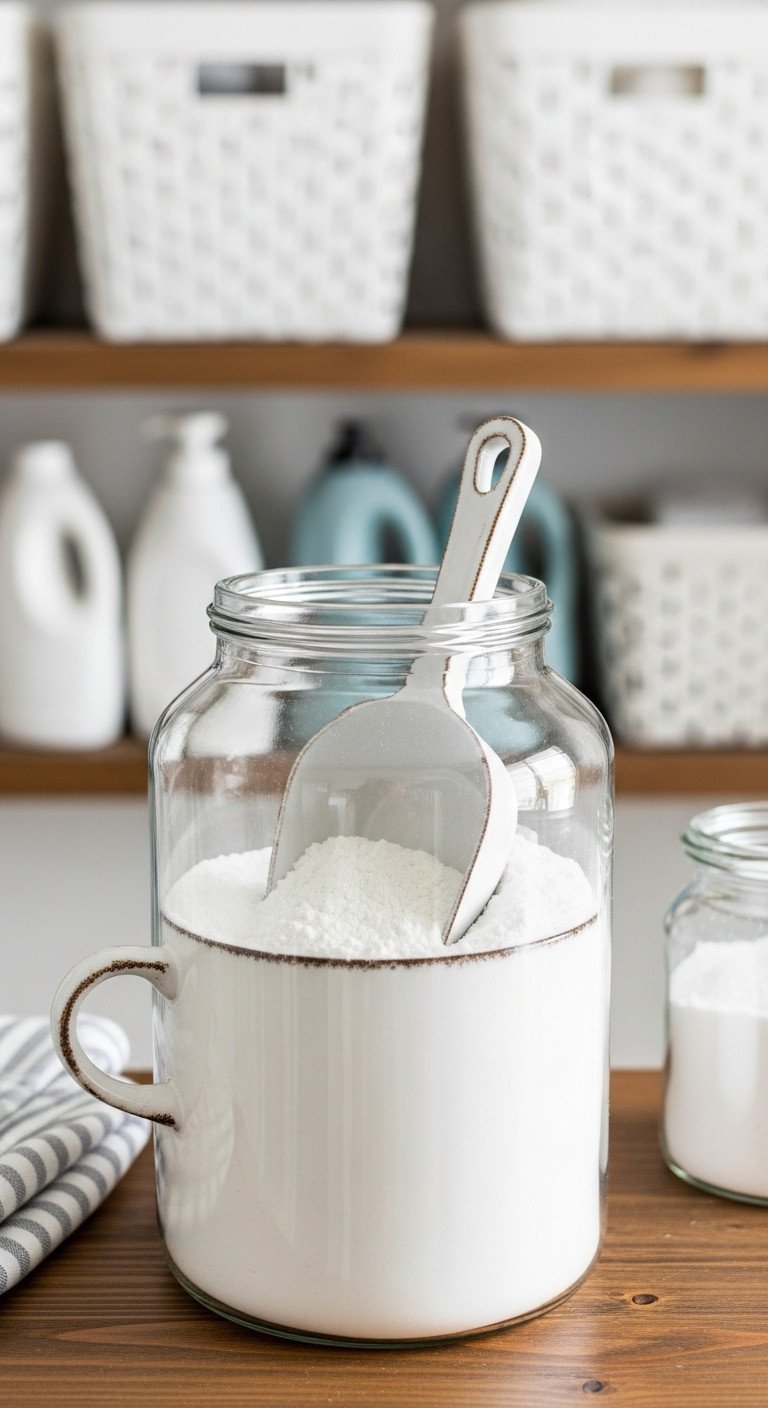
Save this clever laundry room tips!
Materials Needed:
- Single Mismatched or Orphan Teacup (wide rim is best)
- Large Glass Jar or Airtight Canister
- Powdered Laundry Soap, Bath Salts, or Flour
Step-by-Step Directions:
- Select: Choose a cup that has a comfortable handle and a wide rim to efficiently scoop powdered materials. A smaller cup is ideal for concentrated laundry detergent or bath salts; a larger cup is better for flour/sugar.
- Measure: Use a measuring cup to determine the exact volume of your teacup (e.g., 1/2 cup or 1/3 cup). Note this volume on the outside of your storage canister or with a tag.
- Fill and Insert: Fill your airtight canister with the powdered material. Insert the teacup, handle up, into the container for immediate and convenient scooping during use.
- Display: Position the canister and teacup combination prominently in your laundry room or pantry to showcase the farmhouse aesthetic.
Lesson Learned: If using the teacup for food items (like sugar or flour), ensure it has no hairline cracks and has been thoroughly cleaned to avoid contamination from previous uses.
Advanced Troubleshooting: Solving Common Upcycling Failures
Even with the best instructions, working with fragile vintage china can present challenges. Adhesion can fail, cracks can appear, and stands can wobble. This section is dedicated to providing expert solutions for the most common failures crafters experience. By understanding the root cause of each problem, you can diagnose what went wrong and apply a professional fix, saving your project and your sentimental china from the discard pile.
Adhesive Compatibility Chart: Choosing Your Permanent Bond
| Project Type | Materials to Bond | Required Adhesion Type | Key Attribute | Recommended Product |
|---|---|---|---|---|
| Tiered Stands, Wall Mounts, Bird Feeders | China to Metal/Wood | Structural Epoxy (Two-Part) | High Tensile Strength, Rigid, Permanent | Two-Part Marine Epoxy |
| Candle Holders, Jewelry Dishes (Light Use) | China to China (Decoration) | Glass Cement or E6000 | Flexible, Clear, Decent Heat Tolerance | Industrial Strength Craft Glue |
| Outdoor Planters, Mosaics | China to Stone/Grout/Weather | Construction Adhesive or Marine Epoxy | UV Resistant, Waterproof, Weatherproof | Outdoor-Rated Construction Adhesive |
| Pin Cushions, Temporary Decor | Fabric to China | Hot Glue Gun | Fast Cure, Non-Permanent (if needed), Low Strength | Standard Hot Glue |
Troubleshooting Your Project (Common Failures & Fixes)
- Failure: Cracking or chipping while drilling.
- Root Cause: Excessive heat buildup or high drill speed.
- Expert Solution: Practice on an inexpensive piece first. Ensure constant, heavy water lubrication and maintain the drill speed below 300 RPM. Use light, steady pressure.
- Failure: Structural bond (like a bird feeder) fails or wobbles after curing.
- Root Cause: Improper surface preparation (dirty/glazed) or using the wrong adhesive (e.g., hot glue or non-structural craft glue).
- Expert Solution: Re-prep surfaces by lightly sanding the glaze and wiping with alcohol. Re-bond using a measured two-part structural epoxy and ensure the pieces are clamped for the full 72-hour cure time.
- Failure: Hairline cracks appear in the china after using hot glue for wicks/decor.
- Root Cause: Thermal shock from the high heat of the glue gun on the cold, thin china (especially bone china).
- Expert Solution: Preheat the china slightly (e.g., placing it on a warm countertop) before applying hot glue, or use a medium-heat silicone or specialized heat-resistant adhesive for the wick tabs instead.
- Failure: Gilt (gold/silver trim) wears off during cleaning.
- Root Cause: Overly aggressive scrubbing or use of abrasive/bleach-based cleaners.
- Expert Solution: Use only mild soap and water or a baking soda paste. Avoid all chemical solvents or abrasive pads on gilded areas.
Key Takeaways: Your Quick Guide to Durable Tea Cup Crafts
To ensure your teacup upcycle projects are both beautiful and built to last, remember these three core principles. They represent the difference between a temporary craft and a permanent piece of functional art. Mastering them will give you the confidence to tackle any project with your treasured china.
The Three Pillars of Permanent Tea Cup Upcycling:
- Master the Prep: Always clean, degrease, and lightly score the surface of the glaze before applying any adhesive. This ensures a chemical bond rather than a temporary surface bond.
- Drill with Discipline: Utilize a diamond-coated bit at very low RPM and maintain constant water cooling to prevent thermal shock, ensuring a clean, non-cracked hole every time.
- Choose the Right Bond: Match the adhesive to the intended function. Use industrial two-part epoxy for structural, load-bearing, or outdoor projects (stands, feeders, wall mounts).
People Also Ask About Tea Cup Upcycle Safety
When working with fragile materials and powerful adhesives, safety questions are common and critical. Here are direct answers to the most frequently asked questions about teacup upcycling safety, helping you craft with confidence.
What is the most durable, waterproof adhesive for ceramic teacups?
The most durable and waterproof adhesive for structural ceramic upcycling is a marine-grade two-part epoxy resin. This chemical adhesive forms a permanent, rigid bond with tensile strength often exceeding 2,500 PSI, making it ideal for outdoor projects like bird feeders or high-stress applications like tiered cake stands or wall mounts.
Is it safe to use a vintage teacup as a candle holder?
Yes, it is safe, provided the ceramic is thick and you use the correct wick size. A wick that is too large can generate excessive heat, causing thermal stress and potentially cracking a thin-walled vintage cup. Always supervise the candle and use a high-quality wax like soy or beeswax for a slower, cooler burn.
Can I use chipped or cracked teacups for upcycling projects?
Absolutely. Chipped or cracked teacups are perfect for non-structural projects like planters, pin cushions, or mosaic art. For planters, the cracks can even provide natural (though sometimes excessive) drainage. Always sand down any sharp or ragged edges immediately to ensure safe handling.
What is the biggest mistake crafters make when drilling china?
The single biggest mistake is drilling too fast without adequate water cooling. This generates friction, creating intense localized heat (thermal shock) that instantly destroys the glass-like glaze, leading to catastrophic radial cracking. Always use slow speed and continuous water lubrication.
Final Thoughts
The journey from a delicate, often forgotten vintage teacup to a functional, beautiful new piece of home or garden decor is one of preservation and creative mastery. By combining the 11 inspirational ideas in this guide with the essential technical knowledge of china drilling and permanent adhesion, you are no longer limited by the fragility of the material. Embrace the challenge of transforming these sentimental pieces into durable, long-lasting works of art. Which of these 11 tea cup upcycle ideas will you master first? Let us know in the comments below
Last update on 2025-12-05 / Affiliate links / Images from Amazon Product Advertising API

