As an Amazon Associate CoffeeXplore.com earns from qualifying purchases.
Learn To Pour Perfect Latte Art A Step By Step Visual Guide
Have you stared at a cafe latte, wondering how baristas create those beautiful designs? You try at home, but end up with a cup of bubbly, messy foam instead.
Latte Art is the skill of pouring perfectly steamed milk into espresso to create a pattern. The frustration of wasting milk on muddy, undefined blobs is a common hurdle for every home barista.
Latte art is achieved in three main phases: 1. Steaming milk to a silky, glossy microfoam texture. 2. Pulling a quality espresso shot with stable crema to act as a canvas. 3. Using a precise high-then-low pouring technique to create the design. This guide will show you exactly how to master each step. You’ll learn the secrets to that perfect, cafe-quality heart.
Frustrated with Bubbly Foam? Here’s How to Finally Master Coffee Art at Home
If you’ve ever felt the disappointment of watching your carefully prepared milk turn into a indistinct white cloud, you’re not alone. The journey of a home barista is often paved with wasted milk and frustrating, bubbly foam. Many guides show you the final product but fail to explain the two elements that truly matter: creating silky, elusive microfoam and mastering the pouring technique.
This isn’t about artistic talent; it’s a technical skill. We’ll break down the process into clear, manageable steps, sharing the “aha” moments that turn struggle into success. Think of your espresso as the canvas and the perfectly steamed milk as your paint. Without the right paint, you can’t create art. This guide is your definitive path to finally understanding how to make the perfect “paint” and use it to pour simple latte art you can be proud of.
A 7-Step Visual Guide to Pouring Your First Perfect Latte Art Heart
This is the core of your training. We will walk through the entire process, from grabbing your tools to that final, satisfying pour. Each step is a crucial building block for the next. Focus on the physical actions and the sensory feedback—what you see, hear, and feel will guide you to success. Let’s create your first latte art heart.
1. Choose Your Essential Barista Tools

Pin this essential gear guide to your “Home Coffee Bar” board!
Having the right barista tools is non-negotiable. The proper equipment gives you the control necessary to create silky microfoam and pour with precision.
What You Need:
- Espresso Machine with a Manual Steam Wand: Essential for controlling aeration. A commercial-style or Panarello wand will work, but one that offers manual control is best.
- Stainless Steel Milk Pitcher (12-20 oz): Look for one with a sharp, defined pouring spout. This feature is crucial for controlling the milk flow for both simple and complex coffee foam designs.
- Wide, Bowl-Shaped Latte Cup (8-12 oz): A wider surface area provides a better canvas for your art compared to a tall, narrow mug.
- Fresh, High-Quality Espresso Beans: A rich, stable crema is impossible without fresh beans.
- Cold, Fresh Whole Milk: The ideal protein and fat content makes it the easiest and most forgiving milk for learning how to do latte art at home.
- (Optional) Clip-on Thermometer: Highly recommended for beginners to avoid scalding the milk and to ensure consistent temperature every time.
What To Do:
- Select Your Pitcher: A 12 oz frothing pitcher is perfect for single lattes. Ensure it’s made of stainless steel, which helps you gauge temperature by touch.
- Choose Your Cup: Pick a ceramic latte cup that is wider than it is tall. This gives you more room to pour your design.
- Chill Your Gear: For the best results, keep your milk pitcher in the refrigerator before use. A cold pitcher gives you more time to texture your milk perfectly before it gets too hot.
Pro-Tip: The shape of your pitcher’s spout is critical. A sharper, more defined spout gives you the control needed to pour fine lines for advanced art later on. It’s worth investing in a good one from the start.
2. Prepare Your Espresso Canvas

Save this tip for pulling the perfect espresso shot!
Your espresso shot is the foundation. A perfect shot produces a rich crema that acts as a dark, contrasting canvas for the white milk foam.
Materials Needed:
- Freshly roasted coffee beans (ground fine, like table salt)
- Espresso machine and portafilter
- Burr coffee grinder (recommended for consistency)
- Coffee scale and timer
- Your chosen wide-mouthed latte cup
Step-by-Step Directions:
- Grind Fresh: Always grind your coffee beans immediately before pulling your shot. Pre-ground coffee produces weak, unstable crema that won’t support your art.
- Dose and Tamp: Dose the correct amount of coffee for your basket. Tamp it evenly with firm, level pressure to ensure a balanced extraction.
- Pull the Shot: Place your cup under the portafilter and start the extraction. Aim for a total shot time between 25-30 seconds for a balanced espresso.
- Inspect the Crema: The final shot should have a thick, unbroken, reddish-brown layer of crema. This is your canvas. If it’s thin, pale, or disappears quickly, your art will lack contrast and definition.
Lesson Learned: I used to think any espresso would work. I learned the hard way that without a thick, fresh crema, the milk foam has nothing to sit on. Your design will become a muddy, disappointing mess every single time.
3. Master the Aeration ‘Stretching’ Phase
Pin this crucial milk steaming step!
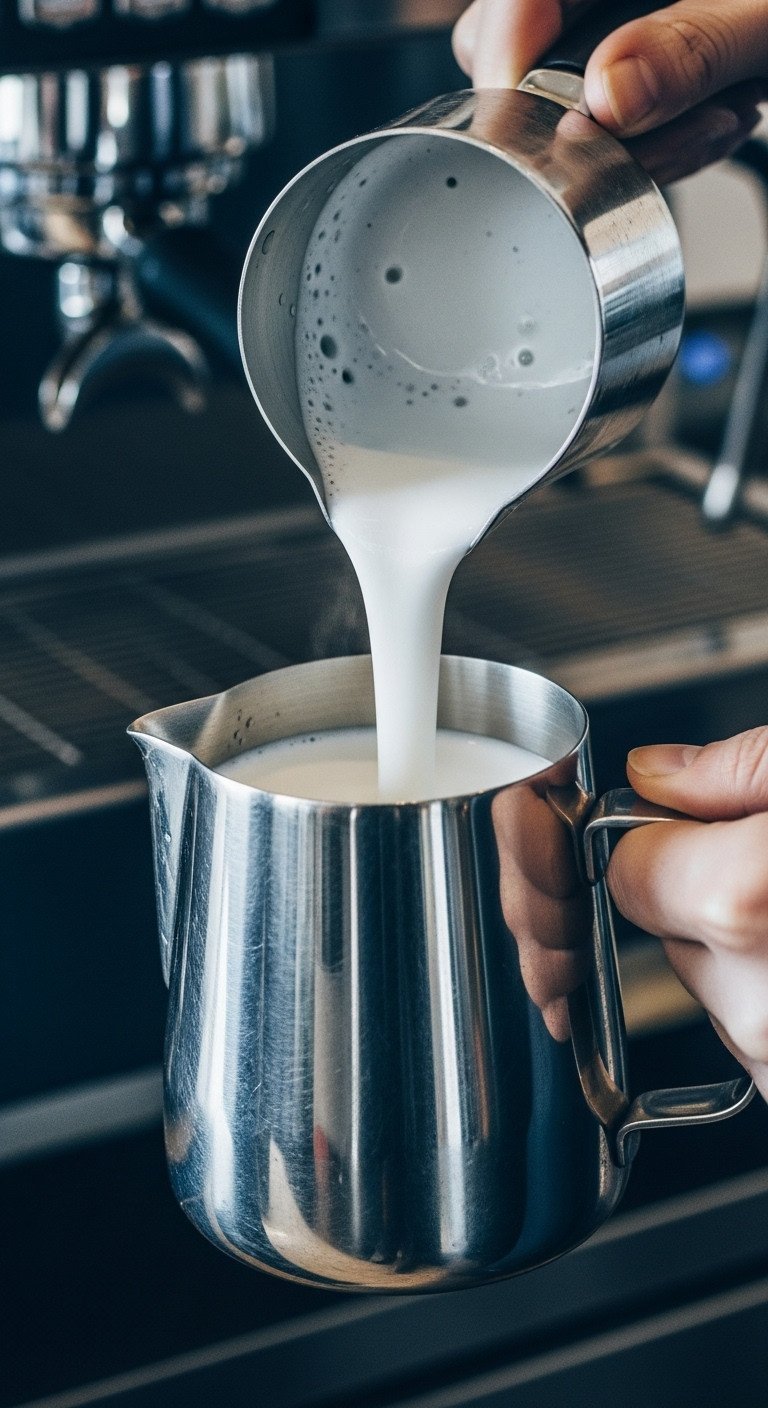
This is the most critical step and where most beginners struggle. Aeration, or “stretching,” is the process of introducing air into the milk. The goal is to do this gently and for a very short time.
Supplies Needed:
- Chilled stainless steel pitcher
- Cold whole milk (fill to just below where the spout begins)
- Espresso machine with a steam wand
- A clean, damp cloth
Step-by-Step Directions:
- Purge the Wand: Before you begin, point the steam wand into the drip tray (covered with your cloth) and open the valve for 2 seconds. This clears out any condensed water.
- Position the Wand: Submerge the tip of the steam wand about half an inch below the surface of the milk, positioning it slightly off-center in the pitcher.
- Start Steaming: Turn the steam wand on to full power. Immediately lower the pitcher just enough so the wand tip is at the very surface of the milk.
- Listen for the Hiss: You should hear a consistent, quiet “tssss” or hissing sound, like paper tearing. This is the sound of air being introduced correctly. This phase should only last for 3-5 seconds.
- Watch the Volume: Continue hissing until the milk volume has increased by about 20-30% and the pitcher begins to feel lukewarm to the touch.
Pro-Tip: This is where most beginners fail. Too much hissing creates stiff, bubbly foam that won’t pour. Too little creates hot milk with no foam at all. Focus on the sound—a gentle hiss is perfect. A loud, violent screech means the wand tip is too high out of the milk.
4. Create the Silky Microfoam ‘Vortex’
Save this game-changing milk texture tip!
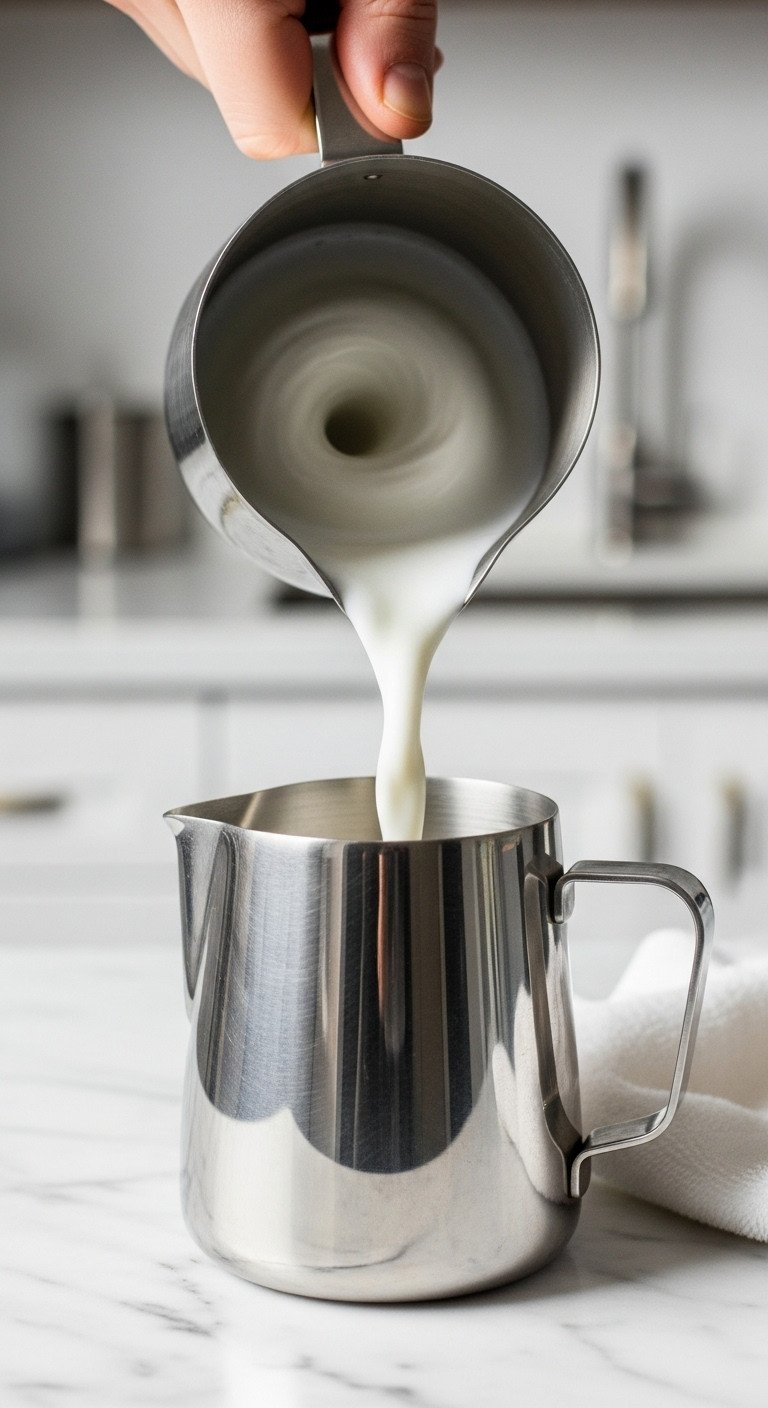
After introducing air, you need to seamlessly integrate it. This is done by creating a vortex, or whirlpool, which breaks down large bubbles and creates a uniform, silky microfoam.
Tools Needed:
- Your pitcher with the now-aerated milk
- Espresso machine steam wand
Step-by-Step Directions:
- Raise the Pitcher: After the initial 3-5 second “hiss,” raise the pitcher slightly. This submerges the steam wand deeper into the milk and immediately stops the hissing sound.
- Find the Vortex Position: Keep the wand off-center and adjust the angle until you see the milk begin to spin rapidly in a powerful vortex.
- Continue Heating: Hold this position. This spinning motion is crucial; it’s folding the foam into the milk and breaking down bubbles, creating that perfect wet paint texture.
- Gauge the Temperature: Continue heating the milk while it spins until the pitcher becomes too hot to comfortably hold for more than a second. This is around 140-150°F (60-65°C).
- Turn Off Steam & Wipe: Turn off the steam wand before removing it from the milk. Immediately wipe the wand with your damp cloth and purge it again for 2 seconds to clear any milk residue.
Lesson Learned: If you see a powerful vortex, you are doing it right. This is the magic step that transforms bubbly foam into the liquid gold required for latte art. If you don’t create a vortex, you won’t be able to pour art.
5. Groom Your Milk for a Flawless Finish
Pin this simple trick for perfect latte art milk!
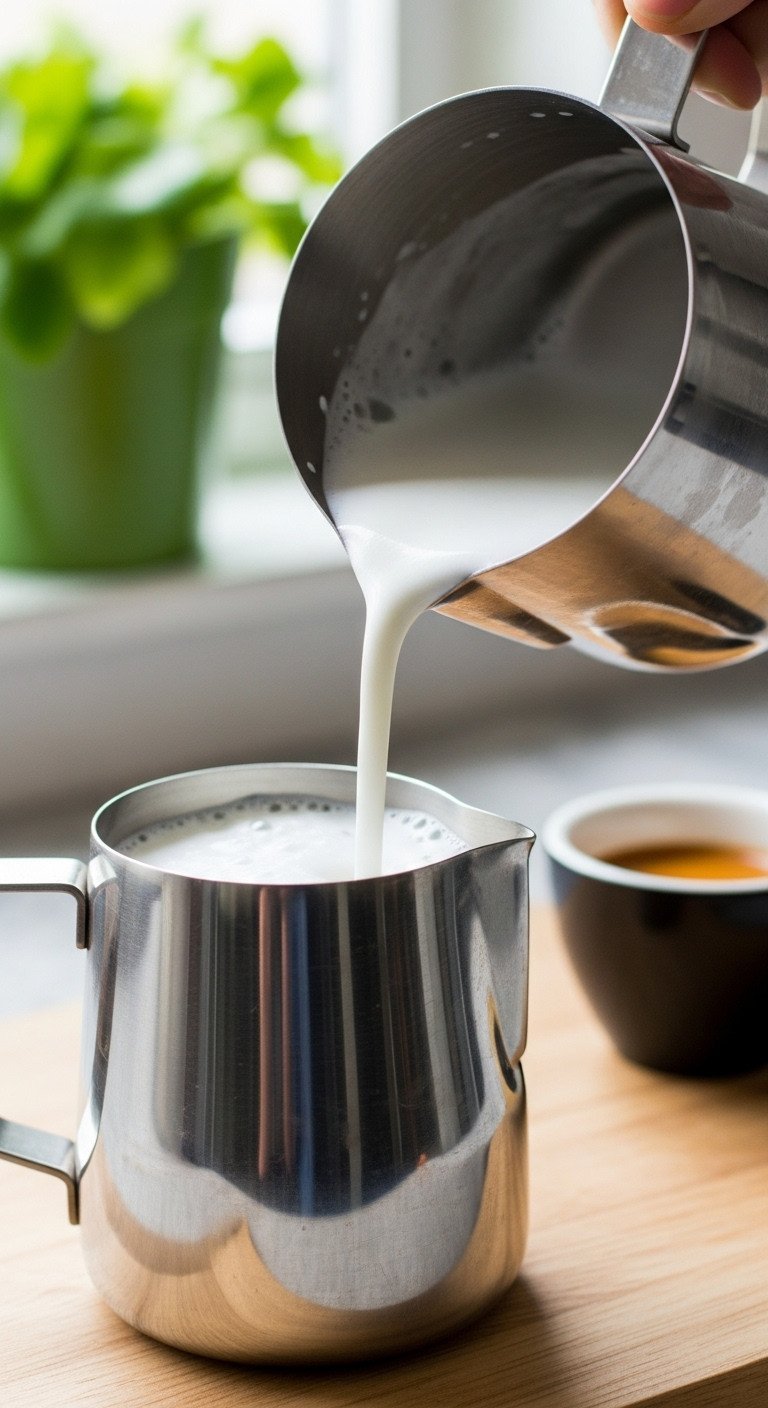
Before you pour, a final, quick preparation ensures your microfoam is flawless. This “grooming” step makes the milk uniform and glossy.
What You Need:
- Your pitcher of freshly steamed milk
- A solid countertop surface
Step-by-Step Directions:
- Inspect the Surface: Immediately after steaming, look at the milk. It should look like glossy, wet paint. If you see any small surface bubbles, don’t worry.
- Tap to Settle: Give the base of the pitcher one or two firm taps on the counter. This will pop any large bubbles that may have survived the vortex.
- Swirl Continuously: Swirl the milk in the pitcher in a steady, circular motion. You must keep swirling until the exact moment you are ready to pour. This keeps the foam and milk integrated and prevents separation.
- Look for the Sheen: As you swirl, you will see the milk develop a beautiful, uniform sheen. This is the sign that your milk has the perfect microfoam texture and is ready for pouring.
Pro-Tip: Never let your steamed milk sit still! It will start to separate into layers of hot milk and stiff foam within seconds. The swirling motion is non-negotiable and must be continued right up until you start your pour.
6. Pour the Heart Foundation (Set & Blob)

Save this core pouring technique for your practice sessions!
All latte art is based on one fundamental pouring motion: starting high to mix the base, then dropping low to draw the design.
What You Need:
- Your cup with the fresh espresso shot
- Your pitcher of perfectly groomed microfoam
Step-by-Step Directions:
- Tilt Your Cup: Hold your latte cup in your non-dominant hand and tilt it towards the pitcher at about a 45-degree angle. This brings the surface of the espresso closer to the pitcher’s spout, giving you more control.
- Start High (Set the Canvas): Begin pouring a thin, steady stream of milk from about 4-6 inches above the cup, directly into the center of the espresso. This high pour allows the milk to dive underneath the crema, mixing to create a uniform brown canvas.
- Fill to 2/3 Full: Continue this high pour until the cup is about two-thirds full. As you pour, slowly begin to level the cup back to a flat position.
- Drop in Low (Create the Blob): Now for the art. Swiftly bring the spout of the pitcher down so it is almost touching the surface of the liquid in the center of the cup. A white dot will immediately appear on the surface.
- Expand the Blob: Keep pouring steadily into that central dot. Don’t move the pitcher around. Just let the flow of milk expand the dot into a large, round circle that will become the body of your heart.
Lesson Learned: The distance of the pour is everything. A high pour mixes. A low pour draws. The biggest beginner mistake is starting to “draw” (the low pour) too soon, before the canvas is properly mixed and filled.
7. Finish with the Classic Pull-Through

Pin the final step to your perfect latte art heart!
This final, quick motion transforms your white circle into the classic heart pattern. It requires a steady, confident hand.
What You Need:
- Your cup, now nearly full with the white circle foundation
- The remaining milk in your pitcher
Step-by-Step Directions:
- Continue the Pour: Keep pouring into the center of the white circle until the cup is almost completely full.
- Lift and Accelerate: To finish the heart, lift the pitcher slightly higher (about an inch). This will cause the stream of milk to become thinner.
- Pull Through: In one smooth, confident motion, move the thin stream of milk forward, straight through the center of the circle to the opposite edge of the cup.
- Stop the Flow: Cut off the flow of milk as you reach the far edge. The forward motion will pull the foam into a point, creating the classic heart shape.
- Admire Your Work: You did it! Take a moment to admire your first successful coffee art heart before you enjoy it.
Pro-Tip: Confidence is key on the pull-through. A hesitant or shaky motion will result in a wiggly, undefined line. Commit to a single, smooth stroke from the center to the edge.
Key Takeaways: Your Quick Guide to Perfect Pours
As you practice, keep these core principles in mind. They are the foundation of every successful pour.
- Texture is Everything: Focus 80% of your effort on mastering silky, glossy microfoam. Without the right “paint,” you can’t create art.
- Cold is Gold: Always start with cold milk in a cold pitcher. This gives you more time to create the perfect texture before the milk gets too hot.
- High and Low: Remember the two-part pour. Pour from high up to mix your canvas, then drop the pitcher spout low (almost touching) to draw the design.
- Listen to the Sound: The sound of a gentle “hiss” for only a few seconds is the key to avoiding big, stiff bubbles that ruin your texture.
- Practice with a Purpose: Don’t just pour randomly. Isolate skills. Practice only steaming one day, and only pouring motions (with water) the next to build muscle memory.
People Also Ask About Learning Latte Art
Why is my latte art foam too bubbly and stiff?
You are likely introducing too much air for too long. This is the most common beginner mistake. The “stretching” or aeration phase (the hissing sound) should only last 3-5 seconds. After that, you must raise the pitcher to submerge the wand, stopping the hiss and focusing only on spinning the milk in a vortex to create a silky texture.
Why does my design look muddy and have no white contrast?
This is a pouring distance problem. To get a sharp white design, the spout of your pitcher must be extremely close to the surface of the coffee when you pour the art. If you pour from too high, the milk dives under the crema, resulting in a muddy, undefined look. Set your canvas from high up, then drop in very low for the design.
What is the best milk for latte art beginners?
Whole dairy milk is unquestionably the best for learning. Its higher fat and protein content creates a more stable, forgiving, and easy-to-steam microfoam. While you can use alternative milks, always choose a “barista series” version, as they have added ingredients to help them steam properly.
How can I practice latte art without wasting milk?
You can practice the two core skills separately. To practice steaming, use a pitcher of cold water with a single drop of dish soap. It will foam up in a very similar way to milk, allowing you to practice the aeration and vortex technique. To practice pouring, simply use water in both your pitcher and your cup to master the physical motions.
Final Thoughts
Learning how to make coffee art is a journey of patience and practice. Remember that every expert barista started by making bubbly messes. This is a technical skill based on physics and muscle memory, not an innate artistic talent.
By focusing on the fundamentals—especially creating silky microfoam with a perfect vortex—you are building the foundation for success. Celebrate the small victories, learn from the messy cups, and be patient with yourself. With consistent practice, you will develop the control and confidence to pour a beautiful latte art heart every time.
What’s the biggest challenge you’re facing in your latte art journey right now? Share in the comments below—let’s troubleshoot together
Last update on 2026-01-14 / Affiliate links / Images from Amazon Product Advertising API

