As an Amazon Associate CoffeeXplore.com earns from qualifying purchases.
Master Kombucha Home Brewing For Gut Health And Perfect Flavor
Struggling to perfect your homemade kombucha? You’re not alone. Many brewers face the challenge of achieving that perfect balance of fizz and flavor.
Kombucha is a naturally effervescent fermented tea beverage. It’s made by introducing a symbiotic culture of bacteria and yeast, known as a SCOBY, to sweetened tea. This process creates a drink packed with potential health benefits.
Kombucha brewing is a science-backed process that, when done correctly, produces a safe, probiotic-rich tea that supports your gut microbiome. This guide will walk you through every step, from understanding the microbiology to bottling a perfectly carbonated and flavorful finished product.
Are Fermented Tea Drinks Safe? The SCOBY Science Behind Kombucha
Kombucha is a naturally effervescent fermented tea beverage made by introducing a symbiotic culture of bacteria and yeast (SCOBY) to sweetened tea, producing organic acids and probiotics that support digestion and the gut microbiome. This guide, based on established scientific fermentation principles and food safety standards, demystifies the process, empowering you to brew with confidence. The primary entity in the world of fermented tea drinks is Kombucha, and at its heart is the SCOBY.
SCOBY is an acronym for a Symbiotic Culture of Bacteria and Yeast. This living culture, often called the “mother,” is a cellulose biofilm that houses the microorganisms responsible for fermentation. It transforms a simple sweet tea into a complex, acidic, and probiotic-rich beverage. Understanding this relationship is the first step to mastering your brew and ensuring every batch is safe. The key to safe brewing lies in controlling the environment to favor these beneficial microbes while inhibiting harmful pathogens.
The Microbiology of Mastery: Understanding Your SCOBY and Fermentation Process
To truly master home brewing, you need to understand the living engine behind it: your SCOBY. This isn’t just a single organism; it’s a complex microbial ecosystem. The culture is dominated by bacteria, primarily Acetobacter, and various yeast strains like Saccharomyces. This bacteria-yeast balance is critical for a successful brew.
The primary fermentation, or F1, is where the magic happens. Here’s the breakdown:
1. Yeast Action: The Saccharomyces yeast consumes the sugar (sucrose) in your sweet tea, breaking it down into ethanol (alcohol) and carbon dioxide (CO2).
2. Bacteria Action: The Acetobacter bacteria then consume the ethanol produced by the yeast and convert it into healthy organic acids, primarily acetic acid and gluconic acid. This is what gives kombucha its signature tangy, slightly vinegary taste.
This entire process relies on a safe, acidic environment. This is why strong starter tea—finished, unflavored kombucha from a previous batch—is non-negotiable. Its low pH (typically below 4.5) immediately acidifies the new batch of sweet tea, creating a protective barrier that prevents harmful mold and pathogenic bacteria from taking hold.
Proven Health Benefits and Risks: What Science Says About Kombucha for Gut Health
When brewed correctly, kombucha can be a valuable addition to a healthy lifestyle, but it’s essential to separate scientific fact from marketing hype. Based on clinical studies and scientific consensus, here are the primary benefits and potential risks.
The main health claims for this probiotic tea are linked to the fermentation byproducts. Here are the most well-supported benefits:
- Supports Gut Health with Probiotics: Raw, unpasteurized kombucha contains a variety of live bacteria and yeast cultures that can contribute to a diverse gut microbiome, which is essential for digestive function.
- Rich in Antioxidants from Tea Base: The polyphenols naturally present in black and green tea are preserved during fermentation. These antioxidants help combat oxidative stress in the body.
- Contains Beneficial Organic Acids: The fermentation process produces gluconic and acetic acids. Research suggests these acids may support detoxification processes and have antimicrobial properties.
- Provides Essential B Vitamins: The metabolic activity of the yeast can produce small amounts of B vitamins, including B1, B6, and B12.
Important Safety Disclaimer: While generally safe, homemade kombucha carries risks if not prepared under sterile conditions. The primary concerns are mold contamination, excessive acidity which can harm tooth enamel, and uncontrolled alcohol content. Individuals who are pregnant, breastfeeding, or have compromised immune systems should consult a healthcare professional before consuming homemade fermented beverages.
The Ultimate 9-Step Guide to Mastering Kombucha Home Brewing
Ready to move from theory to practice? This step-by-step guide is designed for beginner success, using recommendations from experienced brewers and professional fermentation standards. Follow these nine steps to create a delicious and safe batch of homemade kombucha.
1. Gathering Essential Food-Grade Equipment
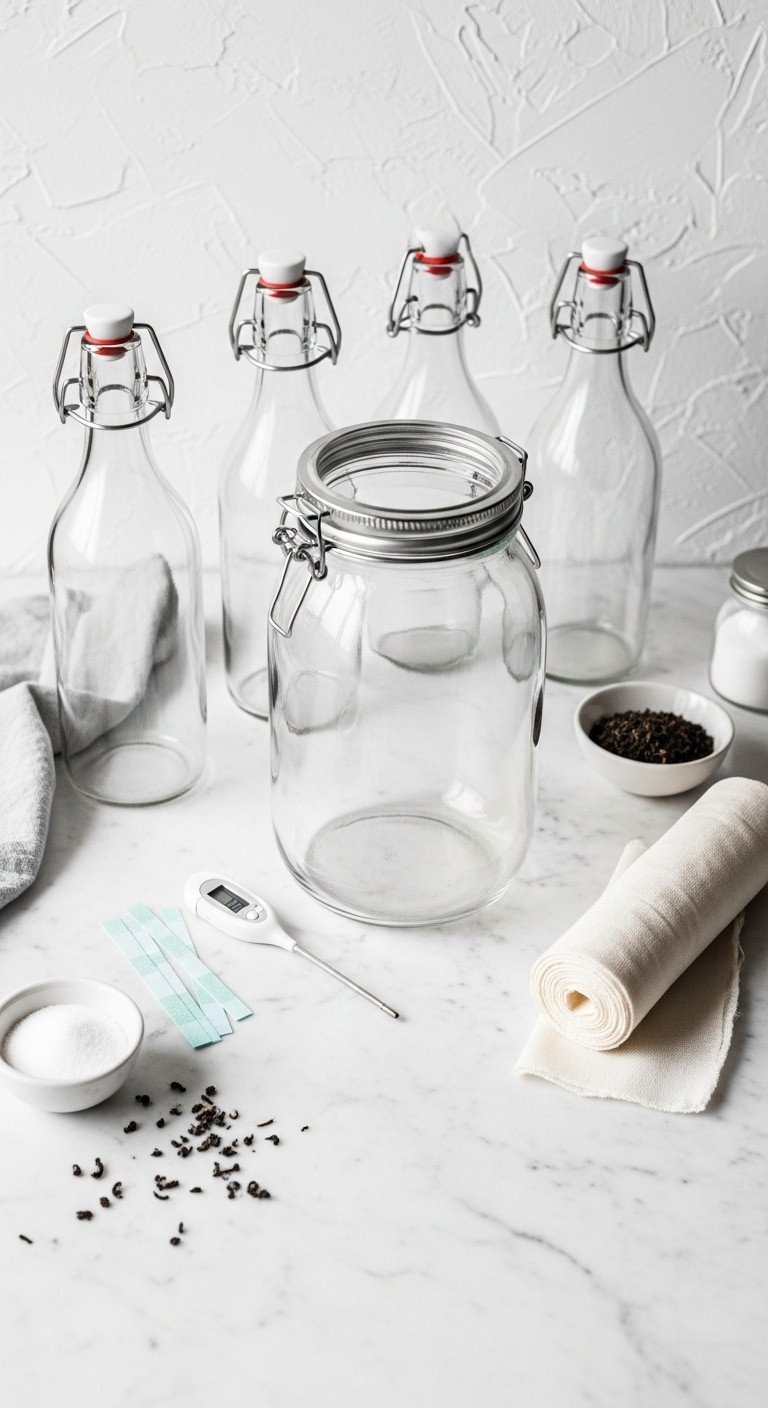
Pin this essential equipment checklist to your ‘DIY Fermentation’ board!
Having the right tools is the first step to a safe and successful brew. Using food-grade materials and pressure-safe bottles is non-negotiable.
Materials Needed:
- 1-gallon Wide-Mouth Glass Jar or Continuous Brew System (must be food-grade)
- Tight-Weave Cloth Cover (cheesecloth or cotton fabric) and Rubber Band
- Digital Thermometer (must be accurate for safety)
- Pressure-Safe Swing-Top Bottles (Grolsch style) for F2 (at least 6, 16oz size)
- Long wooden or plastic Stirring Spoon (metal must be avoided)
- Optional: Digital pH Test Strips or pH Meter for precise monitoring
Step-by-Step Directions:
- Clean all equipment thoroughly using hot water and white vinegar; avoid soap residue at all costs.
- Ensure the brewing vessel is completely dry before beginning the batch preparation.
- Set up a dedicated brewing space away from mold sources (like garbage or compost) that maintains a temperature between 75°F and 85°F.
- Organize all materials so that the brewing and bottling processes can occur efficiently without interruption.
Pro-Tip: Metal utensils can harm your SCOBY. Invest in a dedicated, food-grade plastic or wooden spoon for all brewing tasks to maintain culture health.
2. Preparing the Perfect Sweet Tea Base
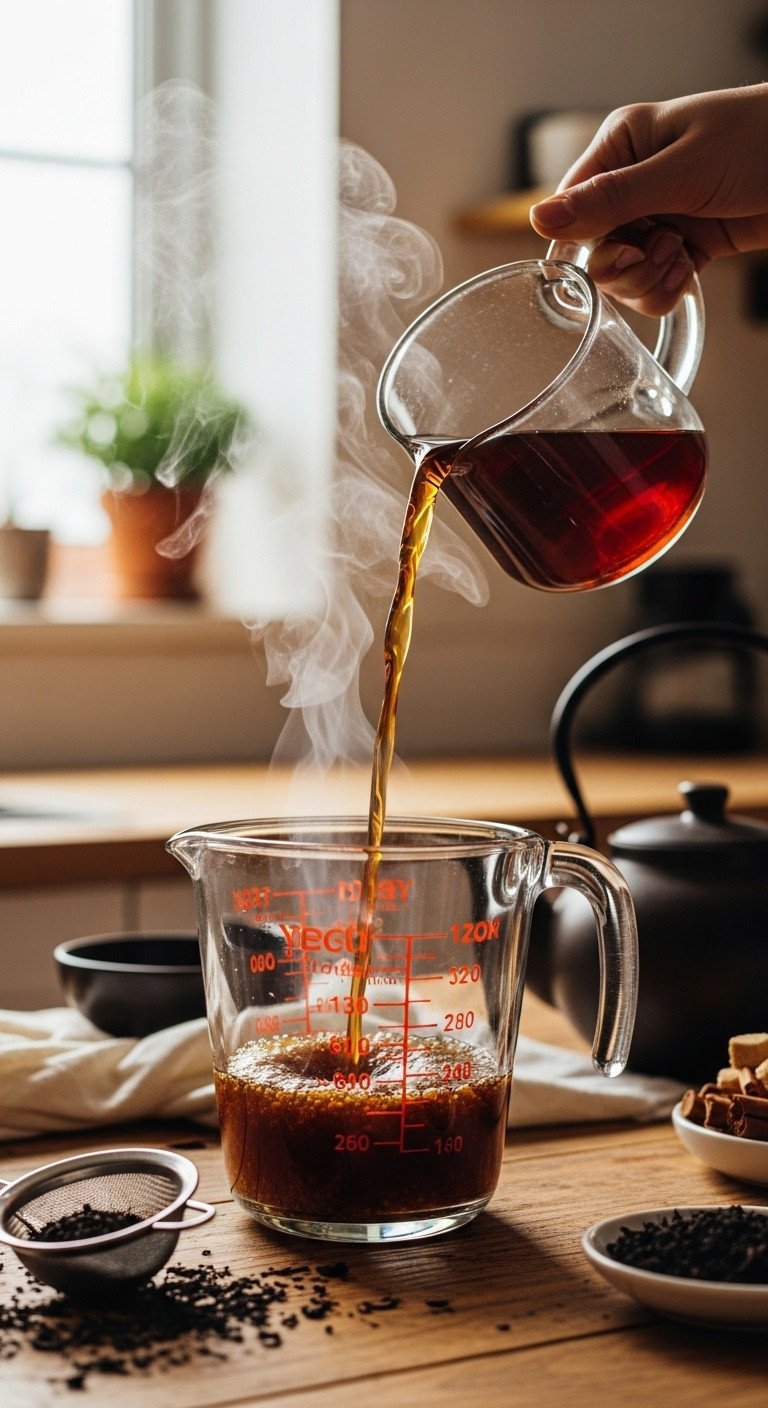
Save this clever organization idea!
The sweet tea is the food for your SCOBY. Getting the ratios and temperature right is crucial for a healthy culture and a delicious final product.
Materials Needed:
- 1 gallon filtered Water (avoid hard or distilled water)
- 8-10 bags or 8-10 teaspoons Loose Leaf Organic Black Tea (or a mix of black and green tea)
- 1 cup Granulated Cane Sugar (essential food for the SCOBY)
- Large stockpot or kettle
Step-by-Step Directions:
- Boil 4 cups of filtered water in your stockpot.
- Remove from heat and steep the tea for 5-7 minutes (do not over-steep, as this can add bitterness).
- Discard the tea bags or strain the loose leaves completely.
- Stir in the 1 cup of sugar until completely dissolved. The sugar is vital SCOBY food.
- Add the remaining 10 cups of cold, filtered water to the stockpot to rapidly cool the sweet tea.
- Critical: Wait for the sweet tea to cool to room temperature (70°F–85°F) before proceeding. Hot tea will kill the SCOBY culture.
Pro-Tip: Use a mix of 75% black tea and 25% green tea to provide a robust nutritional base for the bacteria while leveraging the higher polyphenol count of green tea.
3. Initiating the Primary Fermentation (F1)
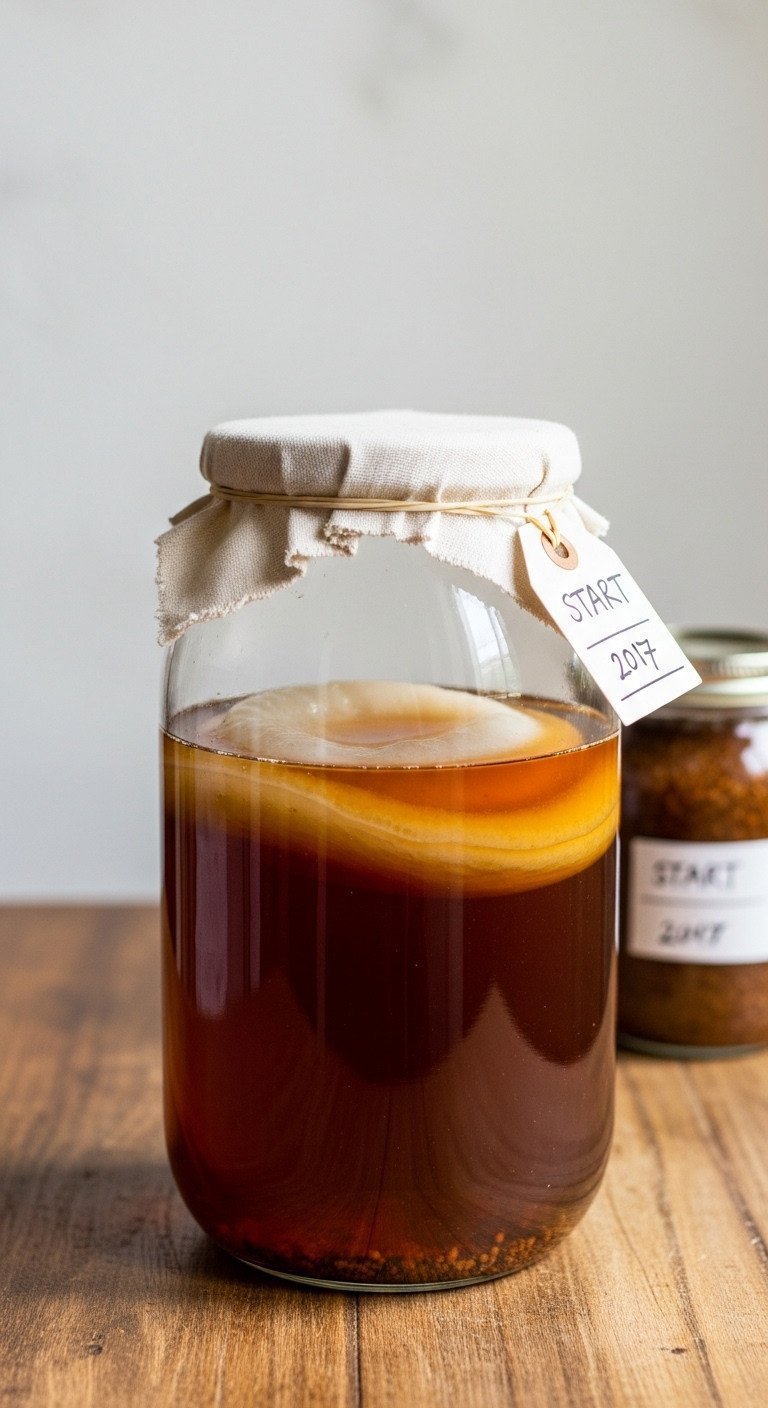
Follow my SCOBY care tips for maximum vitality!
This is the aerobic stage where your SCOBY does the heavy lifting, converting sweet tea into tangy kombucha. The starter tea is your insurance against contamination.
Materials Needed:
- Cooled Sweet Tea Base
- 1-2 cups Strong Starter Tea (finished, unflavored kombucha)
- 1 Healthy SCOBY Culture (pellicle)
Step-by-Step Directions:
- Pour the cooled sweet tea base into your sanitized glass brewing vessel.
- Gently add the 1-2 cups of strong starter tea, ensuring the liquid is below 85°F (the starter tea creates the necessary acidity, pH <4.5, to protect the brew).
- Place the SCOBY pellicle gently into the liquid. It may float, sink, or hover—all are normal.
- Secure the cloth cover tightly over the mouth of the jar using a rubber band. This allows for necessary air exchange (aerobic stage) while preventing fruit flies and contaminants.
- Place the jar in your dedicated, temperature-stable brewing location (75°F–85°F is optimal).
Safety Warning: Never start a batch without strong starter tea. The low pH is the single most important factor in preventing pathogenic bacteria and mold growth.
4. Monitoring and Testing F1 for Optimal pH and Taste
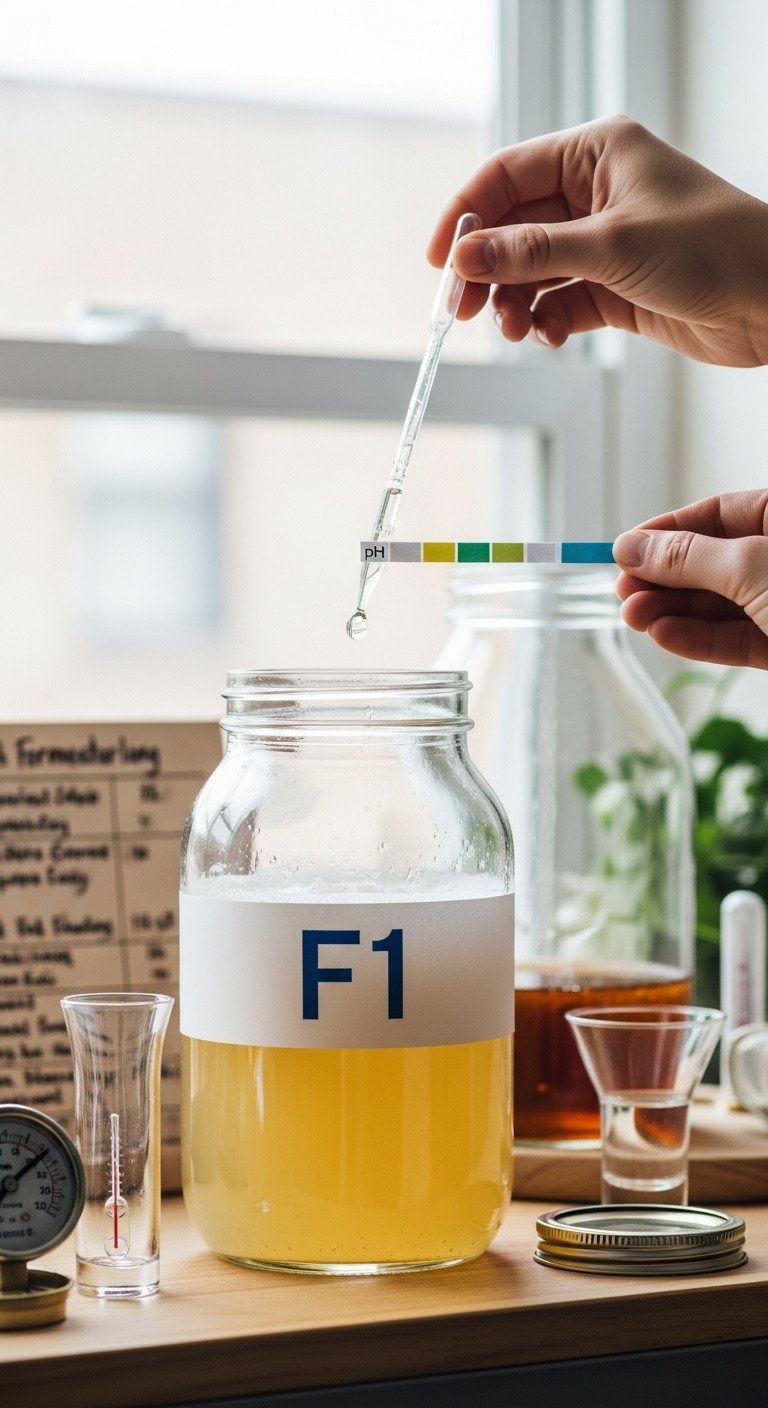
Don’t harvest blind! Test your pH for guaranteed safety and flavor.
Taste is subjective, but safety is not. Regular testing for both pH and flavor ensures you harvest your brew at the perfect moment.
Materials Needed:
- pH Test Strips or Digital pH Meter
- Small, clean utensil for sampling (plastic spoon)
- Fermentation Log Sheet
Step-by-Step Directions:
- Begin checking the brew daily starting on Day 5 or Day 7 (earlier in warm conditions, later in cool).
- Sample a small amount of liquid using a clean utensil (never drink directly from the primary vessel).
- Taste Test: When the brew transitions from overly sweet to a balance of sweet and tangy, it is close to completion.
- pH Test: Confirm the liquid is in the ideal range of pH 2.5 to 3.5. A pH above 4.0 is unsafe and needs longer fermentation or is contaminated (discard if pH does not drop).
- Once the flavor is right and the pH is safe, remove the SCOBY and reserve 2 cups of the finished liquid for the next batch (as starter tea).
Lesson Learned: If your brew tastes overly vinegary, you’ve fermented too long. Next time, harvest 2-3 days earlier. The vinegary liquid can be used as a cleaning solution or robust starter tea.
5. Mastering the Flavor Infusion During F2 Setup
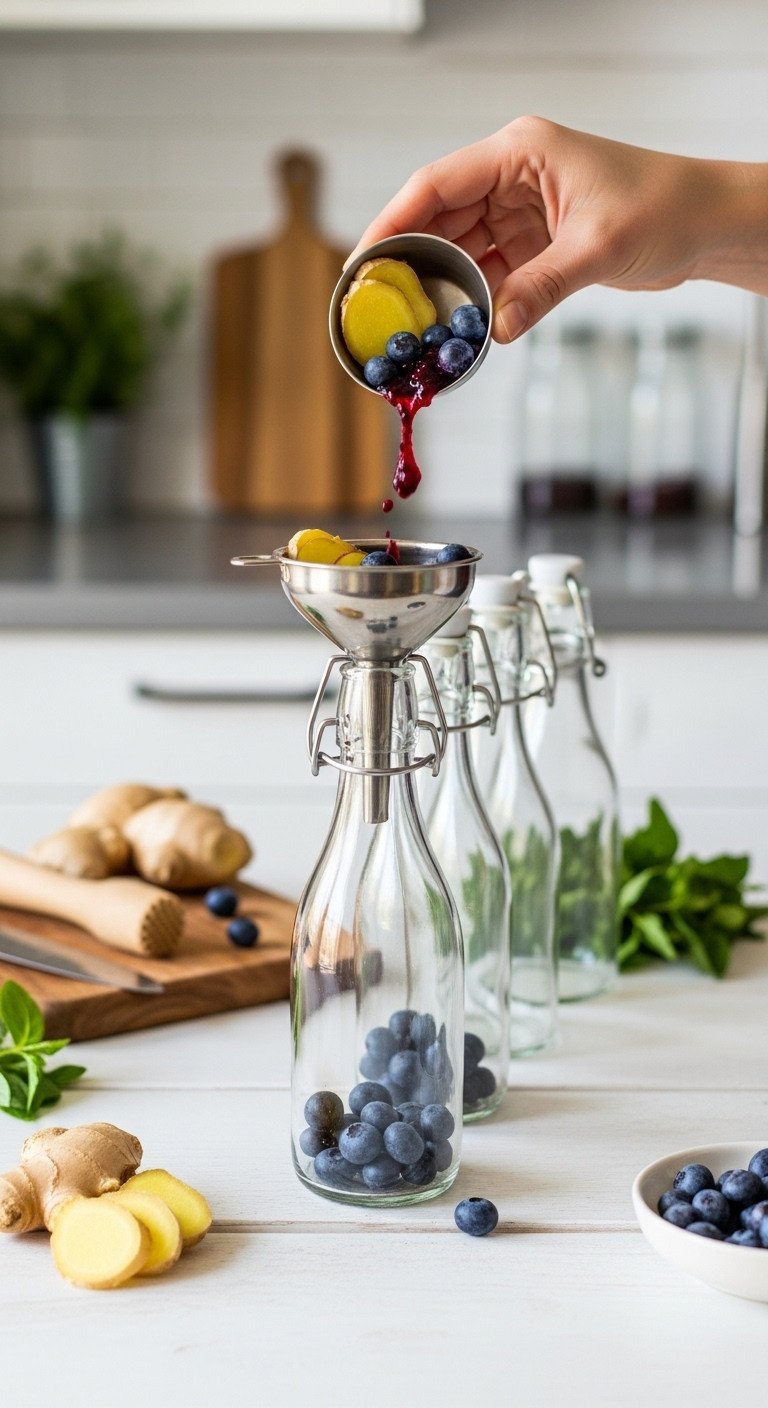
Unlock gourmet flavors! Check out our F2 ratios guide.
The second fermentation (F2) is where you add flavor and create carbonation. The key is providing a small amount of new sugar for the yeast to consume in an airtight environment.
Materials Needed:
- F1 Finished Kombucha (strained)
- Flavoring Agents (fruit juice, fresh fruit, ginger, herbs—avoiding anything oily)
- Funnel and Strainer
- Sweetener (optional, if F1 was very sour)
Step-by-Step Directions:
- Strain the finished F1 kombucha from the large jar into a clean pitcher or bowl to remove any yeast sediment.
- Prepare your flavorings (e.g., chop fresh ginger, create a simple fruit puree, or measure juice).
- Flavoring Ratio Guide: For a 16oz bottle, add 1-2 tablespoons of pureed fruit or 1/4 cup of fruit juice. For spices or herbs (like ginger or turmeric), use 1 teaspoon or less.
- Use the funnel to carefully add the flavorings to the bottom of each swing-top bottle.
- Fill the bottle with F1 kombucha, leaving at least 1 inch of headspace at the top.
Pro-Tip: Pureed fruit or juice will yield much higher carbonation than whole fruit, as it provides a greater surface area and more food (sugar) for the yeast.
6. The Second Fermentation for Maximum Carbonation
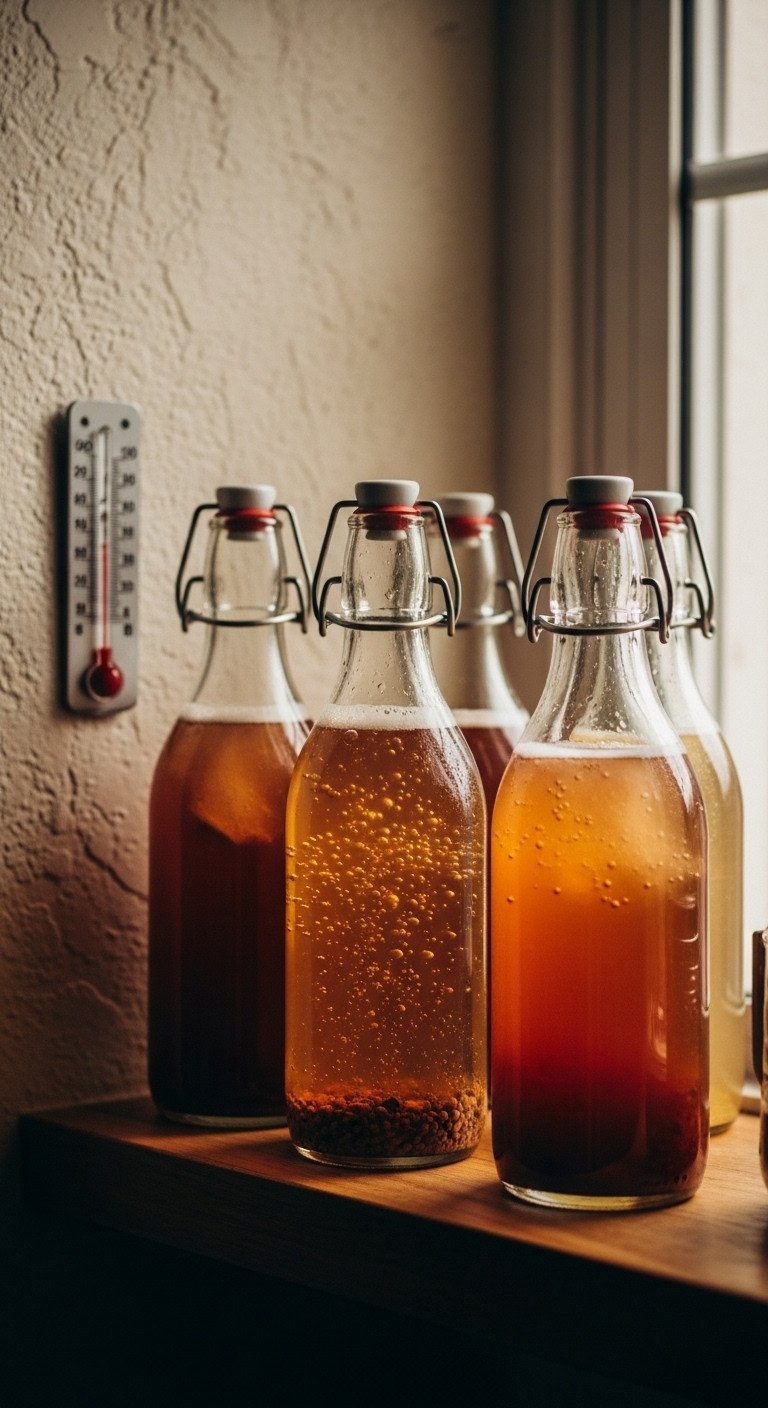
Achieve explosive carbonation safely with this step!
This anaerobic (oxygen-free) stage traps the CO2 produced by the yeast, creating that signature fizz. Monitoring is crucial to prevent over-pressurization.
Materials Needed:
- Sealed Swing-Top Bottles (filled with F1 and flavorings)
- Warm, temperature-stable location (70°F–75°F)
Step-by-Step Directions:
- Place the sealed bottles in a dark, warm location (around 70°F–75°F) for 2 to 5 days.
- Crucial Safety Step (Burping): Starting on Day 2, gently open (or “burp”) one bottle to test the pressure build-up. A quick hiss or pop indicates good carbonation.
- Continue monitoring the pressure daily by burping one bottle. If the hiss is strong, proceed to step 4. If it’s weak or flat, allow one more day before checking again.
- Critical: Once desired carbonation is achieved (the strong hiss/pop), immediately transfer all bottles to the refrigerator.
Safety Warning: Neglecting to burp or refrigerate pressurized bottles can cause them to explode. Always use pressure-safe bottles, and never ferment longer than 7 days in F2 at room temperature.
7. Safe Bottling, Straining, and Storage Protocol

Your finished brew is ready! Store it correctly to maintain carbonation.
Refrigeration is the final and most important step. It halts fermentation, locks in the carbonation, and ensures the flavor and alcohol content remain stable.
Materials Needed:
- Finished F2 Bottles
- Fine-mesh Strainer (optional, for removing sediment)
- Refrigerator
Step-by-Step Directions:
- Once the F2 stage is complete (optimal carbonation achieved), move bottles directly to the refrigerator.
- Cold temperature halts the fermentation process, stopping yeast activity, preserving the carbonation, and ensuring stability (including stabilizing the alcohol content).
- When ready to serve, open the bottle slowly over a sink (especially if highly carbonated) and pour.
- Optional: If using large fruit pieces or chunky purees, pour the kombucha through a fine-mesh strainer to remove sediment before serving.
Pro-Tip: Proper refrigeration is key to controlling the final alcohol level. If you are concerned about ABV, harvest your F1 earlier (when it is still slightly sweet) and chill F2 immediately after carbonation.
8. The SCOBY Hotel: Maintenance and Long-Term Care

Don’t toss your extras! Learn how to maintain a healthy SCOBY Hotel.
As you brew, your SCOBY will grow new layers. A SCOBY “hotel” is a simple way to store these extras for backup or to share with friends.
Materials Needed:
- Extra SCOBY Pellicles
- Large Glass Jar
- 2 cups Mature Starter Tea (vinegar)
- Sweet Tea Mixture (for monthly feeding)
Step-by-Step Directions:
- Place your excess SCOBYs and at least 2 cups of mature, finished kombucha (now highly acidic starter tea) in a clean glass jar.
- Cover the jar tightly with a cloth lid and rubber band, similar to the F1 vessel.
- Store the SCOBY hotel in a cool, dark place (like a cupboard or pantry).
- Feeding Schedule: Every 4–6 weeks, remove 1 cup of the acidic liquid and replenish the hotel with 1 cup of freshly brewed and cooled sweet tea (using the standard 1 cup sugar/gallon ratio, scaled down).
Lesson Learned: If your SCOBY hotel liquid looks cloudy or develops thin, stringy layers, it’s working! If it develops dry, fuzzy spots, discard it immediately.
9. Diagnosing and Fixing Flat or Vinegary Brews
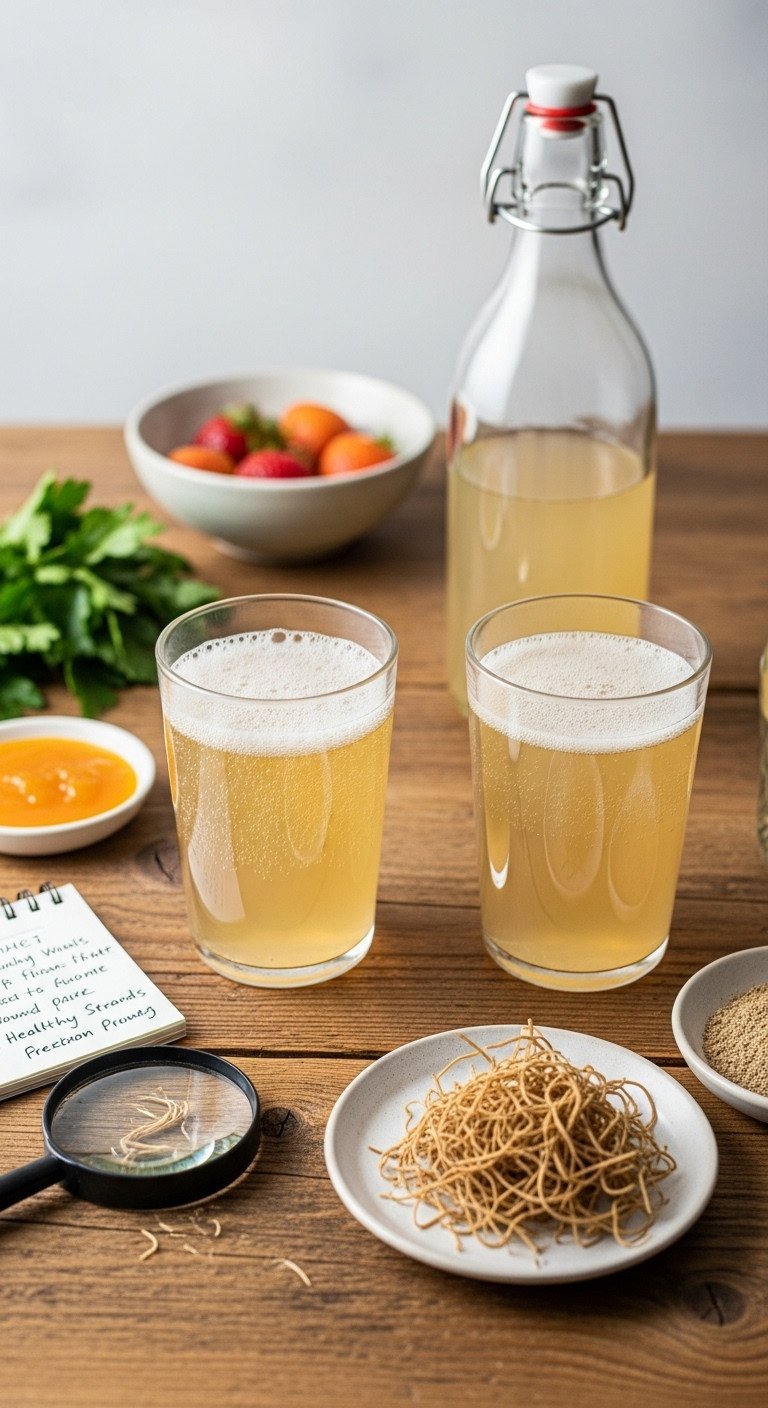
Troubleshooting Guide: Never settle for flat or vinegary kombucha again!
Every brewer encounters issues. Here’s how to diagnose and fix the most common problems to ensure every batch is a success.
Materials Needed:
- Affected F1 or F2 Batch
- Extra Sugar Source (juice, simple syrup)
- Thermometer
Step-by-Step Directions:
- Problem: Flat F2 Kombucha. Solution: Ensure your bottles are pressure-safe and airtight. If they are, add 1-2 teaspoons of extra simple syrup or 1/4 cup of high-fructose fruit juice concentrate to each bottle, reseal, and return to room temperature (75°F) for 2–3 more days.
- Problem: F1 Tastes Too Vinegary/Sour. Solution: Your brew is over-fermented. Reduce the F1 time by 3-5 days in the next batch. Use the vinegary brew as extra-strong starter tea for future batches.
- Problem: No Fermentation Activity. Solution: Check the temperature. If it is below 70°F, use a heating mat to stabilize the temperature. Ensure your SCOBY is healthy and the starter tea was strong enough (if starting with a dried SCOBY, activity may take longer).
- CRITICAL: Mold Identification. Mold looks fuzzy, dry, and often blue, green, or black on the surface. If mold is present, DISCARD THE ENTIRE BATCH AND SCOBY. Mold contamination cannot be reversed.
Expert Insight: According to professional fermentation standards, low carbonation is almost always an issue of insufficient food (sugar) for the yeast during F2 or incorrect temperature during the F2 stage. Yeast needs both warmth and sugar to produce adequate CO2.
Key Takeaways: Your Quick Guide to SCOBY Safety and Success
To ensure every batch of your fermented tea is delicious and safe, keep these core principles in mind. They are the foundation of successful and confident home brewing.
- Prioritize Safety (pH): Always ensure your brew’s pH drops below 4.5 within 48 hours (and aim for 2.5–3.5 for harvesting) by using 1-2 cups of strong, acidic starter tea per gallon.
- Control Temperature: Maintain the primary fermentation (F1) temperature between 75°F and 85°F for consistent, healthy activity and to discourage mold growth.
- Master F2 Carbonation: Use pressure-safe bottles and 1–2 tablespoons of sugar-rich fruit puree or juice per 16oz bottle during the secondary fermentation to achieve perfect fizz.
- Recognize Contamination: If you see dry, fuzzy blue/green/black spots, it is mold—discard the entire batch immediately.
- Avoid Metal: Never let your SCOBY or fermenting tea touch metal for long periods, as it can disrupt the microbial balance.
FAQs About fermented tea drinks
What is the main difference between Kombucha and Jun Tea?
Kombucha and Jun Tea differ primarily in their base ingredients and optimal fermentation temperature. Kombucha uses black or green tea and refined cane sugar, fermenting best at 75°F to 85°F, resulting in a tart, vinegary flavor. Jun uses green tea and raw honey as a sweetener, requiring a slightly cooler temperature (68°F to 78°F), resulting in a lighter, sometimes floral, smoother flavor.
How can I tell for sure if my SCOBY has mold or just harmless yeast?
Mold is fuzzy, dry, and often appears in circular blue, green, or black patches on the surface of the pellicle or liquid. Healthy yeast and bacteria are wet, shiny, and can appear as brownish, stringy sediment hanging below the SCOBY or floating in the liquid. If you suspect mold, discard the entire batch, as it may contain harmful toxins.
Is it safe to drink homemade Kombucha every day?
Yes, homemade kombucha is safe for most healthy adults to consume daily, provided it is brewed safely with a final pH between 2.5 and 3.5. Due to the slight alcohol content and high acidity of homebrews, consumption should be monitored, especially by pregnant women or individuals with specific health conditions. Always listen to your body and consult a healthcare professional regarding regular probiotic intake.
What are the best teas to use for a healthy, long-lasting SCOBY?
The best teas for a healthy, long-lasting SCOBY are traditional black and green teas. These teas provide the essential nitrogen and nutrients (polyphenols/tannins) required to sustain the bacterial and yeast colonies. Avoid flavored teas, especially those containing oils (like Earl Grey), or herbal teas that lack the necessary compounds to feed the culture effectively.
Does homemade Kombucha contain enough probiotics to actually benefit gut health?
Homemade Kombucha is an excellent source of diverse live cultures and organic acids, making it highly beneficial for gut health. Unlike many commercial brands that may be pasteurized, raw homemade brews retain all the active bacteria (Acetobacter) and yeast (Saccharomyces), providing a potent and cost-effective method for supporting the gut microbiome.
Final Thoughts
Mastering fermented tea drinks at home transforms the experience from a costly health habit into a rewarding, safe, and highly personalized craft. By integrating the critical safety protocols—especially rigorous pH monitoring and temperature control—you move beyond guesswork to become a truly confident brewer. You now possess the scientific knowledge of the SCOBY and the actionable steps required to achieve perfectly flavored, highly carbonated kombucha every single time.
What unique flavor combination are you planning for your first batch of perfectly carbonated January 2026 homemade kombucha? Share your ideas in the comments below
Last update on 2026-01-14 / Affiliate links / Images from Amazon Product Advertising API

