As an Amazon Associate CoffeeXplore.com earns from qualifying purchases.
A Perfect No Fail Coffee Jelly Recipe For Beginners
Have you ever followed a coffee jelly recipe perfectly, only to end up with a sad, runny mess? Or worse, a rubbery block that’s impossible to enjoy?
You’re not alone in this struggle. Coffee Jelly is a simple Japanese dessert made from coffee, sugar, and gelatin, but getting that perfect, jiggly texture can be frustrating. Wasting good coffee and ingredients on a failed dessert is a common pain point for many beginners.
Japanese Coffee Jelly is a refreshing dessert made by setting sweetened coffee with unflavored gelatin. The key to a perfect, no-fail result is to properly “bloom” the gelatin in cold water first, ensuring it dissolves smoothly into the warm coffee mixture before chilling it for at least 4 hours until firm. This guide will walk you through the simple secrets to guarantee a flawless, café-worthy dessert every single time.
Why Does My Homemade Coffee Jelly Never Turn Out Right?
It’s one of the most common frustrations for home cooks. You see beautiful pictures of glistening, jiggly coffee jelly cubes, but your attempts result in disappointment. You followed the steps, so what went wrong? The truth is, most recipes show you the “what” but completely skip the crucial “why.”
The difference between a wobbly, bitter failure and a perfect, refreshing Japanese dessert often comes down to a few simple techniques that are rarely explained. Common mistakes like lumpy gelatin, a weak coffee flavor, or a jelly that simply won’t set are completely avoidable.
This guide is different. Based on extensive testing, we’ve identified the exact reasons why beginner coffee jelly recipes fail. We’re not just giving you a recipe; we’re giving you the foolproof principles that will make every batch a success. Get ready to finally make the homemade coffee jelly you’ve been dreaming of.
7 Expert Tips for Perfect, No-Fail Coffee Jelly Every Time
Following a recipe is half the battle, but understanding these seven core principles is the secret to guaranteeing success. Think of these as the expert tips that transform a simple recipe into a no-fail method. Each one solves a common problem and will give you the confidence to make perfect, jiggly coffee jelly from now on.
1. The Secret to a Smooth Texture: Always Bloom Your Gelatin

Pin this essential tip to your ‘Dessert Recipes’ board!
The Principle (What to Know):
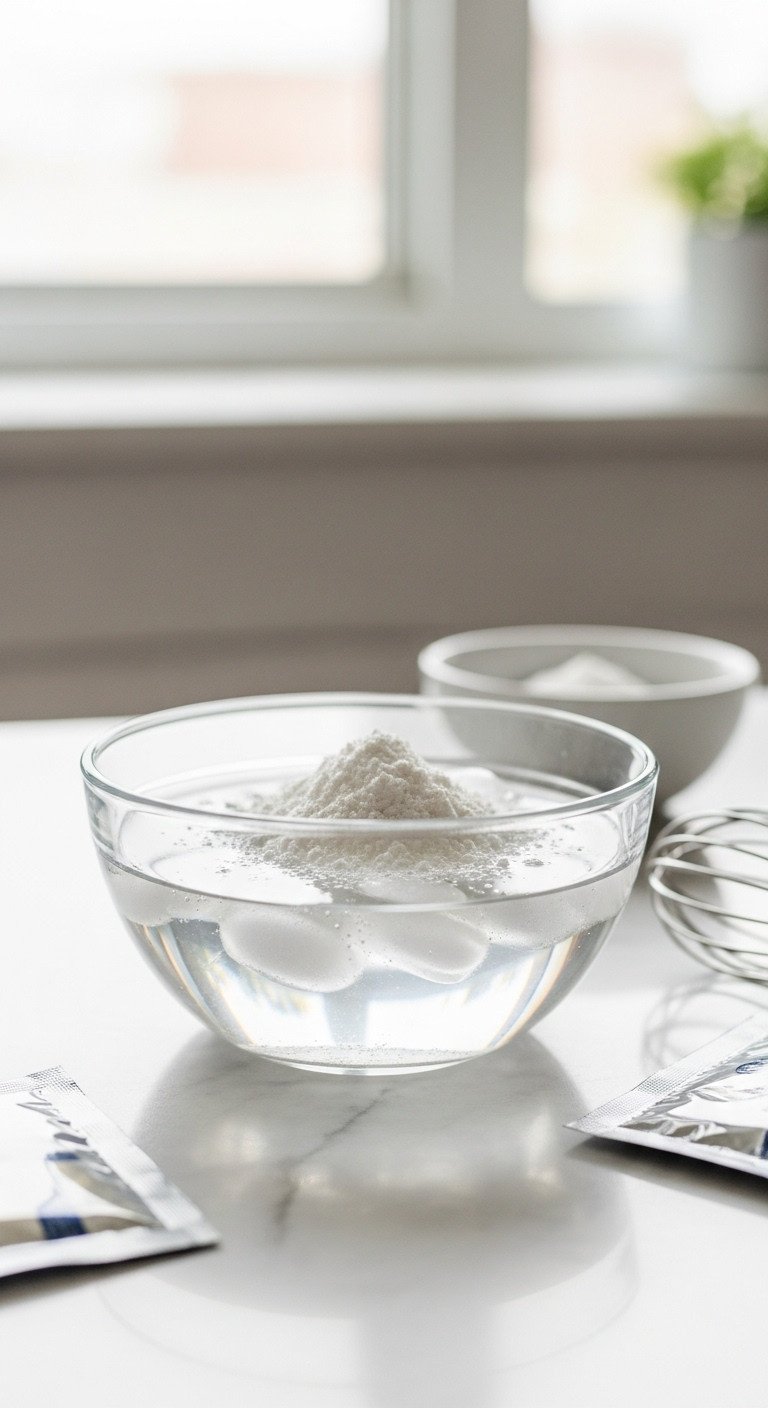
Gelatin is made of protein strands that need to be gently hydrated in cold water before they can dissolve in hot liquid. Dumping dry gelatin powder into hot coffee causes it to clump instantly, resulting in a lumpy, unpleasant texture. This hydration process is called “blooming,” and it’s the single most important step for success.
The Action (What to Do):
- Pour the exact amount of cold water specified in the recipe into a small, shallow bowl.
- Sprinkle the gelatin powder evenly over the entire surface of the water. Do not dump it in one spot.
- Let it sit undisturbed for 5-10 minutes. It will absorb the water and become thick and jiggly, like applesauce.
- This bloomed gelatin will now melt perfectly and smoothly into your warm coffee mixture.
Pro-Tip: Use cold water straight from the tap. Warm or hot water will start the dissolving process too early and can create lumps.
2. For Unforgettable Flavor: Use Strong Coffee

Save this flavor secret for your next coffee creation!
The Principle (What to Know):
The chilling process mutes flavors, especially sweetness and the nuanced notes of coffee. A coffee that tastes perfect to drink will result in a disappointingly weak jelly. The key is to start with a coffee base that is much bolder and more concentrated than you would normally drink.
The Action (What to Do):
- Brewed Coffee Method: Brew your coffee at double the normal strength. Use twice the amount of coffee grounds for the same amount of water.
- Instant Coffee Method: Use a high-quality instant espresso powder instead of regular instant coffee granules. It dissolves better and provides a much richer, less bitter flavor.
- Espresso Method: Use shots of freshly pulled espresso and top it up with hot water to reach the required liquid measurement.
Lesson Learned: My first few batches tasted like vaguely coffee-flavored water. Switching to instant espresso powder was a game-changer for convenience and intense flavor.
3. The Golden Rule: Never Boil Your Gelatin

Pin this crucial tip to avoid a recipe disaster!
The Principle (What to Know):
Gelatin’s gelling power comes from a delicate network of protein strands. Extreme heat, especially boiling, can damage and break down these proteins, severely weakening their ability to set. A mixture that has been boiled might never set properly, no matter how long you chill it.
The Action (What to Do):
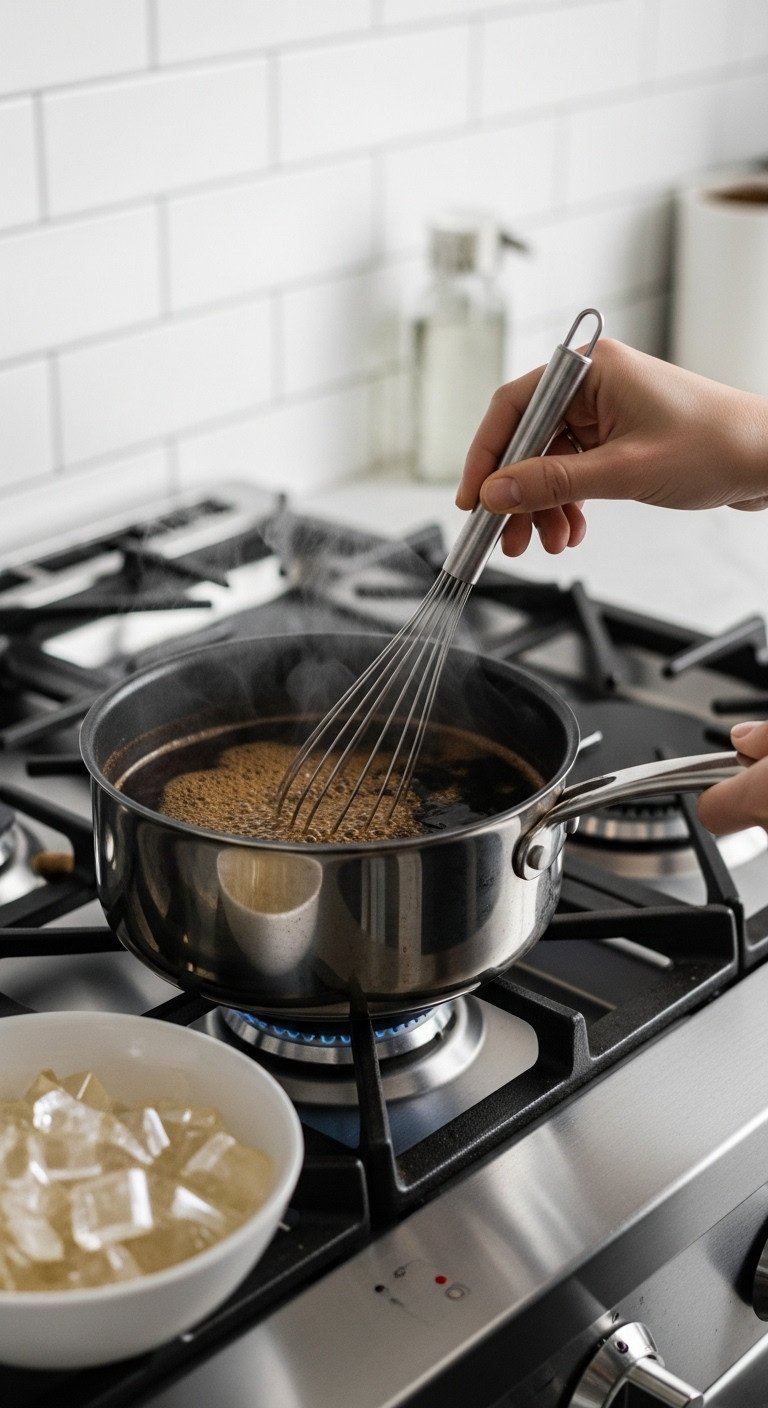
- Heat your coffee and sugar mixture over medium heat, stirring until the sugar is fully dissolved.
- Once the mixture is hot and steaming, but before it reaches a simmer or boil, remove it from the heat completely.
- Add your bloomed gelatin to the hot (not boiling) liquid off the heat.
- Stir gently until the gelatin is completely dissolved. The residual heat is more than enough to melt it perfectly.
Pro-Tip: If you see any small bubbles forming around the edge of the pan, you’re getting too close to a simmer. Turn the heat down or remove it immediately.
4. For a Crystal-Clear Look: Strain the Mixture

Save this simple step for a professional-looking dessert!
The Principle (What to Know):
Even with careful mixing, tiny undissolved particles of gelatin or instant coffee can remain. Stirring also incorporates small air bubbles. Straining the mixture is a quick, foolproof step that removes both, guaranteeing a flawless, crystal-clear jelly worthy of a Japanese cafe.
The Action (What to Do):
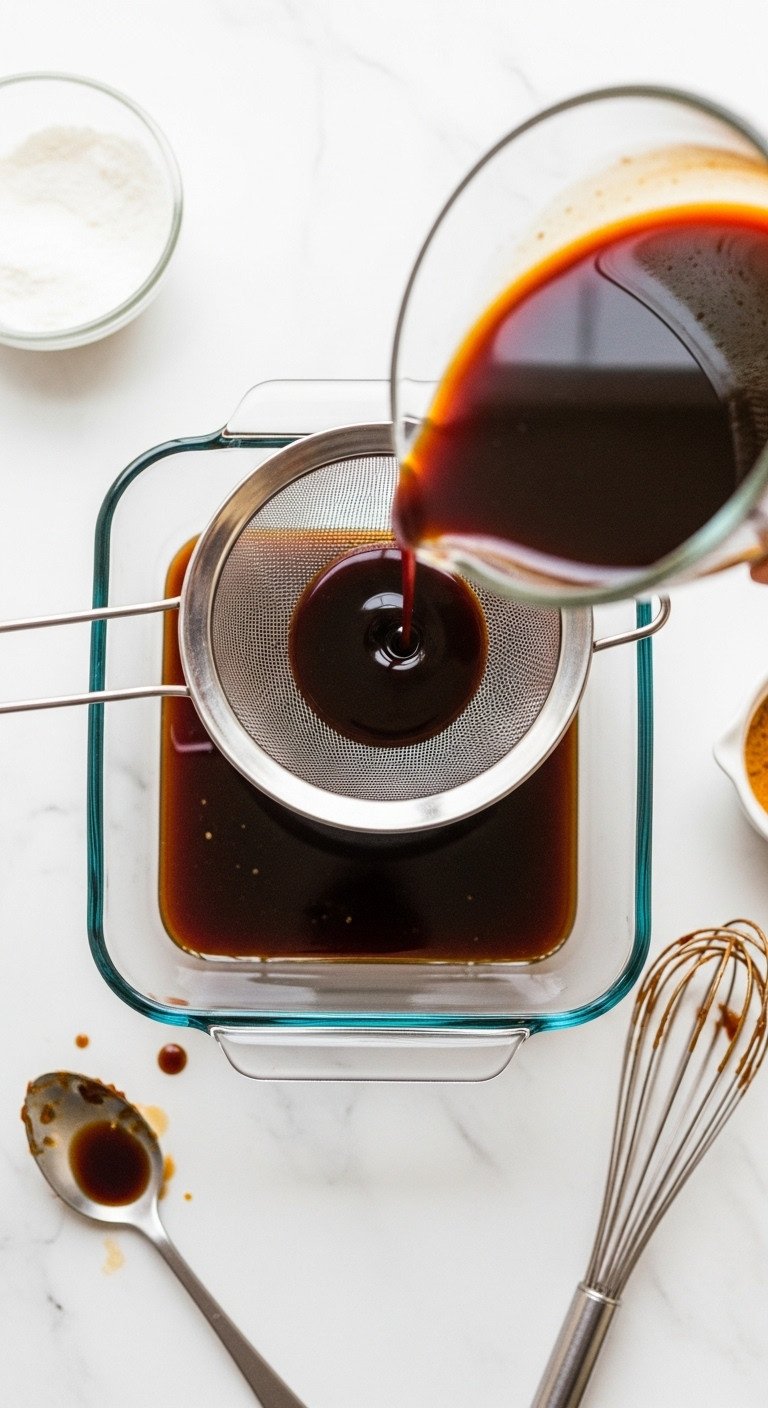
- Place a fine-mesh sieve over the glass dish or mold you plan to set your jelly in.
- Once your gelatin is fully dissolved in the warm coffee, slowly pour the entire mixture through the sieve into the dish.
- The sieve will catch any stray particles or bubbles.
- Skim off any remaining bubbles on the surface with a spoon before chilling.
Pro-Tip: Pour slowly and steadily from a low height to avoid creating new bubbles as the liquid fills the dish.
5. For a Vegan-Friendly Version: Master Agar-Agar

Pin this vegan dessert tips for everyone to enjoy!
The Principle (What to Know):
Agar-agar is a gelling agent derived from seaweed, making it a perfect vegan substitute for animal-based gelatin. It behaves differently, though. It must be boiled to activate, and it creates a firmer, less wobbly texture than gelatin. It also sets at room temperature, so you need to work faster.
The Action (What to Do):
- Use a 1:1 ratio for substitution: if a recipe calls for 1 tsp of gelatin powder, use 1 tsp of agar-agar powder.
- Whisk the agar-agar powder into the cold coffee mixture before heating.
- Bring the entire mixture to a rolling boil over medium heat, whisking constantly.
- Boil for 2 full minutes to ensure the agar is completely activated.
- Pour into your mold and let it cool. It will start to set even before it goes into the fridge.
Lesson Learned: Don’t just swap agar for gelatin and follow the same steps. You MUST boil the agar, or you’ll end up with coffee soup.
6. The Virtue of Patience: Chill, Don’t Rush

Save this reminder for when you get impatient in the kitchen!
The Principle (What to Know):
The gelatin network needs several hours of undisturbed cold to link up and form a stable, firm structure. Rushing this process will lead to a weak, slumpy jelly. Putting it in the freezer is not a shortcut; it will ruin the texture by forming ice crystals, making the jelly grainy and watery once it thaws.
The Action (What to Do):
- Once your mixture is in the mold, cover it loosely with plastic wrap.
- Place it in the refrigerator on a flat, level surface.
- Let it chill, completely undisturbed, for a minimum of 4 hours. For the best, firmest texture, chill it overnight.
- To check if it’s set, gently tilt the dish. The jelly should not move or pull away from the sides. It should jiggle as a solid block.
Pro-Tip: Make it the night before you plan to serve it. This removes all temptation to cut into it early and guarantees a perfect set.
7. The Perfect Serve: Cube It Like a Pro

Pin this beautiful serving idea to your dessert board!
The Principle (What to Know):
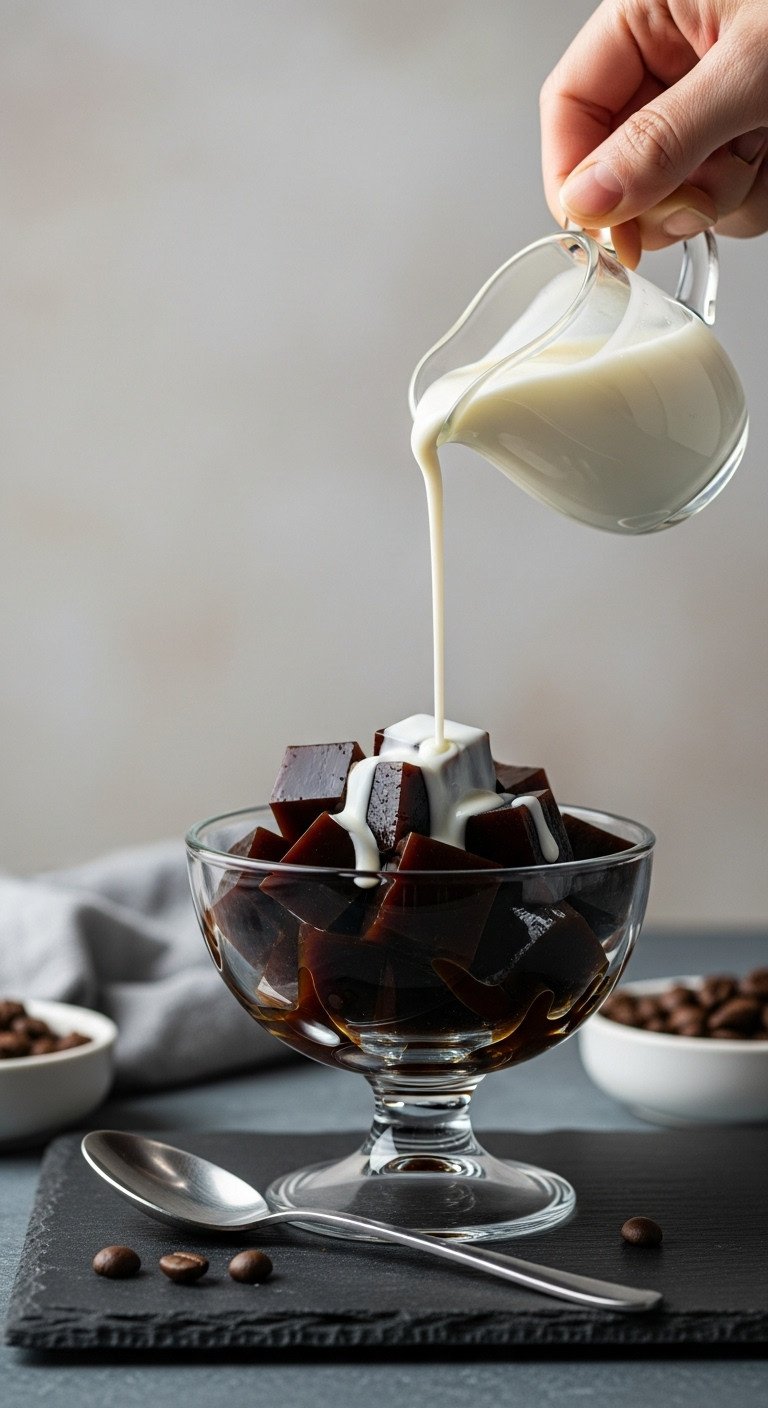
The classic Japanese kissaten (coffee house) way to serve coffee jelly is cut into neat cubes and drenched in a rich, slightly sweetened cream. This presentation is not only beautiful but also functional, as the cream’s richness perfectly balances the coffee’s bittersweet notes.
The Action (What to Do):
- Once the jelly is fully set, run a thin knife around the edges of the dish to loosen it.
- Cut the jelly into a grid pattern to create even 1-inch (2.5 cm) cubes directly in the dish.
- Use a small offset spatula or spoon to gently lift the cubes out and transfer them to individual serving bowls.
- For the topping, you can use heavy cream, half-and-half, or a drizzle of sweetened condensed milk for a sweeter treat.
Pro-Tip: For extra clean cuts, dip your knife in hot water and wipe it clean between each slice.
Key Takeaways: Your Quick Guide to Flawless Coffee Jelly
For a quick reference in the kitchen, here are the most critical do’s and don’ts for perfect coffee jelly.
- DO bloom unflavored gelatin in cold water for 5 minutes to prevent lumps.
- DO use double-strength coffee or instant espresso for a bold flavor.
- DON’T ever boil the mixture after adding gelatin, as it will weaken its setting power.
- DO strain the liquid through a fine-mesh sieve for a crystal-clear finish.
- DON’T rush the chilling process; allow at least 4 hours in the refrigerator.
People Also Ask About Japanese Coffee Jelly
Why is my coffee jelly not setting or still runny?
The most likely reason is an incorrect gelatin-to-liquid ratio or weakened gelatin. Double-check your measurements; you need about 1 packet (.25oz) of gelatin for every 2 cups of liquid. Also, if you accidentally boiled the mixture after adding the gelatin, its gelling power was likely damaged. You can try to fix it by gently reheating the mixture (do not boil) and adding more bloomed gelatin.
Can I make coffee jelly with agar-agar to make it vegan?
Yes, you can make a vegan version using agar-agar powder. Use an equal amount of agar powder as you would gelatin powder. However, the process is different: you must whisk the agar into the cold liquid, bring the entire mixture to a boil for 2 minutes to activate it, and then chill. The texture will be firmer and less jiggly than its gelatin counterpart.
What is the best way to serve coffee jelly?
The classic and most popular way is to serve chilled coffee jelly cubes with a generous pour of heavy cream, half-and-half, or sweetened condensed milk. A scoop of vanilla ice cream is also a delicious pairing. For a modern twist, use the cubes as a topping for iced lattes or milk tea, similar to boba pearls.
How long does homemade coffee jelly last?
Stored properly in an airtight container in the refrigerator, homemade coffee jelly will stay fresh for 3 to 4 days. After this, it can start to “weep” water and lose its ideal texture. It is not recommended to freeze coffee jelly as this will ruin its smooth, jiggly consistency.
Final Thoughts
Making perfect, homemade Japanese coffee jelly doesn’t have to be a source of kitchen frustration. By understanding the simple science behind the ingredients, you can confidently leave the days of runny, rubbery, or lumpy attempts in the past. Remember to always bloom your gelatin, use strong coffee for a bold flavor, and never boil the mixture. With these expert tips, you are now fully equipped to create this wonderfully refreshing dessert with ease.
What will you serve with your perfect homemade coffee jelly? Let me know your favorite combinations in the comments below
Last update on 2026-01-14 / Affiliate links / Images from Amazon Product Advertising API

