As an Amazon Associate CoffeeXplore.com earns from qualifying purchases.
Perfectly Layered Chai Espresso Tonic Recipe You Need To Make
Tired of your usual iced coffee routine? You want something that feels special, a drink that’s both refreshing and complex, but you’re not sure where to start. You’ve heard whispers of the chai espresso tonic, a bubbly, layered, and spicy creation that looks as good as it sounds.
A Chai Espresso Tonic is a refreshing, non-alcoholic coffee drink made with chai spiced syrup, tonic water, and a shot of espresso served over ice. This guide will show you the foolproof, step-by-step method to create this beautiful cafe-quality beverage at home. Get ready to master your new favorite afternoon pick-me-up.
Why Is Everyone Obsessed With This Spicy, Bubbly Coffee Drink?
Before we dive into the recipe, let’s talk about what makes the chai espresso tonic so captivating. Imagine the perfect balance of flavors: the crisp bitterness of tonic water, the rich acidity of a perfect espresso shot, and the warm, aromatic embrace of chai spices. It’s a unique coffee recipe that delivers a complex, multi-layered sensory experience—bubbly, bold, and incredibly refreshing all at once.
It’s crucial to understand how this drink differs from its more common cousin, the Dirty Chai. A Dirty Chai is typically a hot, milk-based latte that combines chai concentrate with an espresso shot. The chai espresso tonic, however, is a completely different beverage. It’s a cold, sparkling, and non-dairy drink built on the effervescent foundation of tonic water, creating a lighter, fizzier experience that’s perfect for a warm afternoon. This guide provides a tried and tested recipe to help you craft this sophisticated coffee mocktail perfectly every single time.
7 Essential Steps for the Perfect Layered Chai Espresso Tonic
Making a cafe-style chai espresso tonic at home is easier than you think. This isn’t just a list of ingredients; it’s a proven, step-by-step tutorial designed to guarantee success, especially with those beautiful, Instagram-worthy layers. Each step in this recipe builds on the last, guiding you from preparation to the perfect final pour.
1. Master the Homemade Chai Spiced Syrup

Pin this essential syrup recipe for all your favorite drinks!
The heart of this drink is a deeply aromatic chai spiced syrup. Making your own from whole spices provides a depth of flavor you simply can’t get from a bottle.
Materials Needed:
- 1 cup water
- 1 cup granulated sugar
- 4 whole cinnamon sticks
- 8 whole green cardamom pods, lightly crushed
- 6 whole cloves
- 2 whole star anise
- 1-inch piece of fresh ginger, thinly sliced
- 2 black tea bags (or 2 tsp loose-leaf black tea)
- A small saucepan for simmering syrups
Step-by-Step Directions:
- Combine Ingredients: In the small saucepan, combine the water, sugar, cinnamon sticks, cardamom pods, cloves, star anise, and sliced ginger.
- Simmer: Bring the mixture to a gentle simmer over medium heat, stirring until the sugar has completely dissolved.
- Steep Spices: Reduce the heat to low and let the syrup simmer gently for 15 minutes to infuse the spice flavors. Do not let it boil rapidly.
- Infuse Tea: Remove the saucepan from the heat. Add the two black tea bags, cover, and let everything steep for another 20 minutes.
- Strain and Store: Remove the tea bags and pour the syrup through a fine-mesh sieve into a clean, airtight glass bottle or jar. Let it cool completely before storing in the refrigerator for up to 2 weeks.
Pro-Tip: Lightly crushing the cardamom pods with the flat side of a knife before adding them to the pot releases their essential oils for a much more fragrant and potent syrup.
2. Perfectly Chill Your Glass & Ingredients

Save this pro tip for the coldest, fizziest drinks every time!
Temperature is a critical factor for success. A cold environment preserves the tonic water’s carbonation and makes the drink ultra-refreshing.
Materials Needed:
- 1 tall glass (Collins or Highball, 10-12 oz)
- Refrigerator and freezer space
- Premium tonic water, such as Fever-Tree Indian Tonic Water
Step-by-Step Directions:
- Chill the Glass: Place your empty serving glass in the freezer for at least 10-15 minutes before you begin assembling the drink.
- Chill the Tonic: Ensure your bottle of tonic water is fully chilled in the refrigerator for several hours. Never use room temperature tonic.
- Prepare for Assembly: Only take the glass out of the freezer and the tonic out of the fridge right before you are ready to pour.
Lesson Learned: The number one killer of carbonation is warmth. A chilled glass and ingredients prevent your ice from melting quickly and keep the tonic’s bubbles lively from the first sip to the last.
3. Brew a Rich, Balanced Espresso Shot

Pin this for your ultimate at-home coffee bar inspiration!
A freshly brewed, high-quality espresso shot is the backbone of this drink’s flavor.
Materials Needed:
- Espresso machine and fresh, medium-roast coffee beans
- OR: 2 oz of high-quality cold brew coffee concentrate
- Small glass or pitcher
Step-by-Step Directions:
- Pull the Espresso: Brew one double shot of espresso (approximately 2 oz). Aim for a balanced extraction, avoiding anything too bitter or sour.
- Alternative Method: If you don’t have an espresso machine, use 2 oz of strong cold brew concentrate. This provides a smoother, less acidic but equally delicious base.
- Quick Cool: Pour the fresh espresso or cold brew concentrate over a single large ice cube in a separate small glass. This cools it down just enough to not shock the tonic water, preserving fizz. Swirl for 5-10 seconds.
Pro-Tip: A medium-roast coffee with fruity or chocolatey notes works beautifully with the chai spices. Avoid overly dark, oily roasts which can make the drink taste acrid.
4. Build the Foundation with Quality Tonic & Ice
Save this beautiful drink idea for your next get-together!
Building the base layers correctly sets the stage for a perfect final product.
Materials Needed:
- Your chilled highball glass
- Your homemade chai syrup
- Large, clear ice cubes
- 4-5 oz of premium, chilled tonic water
Step-by-Step Directions:
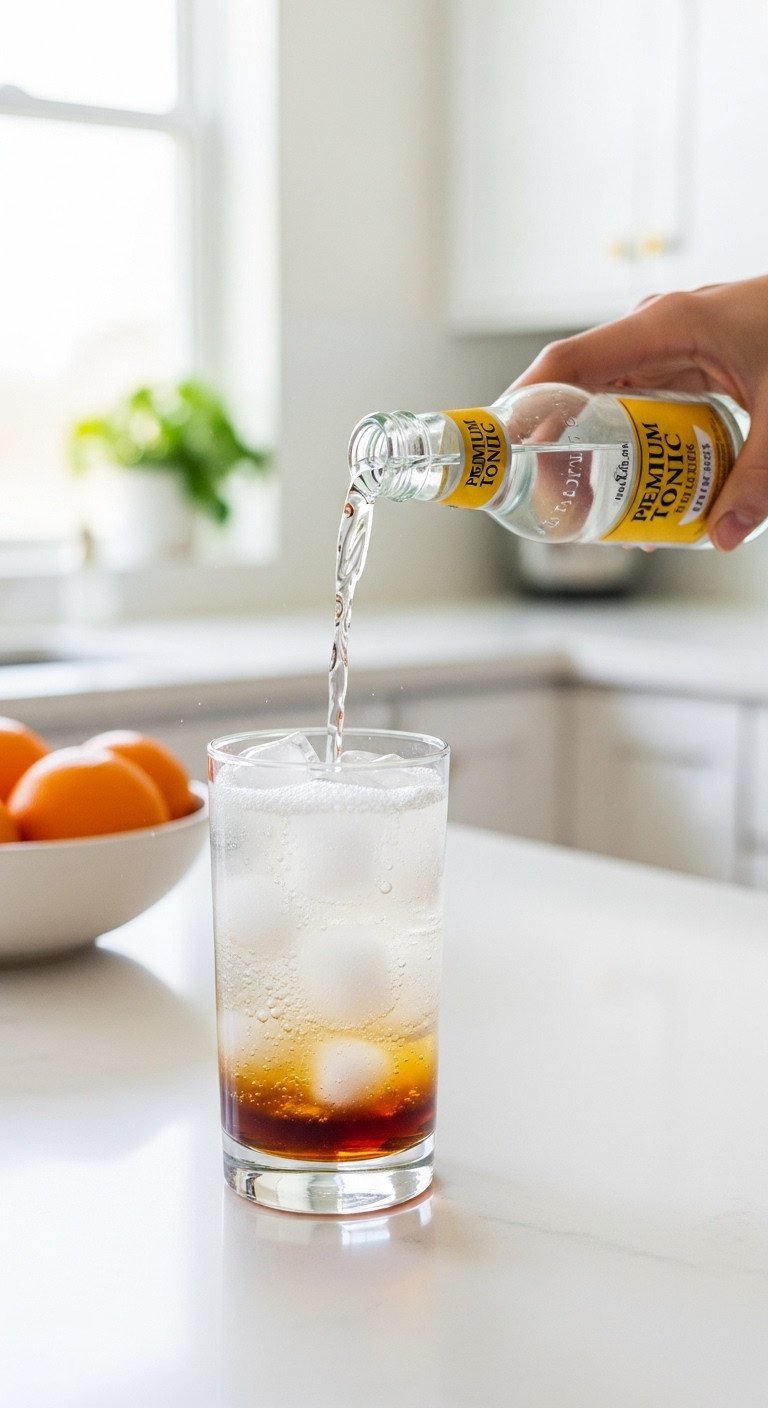
- Add the Syrup: Pour 1 to 1.5 tablespoons of your homemade chai syrup into the bottom of the chilled glass.
- Fill with Ice: Fill the glass about three-quarters full with large ice cubes. Larger cubes melt slower and cause less dilution.
- Pour the Tonic: Gently pour about 4-5 oz of chilled tonic water over the ice, leaving about an inch of space at the top for the espresso. Pouring it down the side of the glass can help preserve carbonation.
Pro-Tip: Using a premium “Indian” style tonic water often works best, as its flavor profile is designed to complement botanicals and spices, making it a perfect match for chai.
5. Execute the Slow Pour for Flawless Layers
The secret to perfect layers is right here! Pin this technique!
This is the most important step for achieving that stunning visual separation.
Materials Needed:
- Your glass of tonic, ice, and syrup
- Your chilled espresso
- A bar spoon or a regular teaspoon
Step-by-Step Directions:
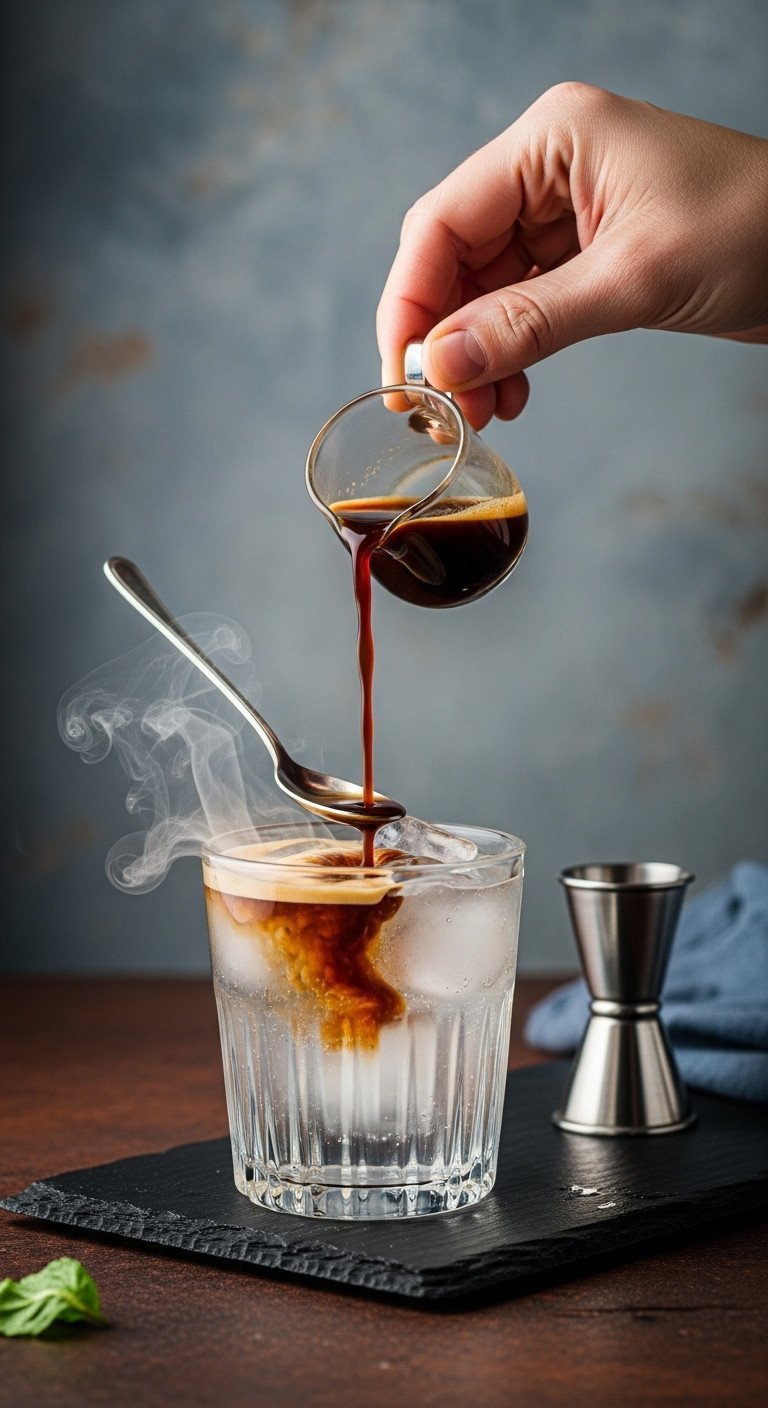
- Position the Spoon: Take your bar spoon (or turn a regular teaspoon upside down) and place the tip of the spoon just above the surface of the tonic water, with the back of the spoon facing up.
- Pour Slowly: Very, very slowly, begin pouring your chilled espresso directly onto the back of the spoon.
- Dispense Gently: Allow the espresso to run off the spoon and gently cascade onto the top of the tonic water. The spoon slows the pour and disperses the coffee, preventing it from mixing and creating a clean layer.
- Observe: Watch as the less dense espresso floats perfectly on top of the denser tonic water and syrup solution.
Lesson Learned: The science behind this is simple liquid density. The sugary tonic is denser than the espresso. Pouring slowly prevents the momentum from forcing them to mix, allowing them to settle naturally into layers. Speed is your enemy here.
6. Add an Aromatic Orange Garnish

It’s all in the details! Save this garnish idea.
The final touch isn’t just for looks; it’s a key flavor component.
Materials Needed:
- One fresh orange
- A vegetable peeler or a channel knife
Step-by-Step Directions:
- Cut the Peel: Using a vegetable peeler, cut a long, wide strip of peel from the orange. Try to avoid taking too much of the white pith, which is bitter.
- Express the Oils: Hold the peel (skin-side down) over the top of the finished drink and give it a sharp twist or pinch. You will release a fine mist of aromatic orange oils onto the surface. This is the most important part of the garnish.
- Place the Garnish: Gently curl the peel into a twist and place it in the glass.
Pro-Tip: The aroma is a huge part of taste. Expressing the oils directly over the drink ensures you get a burst of bright citrus scent with every sip, perfectly complementing the warm chai spices.
7. Serve Immediately & Decide How to Drink It

The perfect afternoon treat! Pin it for later!
You’ve created a work of art. Now, how should you enjoy it?
Materials Needed:
- Your finished Chai Espresso Tonic
- Optional: a tall glass straw or stirrer
Step-by-Step Directions:
- Serve Immediately: Carbonated drinks wait for no one! Serve the drink as soon as the garnish is in place to enjoy peak bubbliness.
- Option A: Drink It Layered: For a dynamic experience, drink it as-is without stirring. Your first sips will be bold espresso, which will gradually give way to the spicy, bubbly tonic as you drink it down.
- Option B: Stir Gently: For a consistent flavor in every sip, insert a straw or stirrer and give it one single, gentle stir from bottom to top. This will combine the layers into a homogenous, spicy-sweet-bitter-bubbly beverage. Avoid vigorous stirring, which will kill the fizz.
Pro-Tip: I personally prefer to drink it layered with a straw. You can move the straw up and down to taste different parts of the drink, getting a bit of everything in each sip without fully mixing it.
Key Takeaways: Your Quick Guide to the Perfect Chai Espresso Tonic
- Homemade Syrup is Best: Making your own chai syrup from whole spices provides a depth of flavor you can’t get from a bottle.
- Temperature is Everything: Chill your glass, chill your tonic, and slightly cool your espresso to keep the drink ultra-refreshing and fizzy.
- Pour Slowly for Layers: Use the back of a spoon to gently pour the espresso on top of the tonic. This is the secret to the beautiful, distinct layers.
- Garnish for Aroma: Don’t skip expressing the orange peel over the drink; the aromatic oils are a key part of the flavor experience.
People Also Ask About Chai Espresso Tonics
Can I make a chai espresso tonic without an espresso machine?
Yes, absolutely. The best substitute is 2 ounces of cold brew concentrate, which provides a strong coffee flavor that’s smooth and less acidic. You can also use 2 ounces of very strongly brewed coffee from a Moka pot or AeroPress.
What’s the difference between a Chai Espresso Tonic and a Dirty Chai?
They are completely different drinks. A Dirty Chai is a hot (or iced) latte made with steamed milk, chai concentrate, and an espresso shot. A Chai Espresso Tonic is a cold, bubbly, non-dairy drink made with tonic water, chai syrup, and espresso.
Why did my drink foam up and lose its layers?
This usually happens for two reasons: temperature or speed. Pouring warm espresso directly into tonic will cause it to foam over and lose fizz. Likewise, pouring the espresso too quickly forces the liquids to mix instead of layer. Always use chilled components and pour very slowly.
Can I make the chai syrup ahead of time?
Yes, making the syrup in advance is a great time-saver. Once strained and cooled, the homemade chai spiced syrup can be stored in an airtight container in the refrigerator for up to two weeks, ready for whenever you crave this drink.
Final Thoughts
You now have all the secrets to crafting the perfectly layered Chai Espresso Tonic, a drink that’s as fun to make as it is to sip. It’s the perfect way to break up your afternoon routine with something truly special.
What’s your favorite way to get creative with your coffee? Have you tried any other fun espresso tonic variations? Share your ideas in the comments below
Last update on 2025-11-19 / Affiliate links / Images from Amazon Product Advertising API

